VCAP6-CMA Deploy - Objective 5.1: Configure vRO for vRA
VMware vRealize Automation VCAP6 VCAP6-CMA
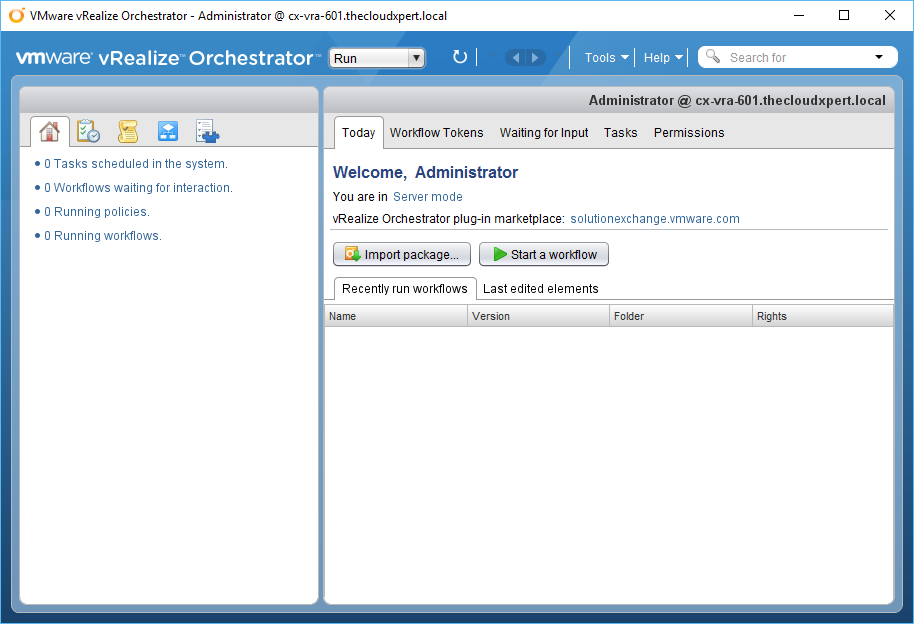
Published on 5 February 2017 by Christopher Lewis. Words: 1494. Reading Time: 8 mins.
Objective Overview
Objective 5.1 - Configure Tenant Properties
- Configure vRealize Orchestrator
- Install and configure plug-ins
- Import an SSL certificate
- Add a vRA server and an IaaS server to vRO.
- Enable custom integrations between vRA and vRO.
- Install and configure a vRO plug-in.
- Import a SSL certificate in vRO configurator.
Note: Due to the obvious duplicate tasks/items/objectives under Configure vRealize Orchestrator, I have re-ordered the tasks in this objective.
Objective Prerequisites
The following prerequisites are assumed for this Objective:
- A fully deployed vRealize Automation Solution (See Objective 1 ).
Note: VMware vRealize Automation 6.x Appliance comes with an Embedded vRealize Orchestrator. In this objective, we are going to be using this embedded vRealize Orchestrator instance, but you can also deploy an External Orchestrator ( HOWTO ).
Objective Breakdown
Configure vRealize Orchestrator:
To enable the configuration of vRealize Orchestrator you first must start the** vco-configurator** service which will require logging into the vRealize Automation Appliance via SSH as root and running the service vco-configurator start command.
Once started, if you log into the VMware vRealize Orchestrator Configuration homepage and select Authentication you will see that the embedded Orchestrator instance is automatically configured to use the vRealize Automation Component Registry for integrated SSO and the vsphere.local\vcoadmins group.
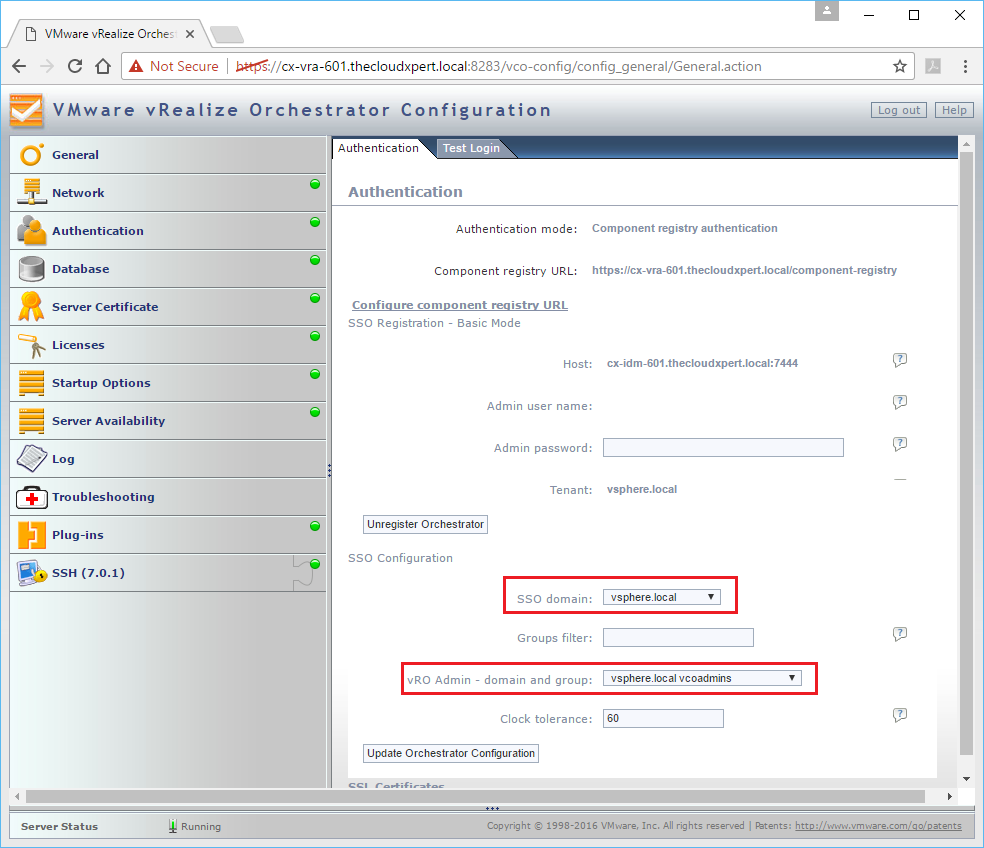
If you want to change this to an AD group you do that here by changing value of the SSO domain drop down to the AD domain, then select the appropriate group from the vRO Admin - domain and group drop down and then click Update Orchestrator Configuration.
Note: You may need to use the Group Filter text box to filter the results of the dropdown as there is only limited number of groups shown.
Note: Be mindful however that if you do use an AD group, the administrator@vsphere.local will no longer have rights to log into the vRO Client to edit/manage workflows in the embedded Orchestrator instance.
I’m not 100% why install a vRO plugin and import SSL certificate are called out twice as I think there is only one way to do each of these actions, so see the aptly named sections below…
Add a vRA server and an IaaS server to vRO.
As part of the automatic configuration of the embedded vRO appliance, vRO will have been configured use the vRA Component Registry, a vCAC host for the Default Tenant would have already been added. However, this is using Per User Session authentication (which is where the currently logged in user credentials are used to run any workflows).
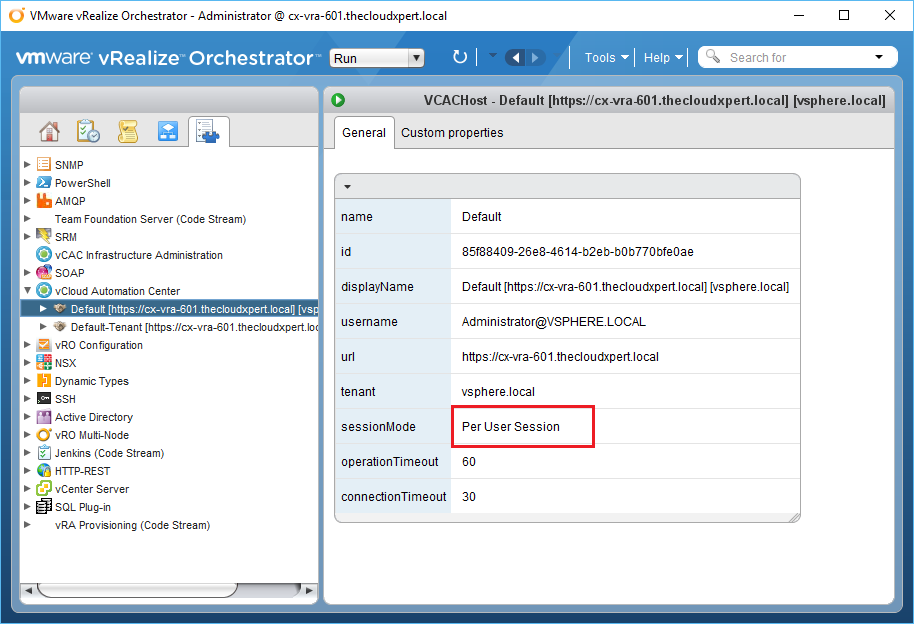
If you want to use Shared Session authentication (which is where a service account runs all workflows for that vCAC host) then we need to add the vCAC host again for each Tenant.
Note: You can choose to run the Update a vCAC Host and update the default connection to vRA to use Shared Session rather than Per User Session but a) that is not part of this objective and b) there is no harm in adding an additional one.
Open the Orchestrator Client.
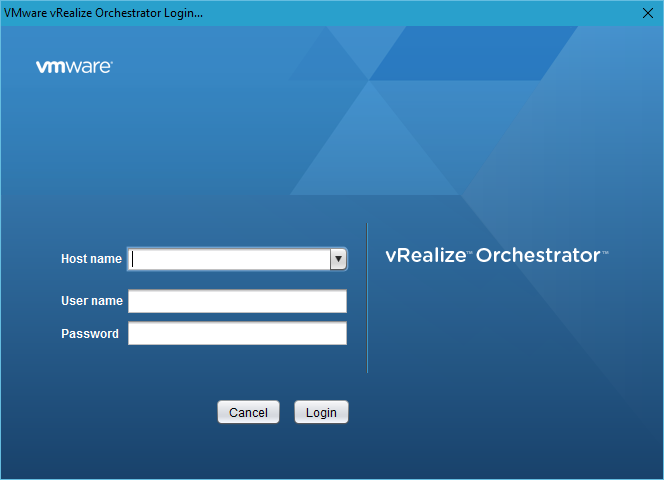
Enter the FQDN of the vRA Appliance into the Host Name ( https://vra-appliance.fqdn ) text box, enter the user into the User name and their Password text box and click Login.
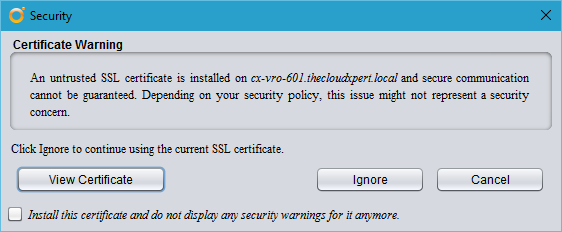
Click Ignore.
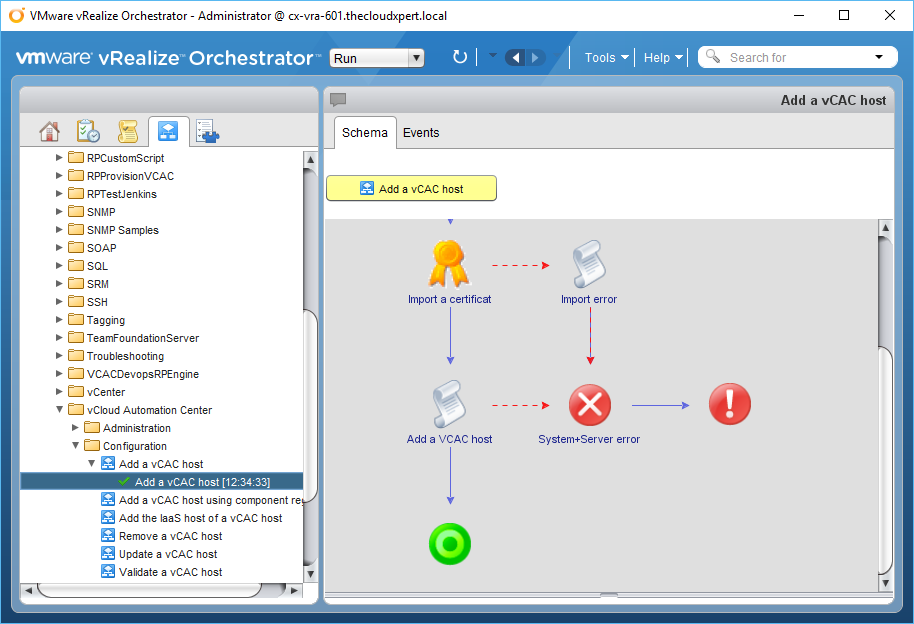
Click Workflows then navigate to Library > vCloud Automation Center > Configuration.
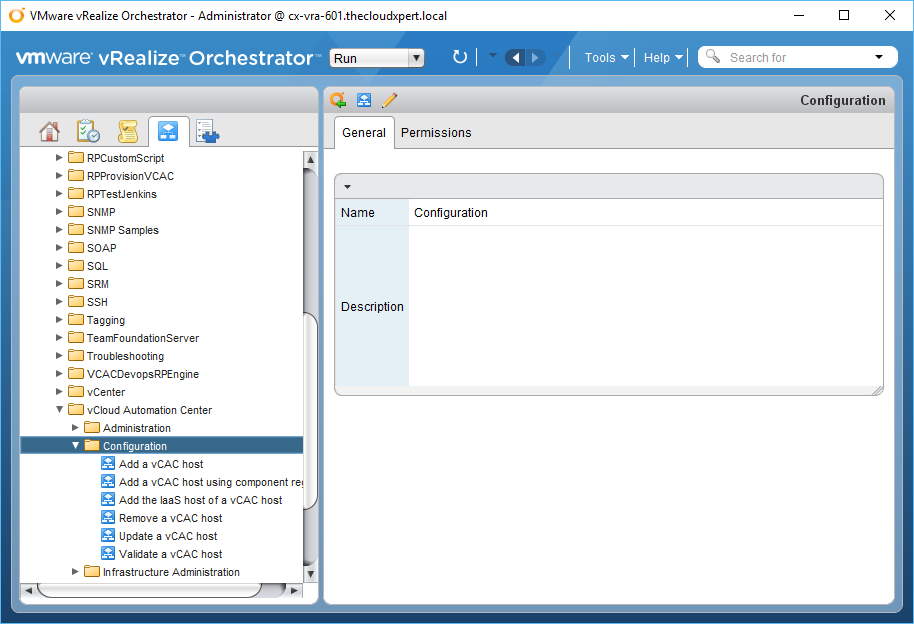
Select the Add a vCAC host workflow and click Start workflow…
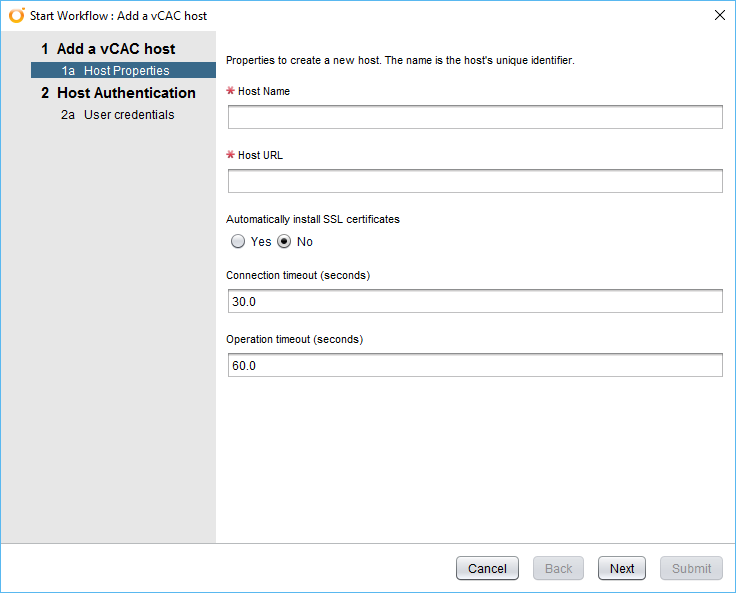
Enter a unique identifier into the Host Name text box, the the vRealize Automation FQDN (either VIP for distributed or appliance for simple) into the Host URL text box, select Yes for Automatically install SSL certificates option.
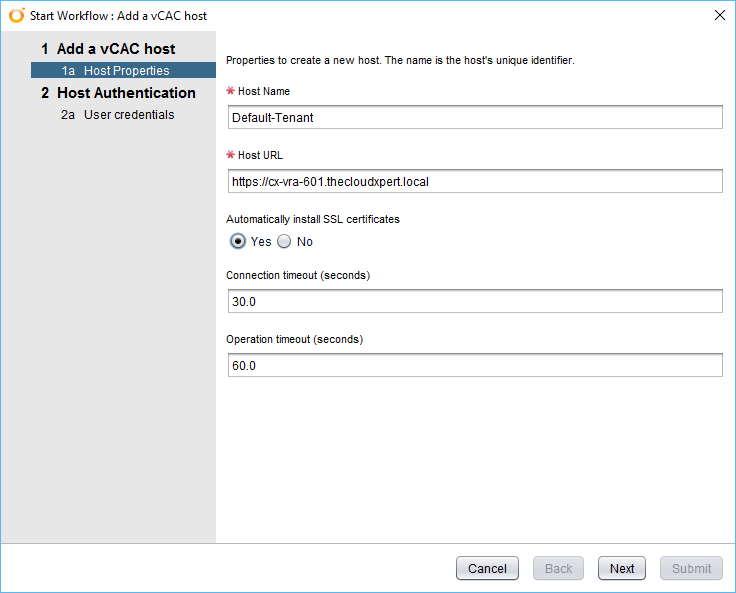
Click Next.
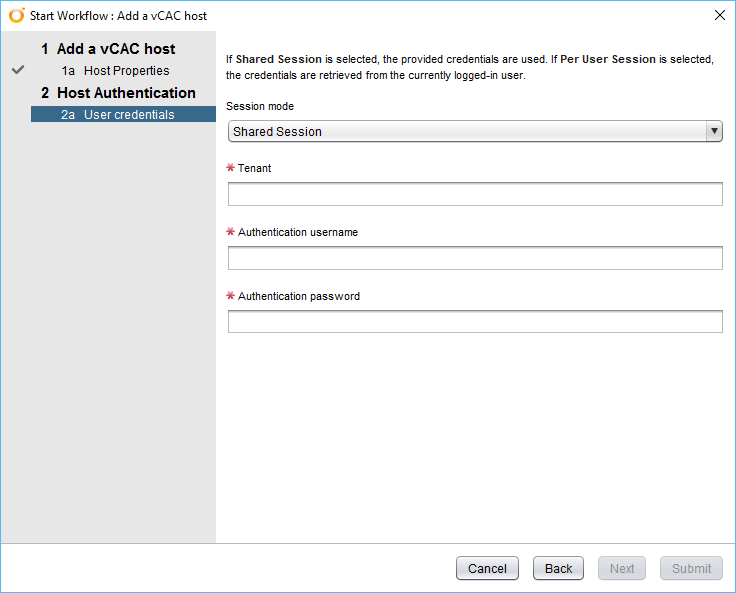
Ensure that Shared Session is selected from the Session mode drop down, enter the name of the Tenant into the Tenant text box, along with the authentication username of administrator@vsphere.local and the password into their respective text boxes.
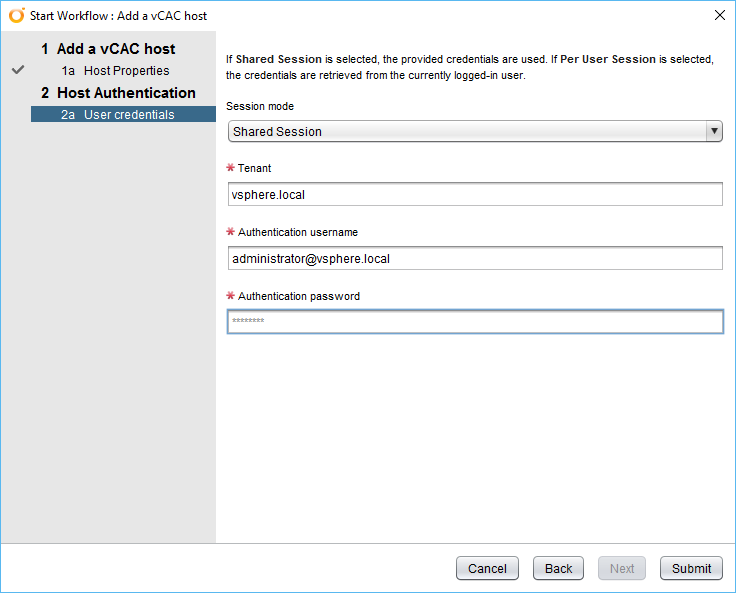
Click Submit.
To confirm this has worked, click Inventory and then expand vCloud Automation Center and select the vCAC host you have just added to check it is Shared Session authentication.
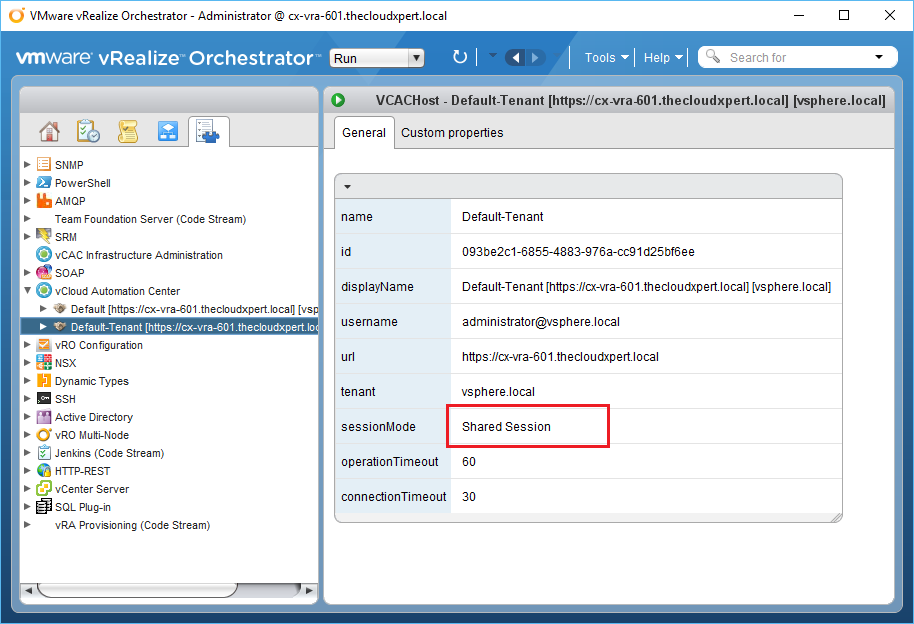
These steps should be completed for all Tenants.
Note: With any tenant apart from the default tenant, you will need to specify a user of vRA (or rather one that the identity Appliance can see in AD) rather than the System Administrator. In my homelab, I use the vRA Service Account.
Navigate back to Workflows > vCloud Automation Center > Configuration and select the Add the IaaS host of a vCAC host workflow.
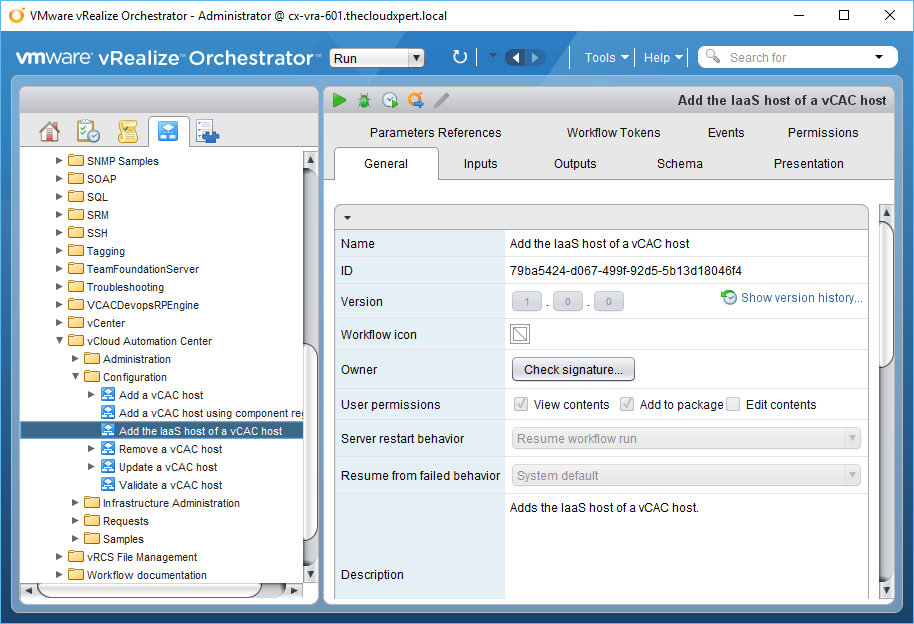
Click Start Workflow…

Click Not Set.
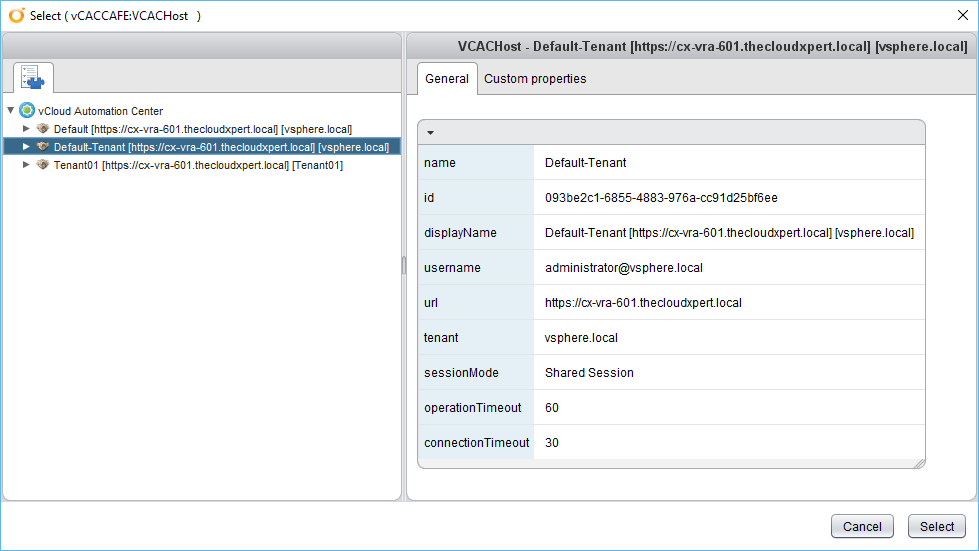
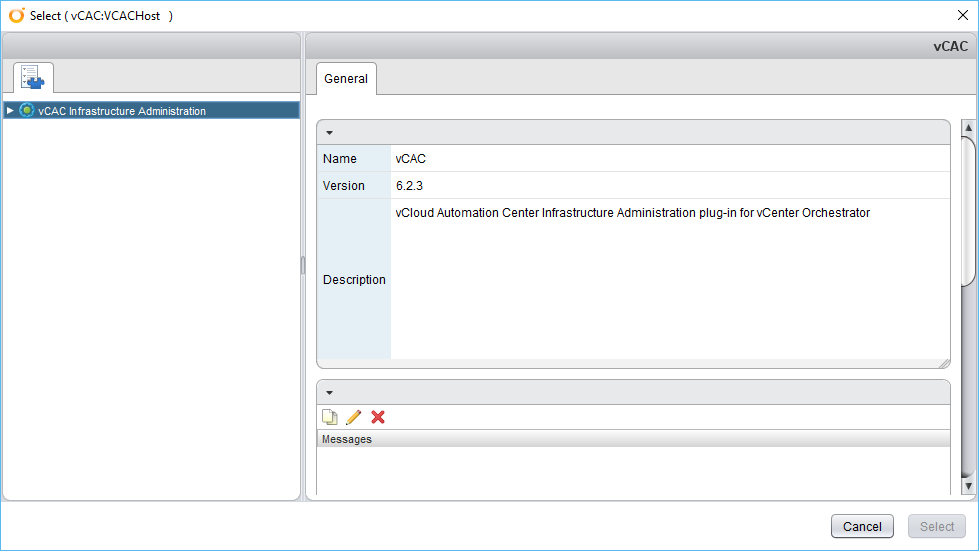
Select the target vCAC host from the list and click Select.
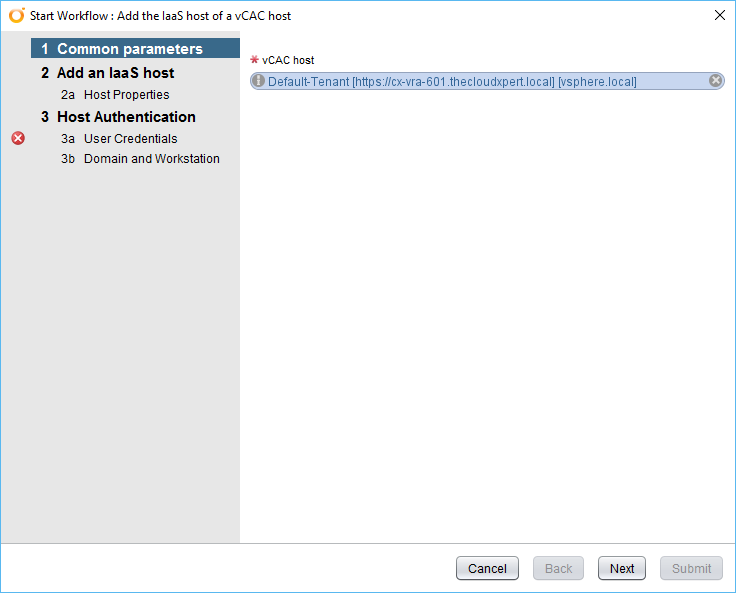
Click Next.
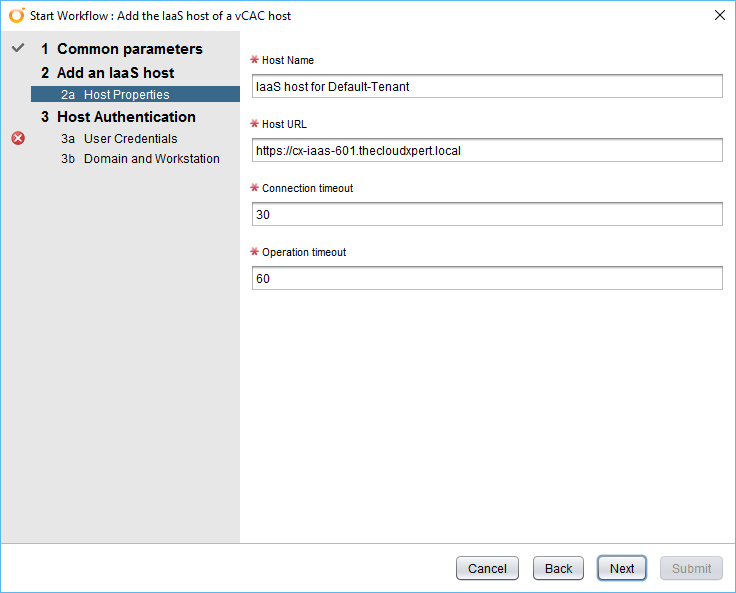
Confirm the IaaS Hosts settings are correct and then click Next.
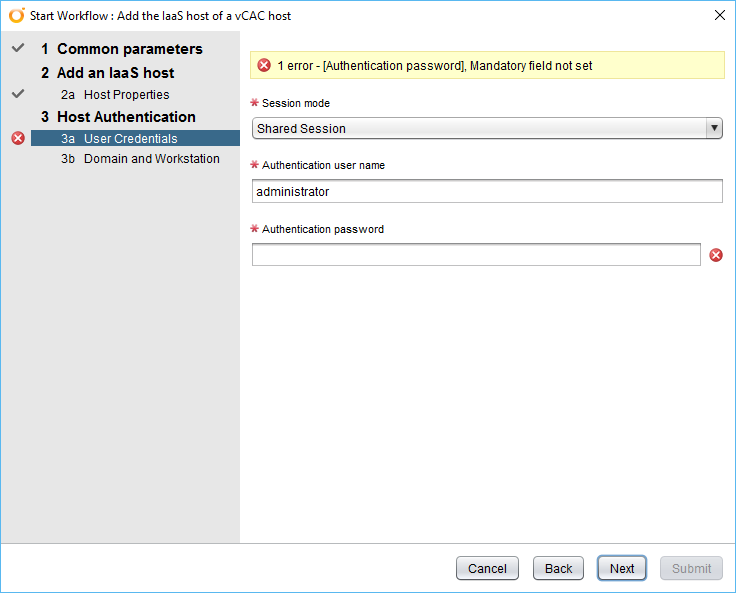
Select Shared Session from the Session mode drop down, enter the user name and password of a user with Administrative privileges to the IaaS Manager Service.
Note: Do not use username@domain or domian\username notation, just enter the username. In my homelab, I’m using the vRA Service Account.
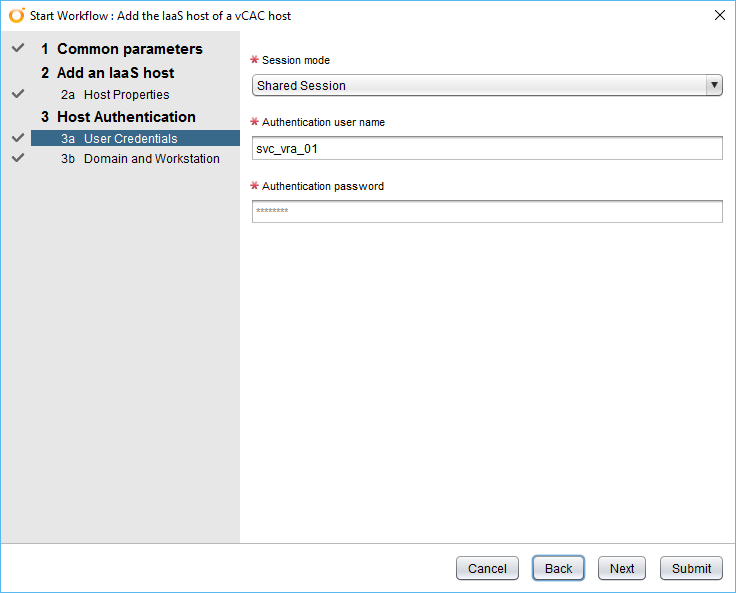
Click Next.

Update the Domain for NTLM authentication text box with the NETBIOS name of the domain.
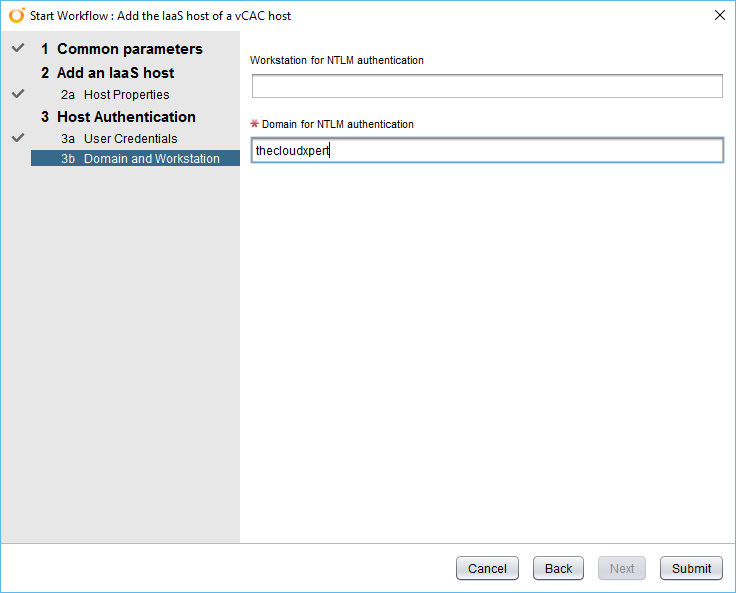
Click Submit.
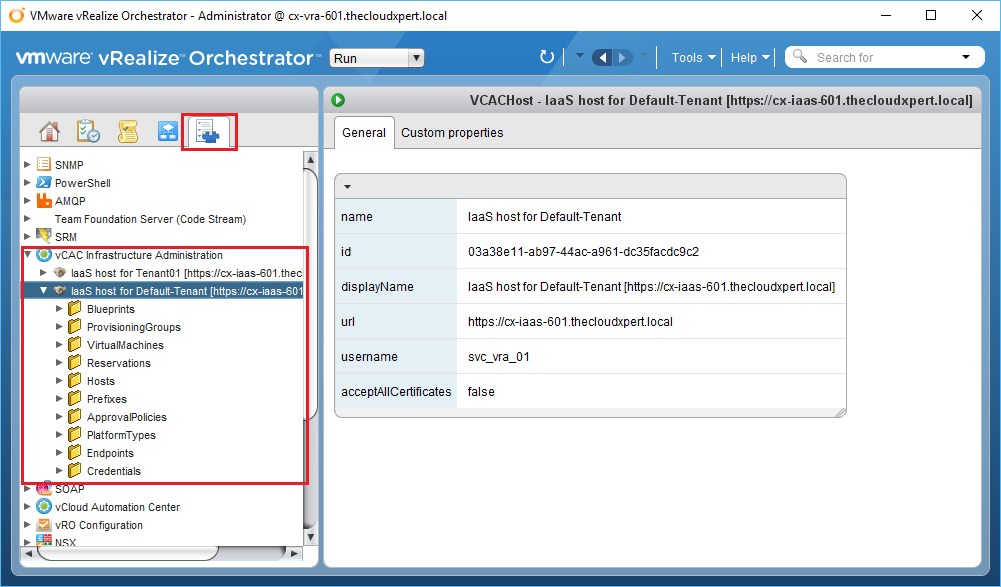
Once completed, you can check it is connected and working within the vRO Client by navigating to Inventory and expanding vCAC Infrastructure Administration > <host name>.
Again, this should be completed for all Tenants.
Enable custom integrations between vRA and vRO.
This is completed in two stages:
- Install vRealize Orchestrator Customization
- Configuring a vRealize Automation Endpoint for vRealize Orchestrator.
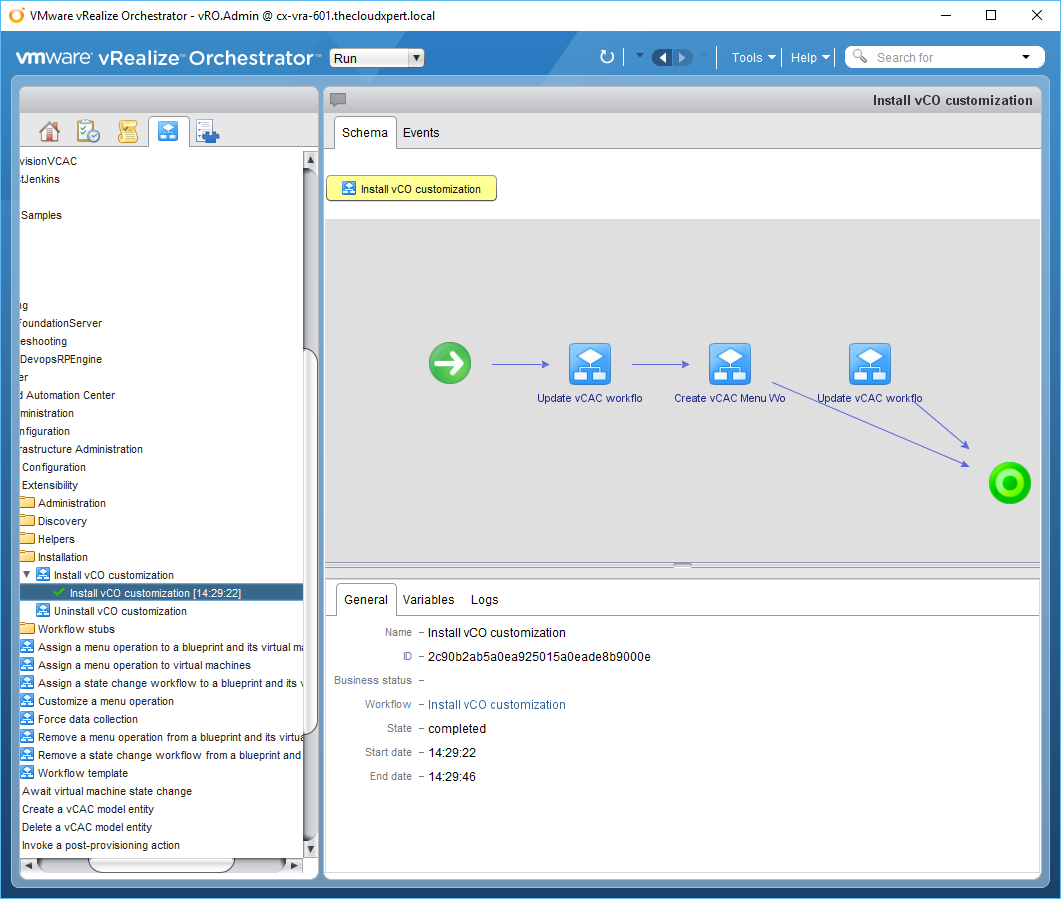
Install vRealize Orchestrator Customization
Log into the vRealize Orchestrator Client using the an account with VRO Administrator rights.
Note: The account will also need privileges on the IaaS Host!
Click Workflows.
Navigate to Library >** vCloud Automation Center** > Infrastructure Administration > Extensibility > Installation.
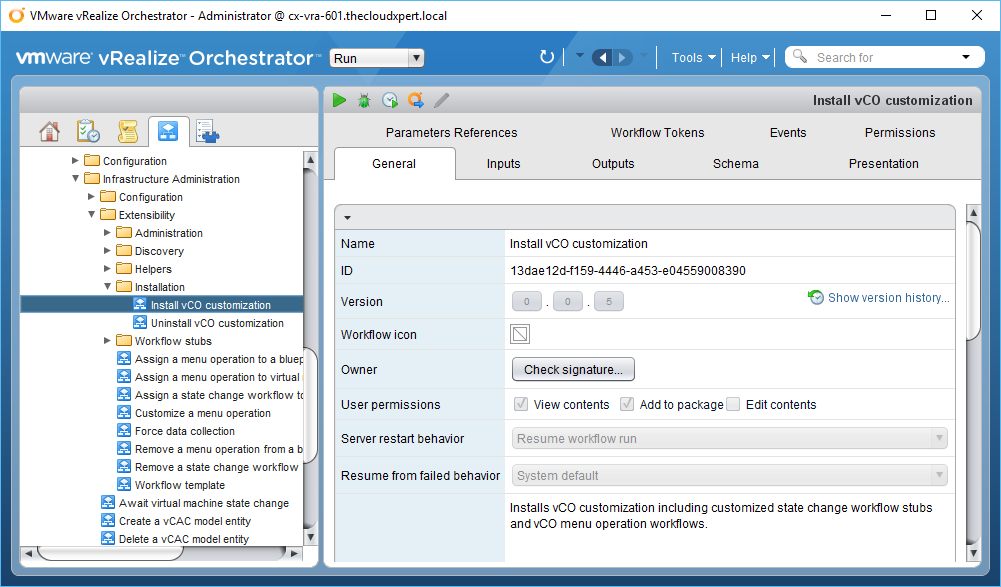
Select the Install vCO Customization workflow and right-click Start Workflow…
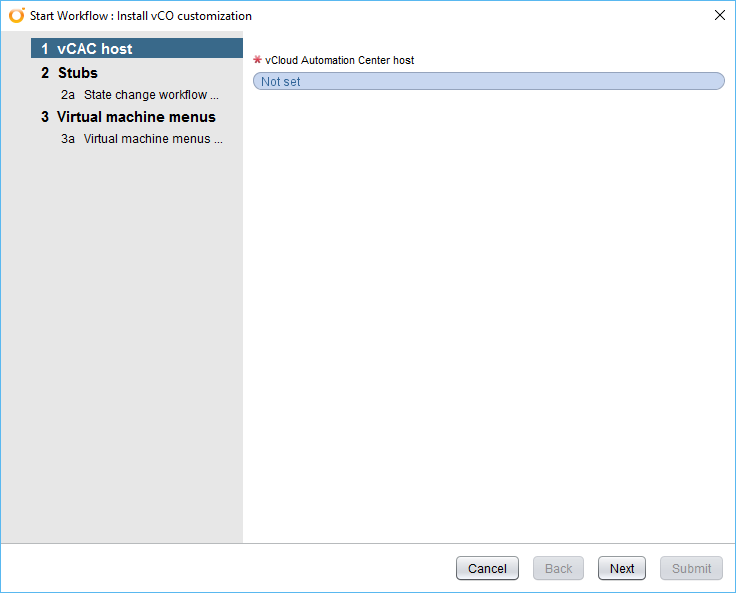
Click Not Set.
Select the appropriate IaaS Host and click Select.
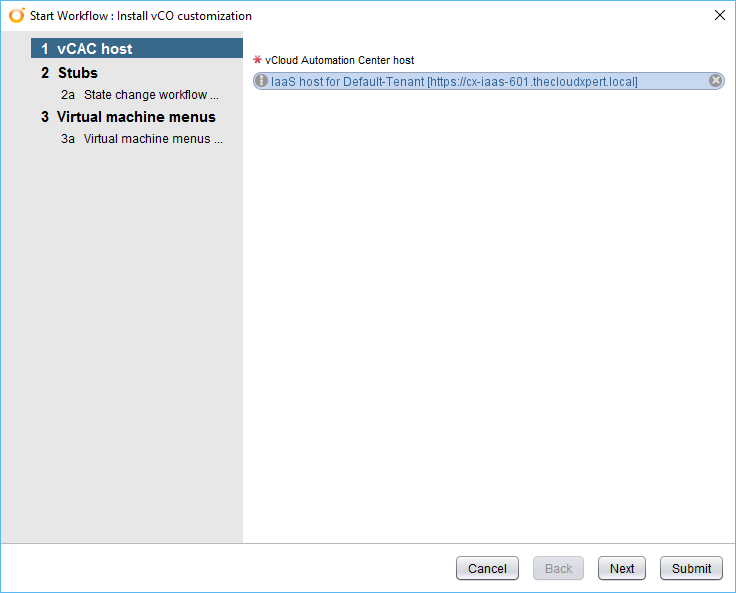
Click Next.
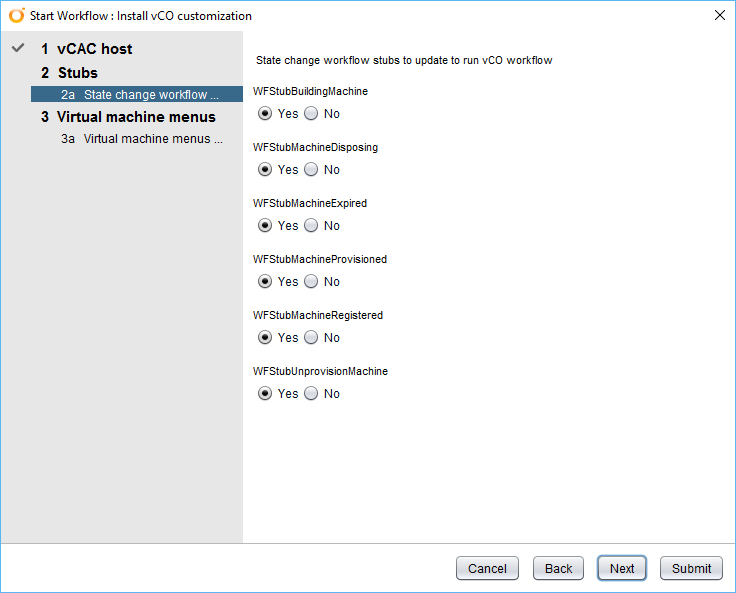
Select which Lifecycle stages you want to be able to add custom logic to (or leave as default = all selected), click Next.
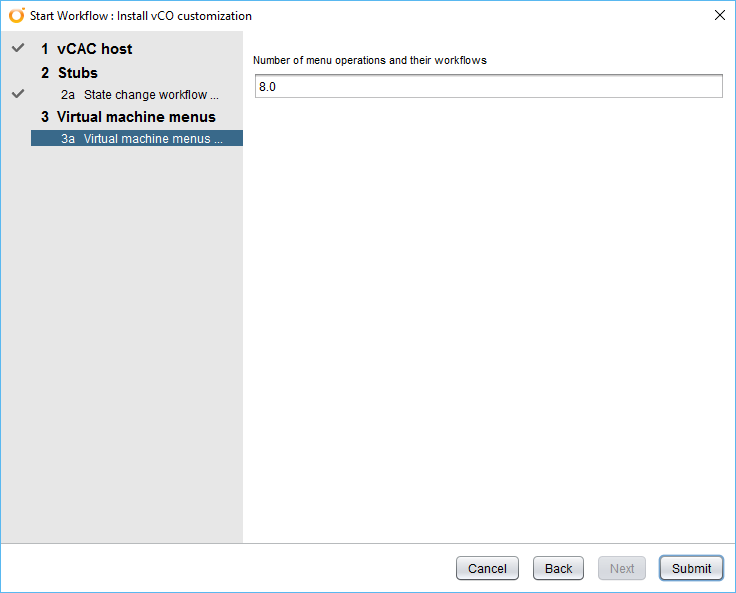
Enter 1 into the Number of menu operations and their workflows text box and click Submit.
Note: Initially the workflow kept failing because I didn’t have access to the IaaS Host. It was only when I temporarily added my account to the local administrators group of the IaaS host that the workflow completed.
Configuring a vRealize Automation Endpoint for vRealize Orchestrator
Navigate to and Login to the vRealize Automation Default Tenant Portal as a user with the Infrastructure Administrator role.
Log into the VMware vRealize Automation Default Tenant as the Infrastructure Administrator.

Click Infrastructure > Endpoints > Endpoints

Click New Endpoint > Orchestration > vCenter Orchestrator

Enter a name for the new Orchestrator Endpoint into the Name text box, enter https://vra-appliance.fqdn:8281/vco into the Address text box and then click …

Click New Credentials.

Enter the friendly name for the credentials into the Name text box, the username (in name@domain format) into the User Name text box and the password into the Password text box and click Save.
Note: The credentials you use should have Execute permissions for any vRealize Orchestrator workflows to call from IaaS.

Click OK.

Add the VMware.VCenterOrchestrator.Priority custom property with a priority of 1 (or whatever priority you wish to give) and click Save.

Click OK.

We could go ahead and configure Advanced Services but as that is in Objective 6.1 we’ll leave it there for now.
Install and configure a vRO plug-in
In this example we’re going to install and configure the VMware SRM plugin for vRealize Orchestrator.
Navigate to VMware vRealize Orchestrator Configuration homepage (https://vra-appliance.fqdn:8283/vco-config)

Enter the the configuration username and password and click Login.

Click Plug-ins.

Scroll down and click the search icon, locate the vRO plugin, click Open and then click Upload and install.

(if prompted) Click I accept the terms of the License Agreement.
Note: Not all plug-ins will come with a EULA that needs accepting.

Click Apply Changes.

Note: As you will see the Plug-in will only be installed properly after a reboot, so lets go ahead and do that now.
Click Startup Options.

Click Restart Service.
Note: for those more adept using linux than i, you can also achieve this via SSH to the appliance and typing service vco-server restart or by rebooting the appliance itself (which is a bit extreme as, in this instance, you will bring down vRA too!)

Import a SSL certificate in vRO configurator
In this example we’re going to import the VMware vCenter SSL Certificate into SSL Trust store but the process is the same for any SSL certificate.
Navigate to the vRealize Orchestrator Configurator Homepage (https://vra-appliance.fqdn:8283/vco-config).

Enter vmware into the Username text box and enter the password configured as part of the deployment process into the Password text box and then click Login.

Click Network.

Click SSL Trust Manager tab.

Note: We’re going to use a URL to obtain the certificate but if you have the files you can just upload the file.
Enter the FQDN of the vCenter server into the URL from which to import a certificate text box and click Import.

Click Import.
Published on 5 February 2017 by Christopher Lewis. Words: 1494. Reading Time: 8 mins.
- HOWTO: Deploy the vRealize Orchestrator 6.x Appliance for vRealize Automation ()
- VCAP6-CMA Deploy - Objective 1.3: Deploy and Manage vRealize Automation Center Infrastructure Components ()
- HOWTO: Deploy VMware vRealize Automation 6.x IaaS Proxy Agent (Distributed Install) ()
- HOWTO: Deploy VMware vRealize Automation 6.x IaaS DEM Worker (Distributed Install) ()
- HOWTO: Deploy VMware vRealize Automation 6.x IaaS Manager Servers (Distributed Install) ()
