Creating a Custom Resource Action - Part 1: Getting Started & API Discovery
VMware Aria VMware Aria Automation VMware Aria Automation Orchestrator
Published on 5 February 2025 by Christopher Lewis. Words: 2053. Reading Time: 10 mins.
Introduction
In this Series, using a real use case as an example, we will look at how to replace an out of the box Resource Action with a Custom Resource Action so that the input form can be customized. In part 1 of the series, we will introduce the use case, review terminology around the topic and walk through how we can discover which API call is being made when we request a Resource Action in the UI.
Other posts in this series include:
- Creating a Custom Resource Action - Part 1: Getting Started & API Discovery
- Creating a Custom Resource Action - Part 2: Creating the Orchestrator Workflow
- Creating a Custom Resource Action - Part 3: Creating the Custom Resource Action
- Creating a Custom Resource Action - Part 4: Enabling the Custom Resource Action via Policy
Contents
Terminology Recap
Before we go any further, it is essential that we all have the same understanding around certain concepts that are key to this post and VMware Aria Automation in general.
What is a Resource?
Within VMware Aria Automation 8.x a Resource is an object that is declared within a VMware Cloud Template, deployed through VMware Aria Automation, and (ideally) remains under management of VMware Aria Automation.
Resources include, but are not limited to, the following:
- Networks
- Disks
- Security Groups
- Load Balancers
- Custom
What is a Custom Resource?
In VMware Aria Automation, a Custom Resource is a Resource that is not provided Out Of The Box (OOTB). Custom Resources are based on VMware Aria Automation Orchestrator Workflows or ABX Actions and are typically used to provide a way to deploy and manage resources for 3rd party products (or that are not natively integrated). For VMware Aria Automation Orchestrator-based Custom Resources, the minimum requirement is to have a supported external Resource Type to attach it too (such as AD:user), a Create Workflow (such as Create a user with a password in an organizational unit) and a Destroy Workflow (such as Destroy a user). For VMware Aria Automation Action-based Extensibility (ABX)-based Custom Resources, the minimum requirement is to have a Create Action, a Read Action and a Destroy Action.
What is a Resource Action?
A Resource Action is an OOTB Day-2 action for an OOTB Resource Types. That is, it provides the ability for an end user to perform certain actions, either on an individual resource or at the deployment level using actions natively provided by VMware Aria Automation. The available Resource Actions for a Resource Type will differ depending on the resource. The visibility of Resource Actions for a particular Deployment or Resource Type can be tailored using a Day-2 Action policy and, using an Approval Policy, single or multiple levels of approvals can be attached for any supported action taken.
For more information on the Resource Actions available in VMware Aria Automation 8.18, see What actions can I run on Automation Assembler deployments or supported resources
What is a Custom Resource Action?
A Custom Resource Action is a Resource Action that has been created to complete an action that either isn’t supported OOTB or to replace an OOTB action. We can create Custom Resource Actions in VMware Aria Automation using either using Orchestrator workflows or ABX actions. Custom Resource Actions can be created at both the Deployment and Resource level, where the Resource Type can either be an OOTB Resource or a Custom Resource.
What is a Custom Form?
A Custom Form is a way for an administrator or item owner to customize how a request is displayed to the self-service user. Custom Forms can be applied to a deployment request (from a catalog item) or a Custom Resource Action.
Scenario
The Problem Statement
Now that we have a joint understanding of some key concepts, let us review the problem statement that led to the creation of this post:
We would like to support end users making changes to their deployed resources using Resource Actions. However, we need to adjust the standard form for the Resource Action in the following ways:
- A warning must be visible so that the end user understands the impact of making the change.
- A Change Record number must be supplied during the request, so that the approver can review the change to confirm it has been approved.
The Issue
The issue with this scenario is that, in Aria Automation 8.x, there is no way to change the form presented to the self-service user when requesting a native Resource Action.
The Use Case
For the purposes of this blog post, we will focus on a use case centered around the Add Disk Resource Action.
The Solution
There are a number of ways to achieve the desired outcome in this scenario, all of which include creating a Custom Resource Action, and they are as follows:
- Create an Orchestrator-based Custom Resource Action using the native Orchestrator vCenter Plug-in with the Virtual Machine workflows.
- Create an Orchestrator-based Custom Resource Action using the native Orchestrator REST Plug-in / Workflows to call the VMware Aria Automation REST API.
- Create an Orchestrator-based Custom Resource Action that uses an Action or Scriptable Task to call the VMware Aria Automation REST API.
- Create an ABX-based Custom Resource Action that uses an action to get all the information required and call the VMware Aria Automation REST API.
The solution for this problem was based on the simple premise that when a self-service user requests a Resource Action via the user interface, the product is actually taking the inputs from the out of the box form, and performing a REST API call to complete task. Therefore, in theory, it should be relatively easy to replicate that same process but with a new Custom Form (with additional fields) in front to meet the additional requirements.
Now, having previously spent a lot of time using Python Scripts to write REST API calls in a number of blog posts, I decided to go with Option 3 in the list of possible solutions.
Step By Step Guide
Prerequisites
To complete the step by step guide, you will need at least the following:
- An instance of Aria Automation 8.x (we’re using 8.18.1)
- An Aria Automation project with a basic deployment (of a virtual machine)
- A self-service user with the following roles assigned in Aria Automation:
- Organization Member
- Service Broker User
- Project Member
- A cloud administrative user with the following roles assigned in Aria Automation:
- Organization Member
- Assembler Administrator
- Orchestrator Administrator
- Project Member (optional)
Discovering the required REST API Call
To identify the relevant REST API call, we are going to use a combination of the browser-based Developer tools to capture the actual call in realtime and the API Docs (which are located on the appliance at https://<auto.fqdn>/automation/api-docs).
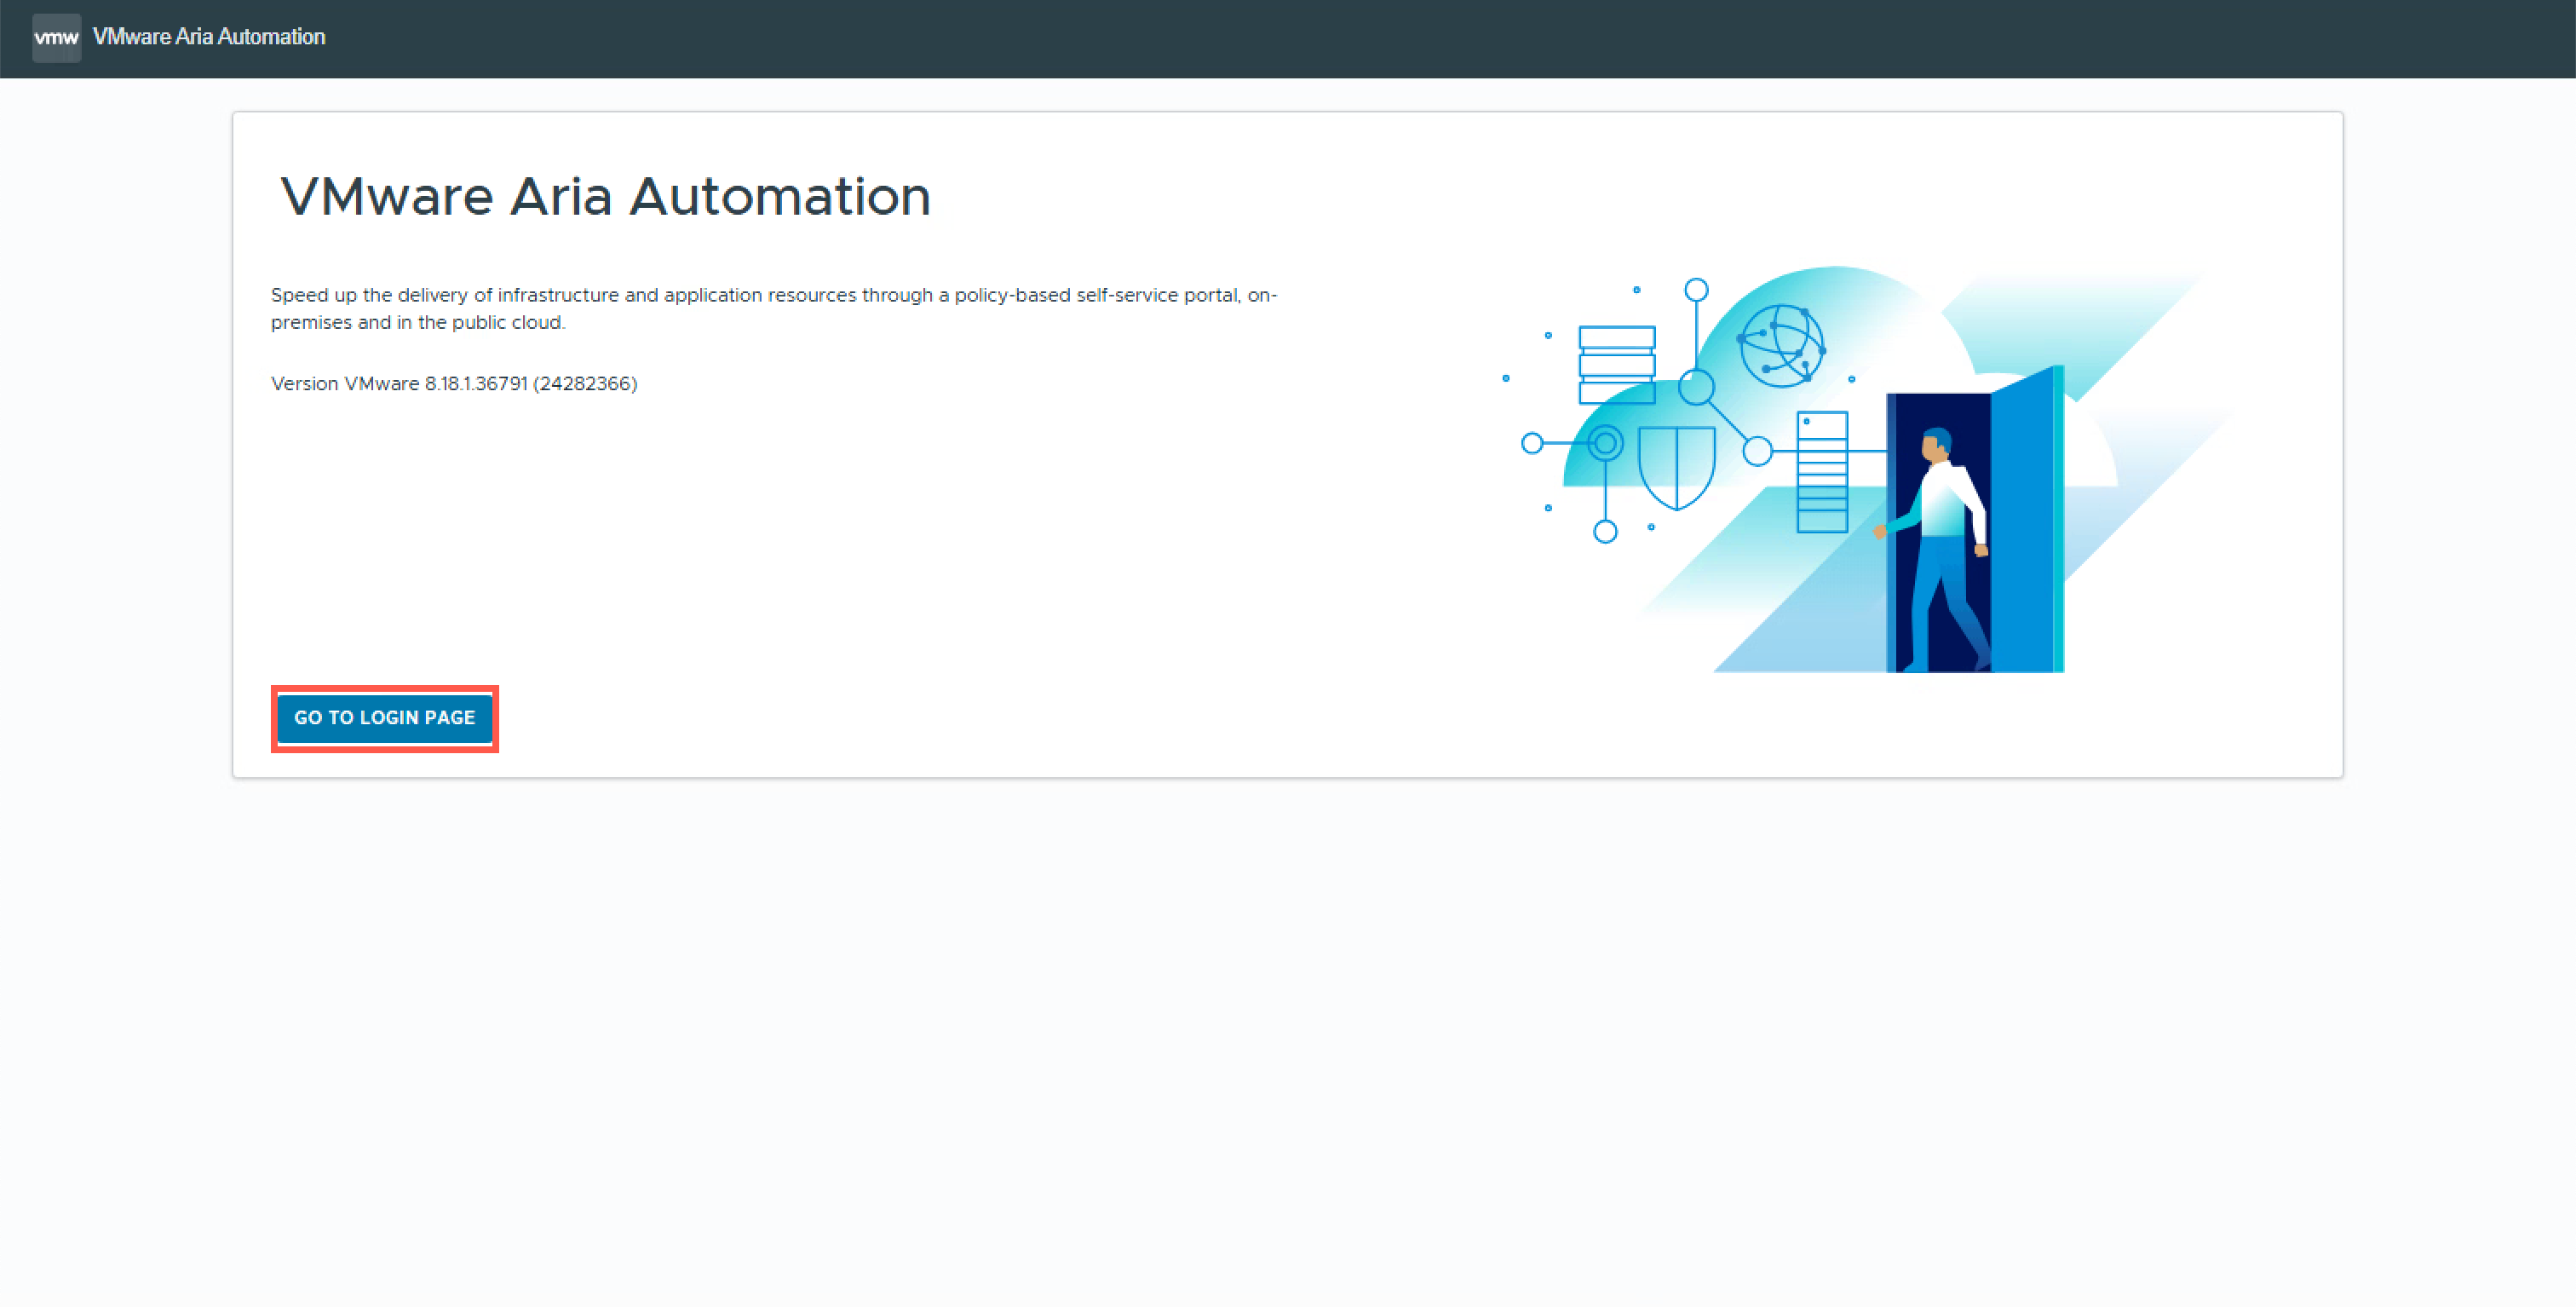
- Navigate sto
https://<auto.fqdn>in the Chrome.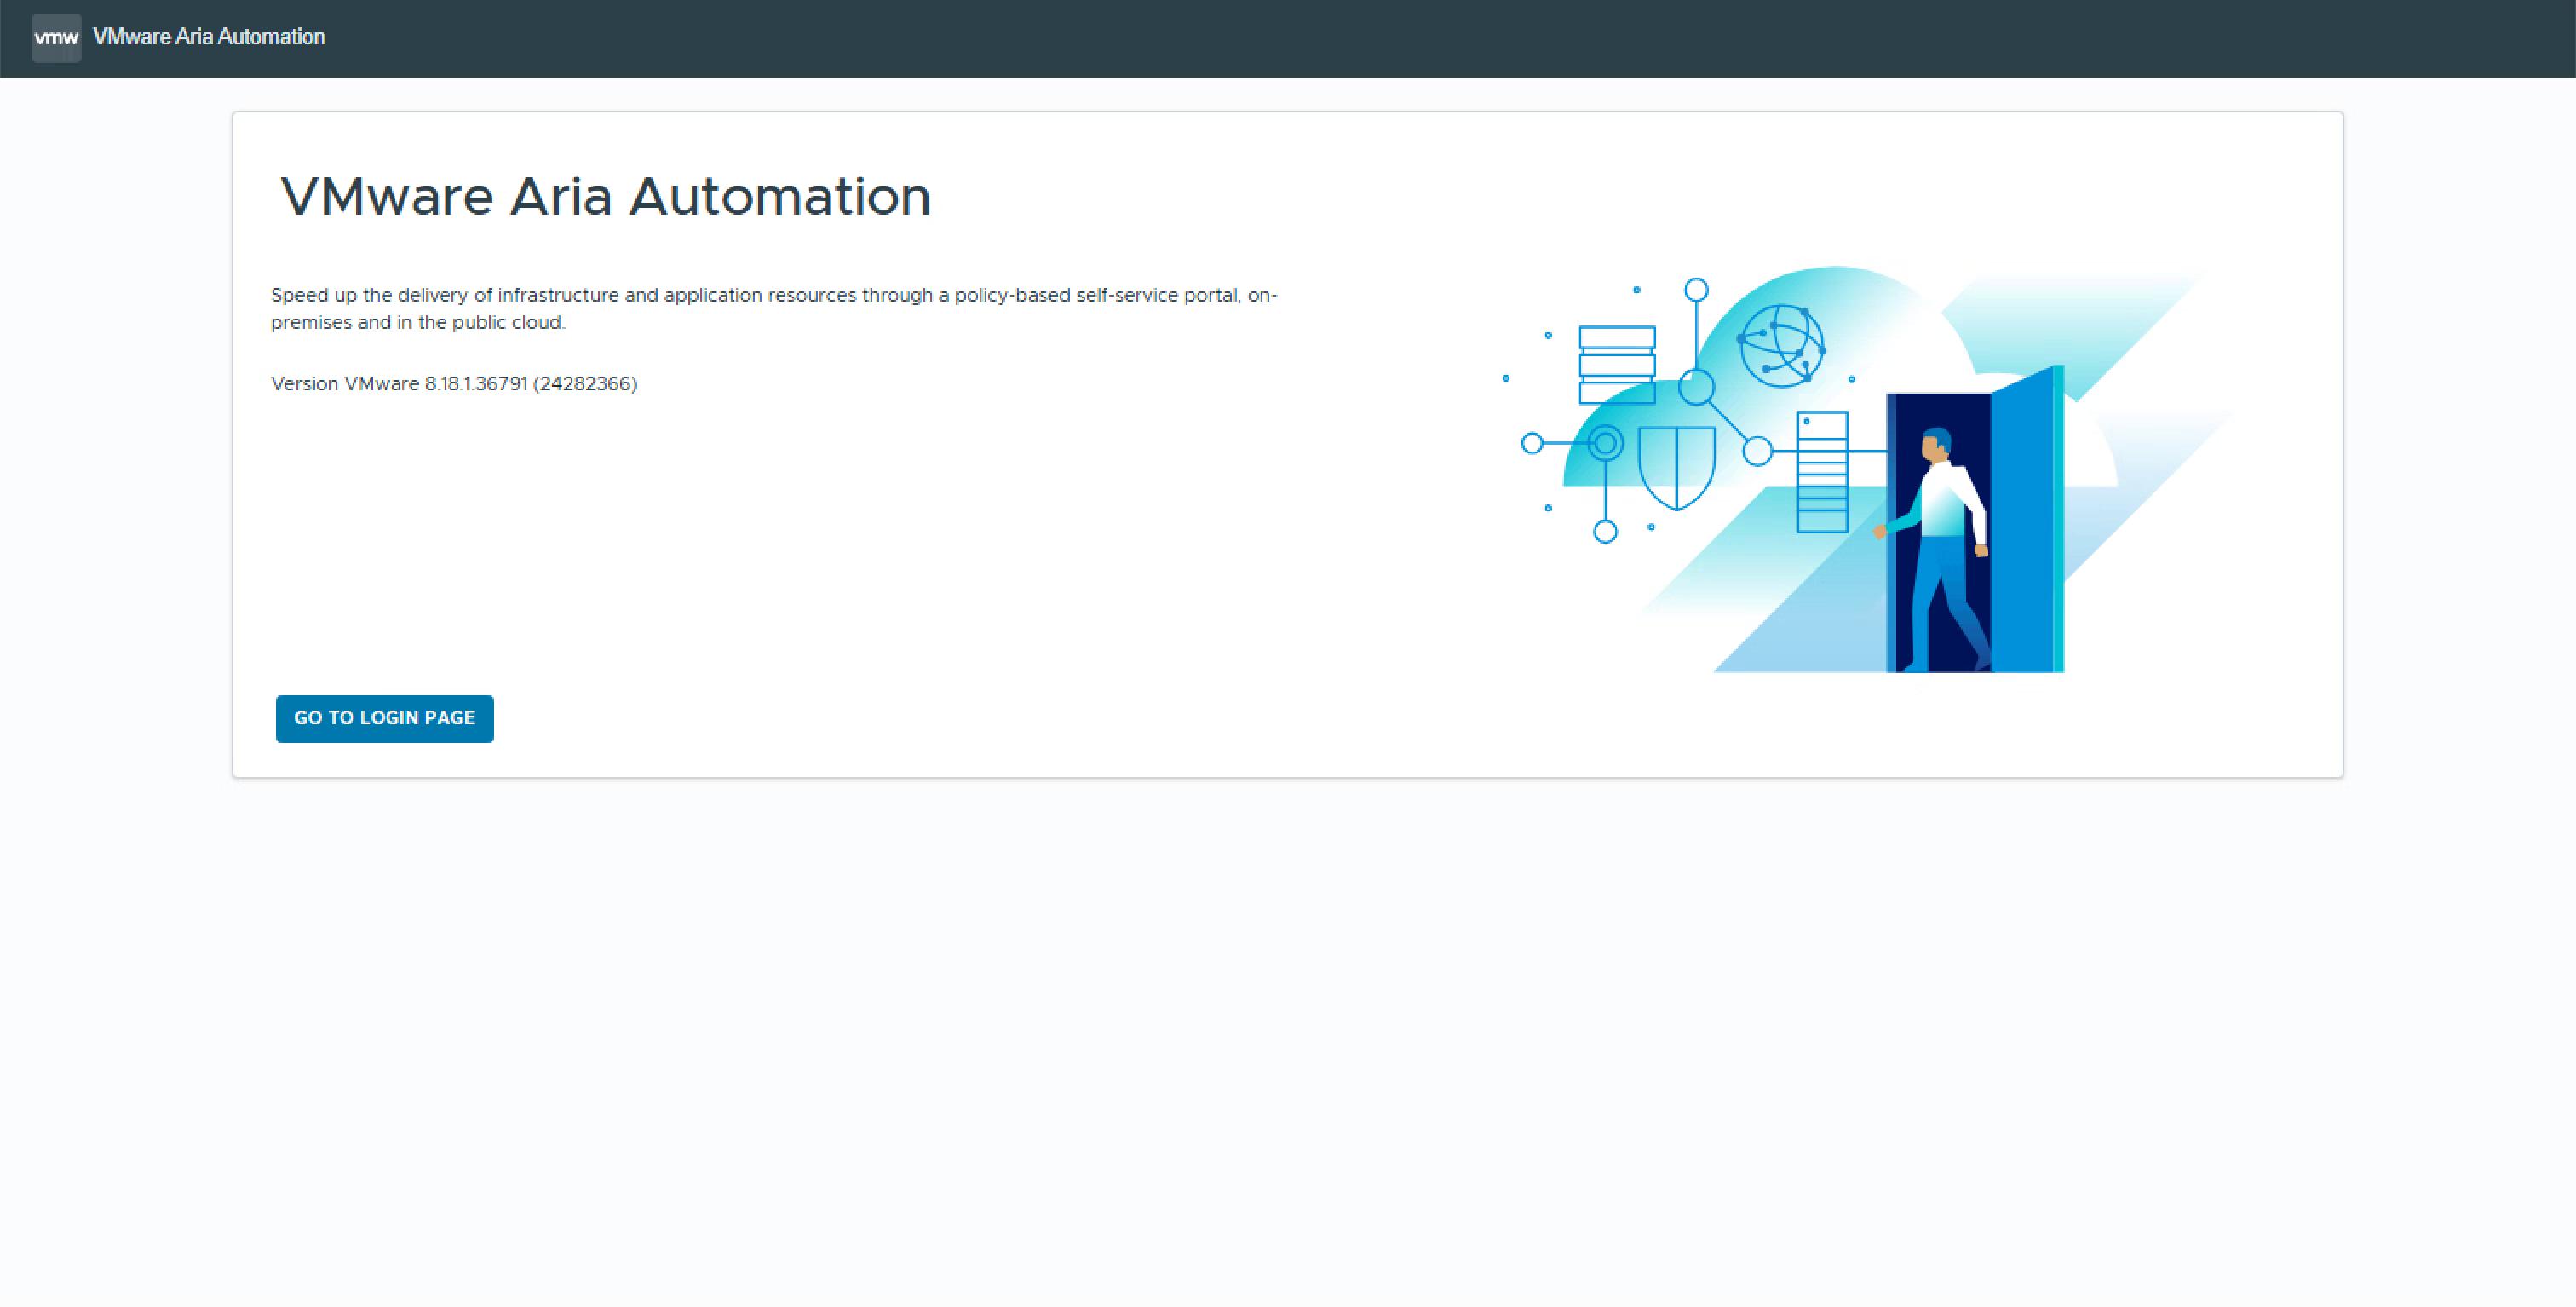
- Click GO TO LOGIN PAGE.
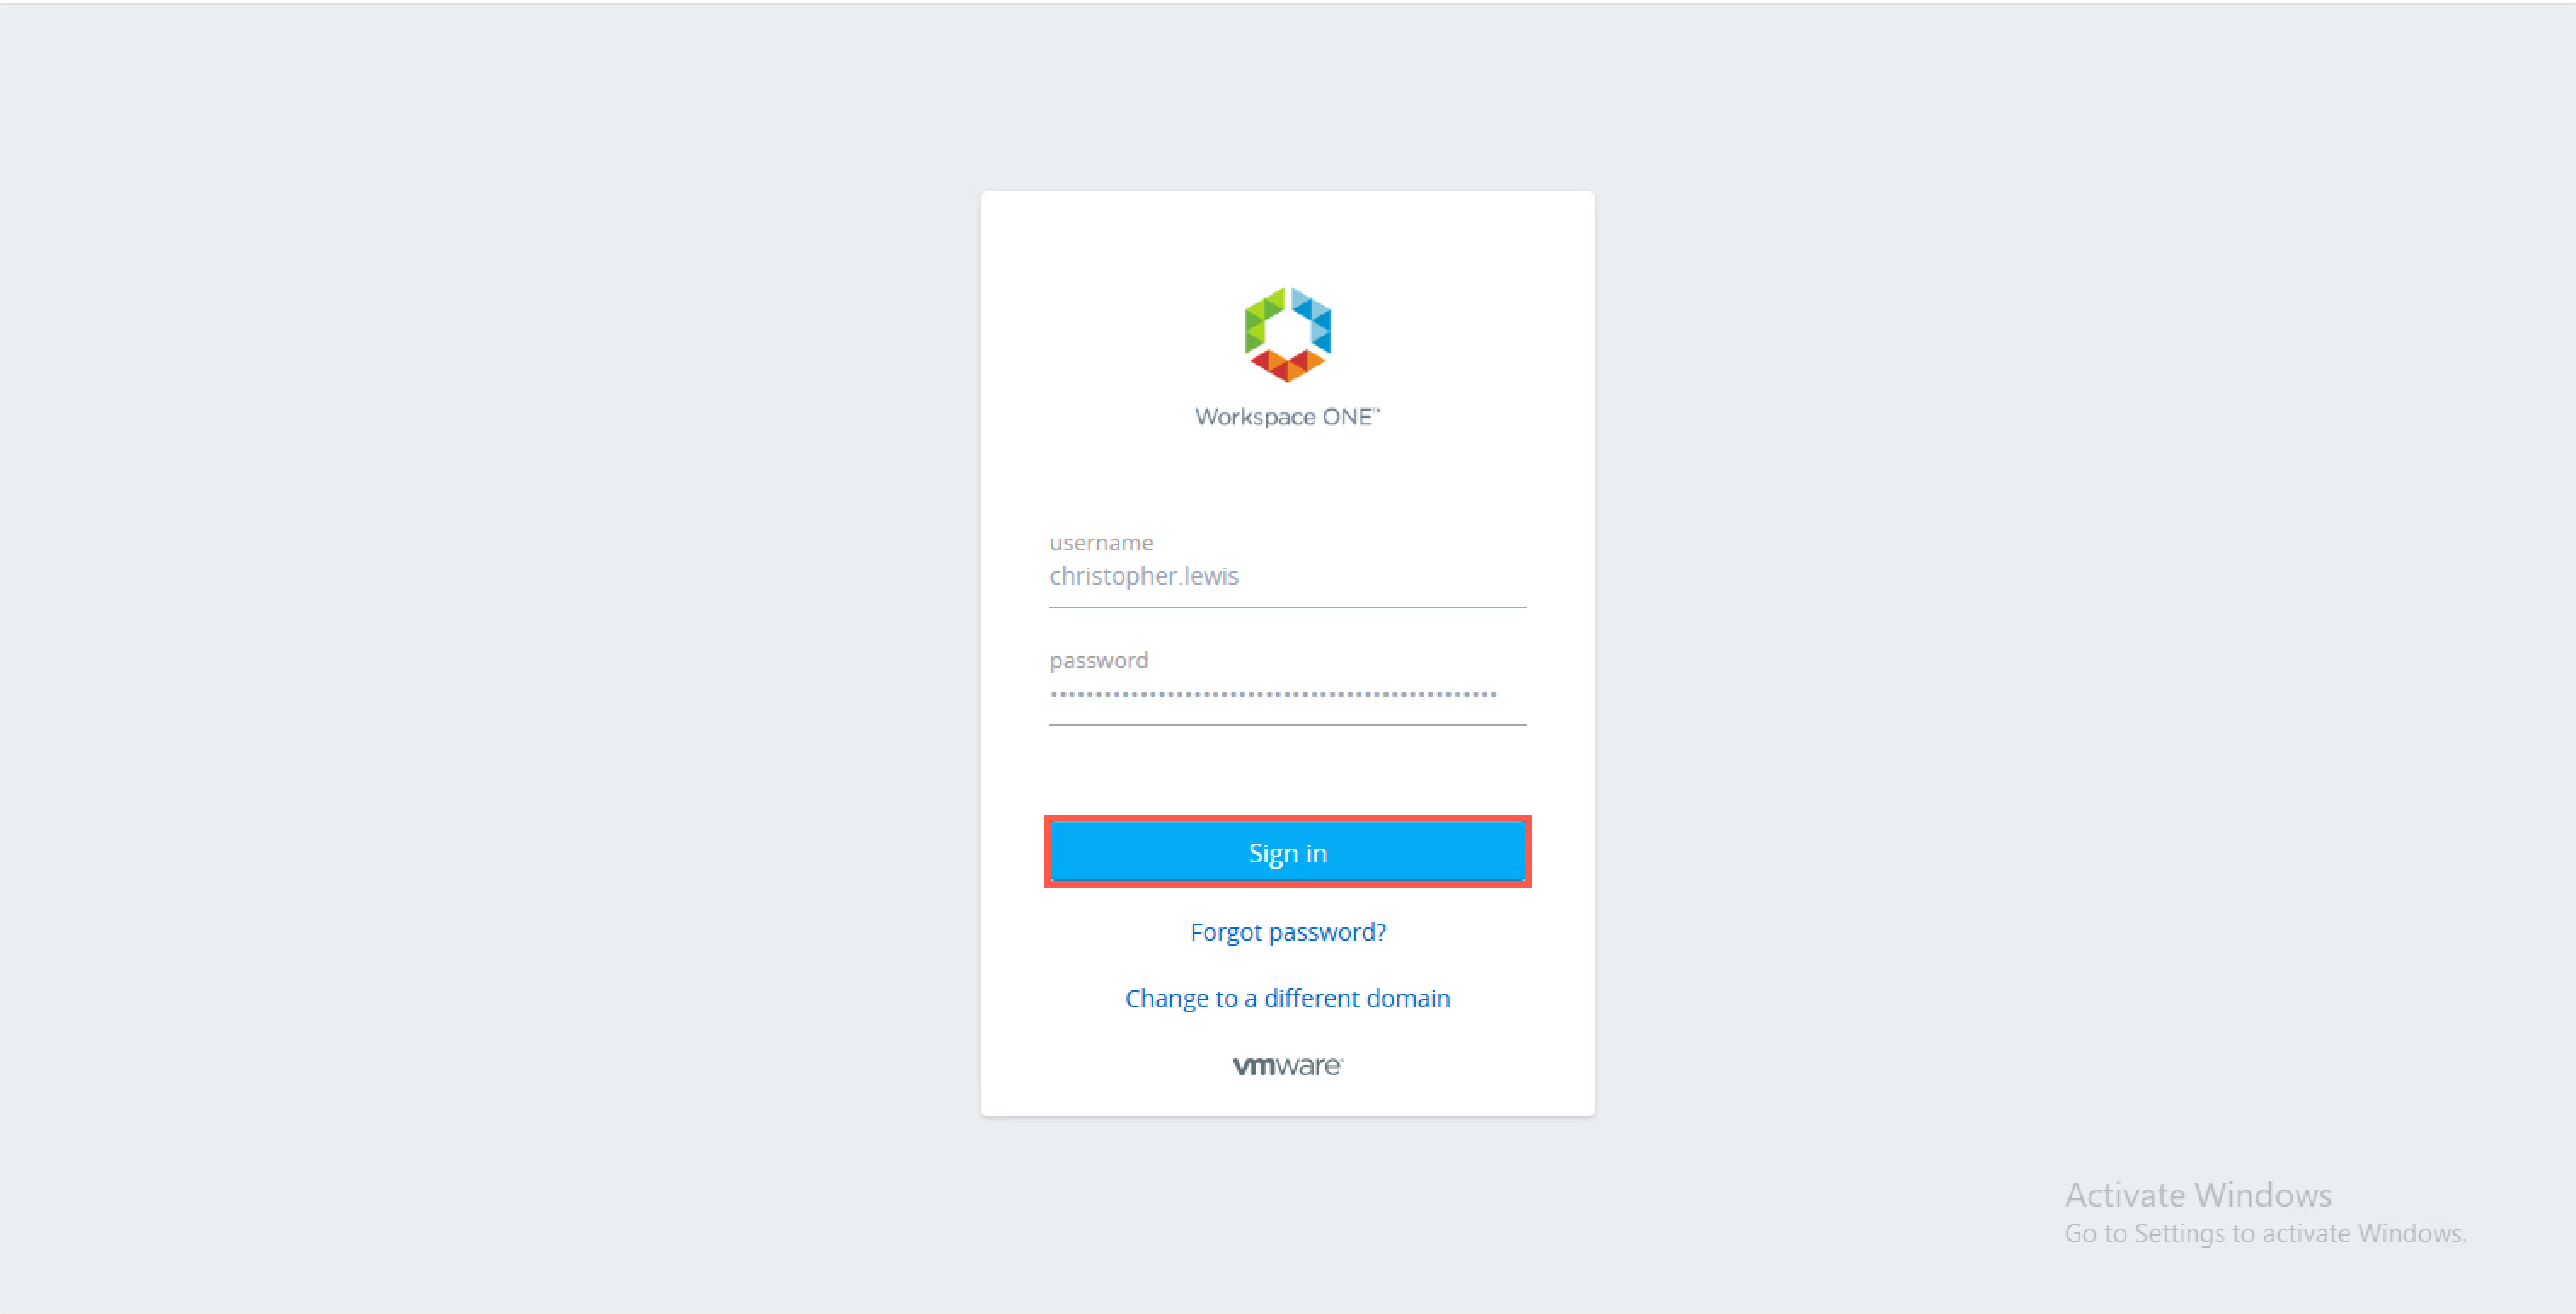
- At the VMware Identity Manager login, enter the cloud administrative user and click Sign in.
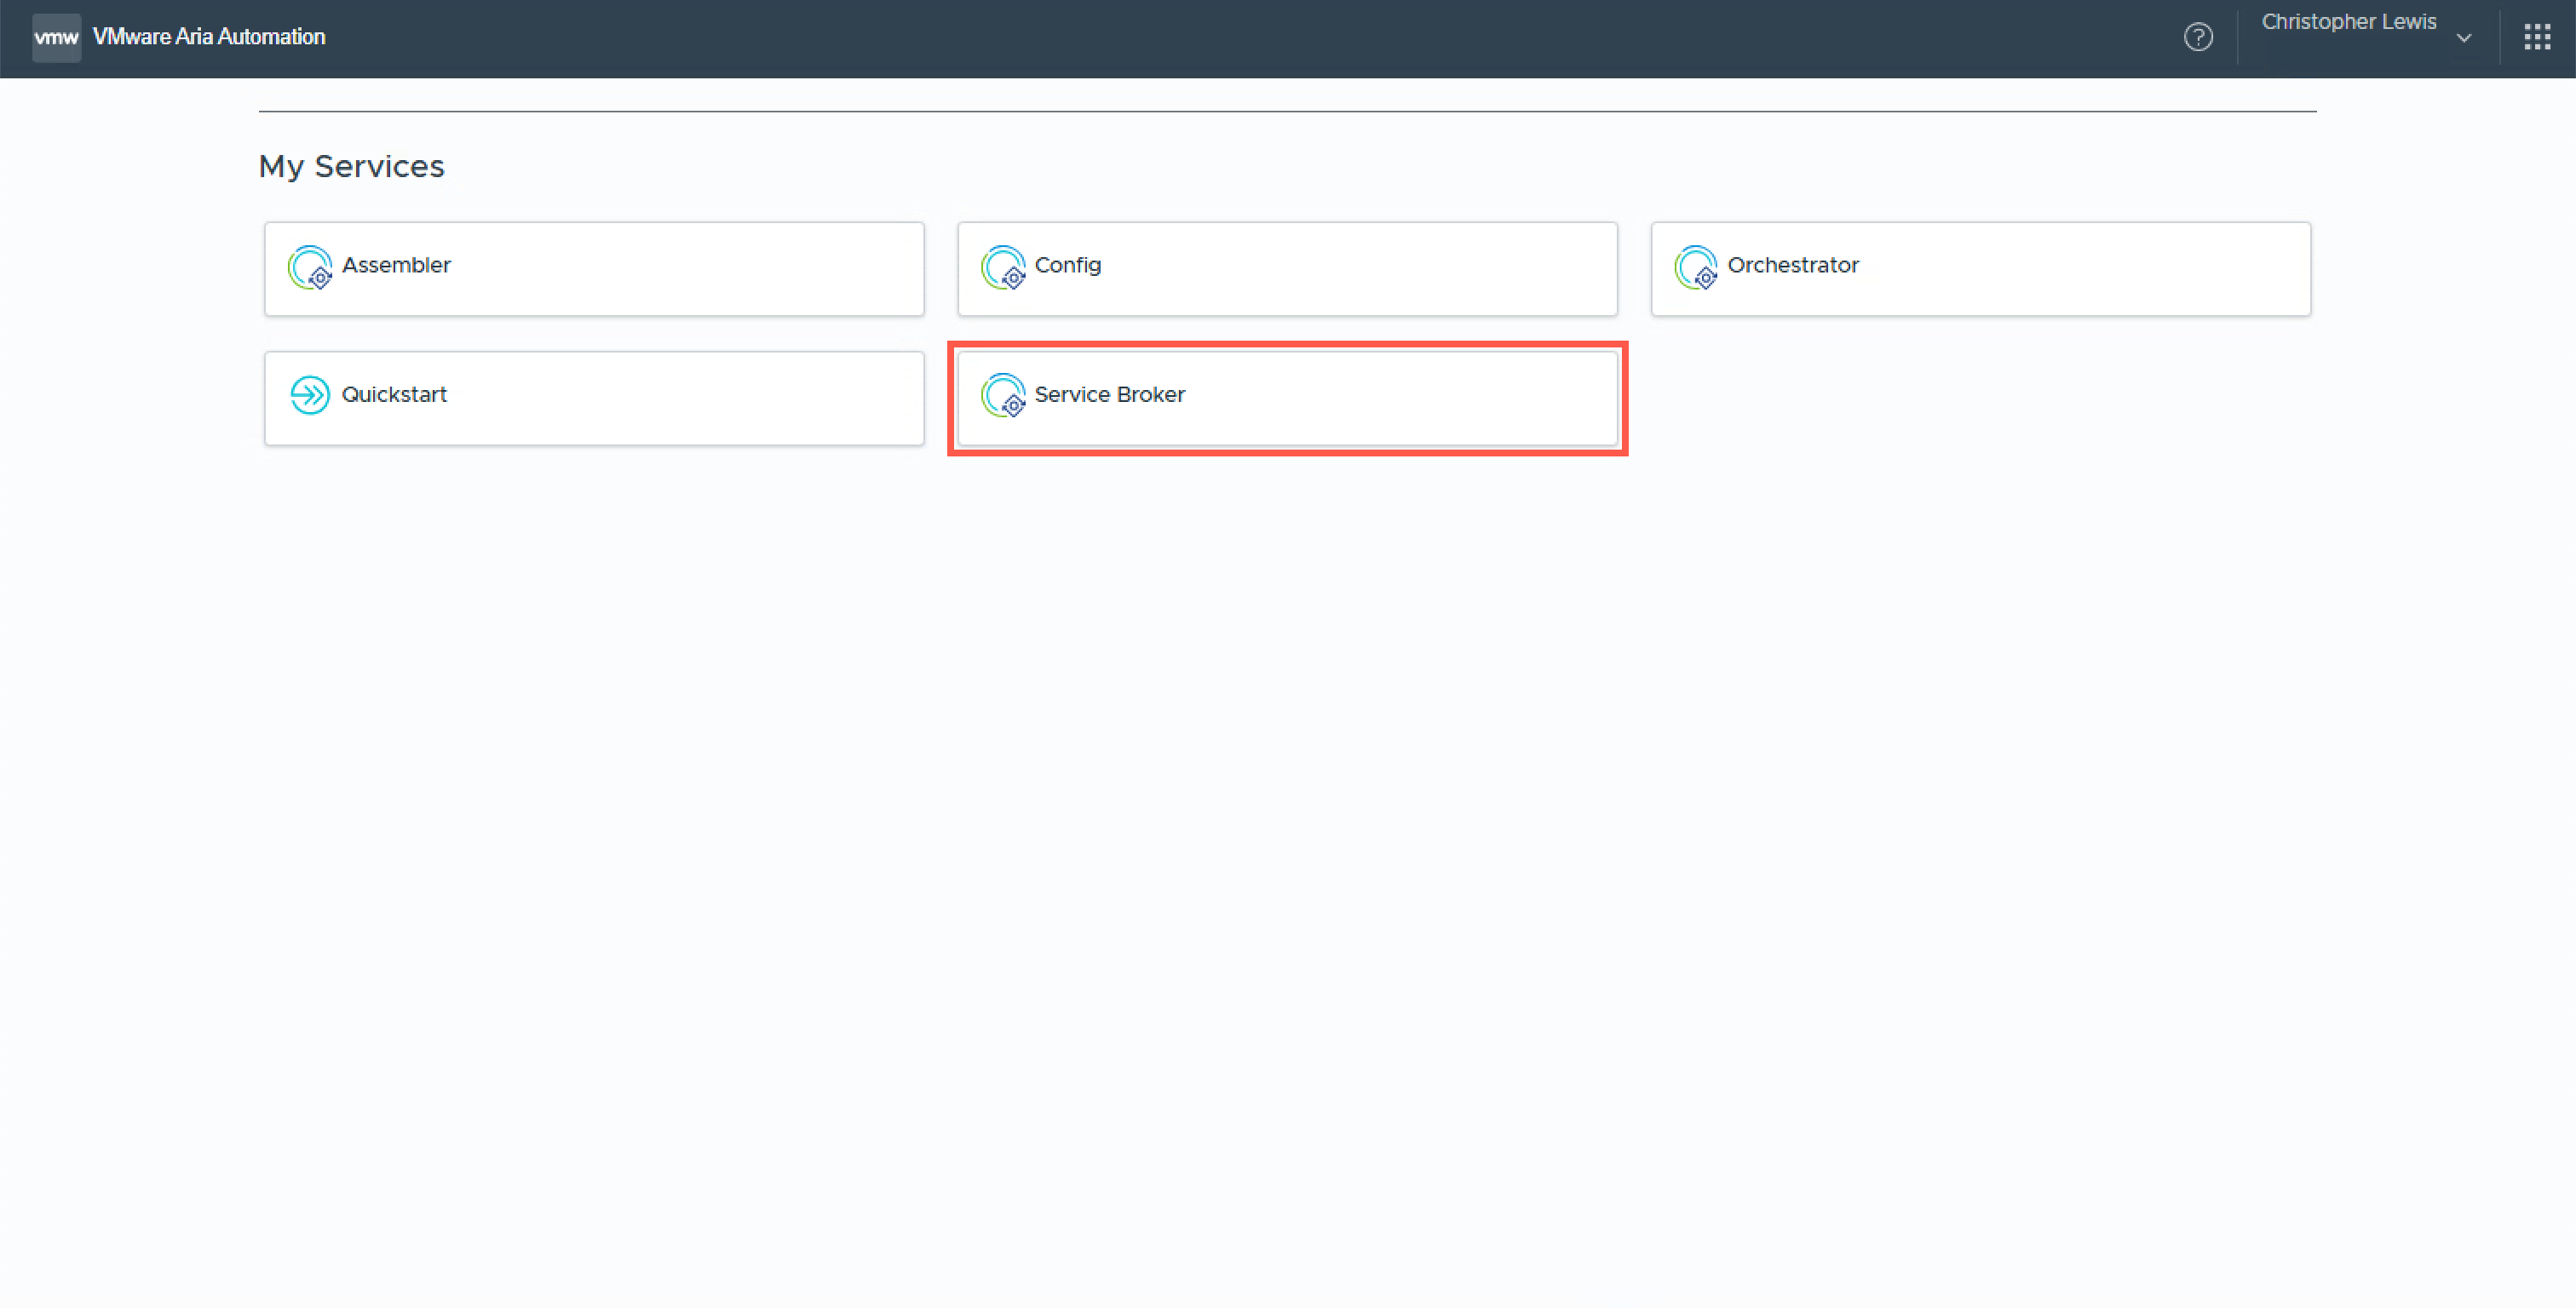
- At the My Services screen, click the Service Broker tile.
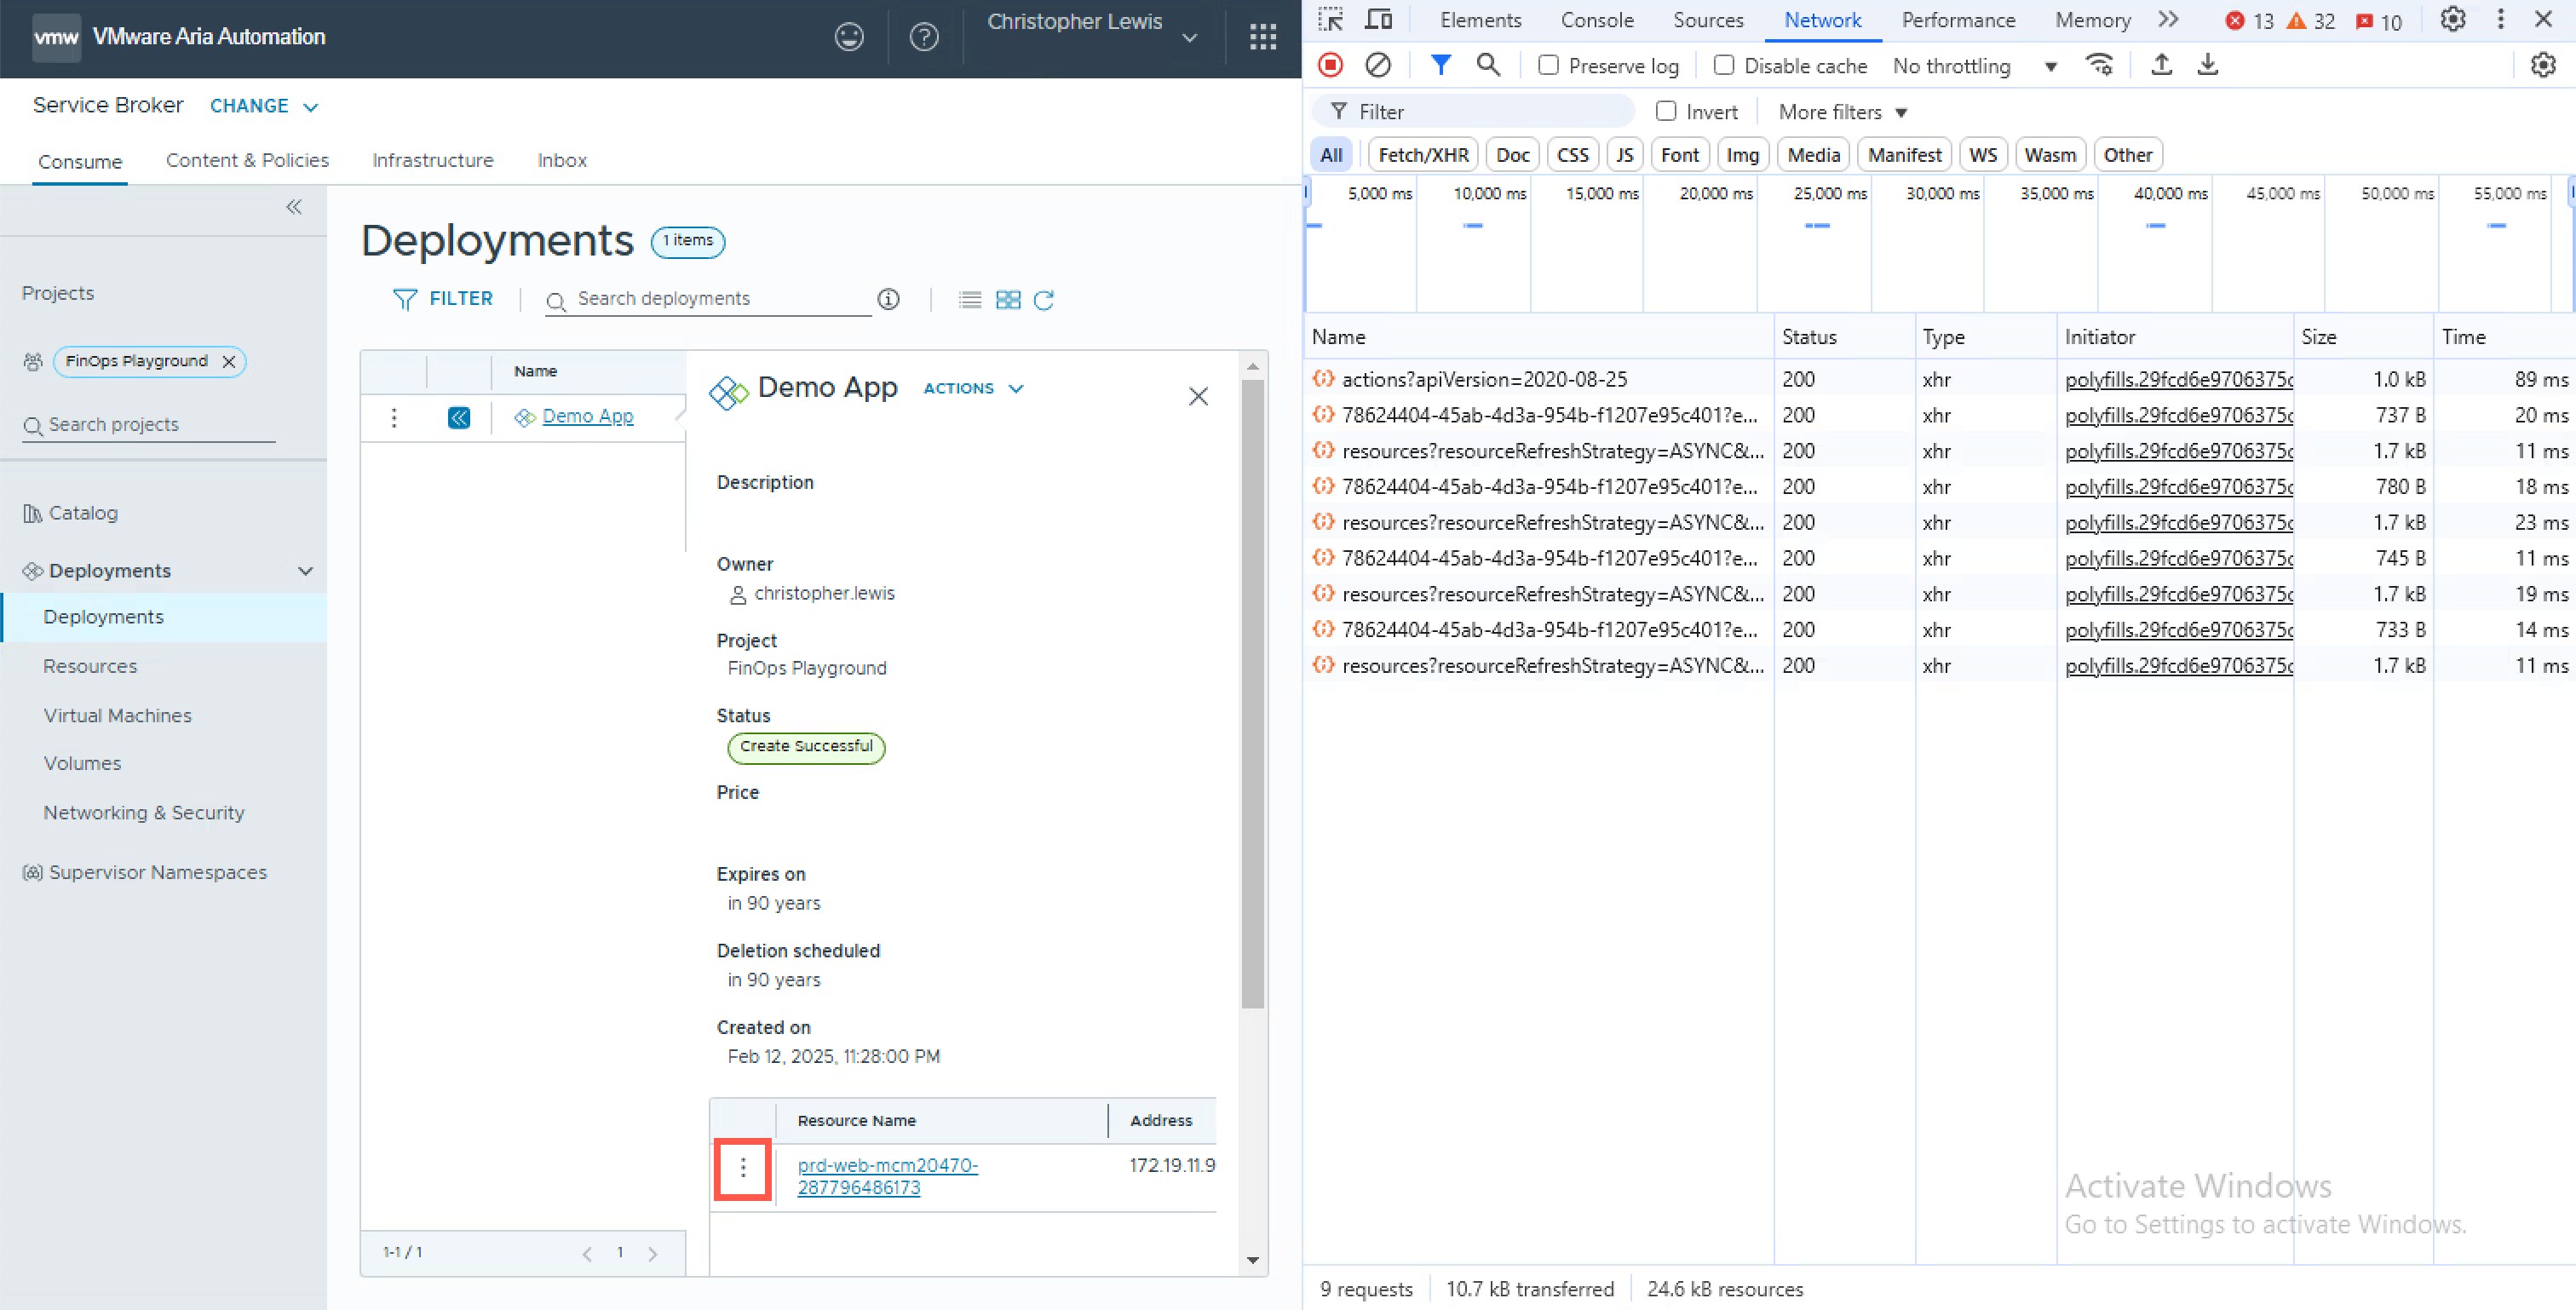
- At the Consume screen, click Deployments to show all deployments available to the administrative user.
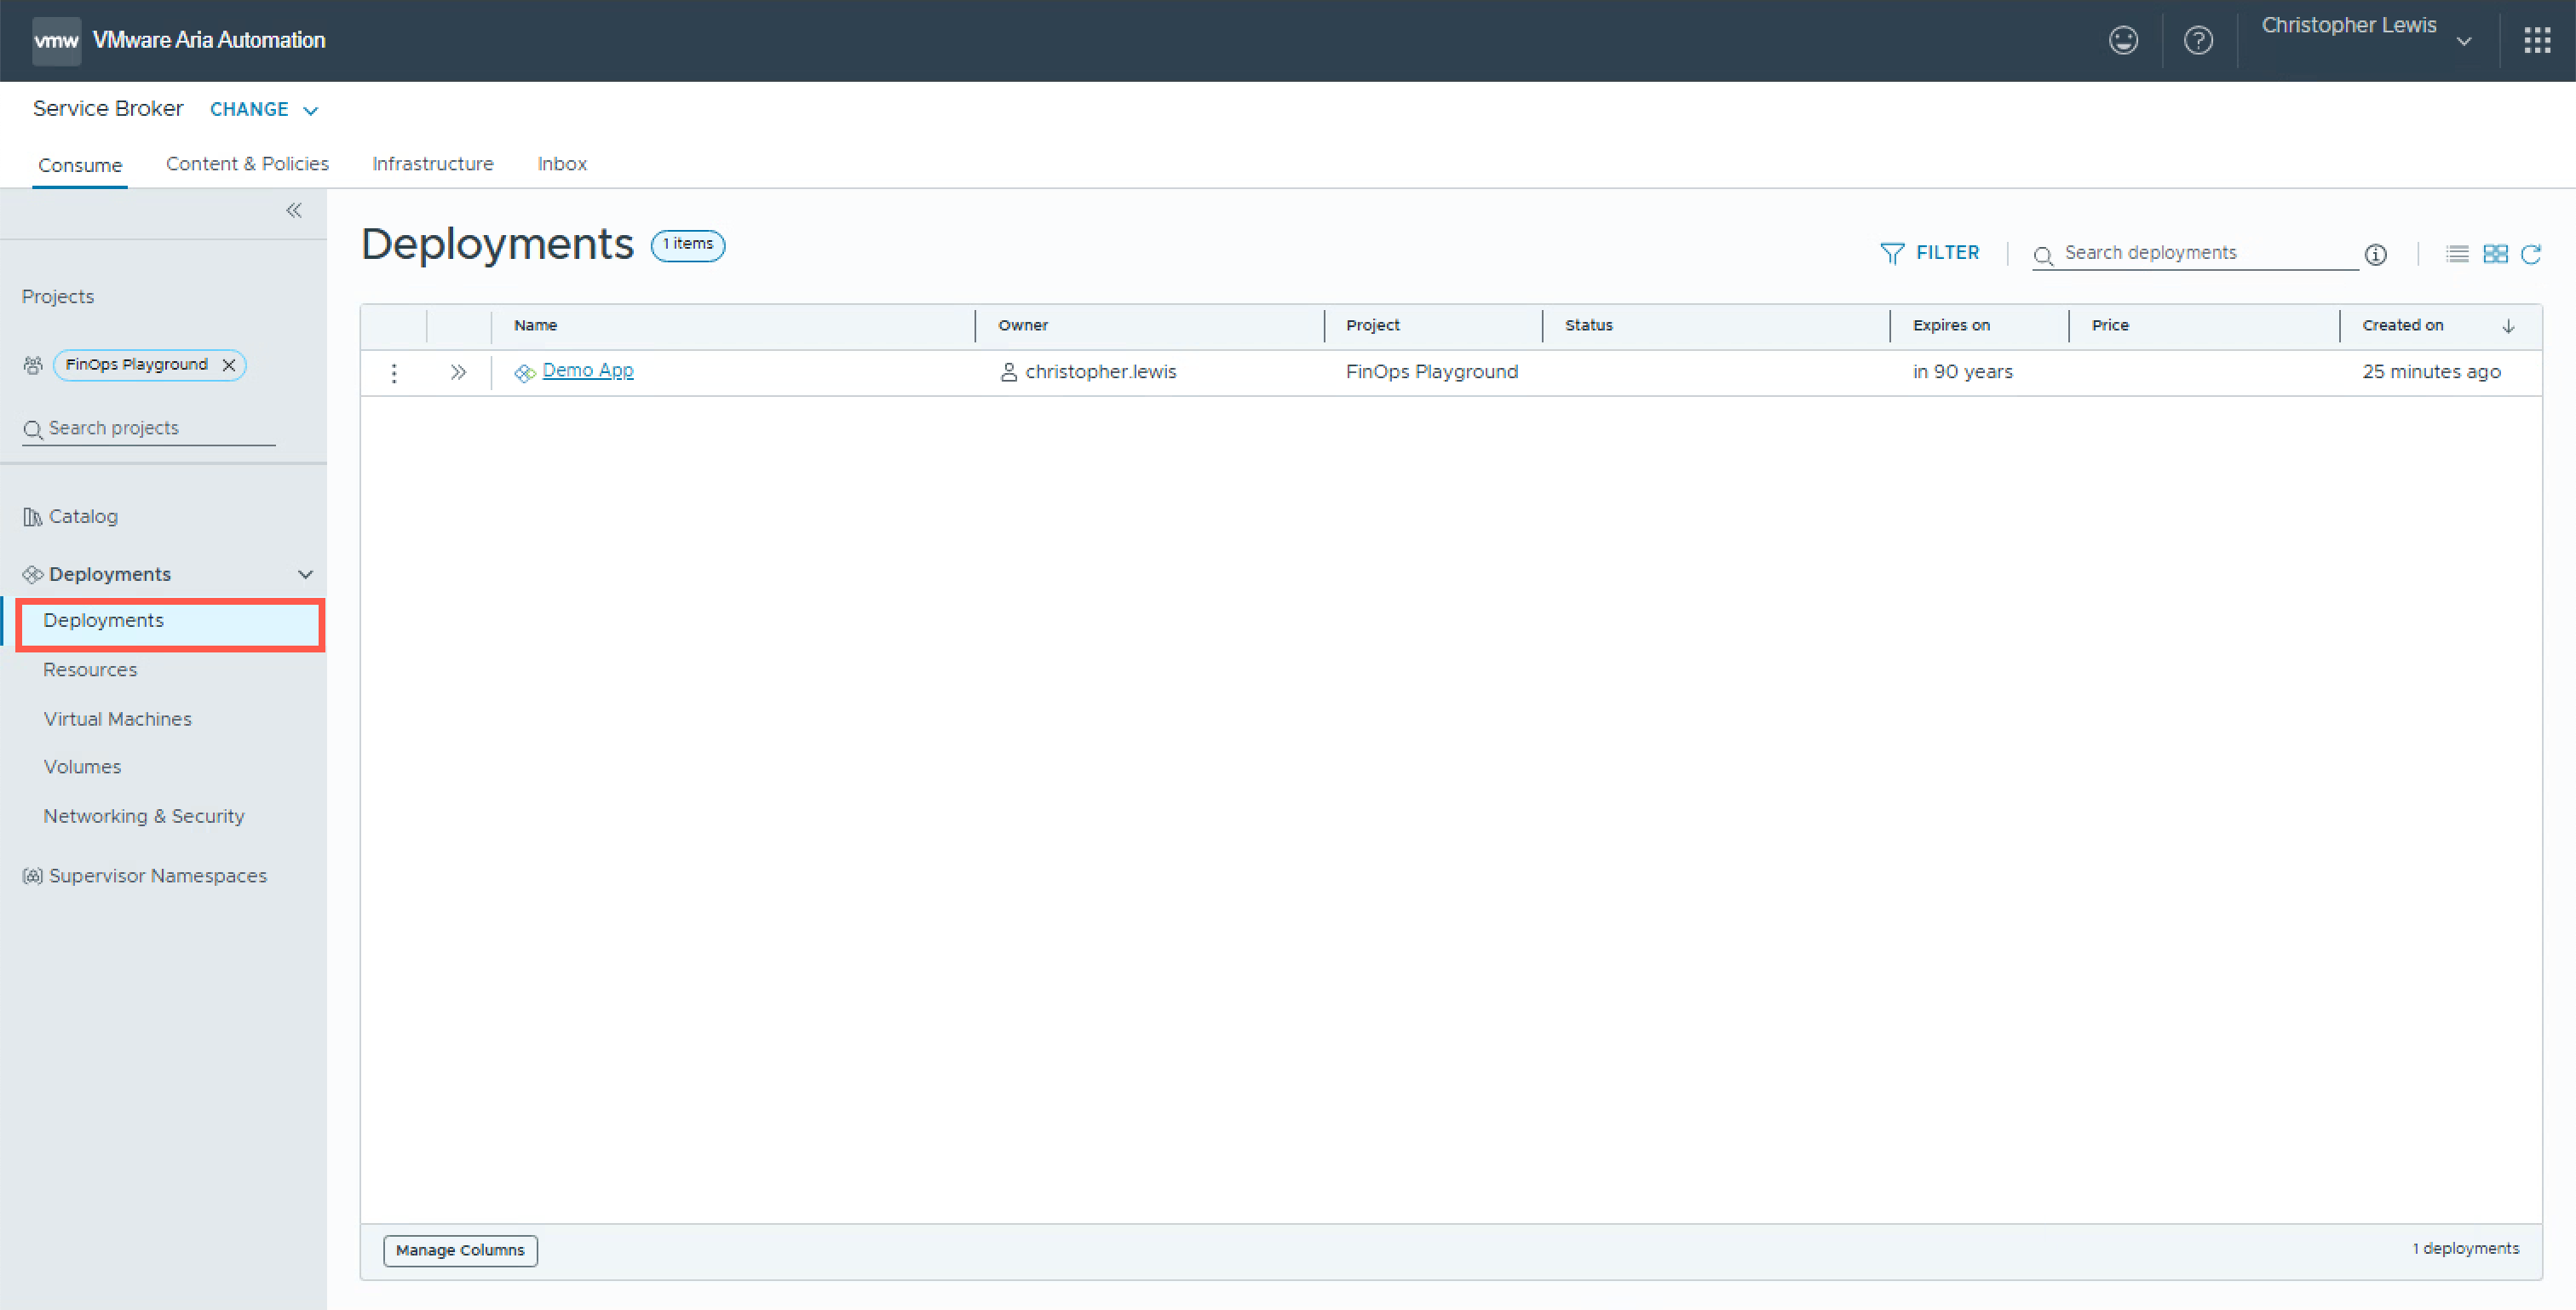
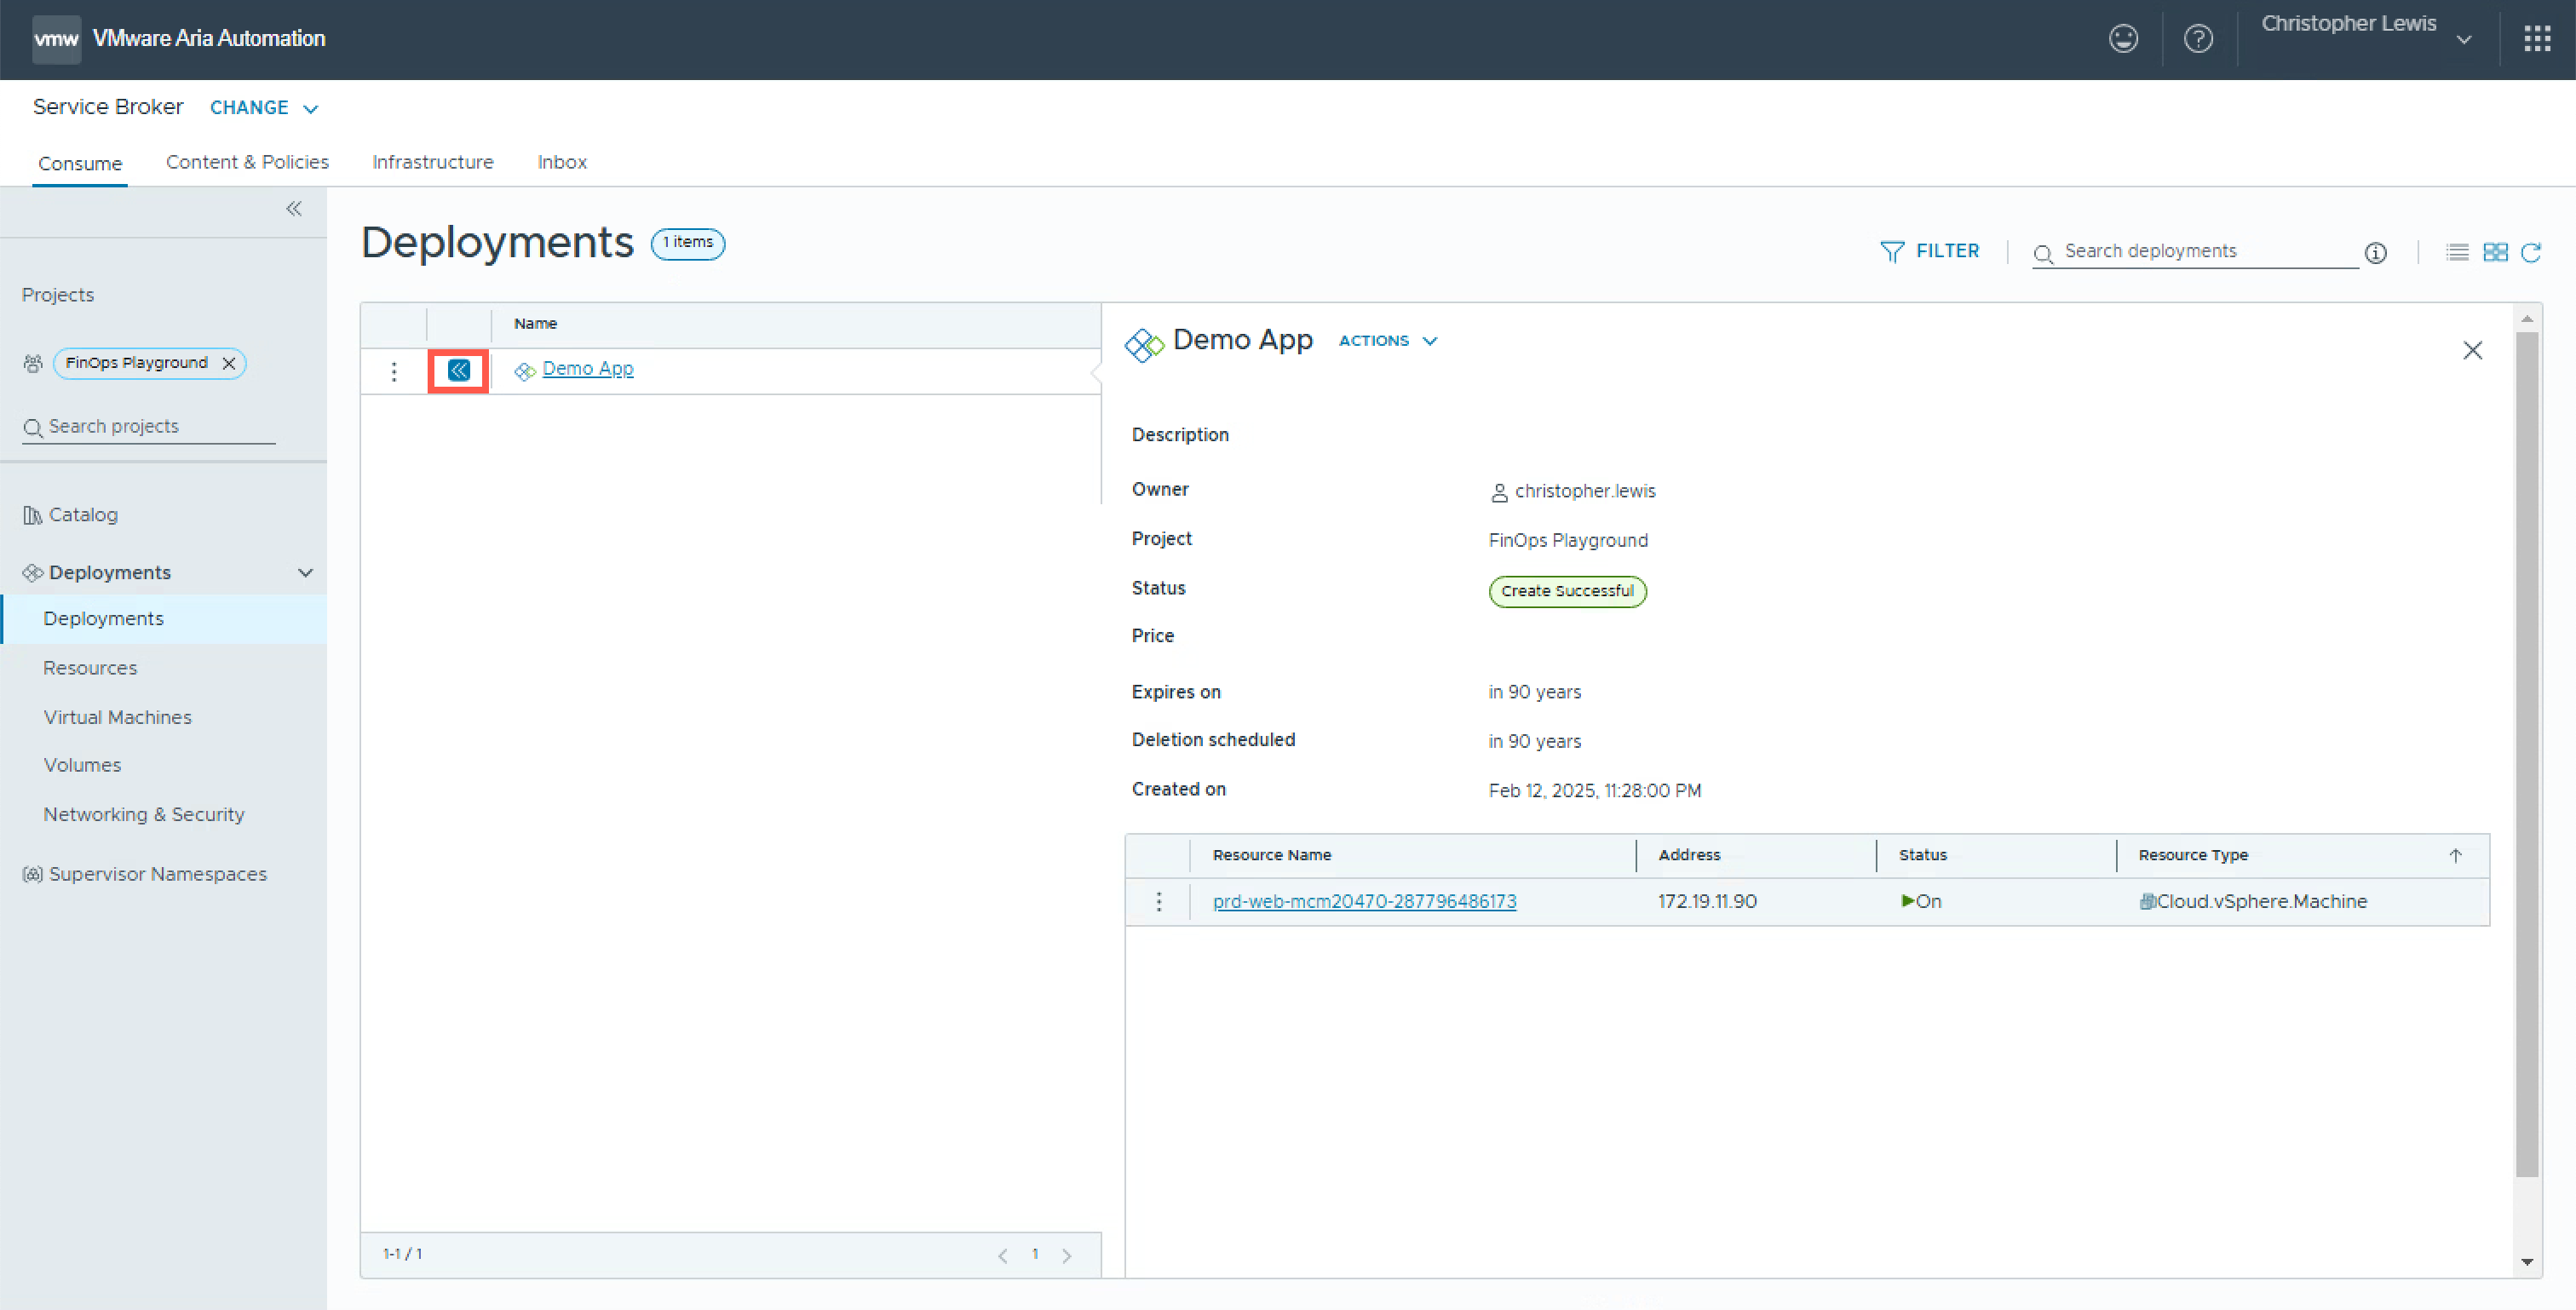
- At the Deployments Screen, locate the demo deployment and click » to expand the view to show resources within.
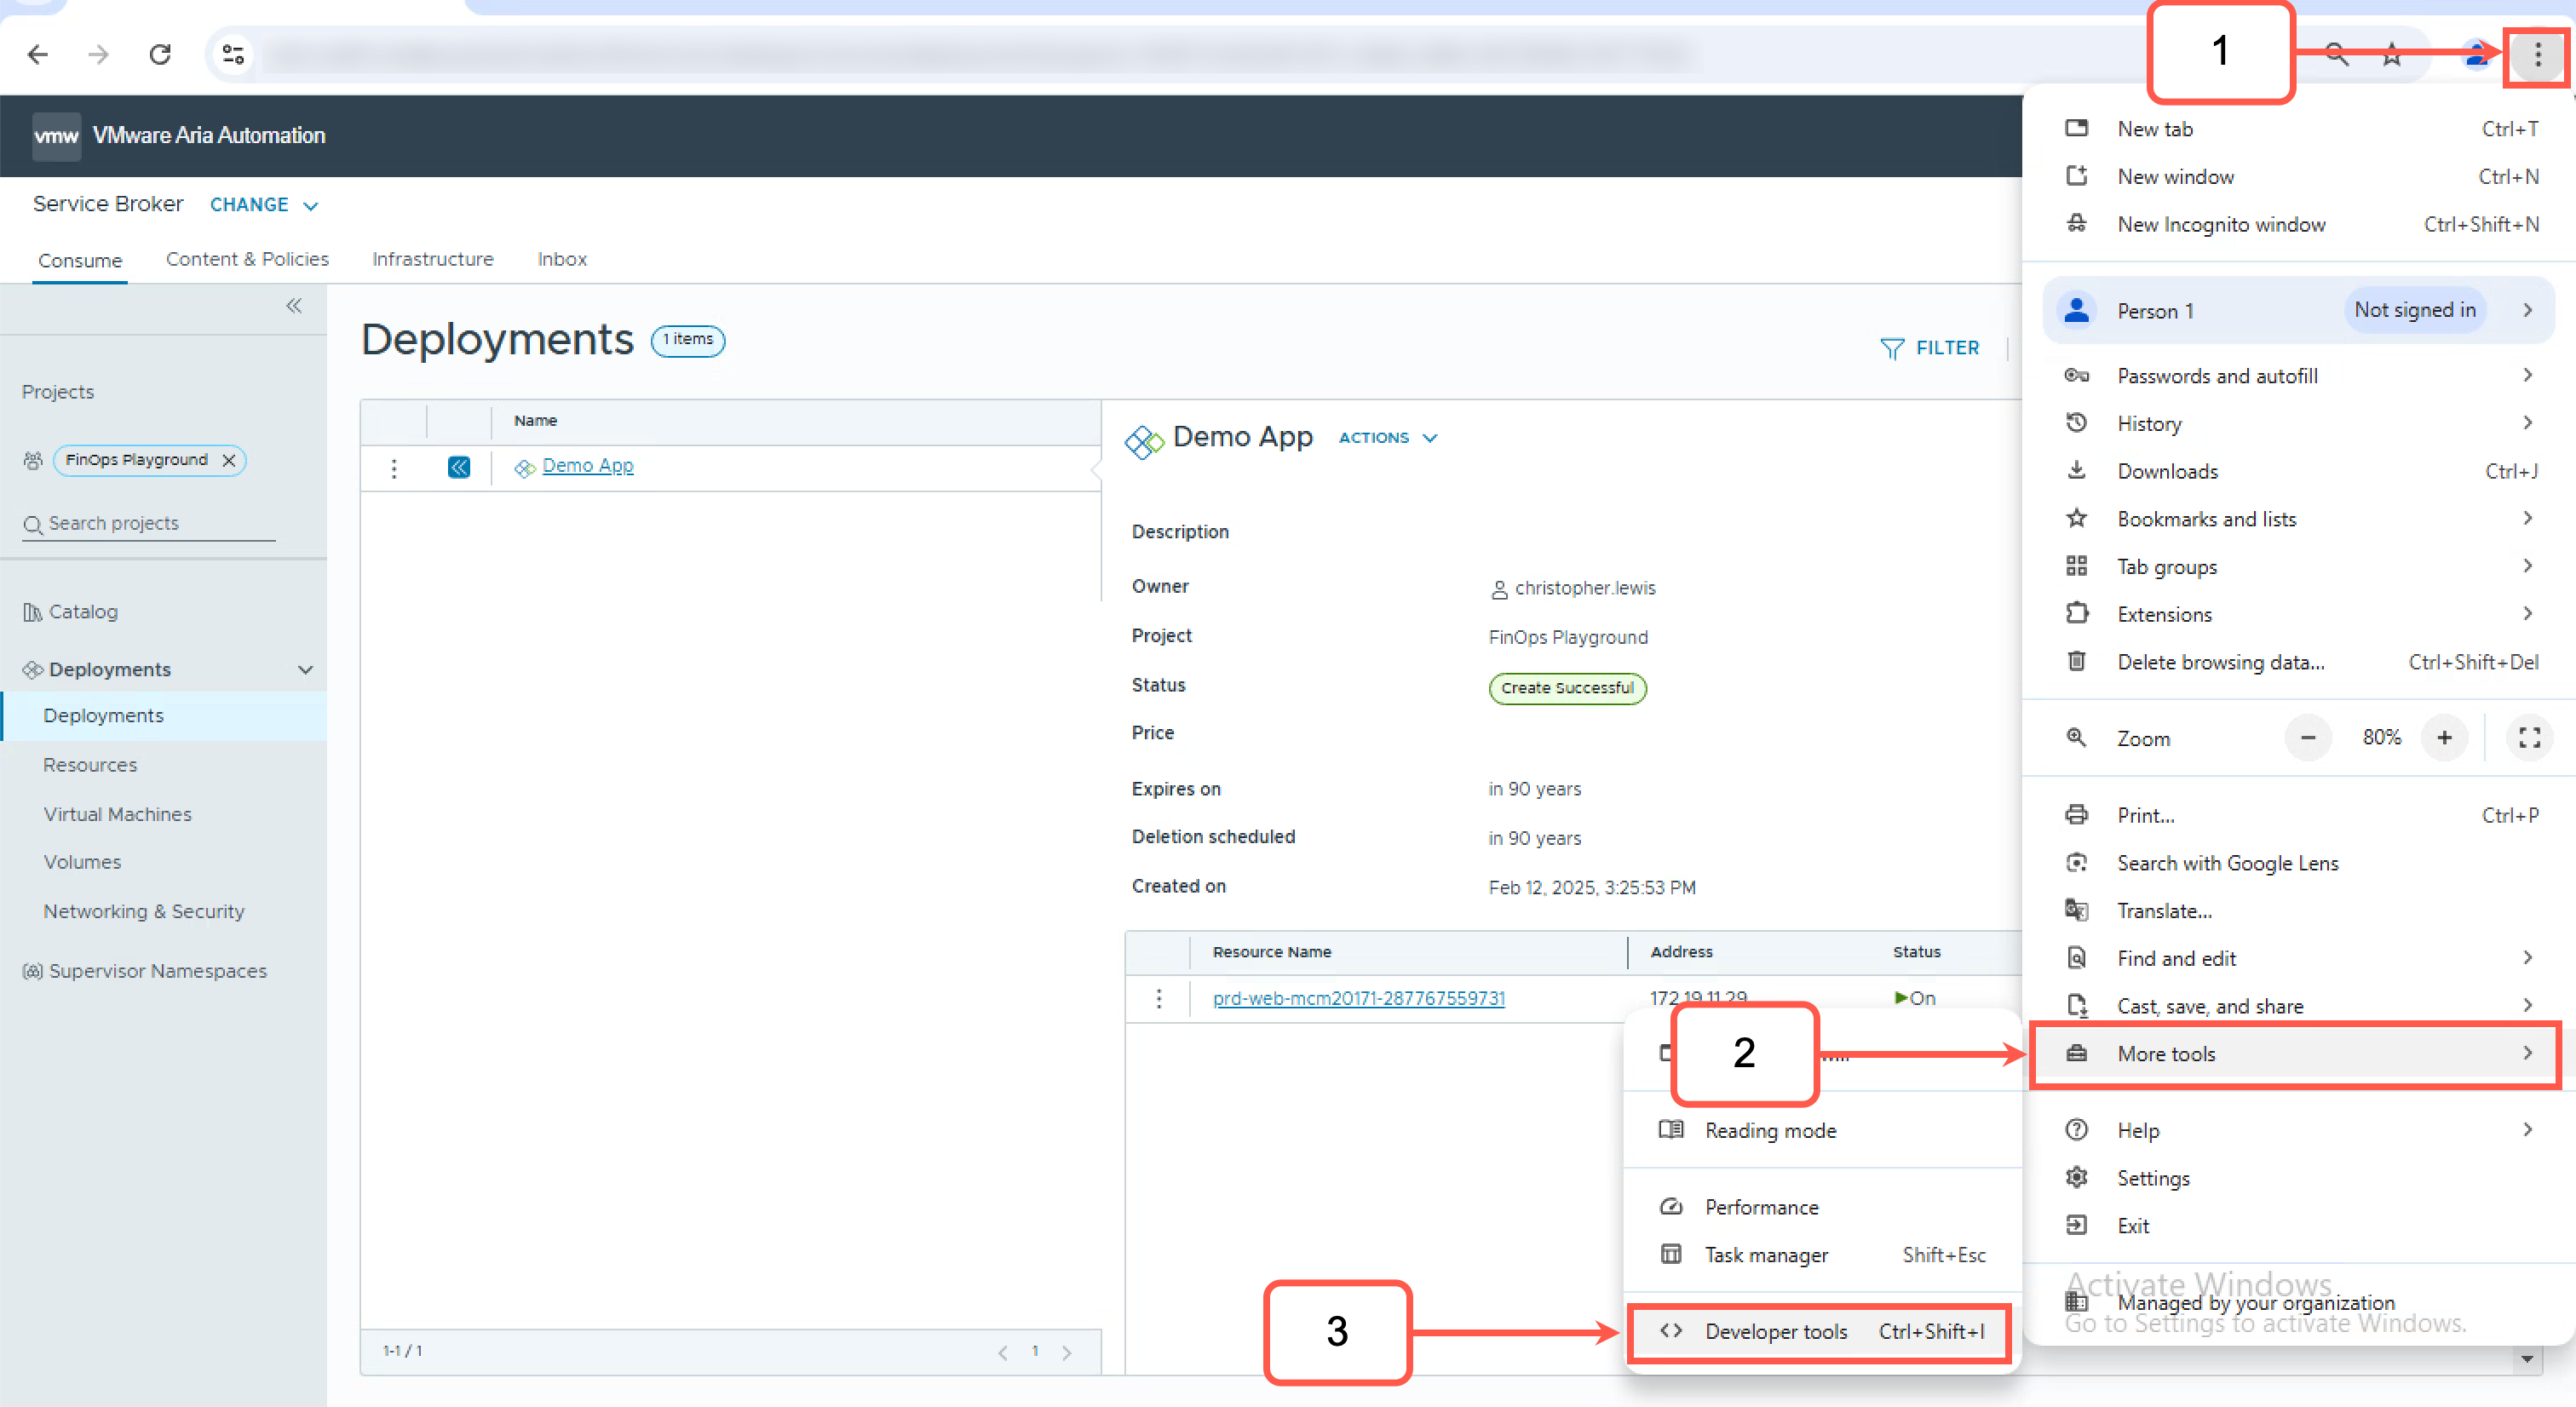
- From within the Chrome Browser, complete the following steps to open the Chrome Developer Tools:
- Click the vertical ellipsis.
- Click More Tools.
- Click Developer Tools.
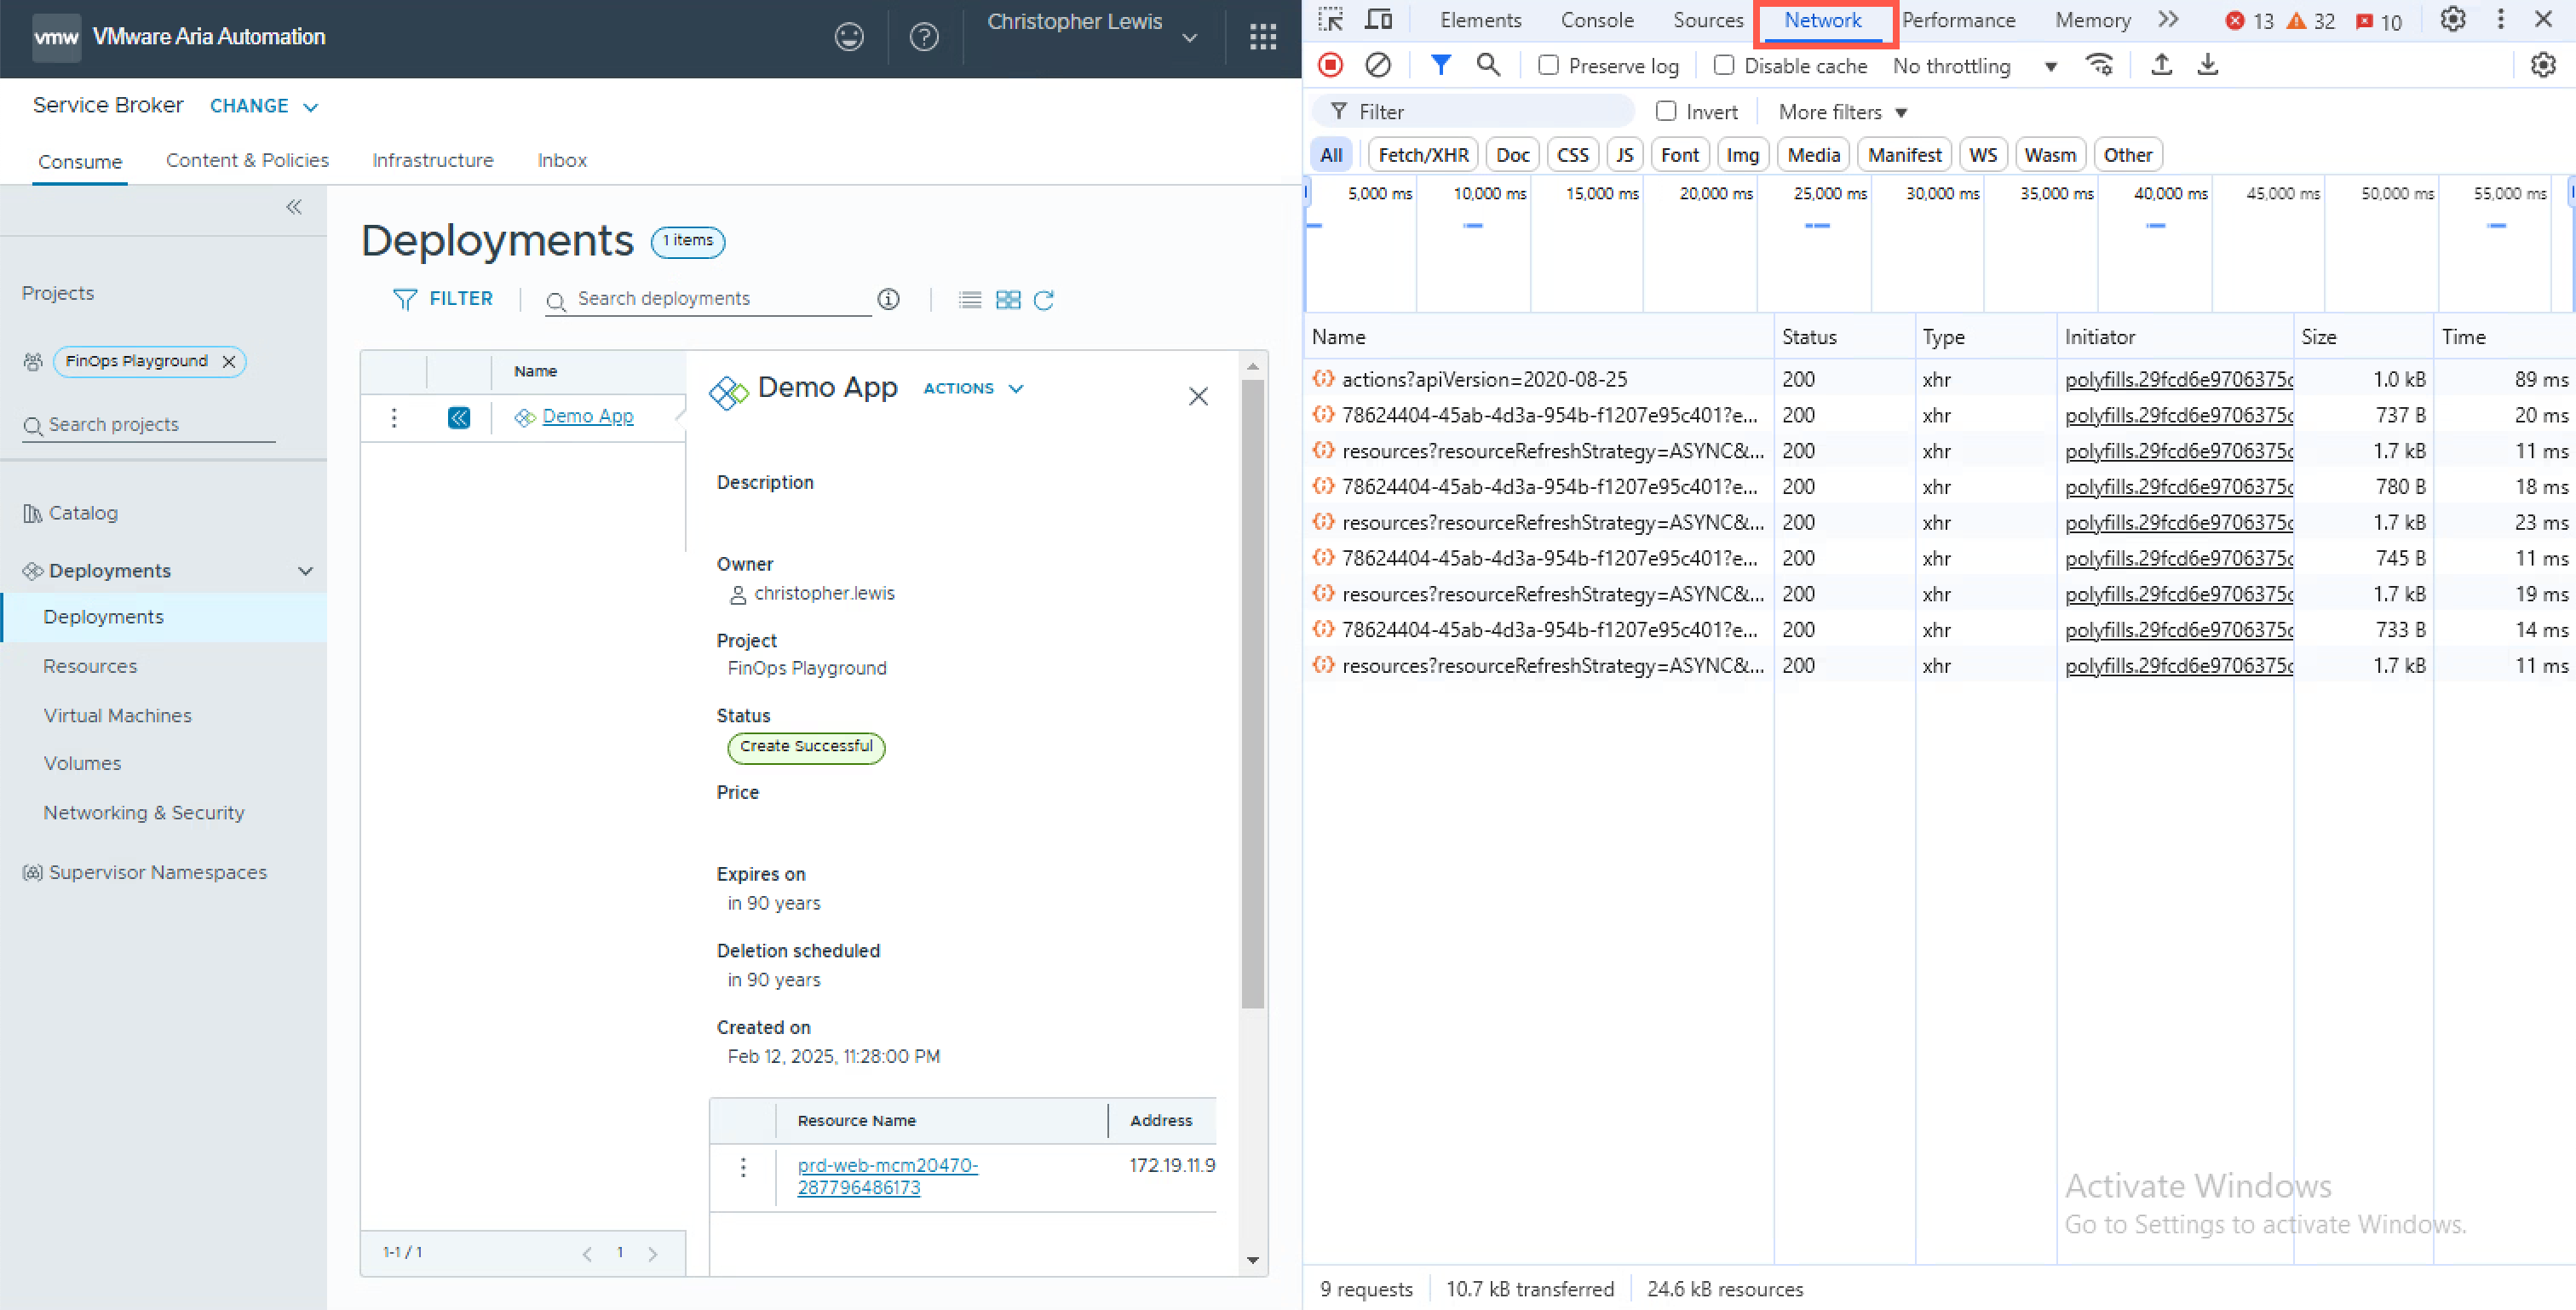
- From within the Chrome Browser Developer Tools pane, click Network.
- In Aria Automation, click the vertical ellipsis for the virtual machine resource to display the Resource Action menu.
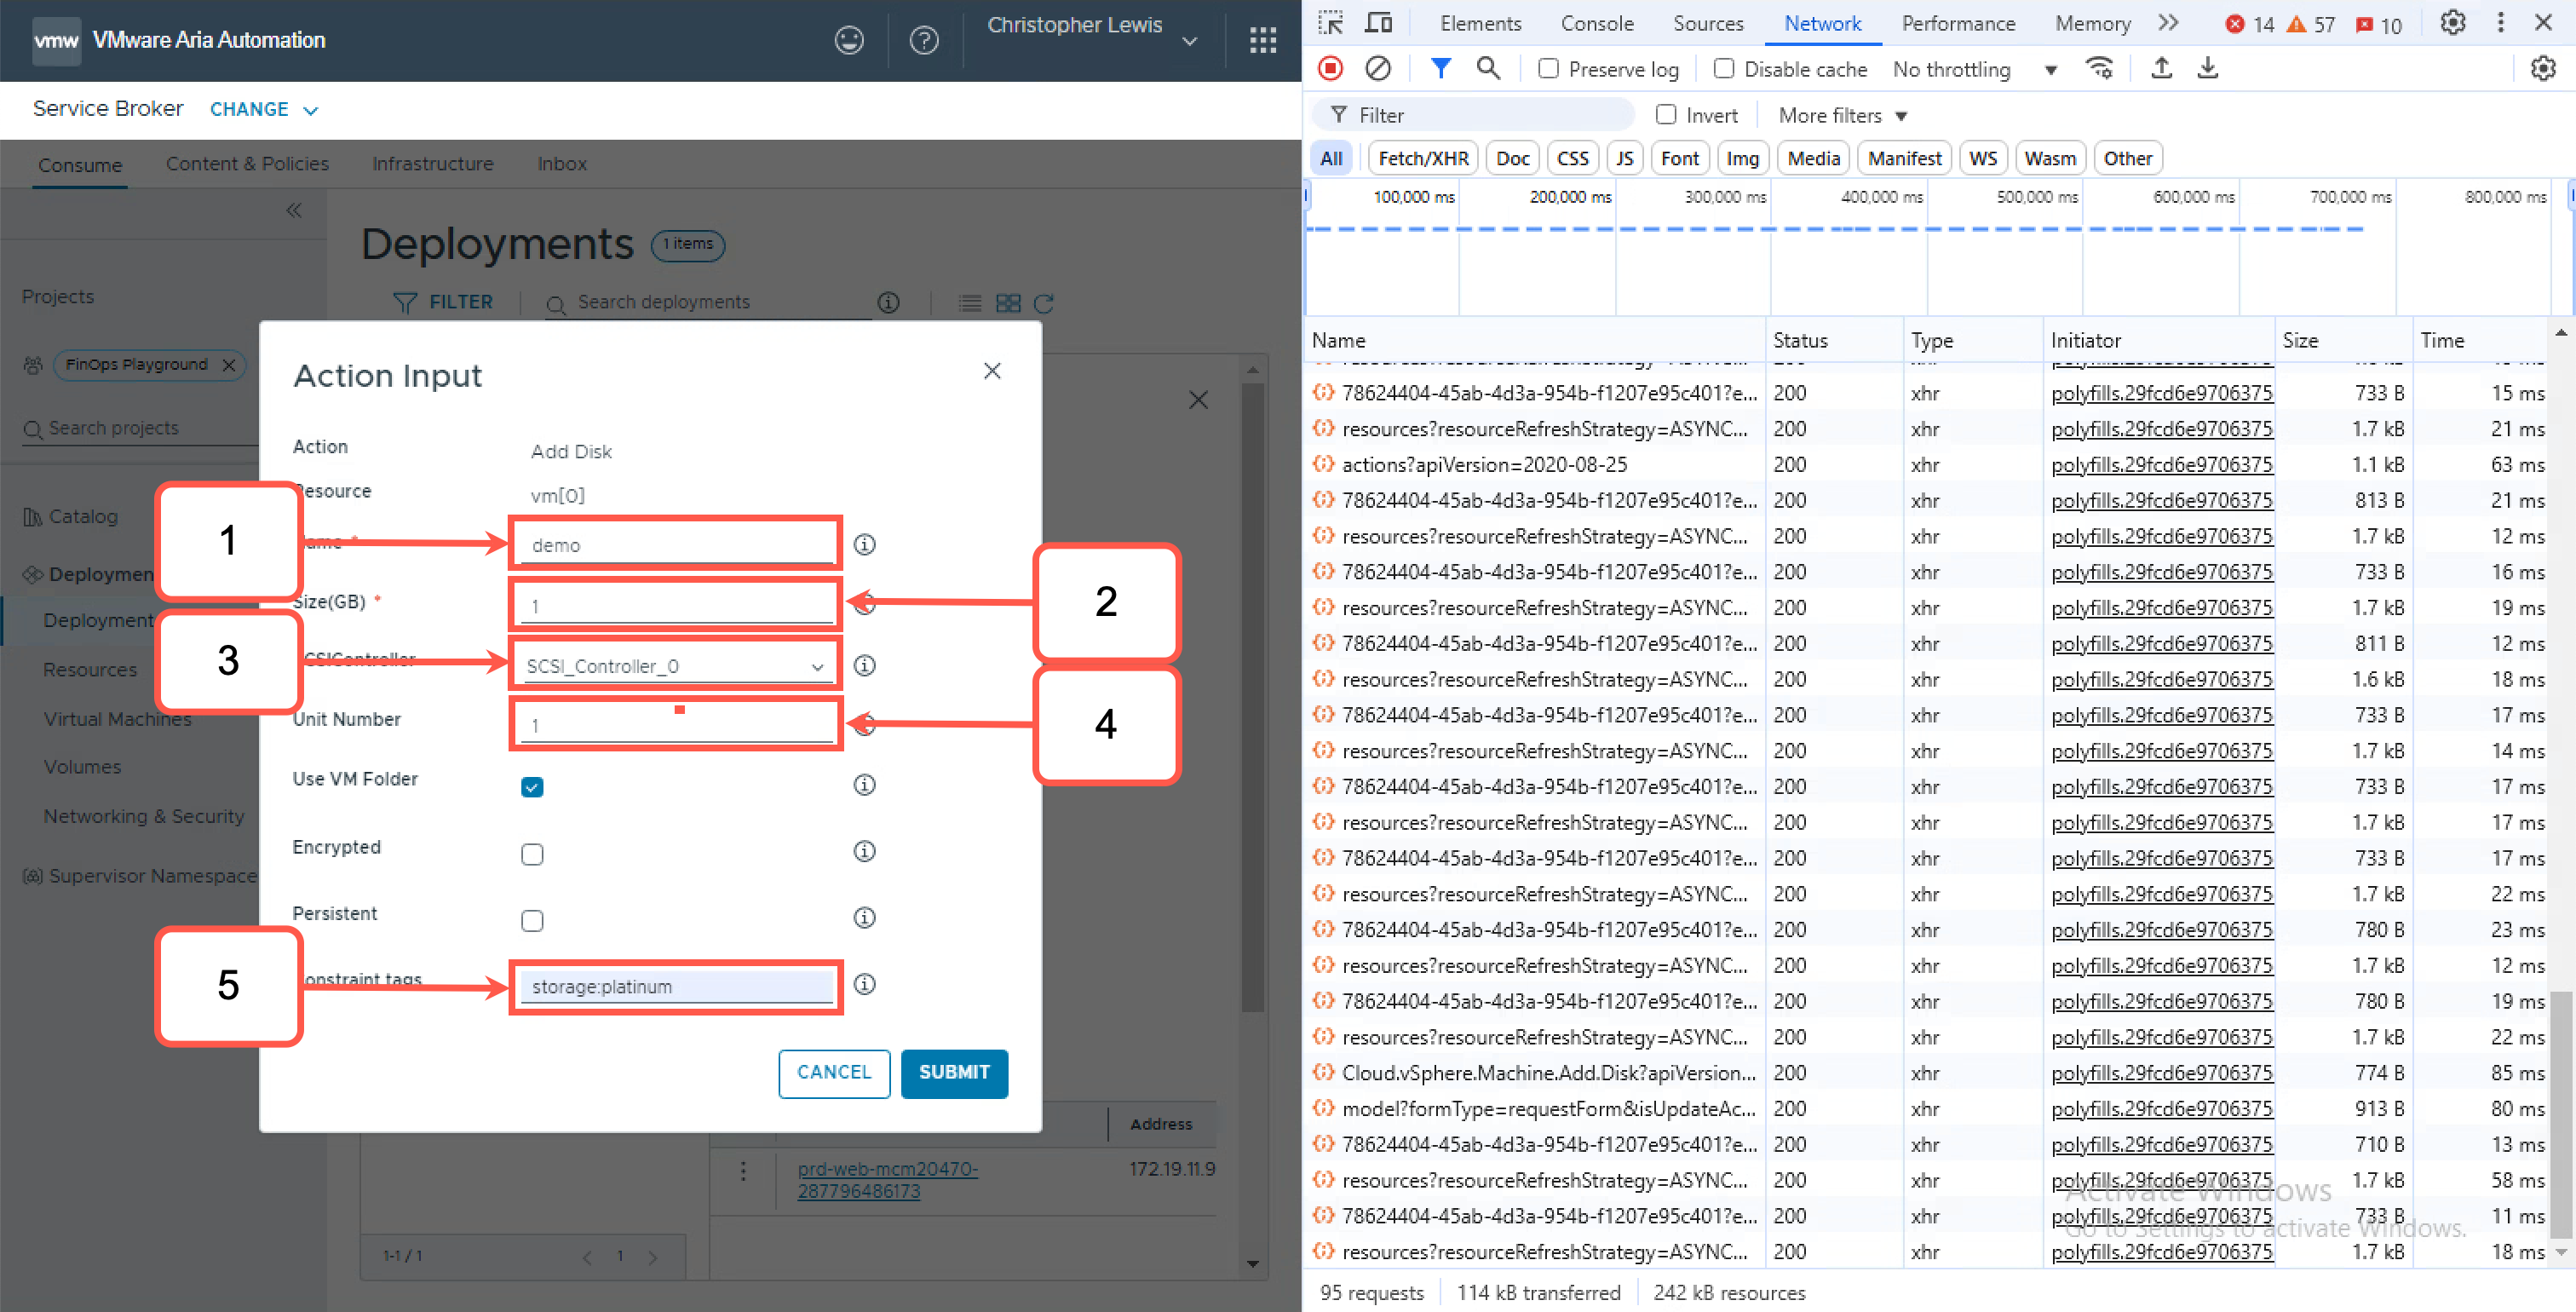
- At the Resource Action menu, click Add Disk.

- At the Action Input dialog, we can complete the form using:
- At the Name field, type Demo.
- At the Size(GB) field, select 1.
- At the SCSIController dropdown, select SCSI_Controller_0 from the list.
- At the Unit Number field, type 1.
- At the Constraint tags field, type storage:platinum.
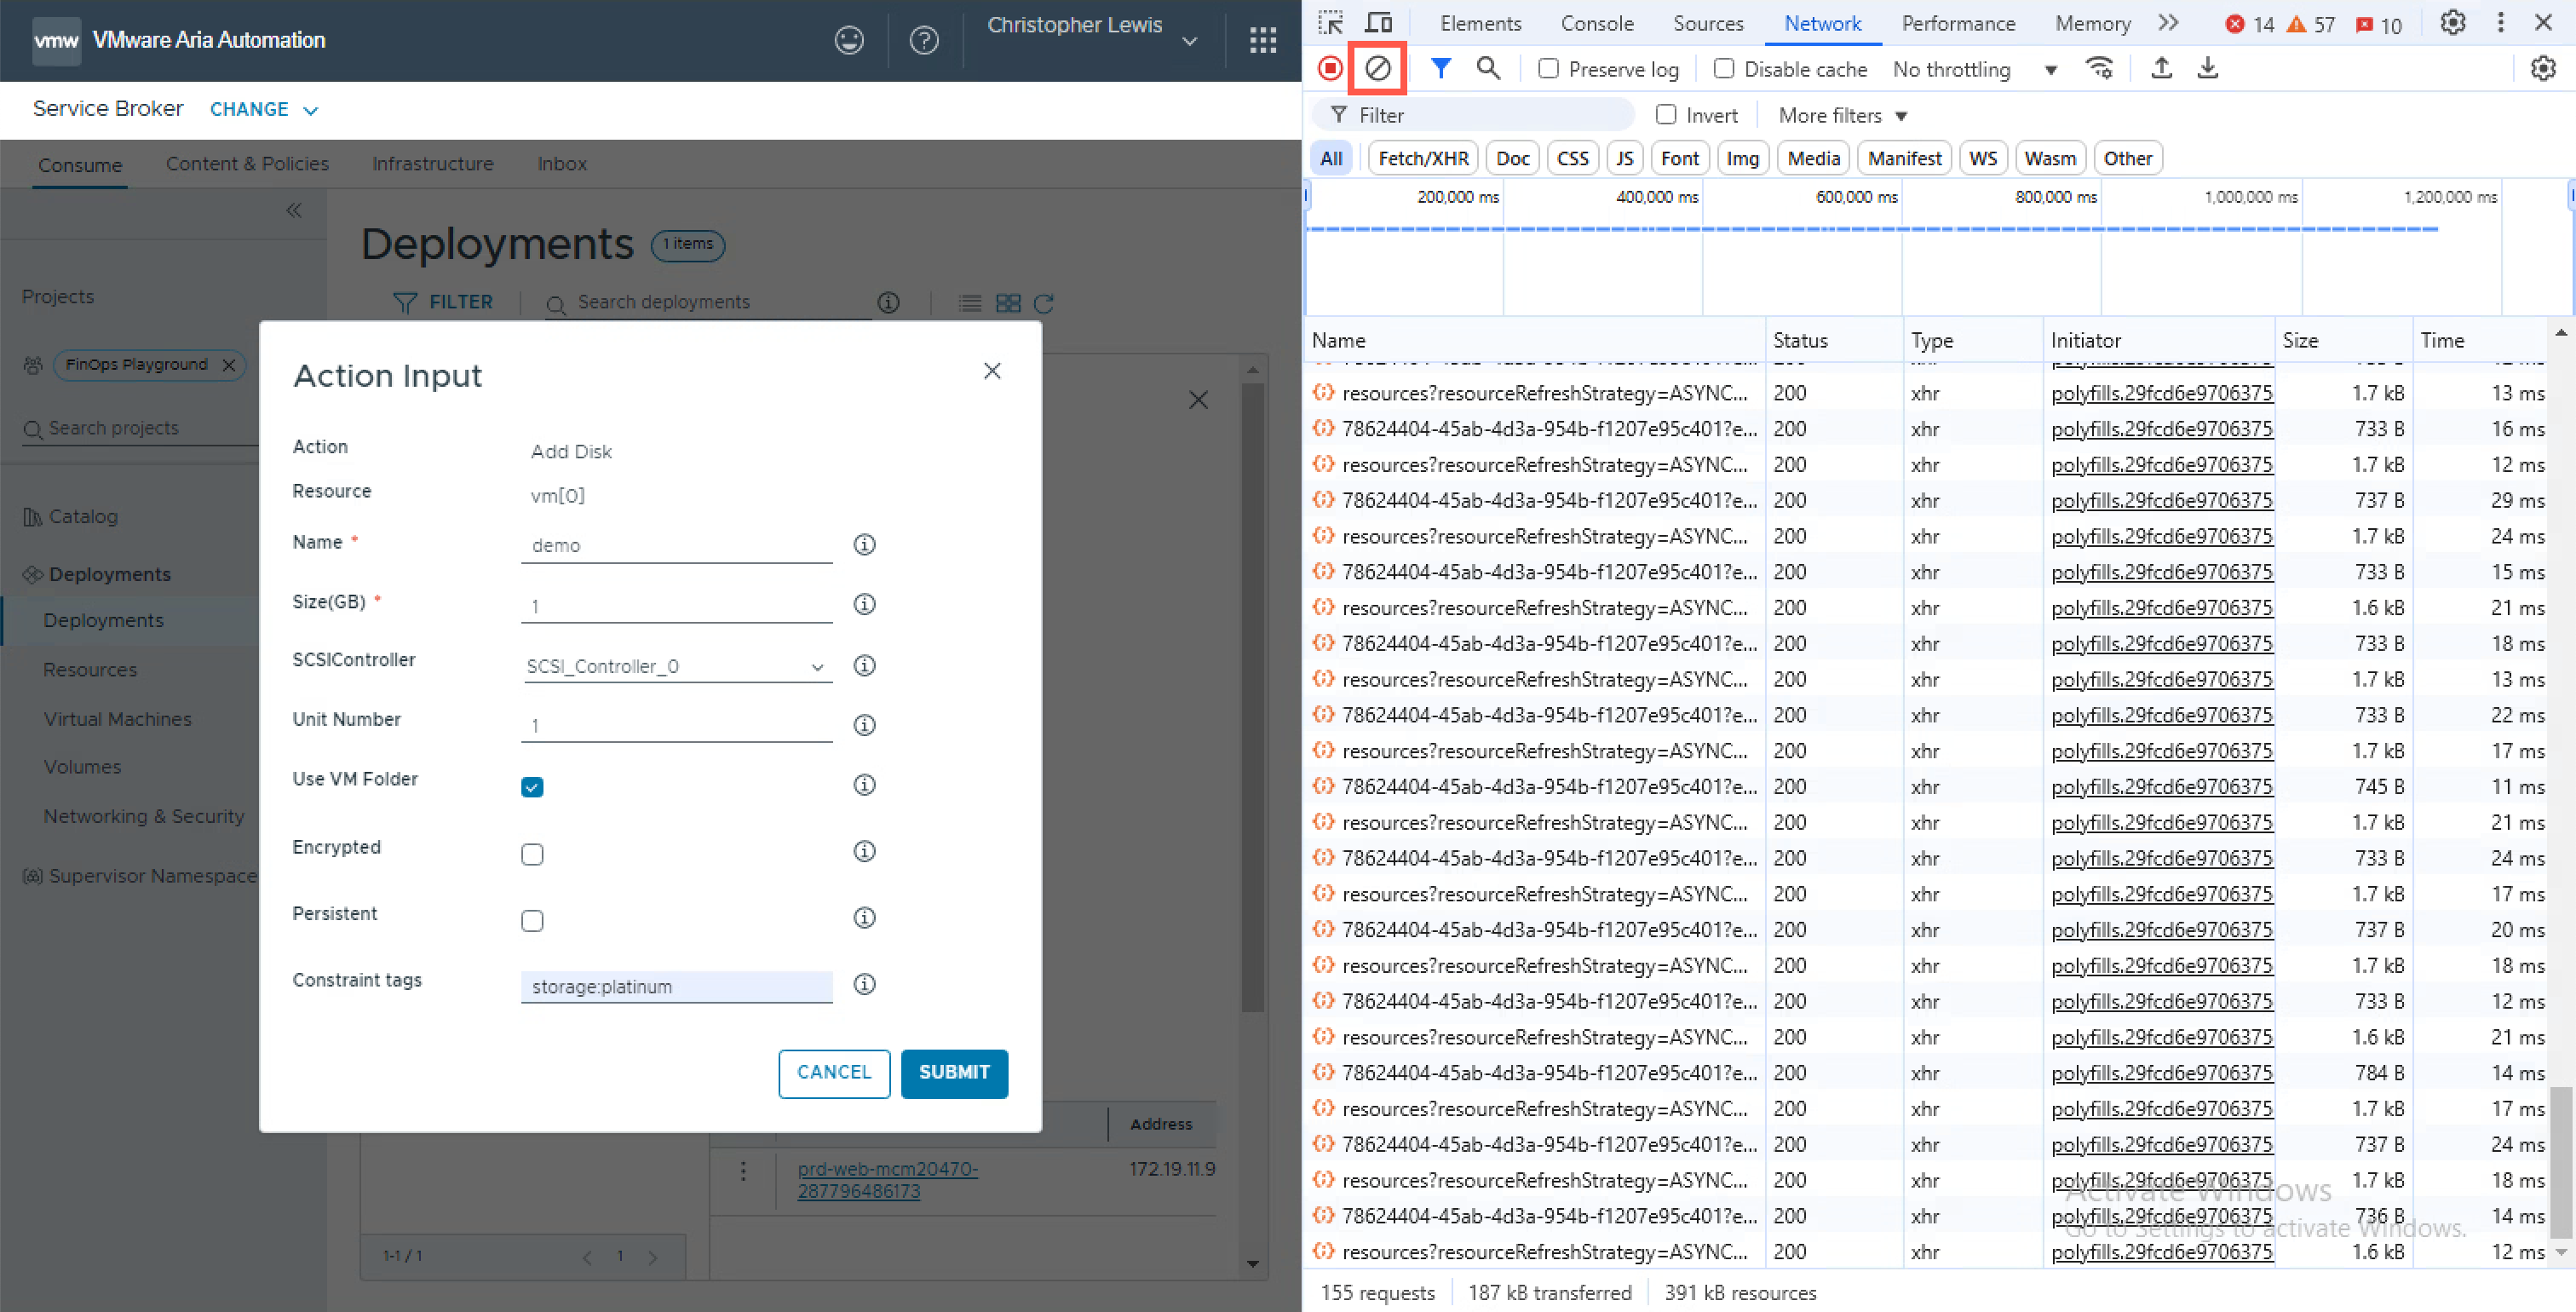
- At the Chrome Browser Developer Tools pane, click the clear icon to remove all current information from the network activity.
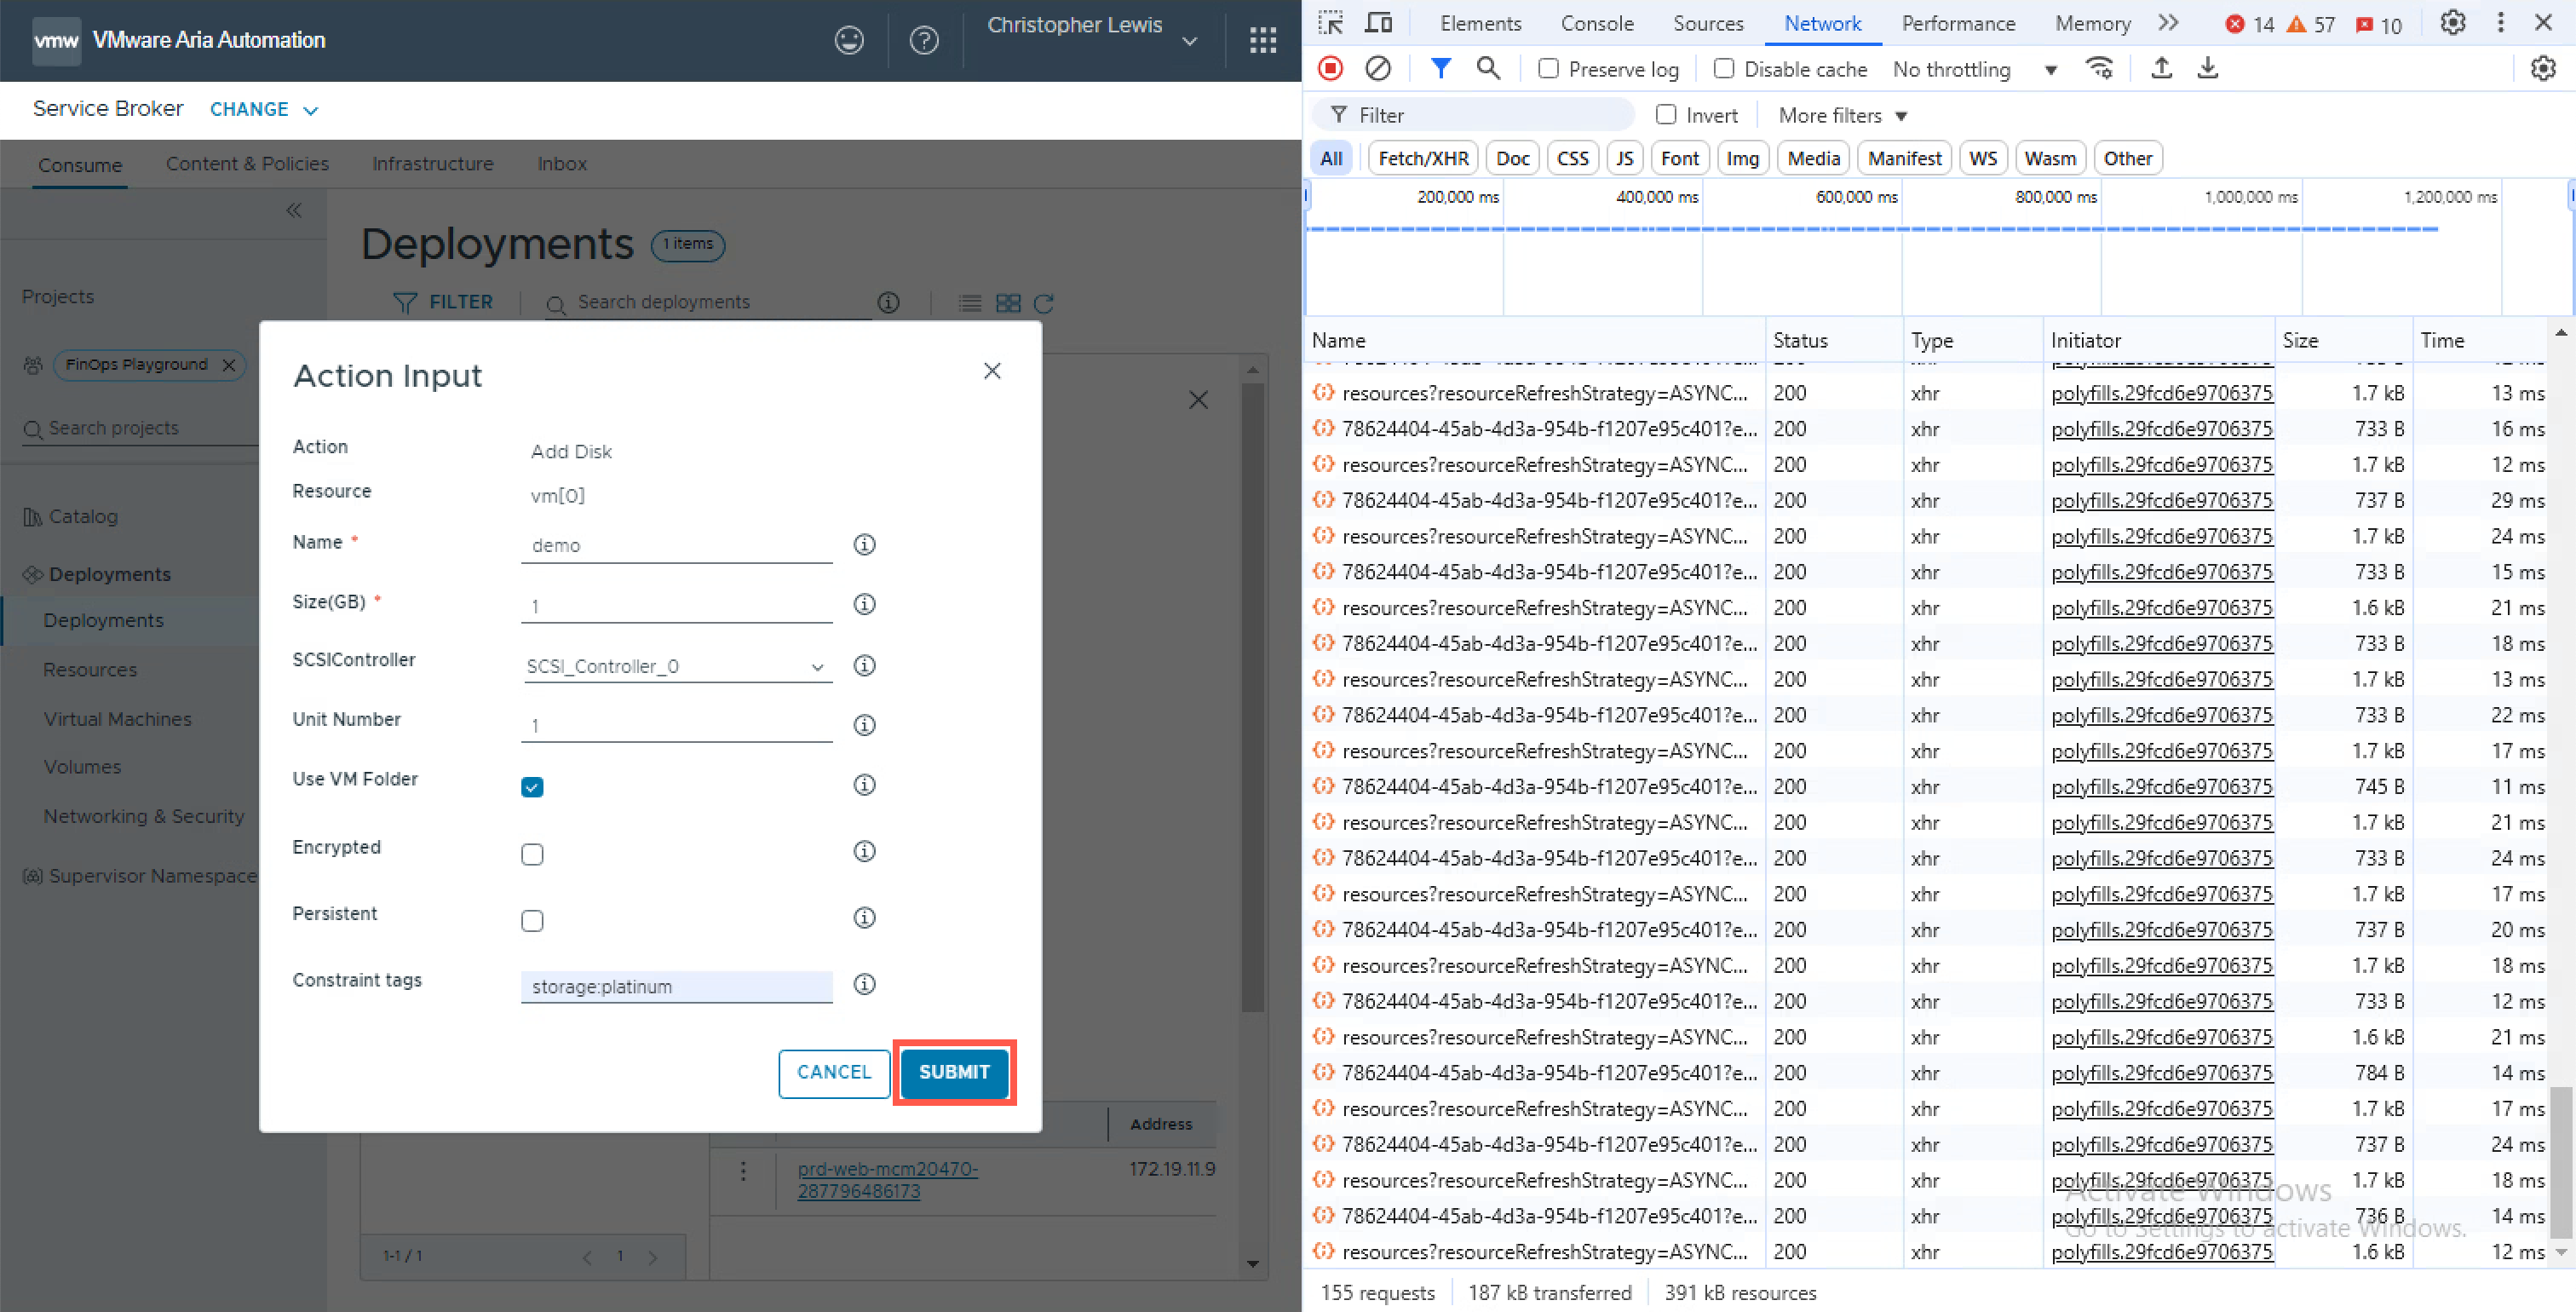
- At Aria the Action Input dialog, click SUBMIT.
- At the Chrome Browser Developer Tools pane, click the stop icon to stop recording the network activity.

- At the Chrome Browser Developer Tools pane, locate and click on the API item shown as requests?apiVersion=2020-08-25.
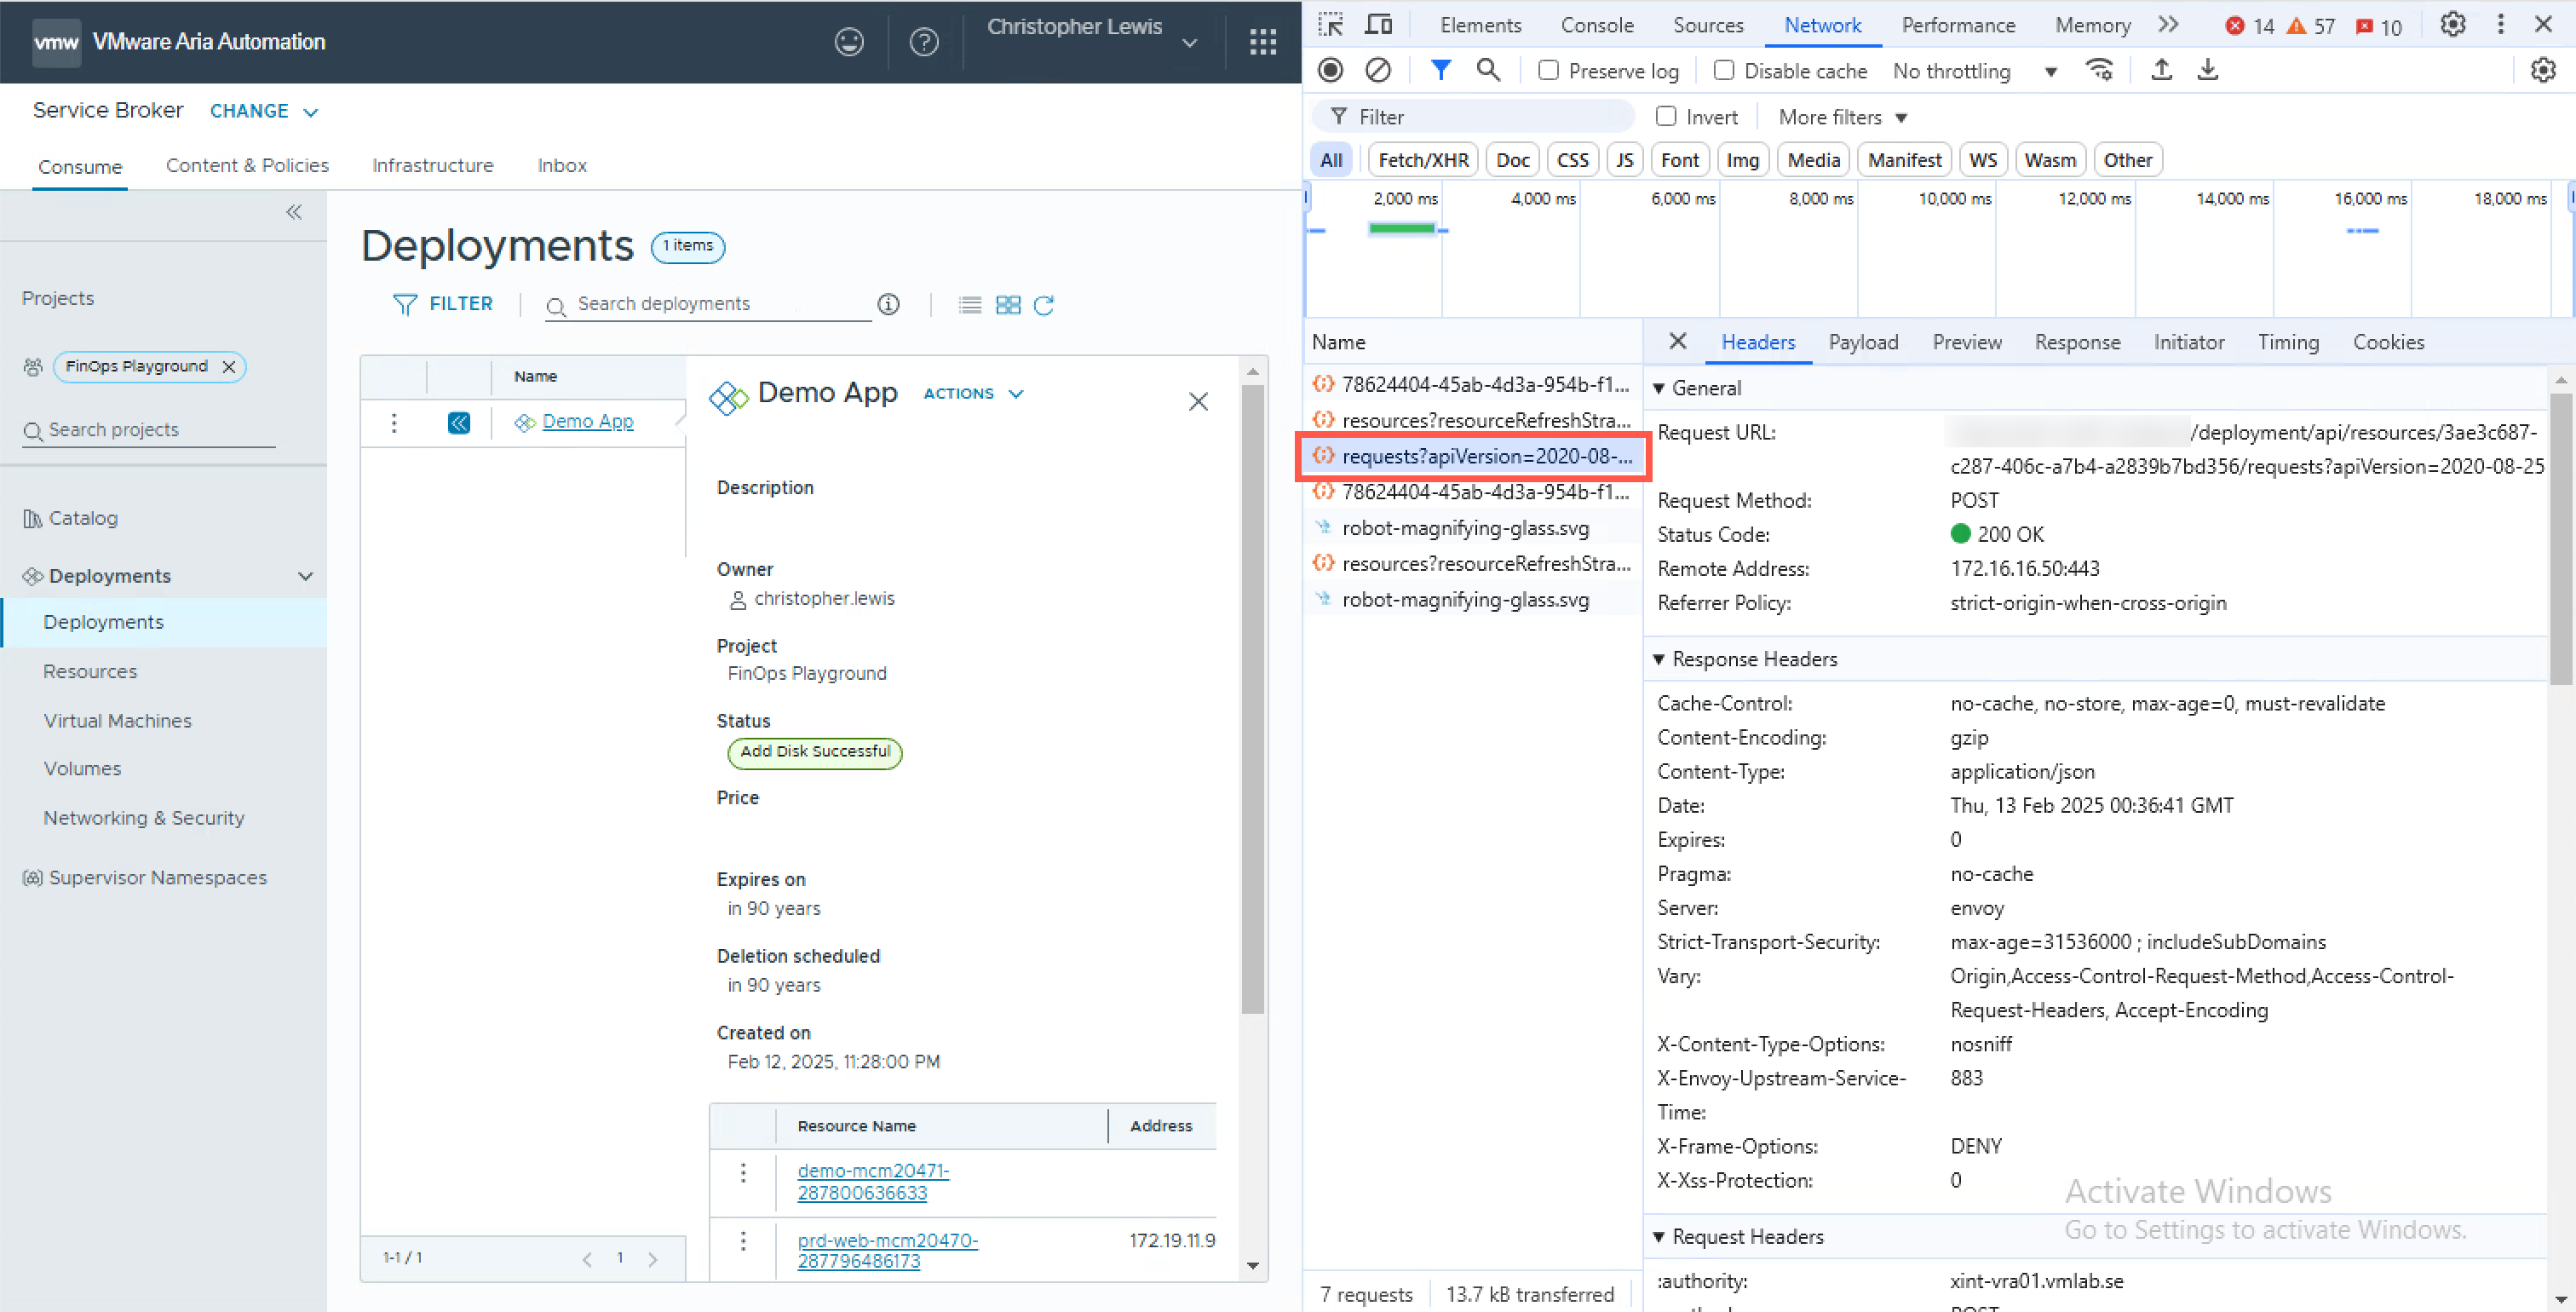
As we can see, we have the following important information about the REST API request:
- The Request URL, which is https://vra.fqdn/deployment/api/resources/{resourceId}/requests?apiVersion=2020-08-25 .
- The Request Method, which is POST.
When we breakdown the Request URL, we can see that the URL contains a GUID (3ae3c687-c287-406c-a7b4-a2839b7bd356) which is actually the Resource Id of the Virtual Machine in Aria Automation. We will need both of these during this blog post.
- At the Chrome Browser Developer Tools pane, click the Payload tab.
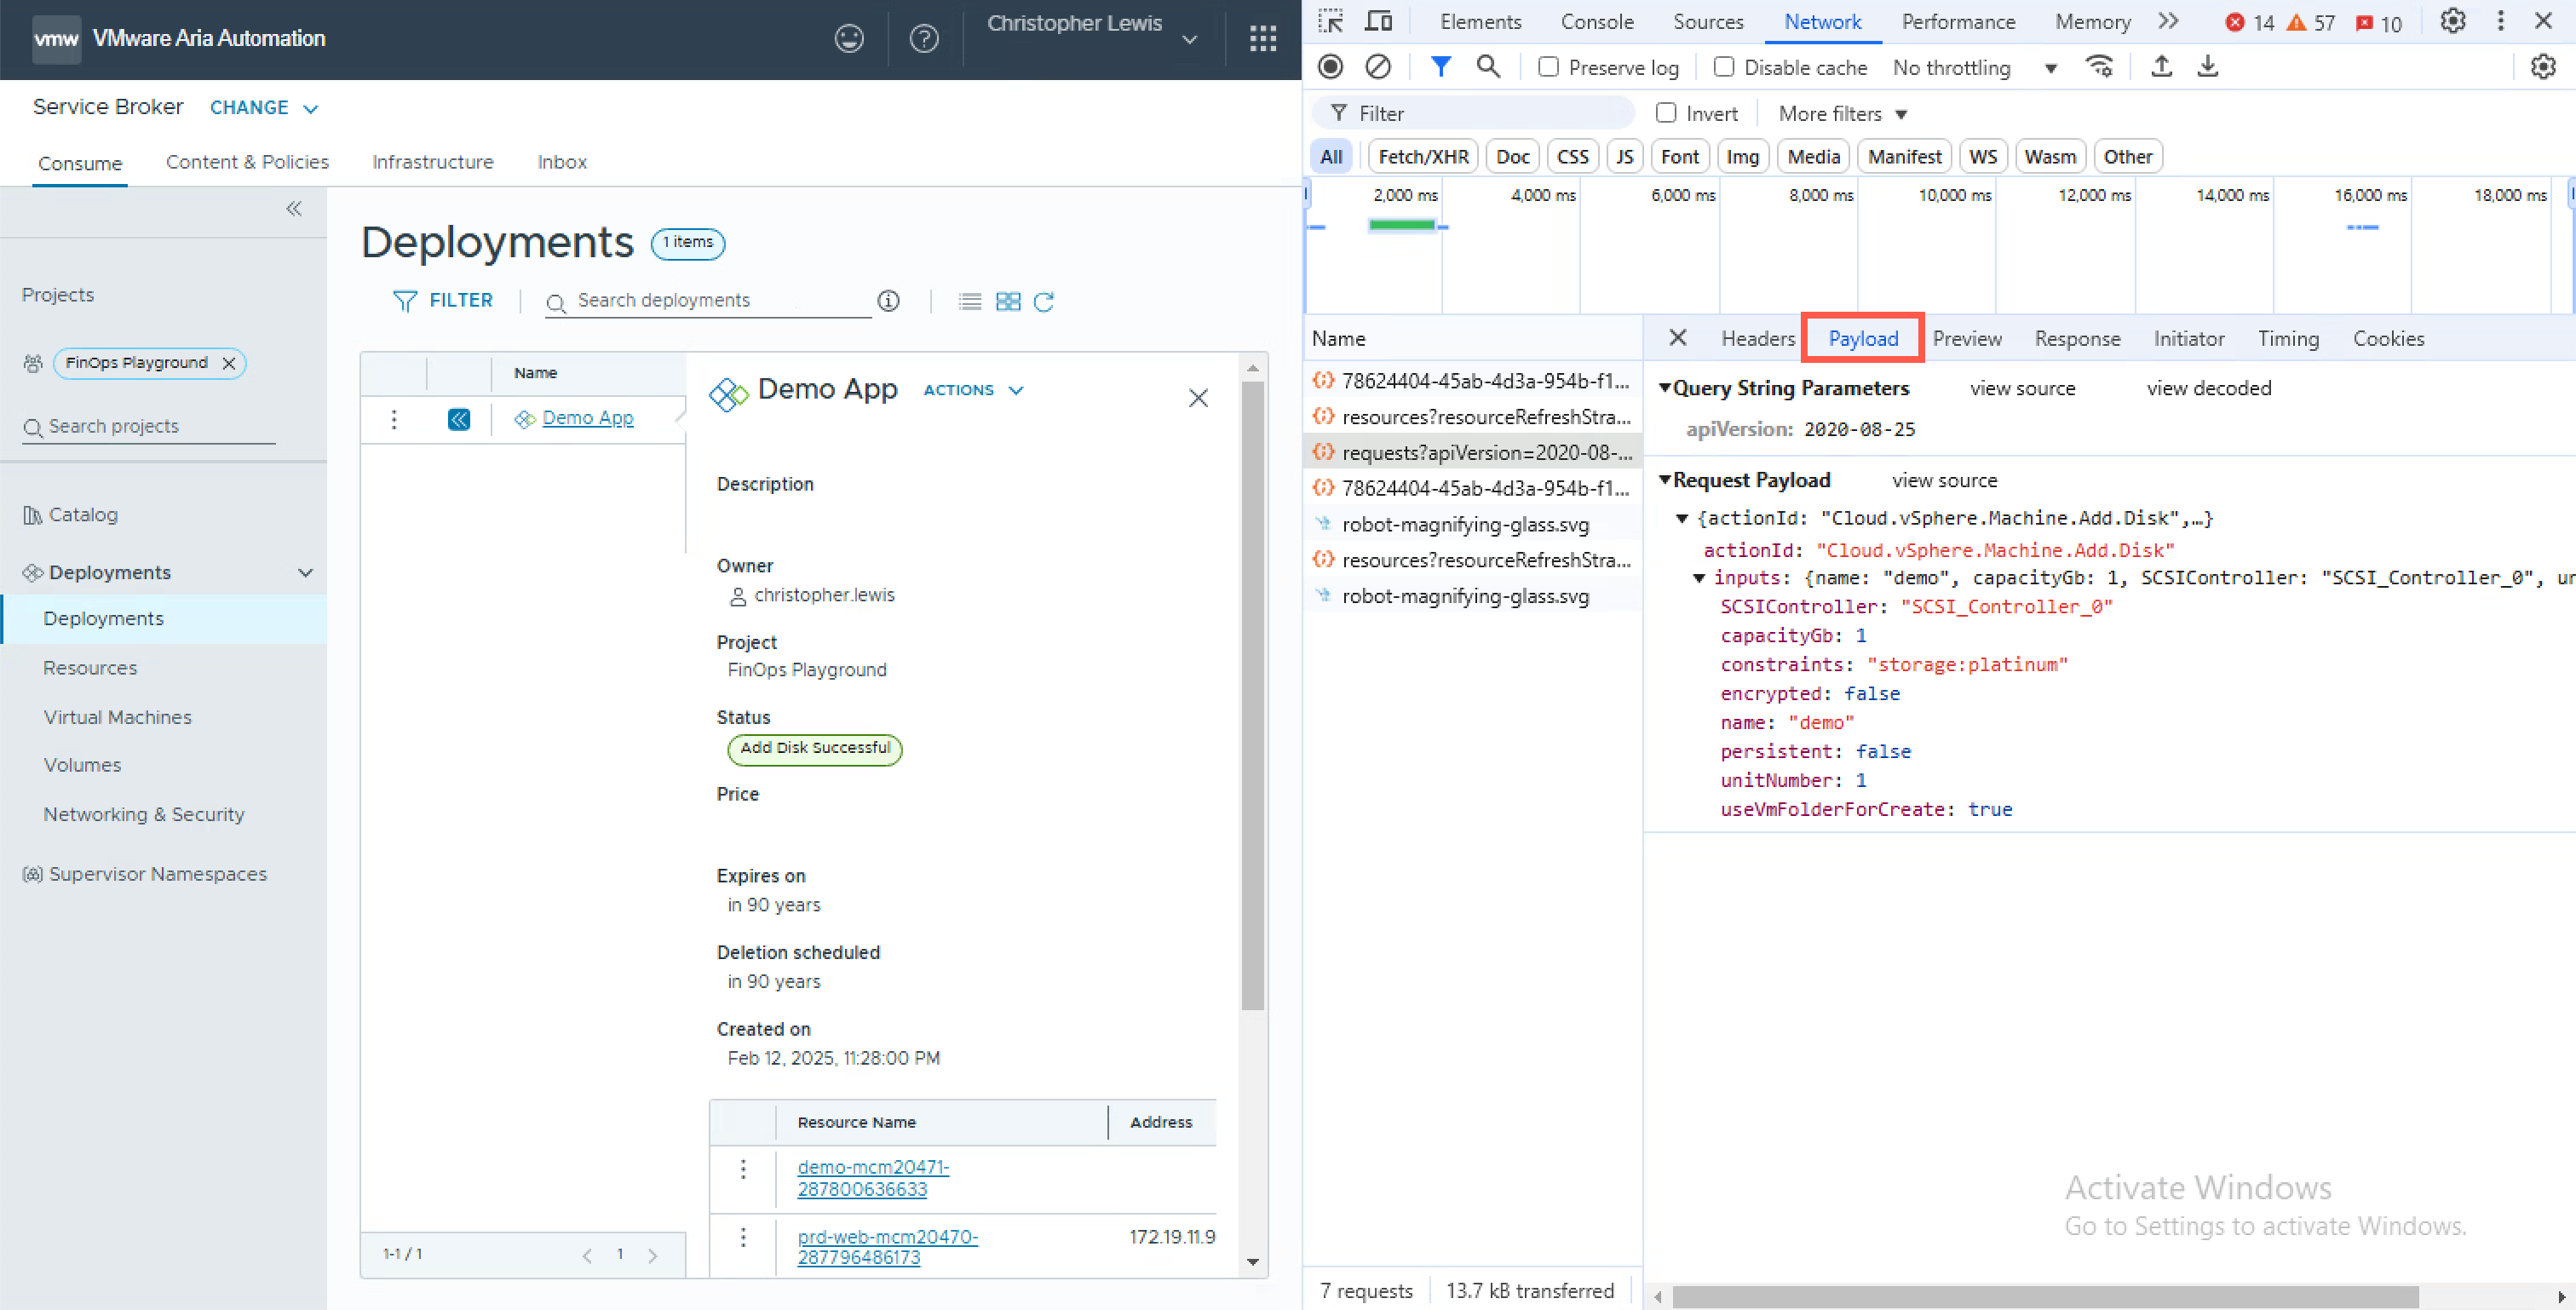
- At the Chrome Browser Developer Tools pane, under Payload, click view source.
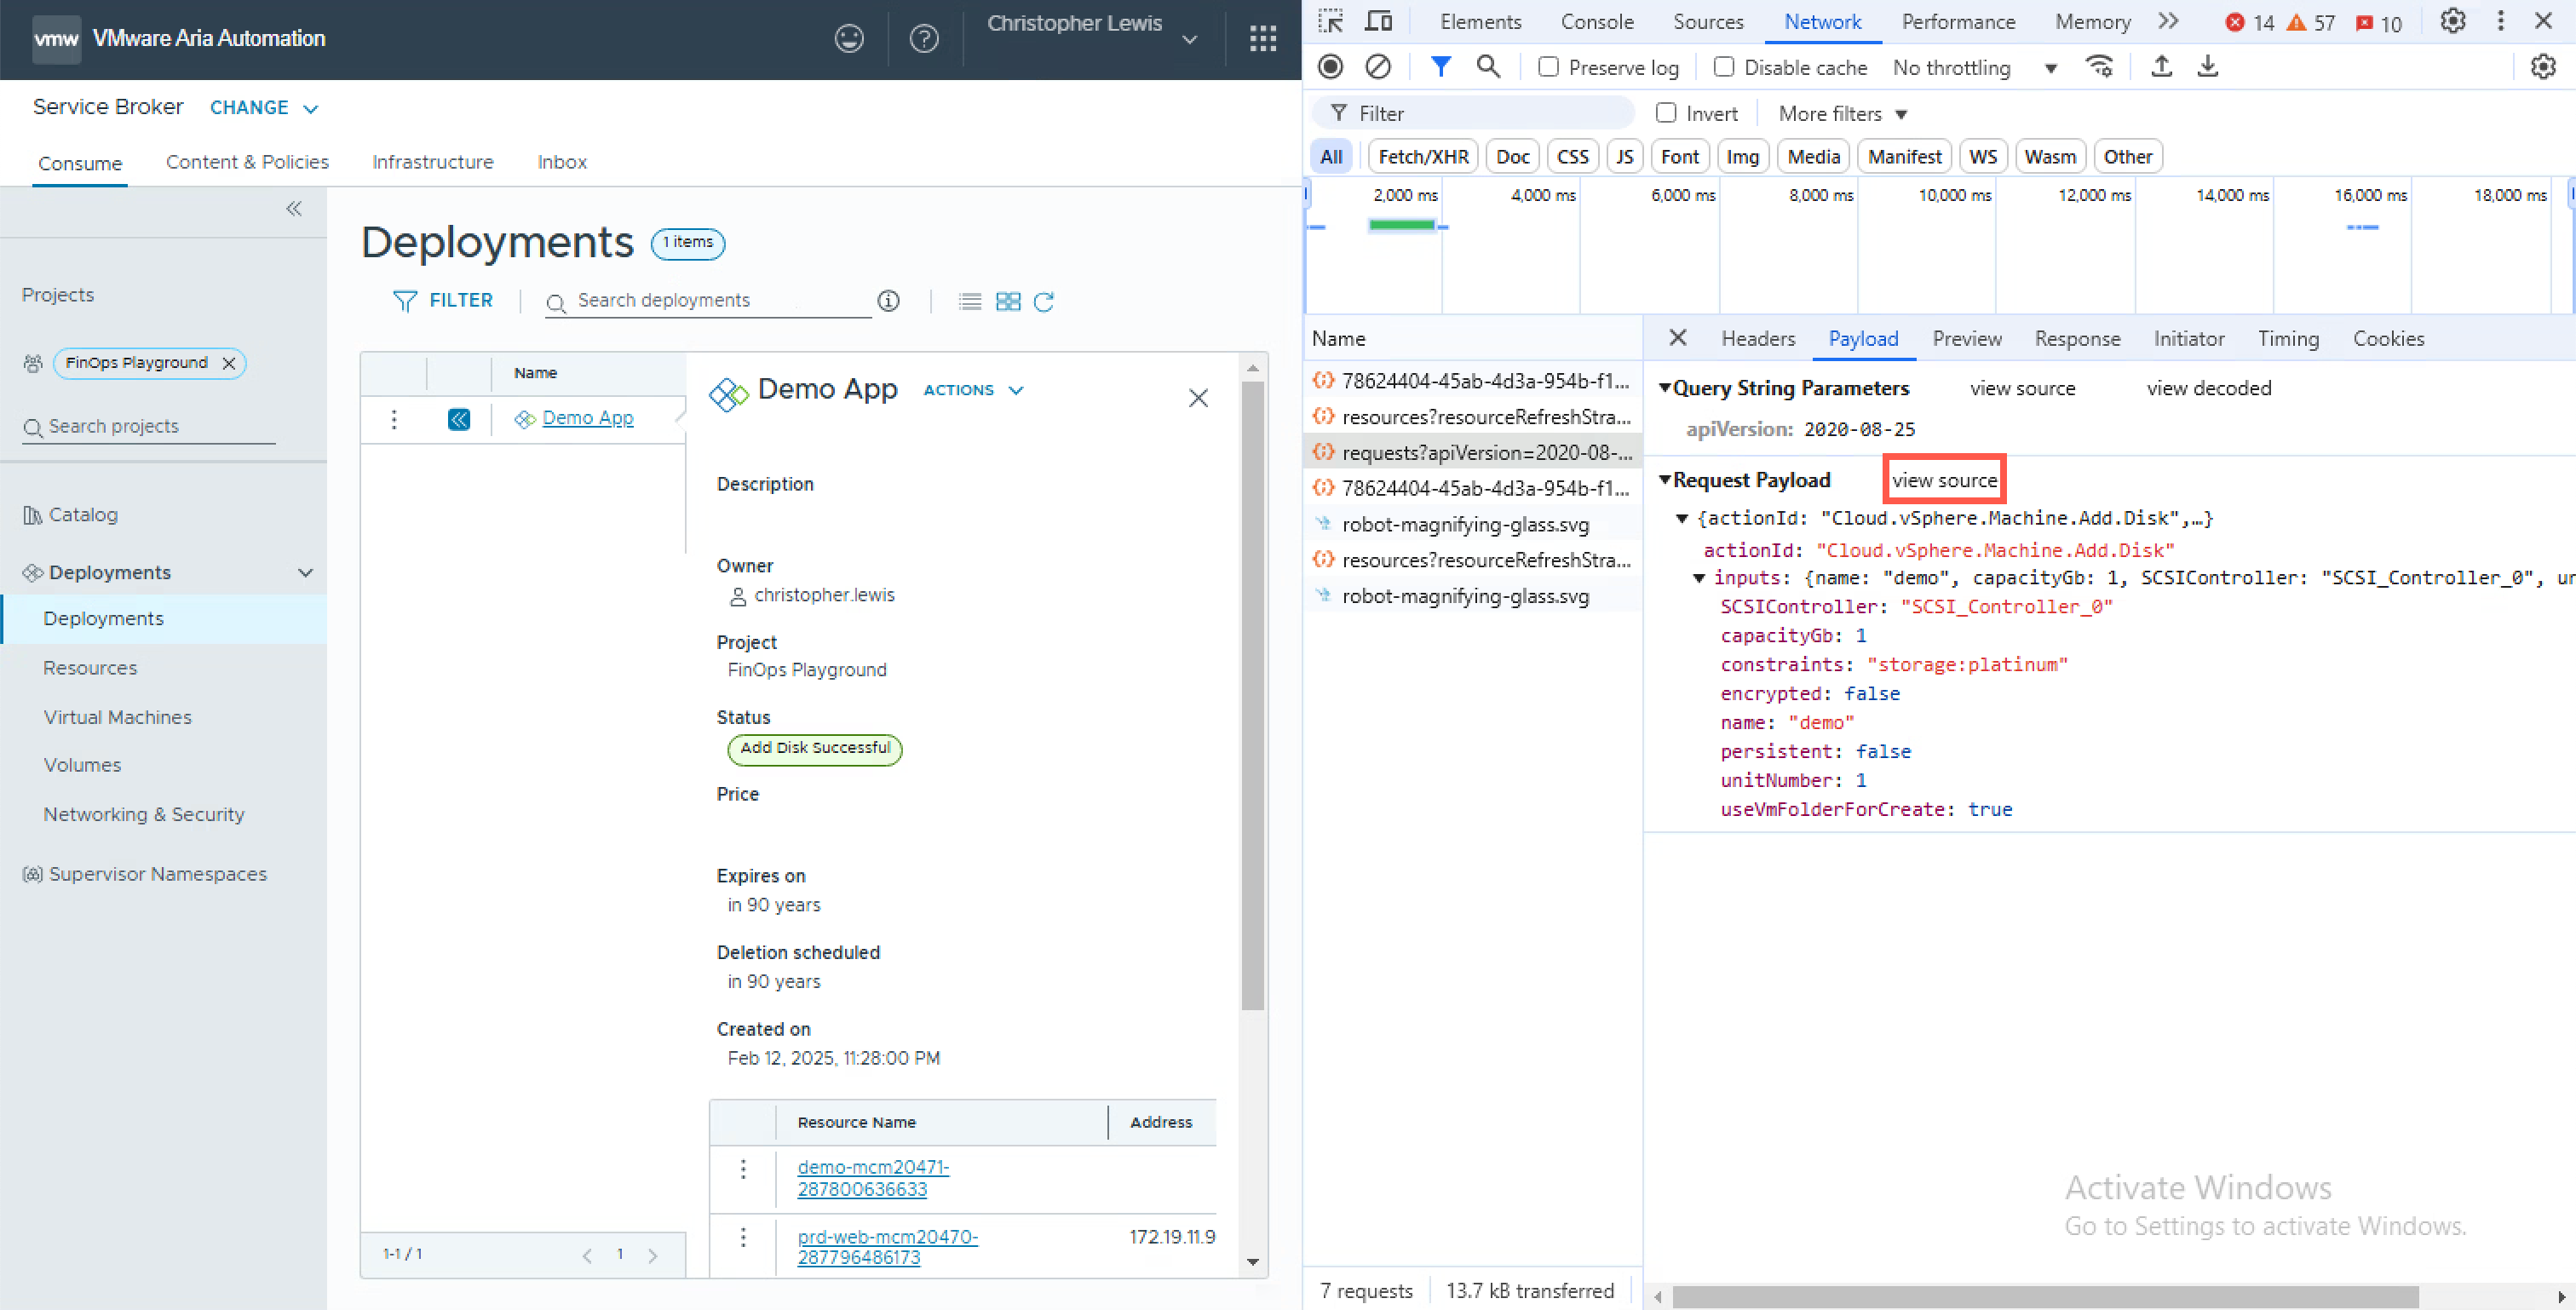
We can see the details of the REST API payload that was submitted when we clicked submit in the user interface.
{
    "actionId": "Cloud.vSphere.Machine.Add.Disk",
    "inputs":
    {
    "name": "demo",
    "capacityGb": 1,
    "SCSIController": "SCSI_Controller_0",
    "unitNumber": 1,
    "useVmFolderForCreate": true,
    "encrypted": false,
    "persistent": false,
    "constraints": "storage:platinum"
    }
}
What is important to note in this payload is the actionId these roughly correspond to the Resource Actions in the UI. The URL format for the Requests API would always be the same with any Resource Action for a particular resourceId. However the actionId and the inputs will change based on the actual request being undertaken.
Some example actionId’s include:
| Resource Action | Resource Type | API Action ID |
|---|---|---|
| Power Off | Deployment | Deployment.PowerOff |
| Power On | Deployment | Deployment.PowerOn |
| Change Owner | Deployment | Deployment.ChangeOwner |
| Change Project | Deployment | Deployment.ChangeProject |
| Change Lease | Deployment | Deployment.ChangeLease |
| Delete | Deployment | Deployment.Delete |
| Rebuild VMs | Deployment | Deployment.RebuildVMs |
| Update | Deployment | Deployment.Update |
| Resource Action | Resource Type | API Action ID |
|---|---|---|
| Add Disk | vSphere Virtual Machine | Cloud.vSphere.Machine.Add.Disk |
| Apply Salt Configuration | vSphere Virtual Machine | Cloud.vSphere.Machine.ApplySaltConfiguration |
| Attach SaltStack Resource | vSphere Virtual Machine | Cloud.vSphere.Machine.AttachSaltStackResource |
| Change Security Groups | vSphere Virtual Machine | Cloud.vSphere.Machine.Change.SecurityGroup |
| Remote Console | vSphere Virtual Machine | Cloud.vSphere.Machine.Remote.Console |
| Create Snapshot | vSphere Virtual Machine | Cloud.vSphere.Machine.Snapshot.Create |
| Delete | vSphere Virtual Machine | Cloud.vSphere.Machine.Delete |
| Delete Snapshot | vSphere Virtual Machine | Cloud.vSphere.Machine.Snapshot.Delete |
| Get Private Key | vSphere Virtual Machine | Cloud.vSphere.Machine.Remote.PrivateKey |
| Power Off | vSphere Virtual Machine | Cloud.vSphere.Machine.PowerOff |
| Power On | vSphere Virtual Machine | Cloud.vSphere.Machine.PowerOn |
| Reboot | vSphere Virtual Machine | Cloud.vSphere.Machine.Reboot |
| Rebuild | vSphere Virtual Machine | Cloud.vSphere.Machine.Rebuild |
| Remove Disk | vSphere Virtual Machine | Cloud.vSphere.Machine.Remove.Disk |
| Reset | vSphere Virtual Machine | Cloud.vSphere.Machine.Reset |
| Resize | vSphere Virtual Machine | Cloud.vSphere.Machine.Resize |
| Resize a boot disk | vSphere Virtual Machine | Cloud.vSphere.Machine.Compute.Disk.Resize |
| Resize Disk | vSphere Virtual Machine | loud.vSphere.Machine.Resize.Compute.Disk |
| Revert Snapshot | vSphere Virtual Machine | Cloud.vSphere.Machine.Snapshot.Revert |
| Shutdown | vSphere Virtual Machine | Cloud.vSphere.Machine.Shutdown |
| Suspend | vSphere Virtual Machine | Cloud.vSphere.Machine.Suspend |
| Unregister | vSphere Virtual Machine | Cloud.vSphere.Machine.Unregister |
| Update Tags | vSphere Virtual Machine | Cloud.vSphere.Machine.Update.Tags |
| Resource Action | Resource Type | API Action ID |
|---|---|---|
| Change Display Name | vSphere Virtual Disk | Cloud.vSphere.Disk.Disk.Change.Display.Name |
| Resize Disk | vSphere Virtual Disk | Cloud.vSphere.Disk.Disk.Resize |
Wrapping It All Up!
In the first post of this series, we have made a great start on fulfilling the use case we have highlighted. After starting with a quick terminology recap, we completed the most crucial step of this whole series, identifying the required API call! As we discussed in the post, when a user requests a Resource Action in the UI, an API call is triggered. This means we can use the same API call in our Custom Resource Action!
Remember to keep an eye out for the rest of the blogs in this series!
Published on 5 February 2025 by Christopher Lewis. Words: 2053. Reading Time: 10 mins.
- Operating a Private Cloud - Part 1: Understanding Pricing Cards in VMware Aria ()
- Operating a Private Cloud - Part 3: Creating a Pricing Card in VMware Aria Automation ()
- Zero2Hero - Using Aria Automation to Deploy Multiple Machines with Multiple Disks - Part 4 ()
- Zero2Hero - Using Aria Automation to Deploy Multiple Machines with Multiple Disks - Part 5 ()
- Zero2Hero - Using Aria Automation to Deploy Multiple Machines with Multiple Disks - Part 3 ()
