VCAP6-CMA Deploy - Objective 4.1: Create and Configure vRealize Automation Machine Blueprints
VMware vRealize Automation VCAP6 VCAP6-CMA
Published on 5 February 2017 by Christopher Lewis. Words: 1640. Reading Time: 8 mins.
Objective 4.1: Create and Configure vRealize Automation Machine Blueprints
Objective Overview
- Create and Configure Machine Blueprints according to a deployment plan:
- Assign a Reservation Policy
- Define Instance Types
- Define Build Profiles/Custom properties
- Create Machine Prefixes
- Create Lease Policies
- Create Machine Resource Allocations (min/max)
- Define Actions
- Create Shared Blueprints
- Create Master Blueprints
- Create Multi-Machine Blueprints
Objective Prerequisites
The following prerequisites are assumed for this Objective:
- A fully deployed vRealize Automation Solution (See Objective 1 ).
- Fabric Group and Reservation created
Objective Breakdown
In this example, I am going to create a Blueprint based on a vSphere Template in the Default Tenant (but you could just as easily create it in another tenant). I will fill out the minimal information required to create the blueprint and then tackle each of the elements of this objective. Obviously, In real life you would complete as much as possible when creating the Blueprint rather than going back and amending it multiple times.
Create and Configure Machine Blueprints according to a deployment plan
- Navigate to the vRealize Automation Portal for the Default Tenant (
https://vra.fqdn/vcac)

- Log in using an account with the Tenant Administrator role assigned.
- Click the Infrastructure Tab.
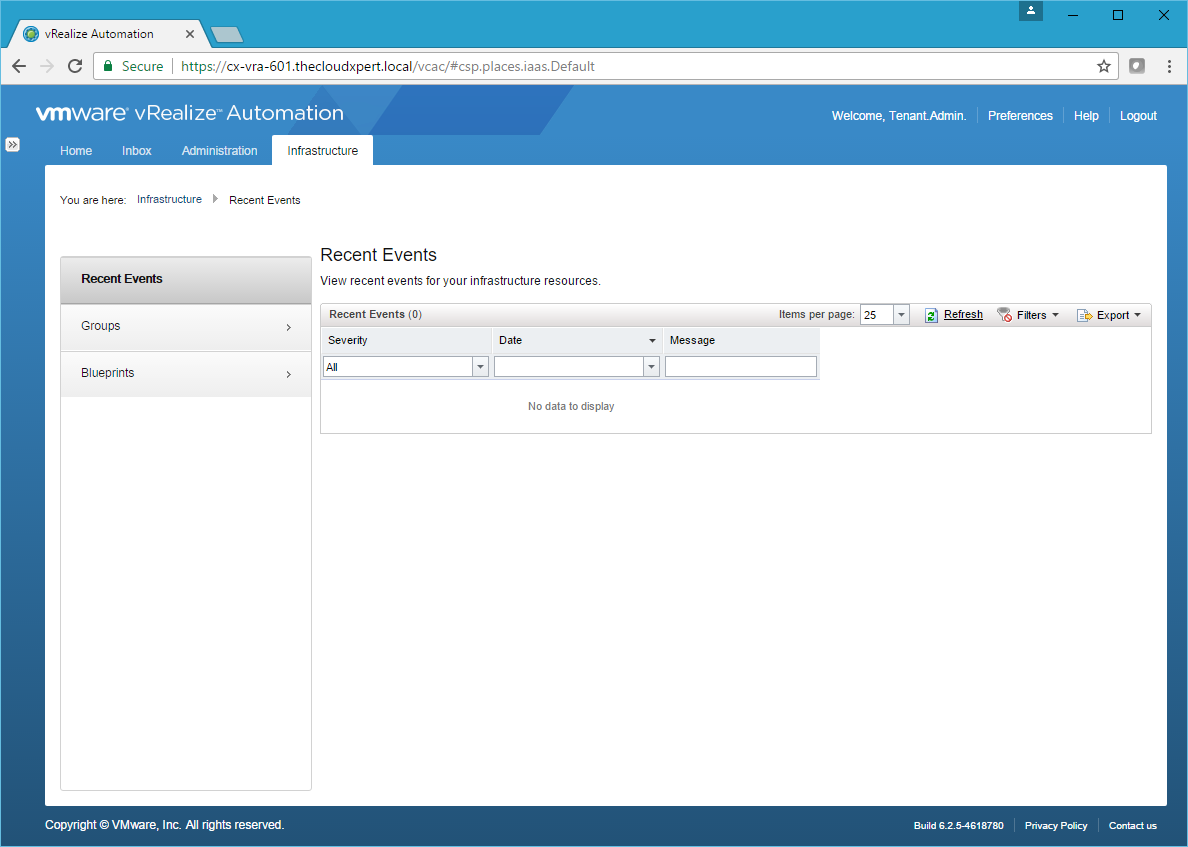
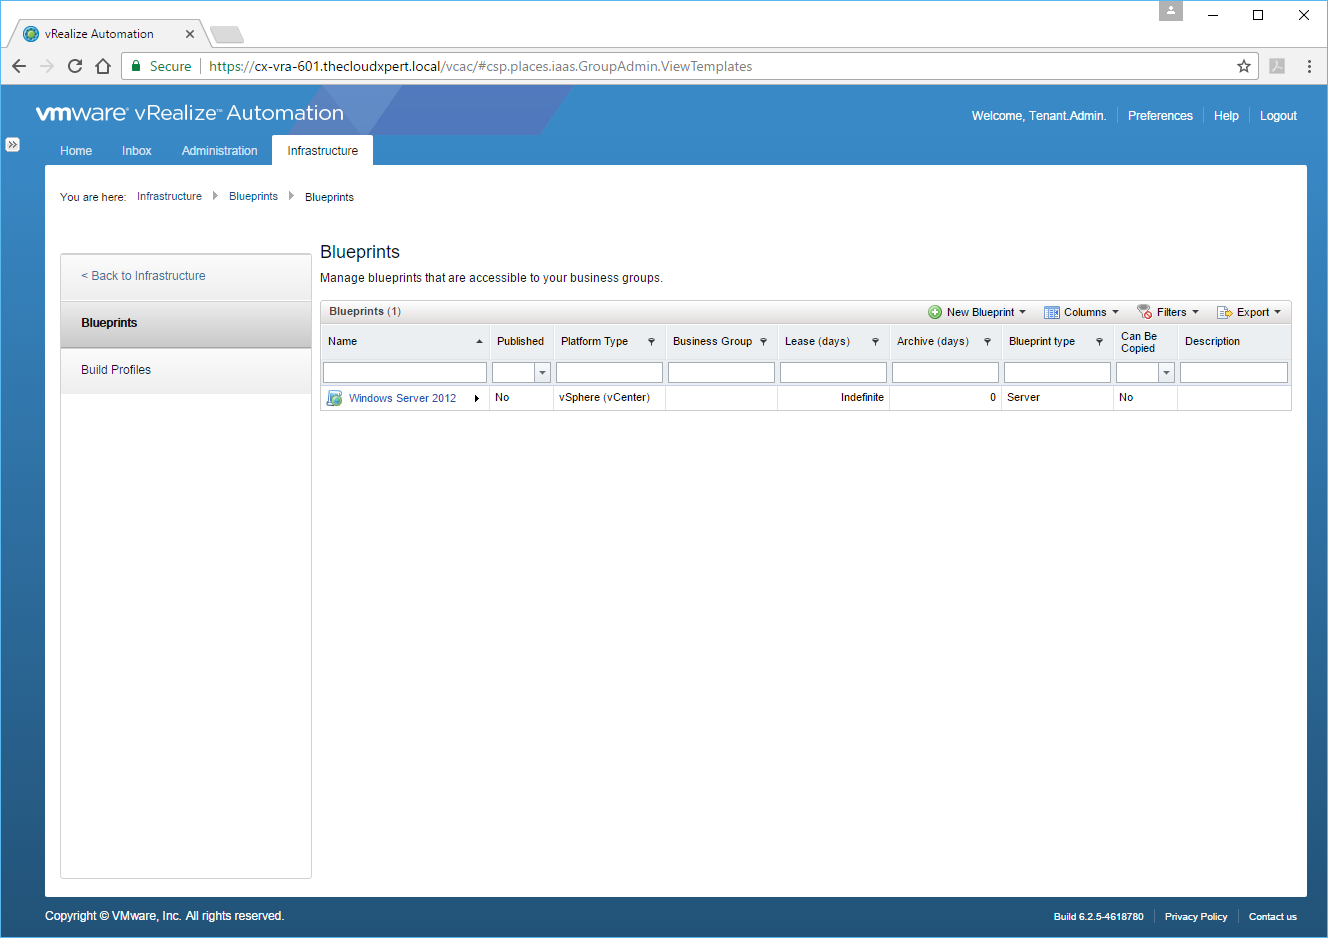
- Click Blueprints > Blueprints.

- Click New Blueprint > Virtual > vSphere (vCenter).
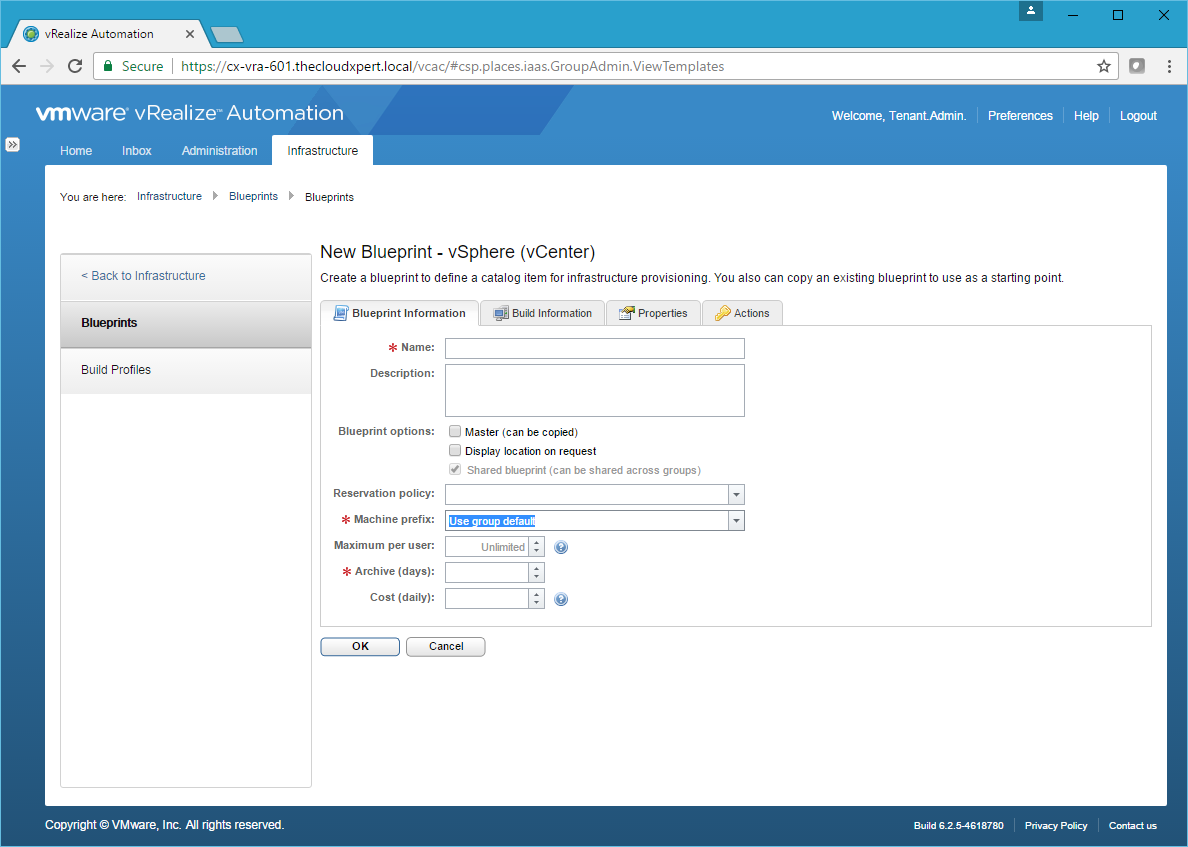
- Type the name of the of the new Blueprint into the Name text box, select machine prefix from the Machine prefix drop down, and enter a numerical value into the Archive (days) text field.
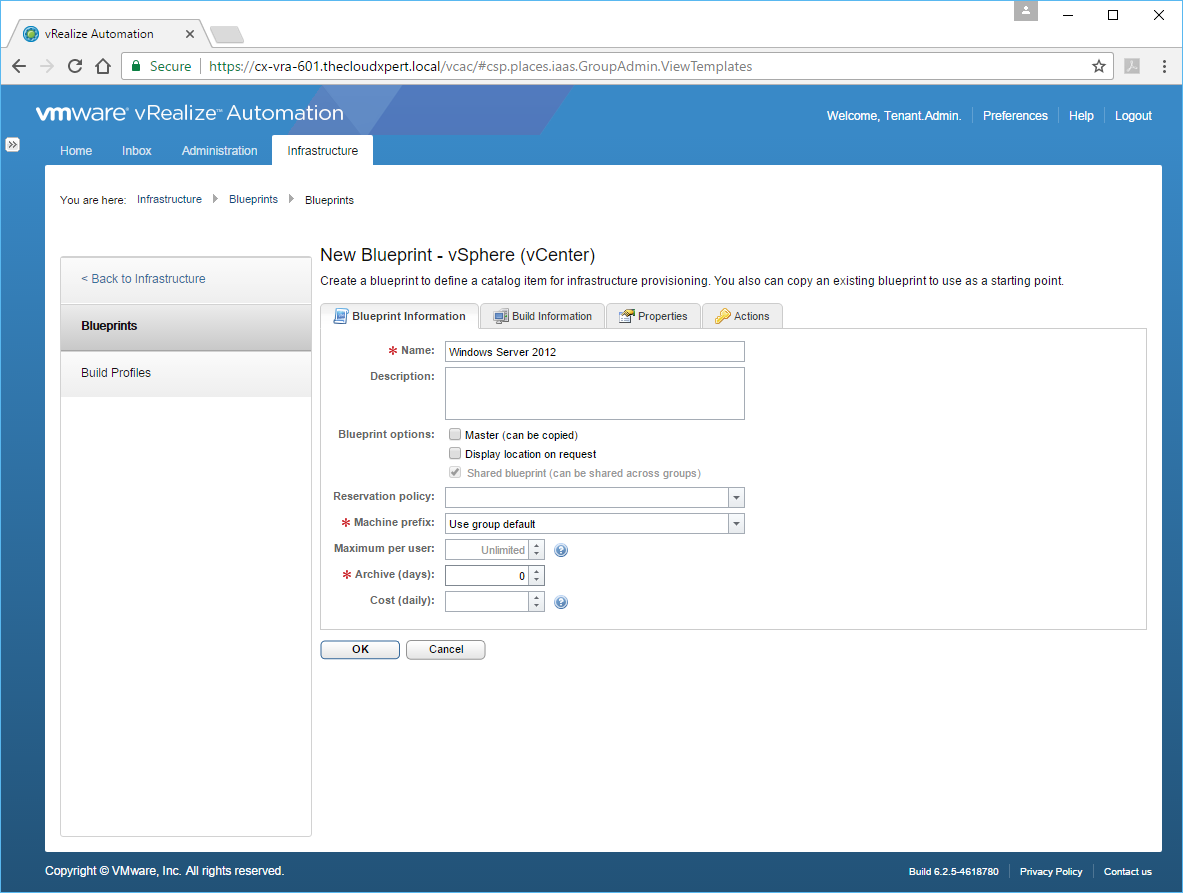
0 in the Archive (days) text field means that the deployed instance of the Blueprint will be deleted rather than archived.
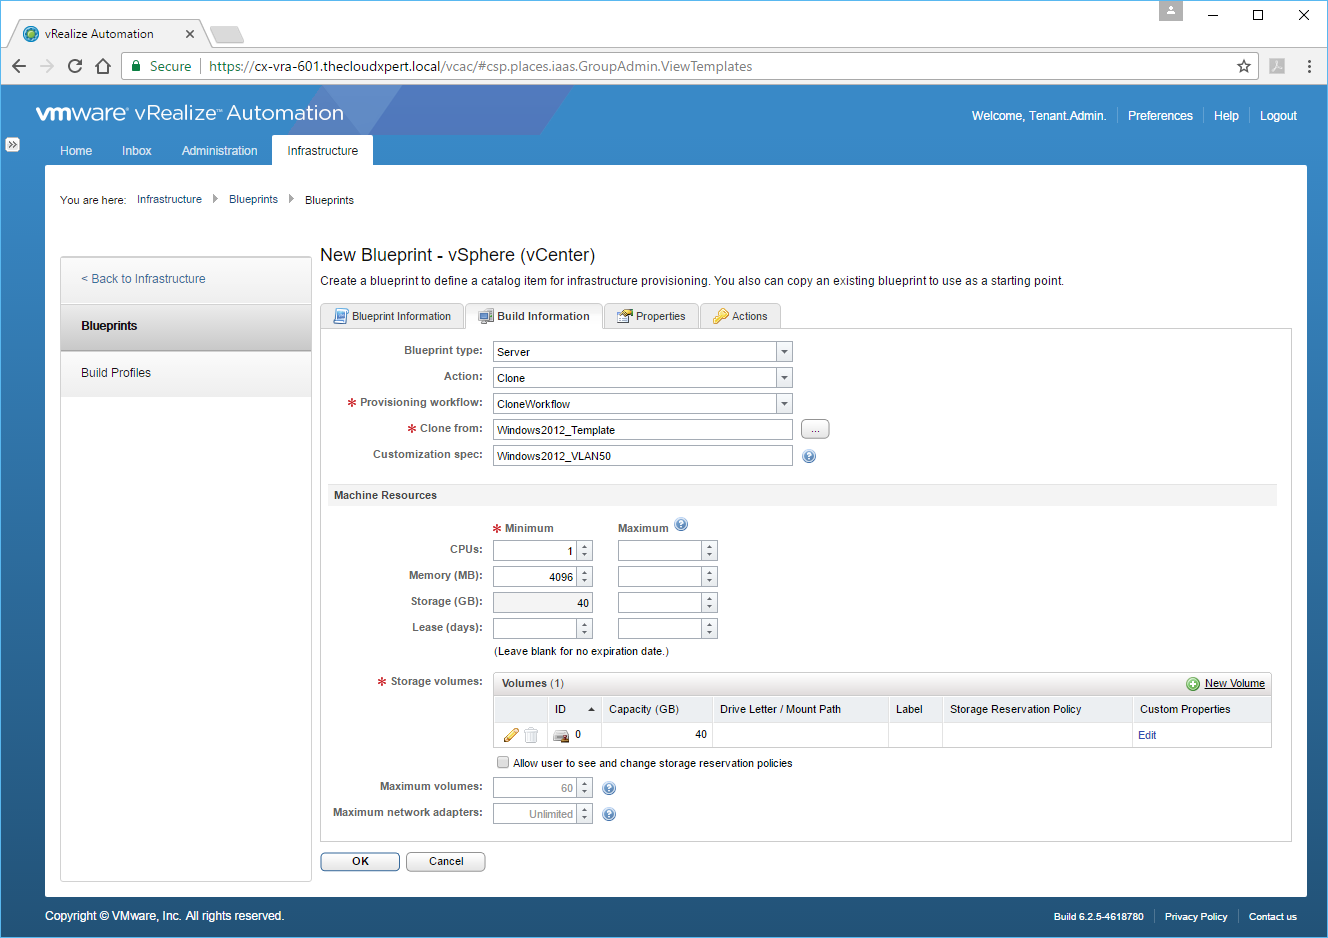
- Click Build Information.

- Select Server from the Blueprint type drop down, then Clone from the Action drop down and ensure CloneWorkflow is selected from the Provisioning workflow drop down. Click … next to the Clone from text field.
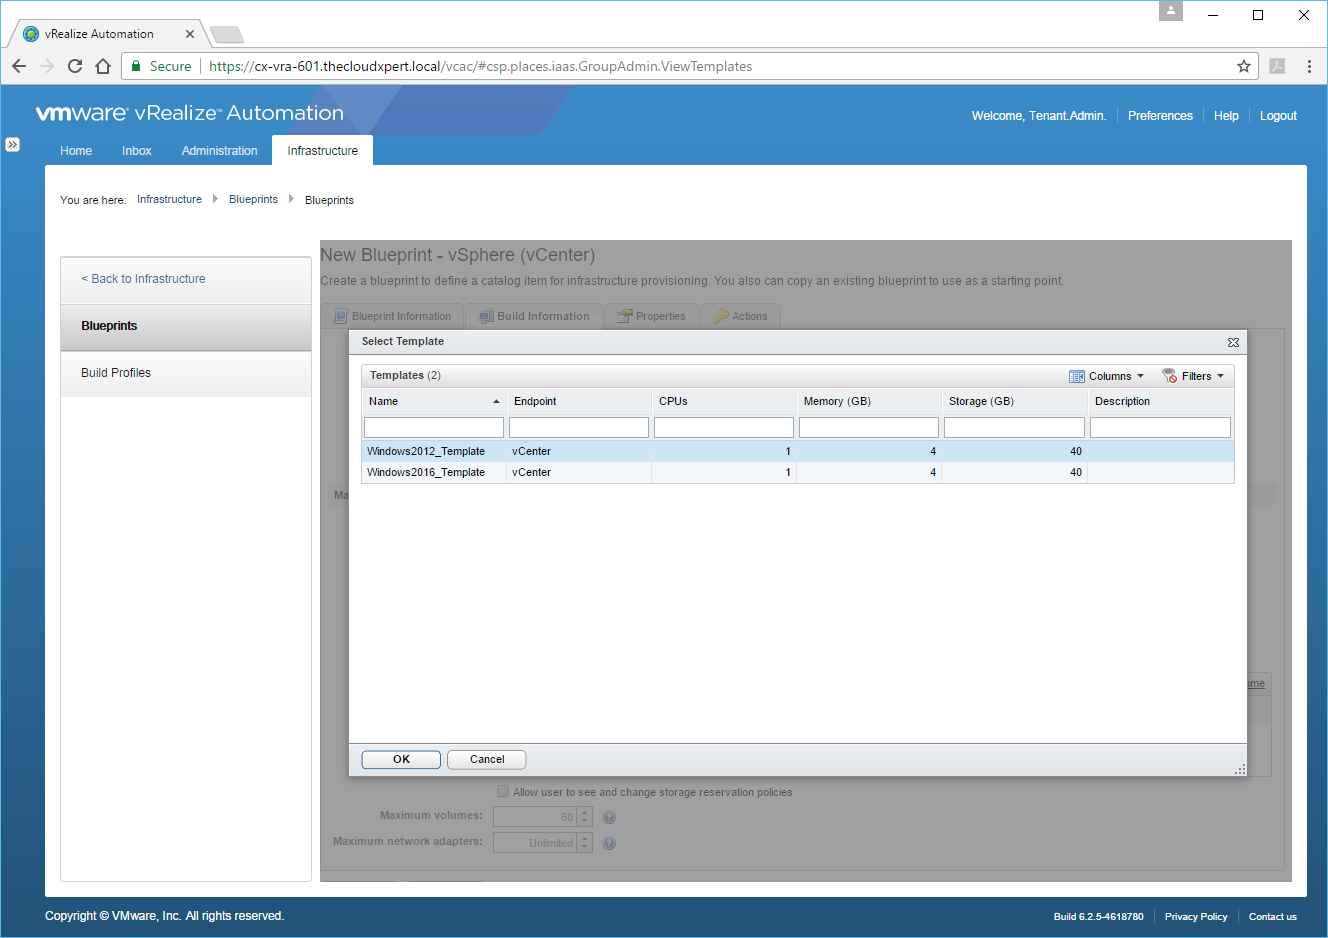
- Select the appropriate virtual machine template and click OK.

- Type the name of the vSphere Customization specification into the Customization spec text box, choose a minimum number of CPU form the text field and also, under Storage volumes, add/configure additional storage (if required).
- Click the Properties Tab.
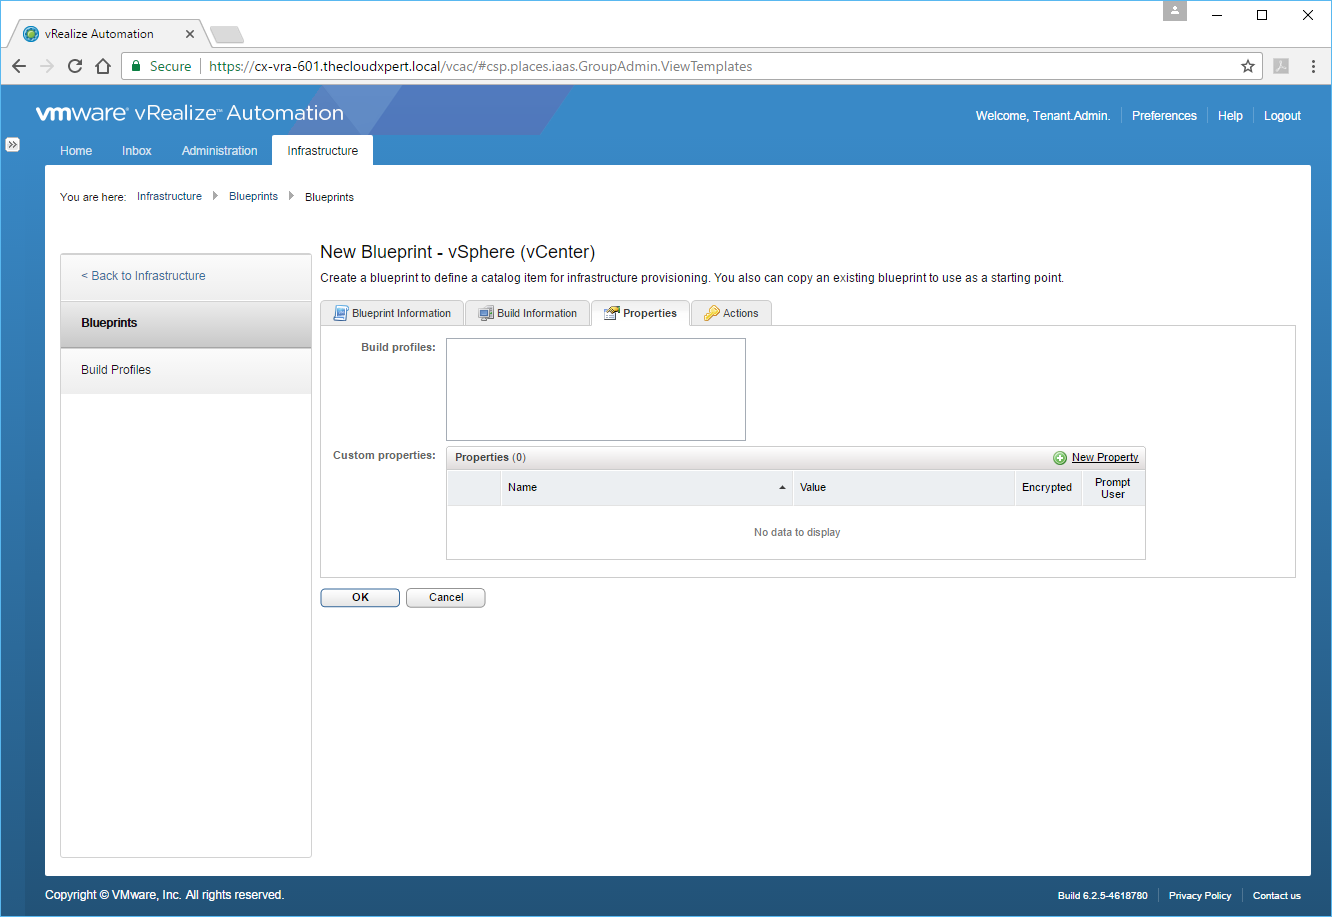
- Leave the Default settings and click the Actions Tab.
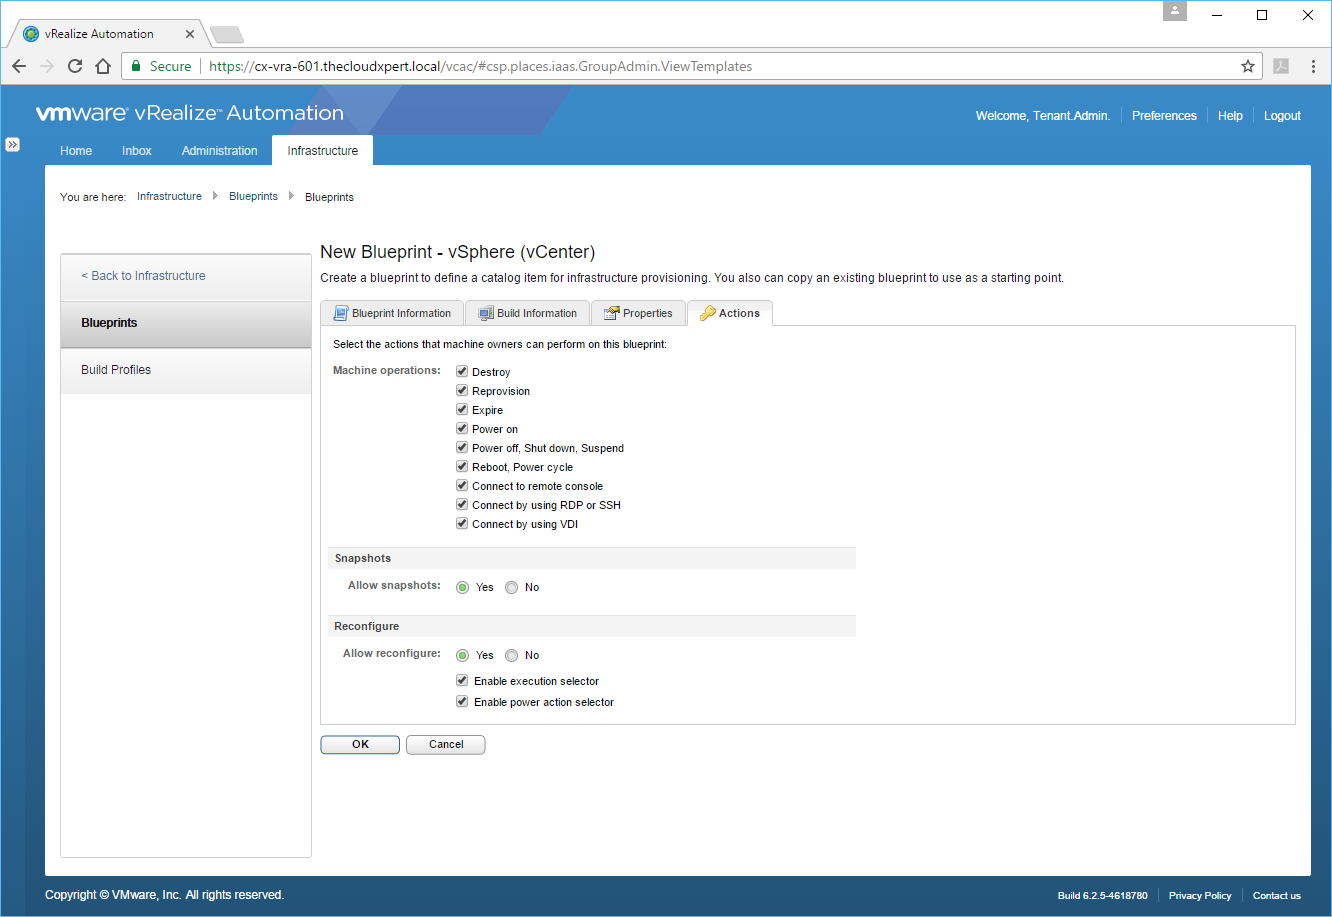
- Leave the Default settings and click OK.

Congratulations! that’s your first vSphere Template created! Now you would normally go ahead and Publish the new Blueprint to the Service Catalog, but that’s covered elsewhere so we won’t be doing that here.
If you want to see the process for creating other Blueprints, see HOWTO: Create a vRealize Automation 6.x vSphere Linked-Cloned Blueprint ]
Assign a Reservation Policy
Now you would normally assign a Reservation Policy during the creation of a Blueprint. However, you can also change this value once the Blueprint has been created, so lets look at how to do this.
- Navigate to the vRealize Automation Portal for the Tenant (
https://vra.fqdn/vcac)
-
Log into the vRealize Automation Portal with Tenant Administrator role.
-
Select the Infrastructure > Blueprint > Blueprints
- Click the Blueprint you want to change.
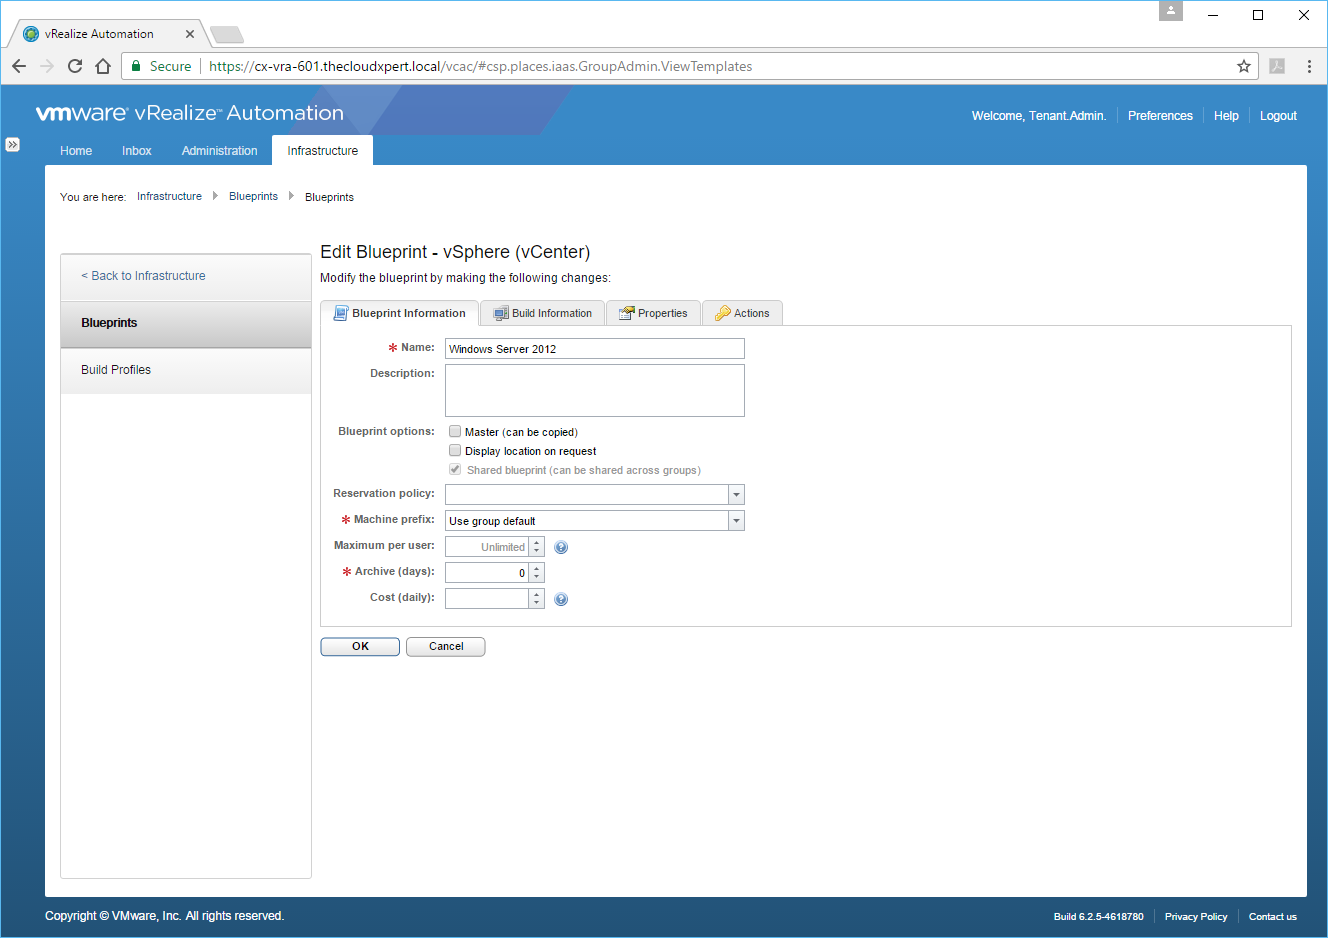
- Select the appropriate Reservation Policy from the Reservation policy dropdown.
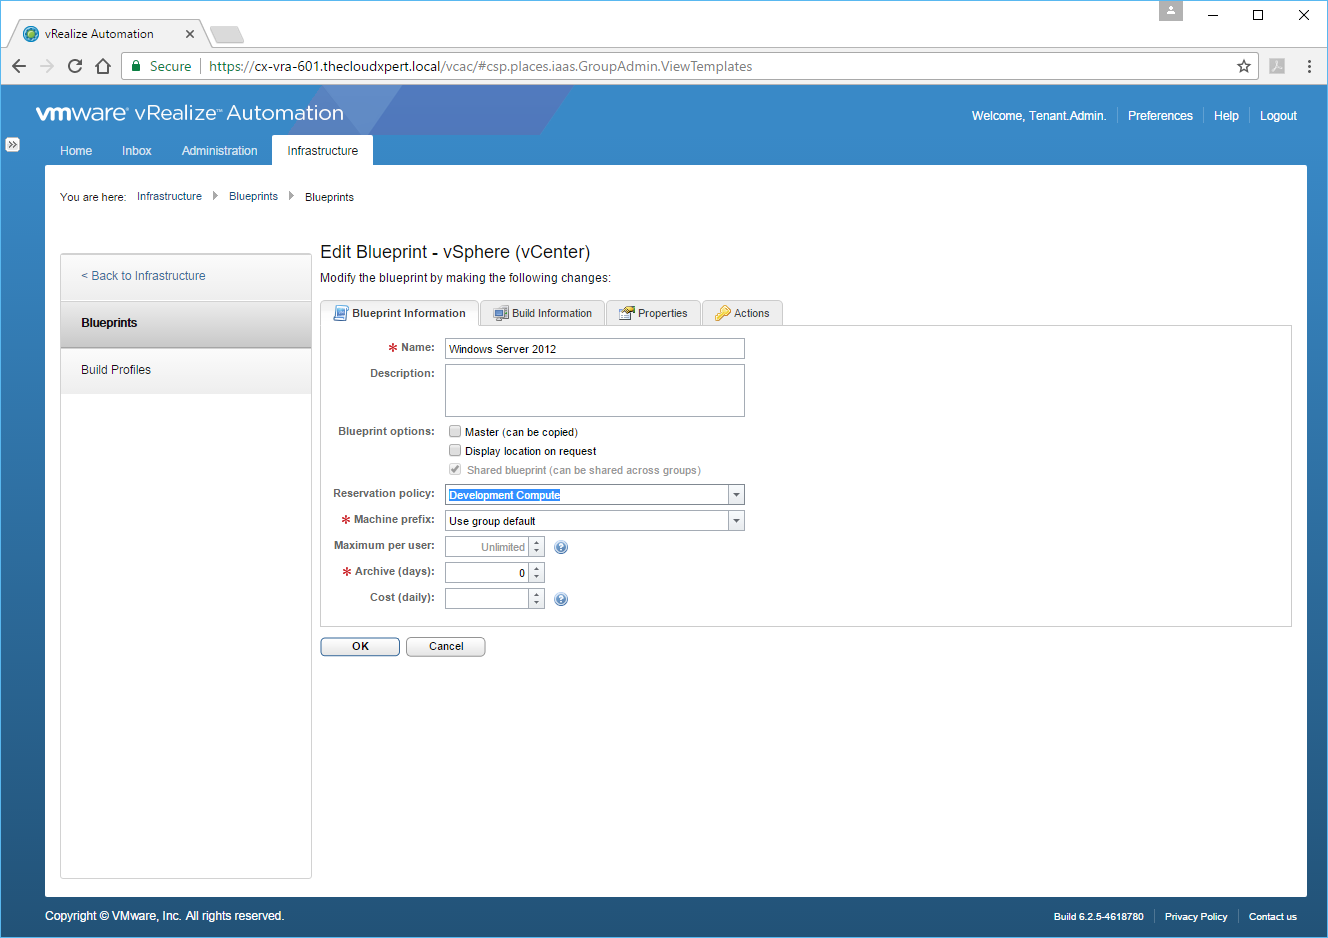
- Click OK.
Define Instance Types
Instance Types are used to define the sizes of Amazon EC2 Cloud Machines.
- Navigate to the vRealize Automation Portal for the Tenant (
https://vra.fqdn/vcac)
- Log in using an account with the Infrastructure Administrator role assigned.
- Select the Infrastructure > Blueprint > Instance Types
From here an Amazon Machine Image Instance Type can be created, edited or removed.
Define Build Profiles/Custom Properties
The creation of Build Profiles and Custom Properties will be covered in Objective 4.3. From a Blueprint perspective, this is how you update a Blueprint to add Custom Properties and Build Profiles.
- Navigate to the vRealize Automation Portal for the Tenant (
https://vra.fqdn/vcac)
-
Log into the vRealize Automation Portal with Tenant Administrator role.
-
Select the Infrastructure > Blueprint > Blueprints
- Click the Blueprint you want to change.
- Click the Properties Tab.

-
On this tab you can check the pre-created Build Profiles and or click New Property to create a Blueprint specific property.
-
When finished, click OK to save any changes.
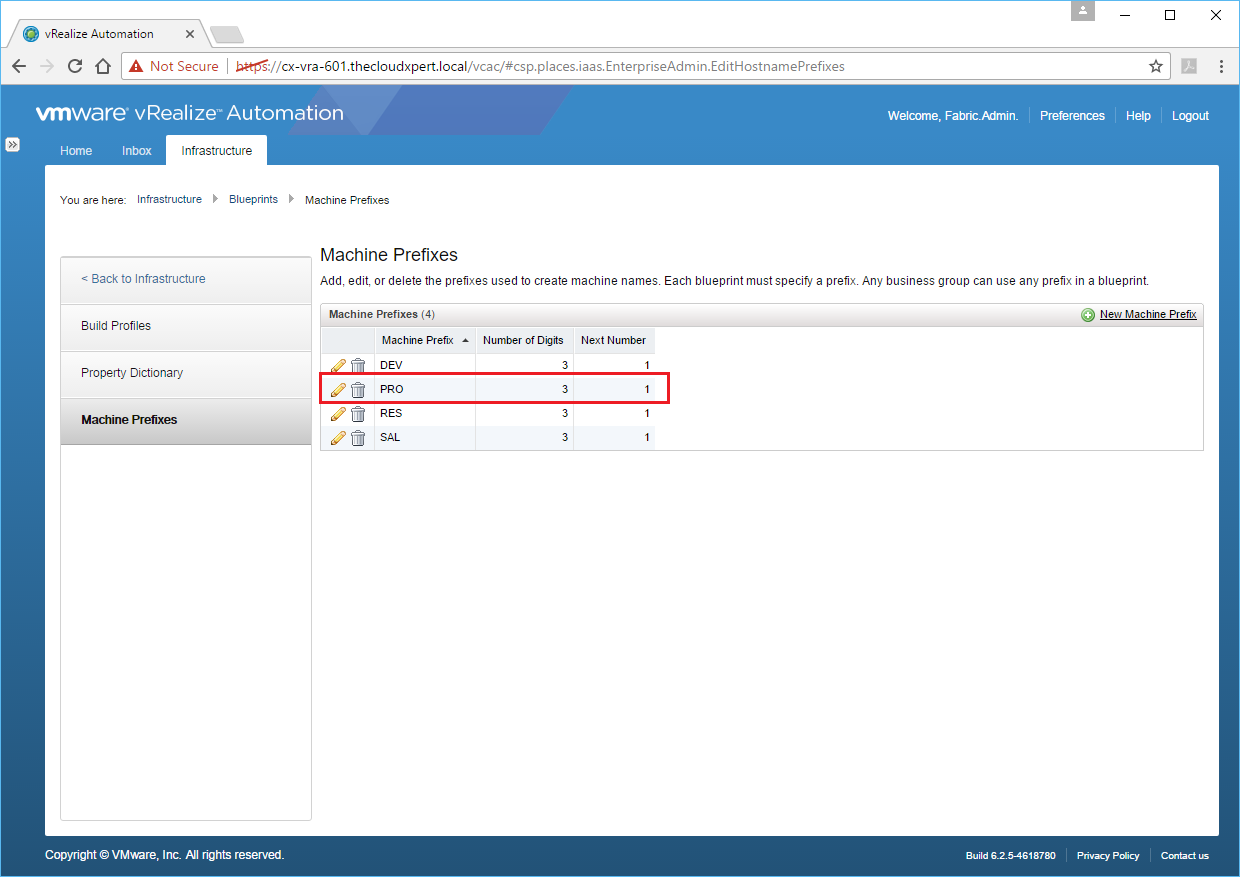
Create Machine Prefixes
A Machine prefix is used to provide default names for virtual machines within a Business Group. They are created by the Fabric Administrator and is a required field when creating a Business Group.
- Navigate to the VMware vRealize Automation Tenant Portal (
https://vra-appliance.fqdn/vcac)
- Log into the Tenant Portal using an account that has the Fabric Administrator role assigned.

- Select Infrastructure > Blueprints > Machine Prefixes.
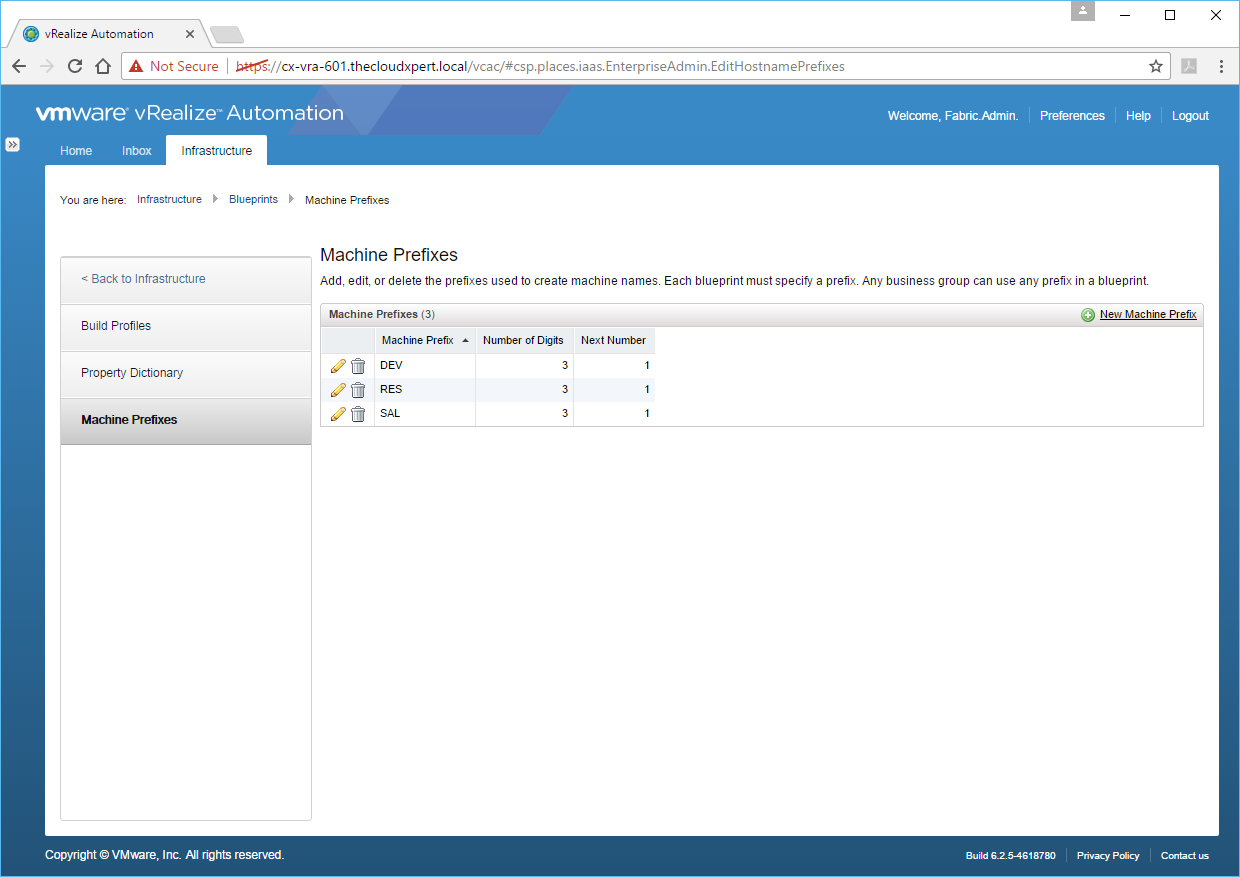
- Click New Machine Prefix.
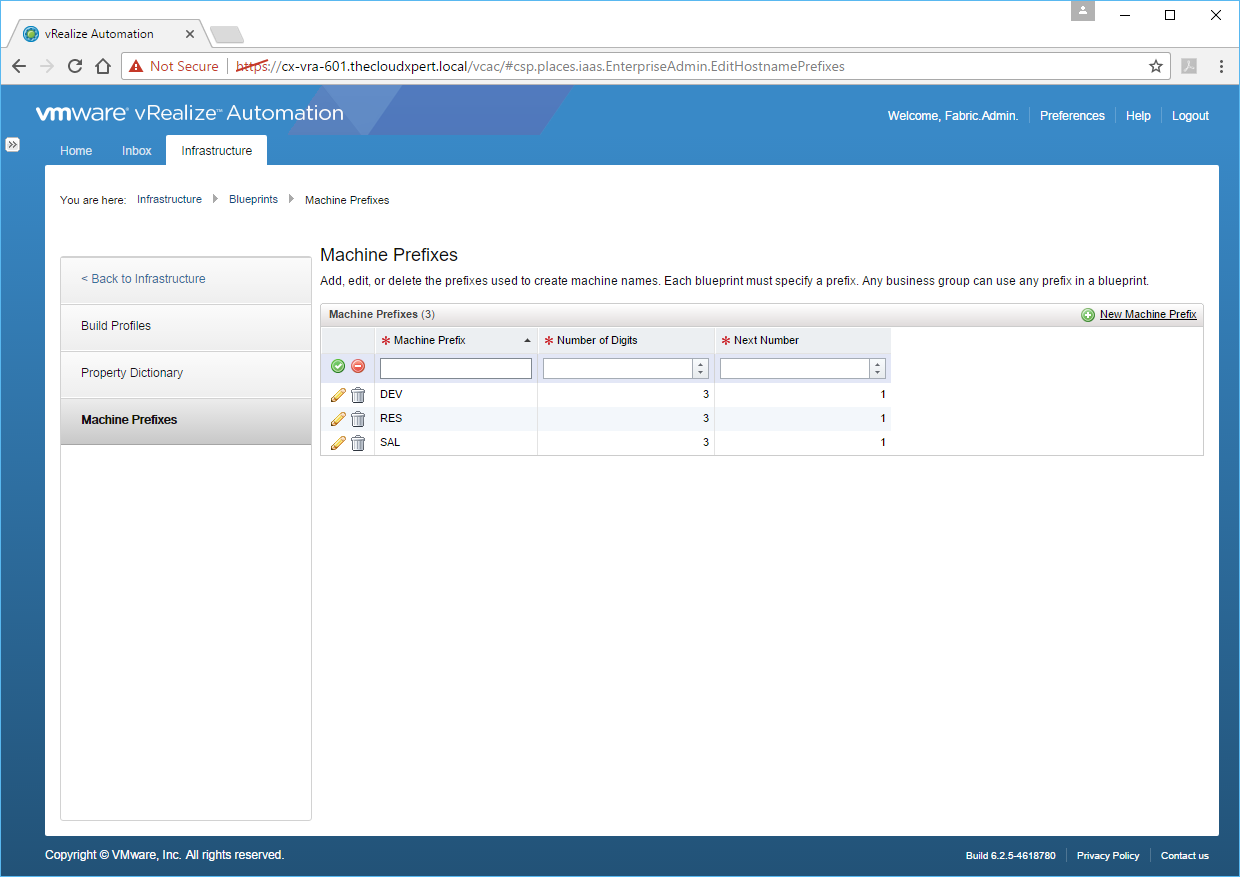
- Enter values for the Machine Prefix, the Number of Digits and the Next Number and click Save.
Create Lease Policies
A Blueprint can be configured with or with out a Lease Policy.
If a Blueprint does not have a Lease Policy, the machines are provisioned from the Blueprint with no expiration date.
If a Blueprint is configured with a Minimum Lease Period (days) machines are provisioned from the Blueprint with that lease duration. If both a Minimum and a Maximum Lease Period is specified within the Blueprint, the user must decided a Lease Duration between the two values at request time.
To set a Lease Period/Policy:
- Navigate to the vRealize Automation Tenant Portal (
https://vra.fqdn/vcac)
-
Log into the vRealize Automation Portal with Tenant Administrator role.
-
Select the Infrastructure > Blueprint > Blueprints
- Click the Blueprint you want to change.
- Click the Build Information Tab and scroll down.

-
Either enter a Minimum or Maximum value or Both to set a lease period or leave blank to have no expiration date on the resultant VMs.
-
Click OK to save changes.
Create machine resource allocations (min/max)
When creating a Blueprint , the author can choose to provide Minimum or a Range (both Minimum and Maximum) values for Resources.
At request time:
- If a Minimum only value is specified in the Blueprint, the Machine will be deployed with that Resource.
- If both a Minimum and Maximum value is specified in the Blueprint, the user will be able to choose between the two values.
To set Machine Resource Allocations:
- Navigate to the vRealize Automation Tenant Portal (
https://vra.fqdn/vcac).
-
Log into the vRealize Automation Portal with Tenant Administrator role.
-
Select the Infrastructure > Blueprint > Blueprints
- Click the Blueprint you want to change.
- Click the Build Information Tab and scroll down.

-
Enter Minimum only or Minimum and Maximum values for CPU, Memory and Storage. You can also add additional Storage Volumes.
-
Click OK to save any changes.
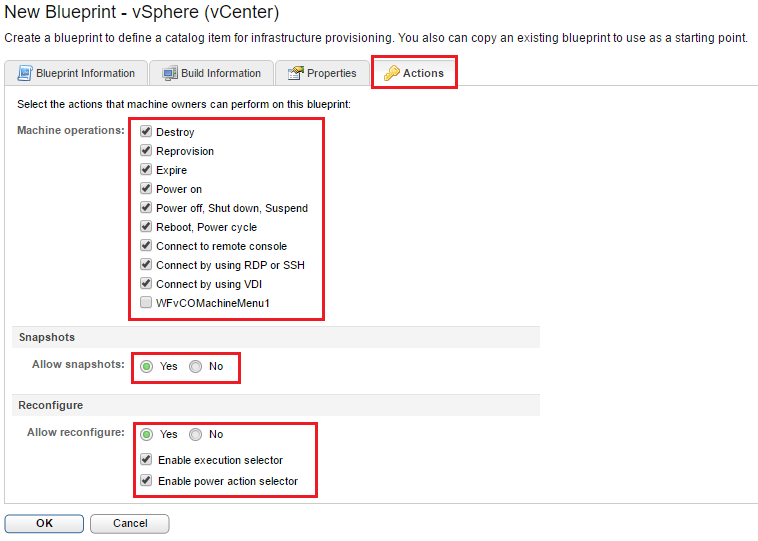
Define Actions
Actions are the operations that can be performed on a machine that is provisioned from the Blueprint.
Adding/Removing an Action at the Blueprint level means that is becomes available/unavailable to all users of the Blueprint. Therefore unless completely necessary, leave the default Actions as is and manage via Entitlements!
To change an Action for a Blueprint, click on the Actions Tab and uncheck (remove) or check (add) the desired Actions. By Default everything is checked.
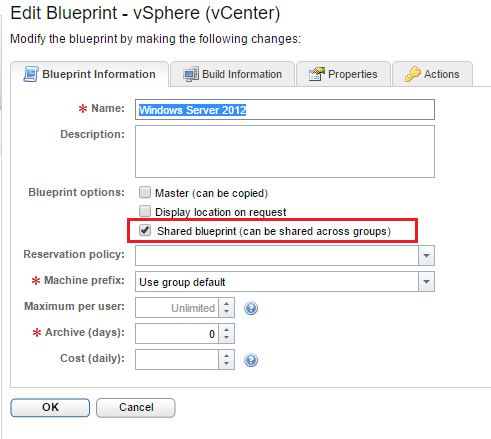
Create Shared Blueprints
A Shared Blueprint is a Blueprint that is shared between multiple Business Groups within a Tenant.
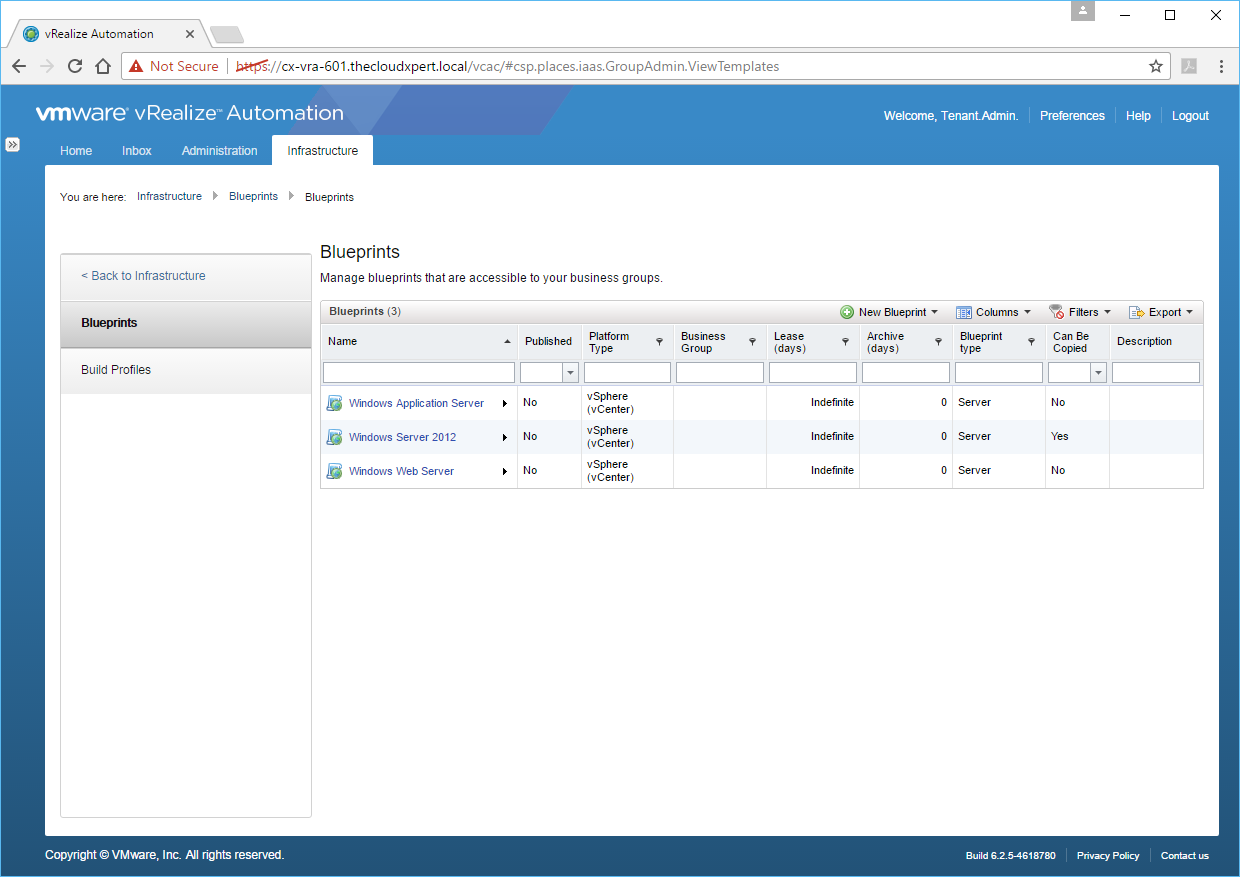
When creating Blueprints as a user with the Tenant Administrator role assigned, all blueprints are “Tenant-Wide” or Shared. This is shown in the Blueprint Information tab within a Blueprint.
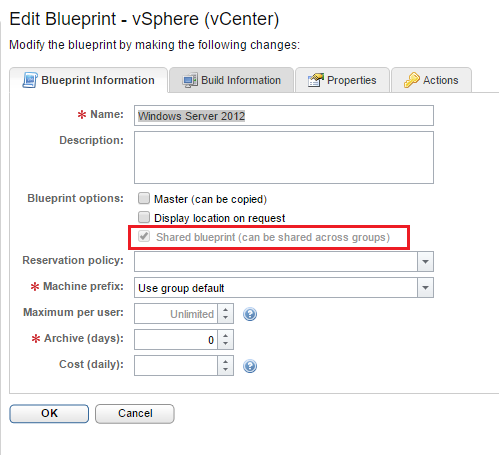
You probably noticed that the Shared BlueprintcCheck box is greyed out and can’t be changed. This is because only if the user also happens to be a Business Group Manager, can the Blueprint be created for the Business Group only or not as a Shared Blueprint.
When the user is both a Tenant Administrator and Business Group Manager, the checkbox becomes active.
Create Master Blueprints
A Master Blueprint is a Blueprint created by a Tenant Administrator that can be copied by other Tenant Administrators and Business Group and used as a “Template”. For example, a Global Virtual Machine Blueprint that can be used as a basis for a Business Group Manager to make their own Business Groups template.
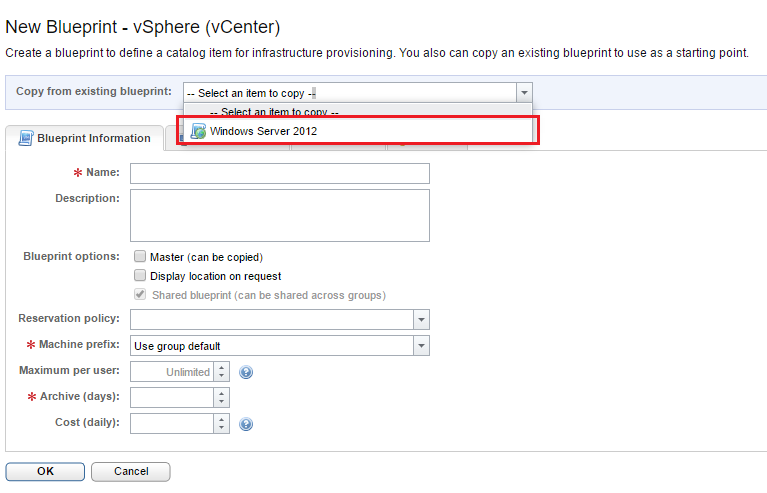
To “flag” a Blueprint as a Master Blueprint you log in to the Portal as a Tenant Administrator and check the Master (can be copied) check box.
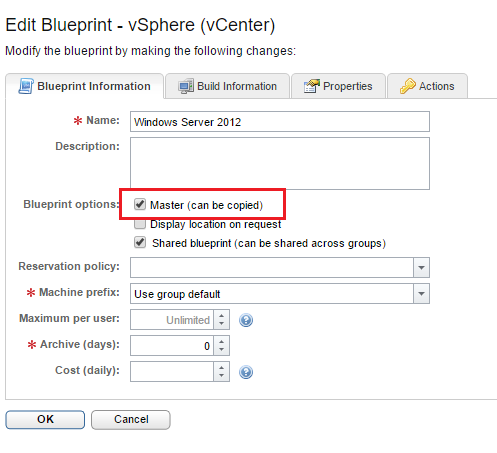
When a Blueprint is flagged as a Master Blueprint the new Blueprint GUI changes to add in drop down called Copy from existing blueprint, where you can choose from a list of Master Blueprints for the Tenant.
Create multi-machine blueprints
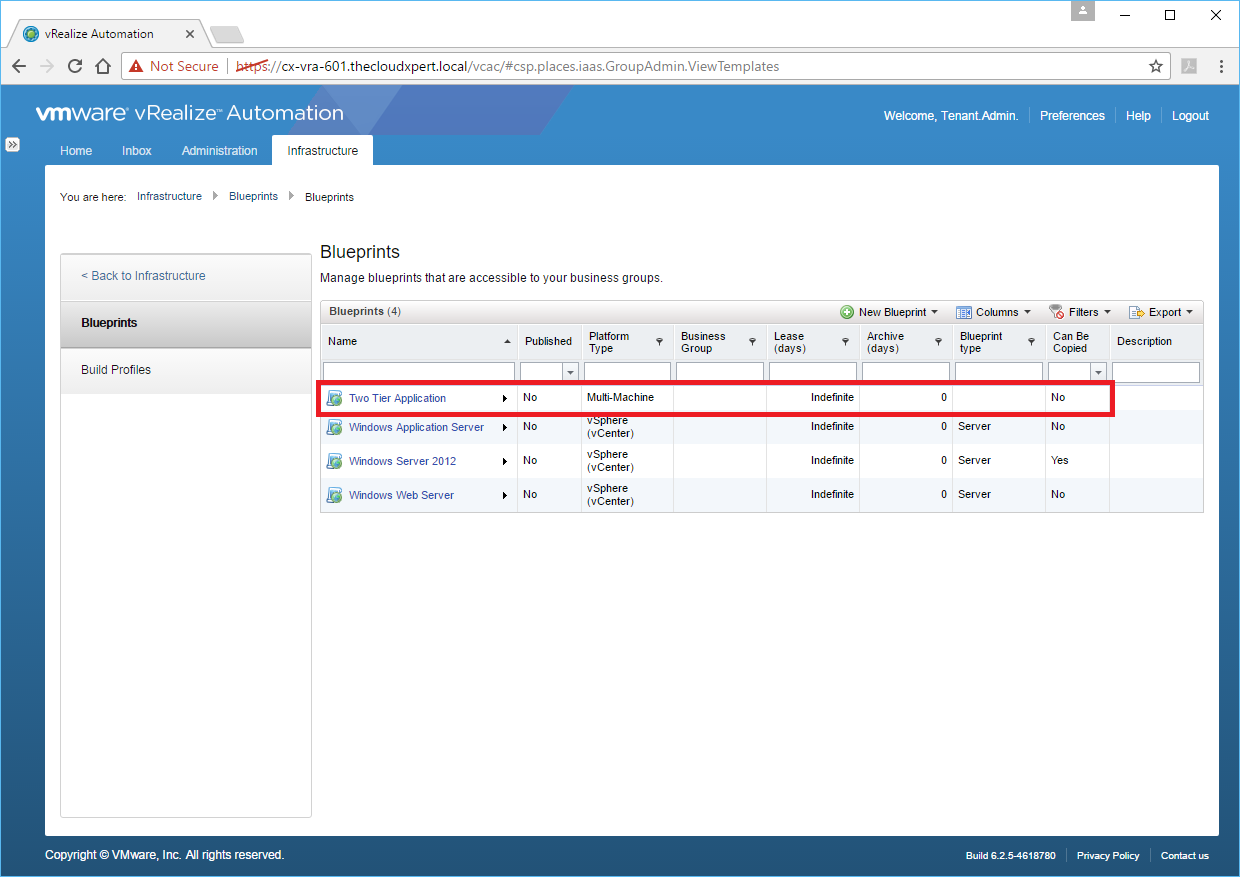
A Multi-Machine Blueprint is a Blueprint that contains multiple components Blueprints.
- Navigate to the vRealize Automation Tenant Portal (
https://vra.fqdn/vcac).
-
Log into the vRealize Automation Portal with Tenant Administrator role.
-
Select the Infrastructure > Blueprint > Blueprints
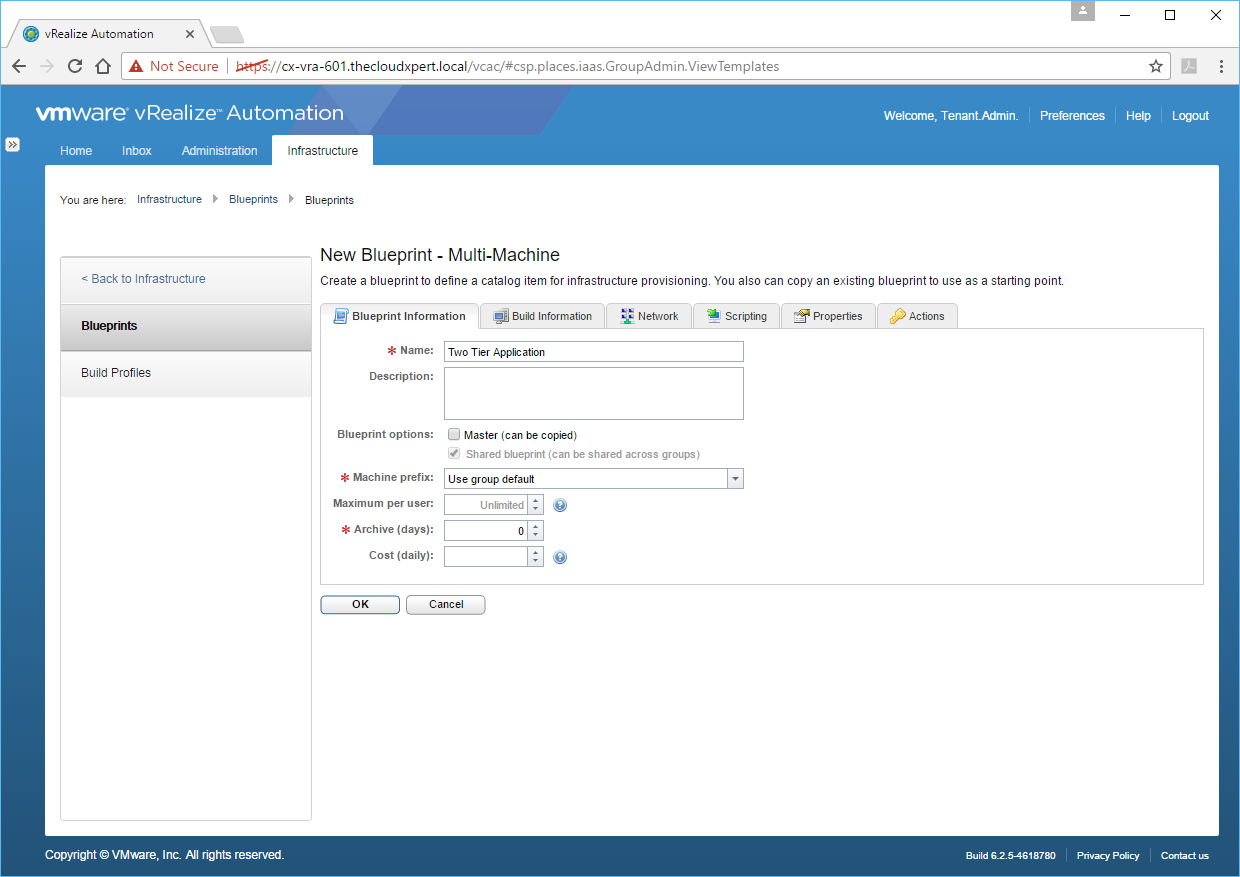
- Select New Blueprint > Multi-Machine.
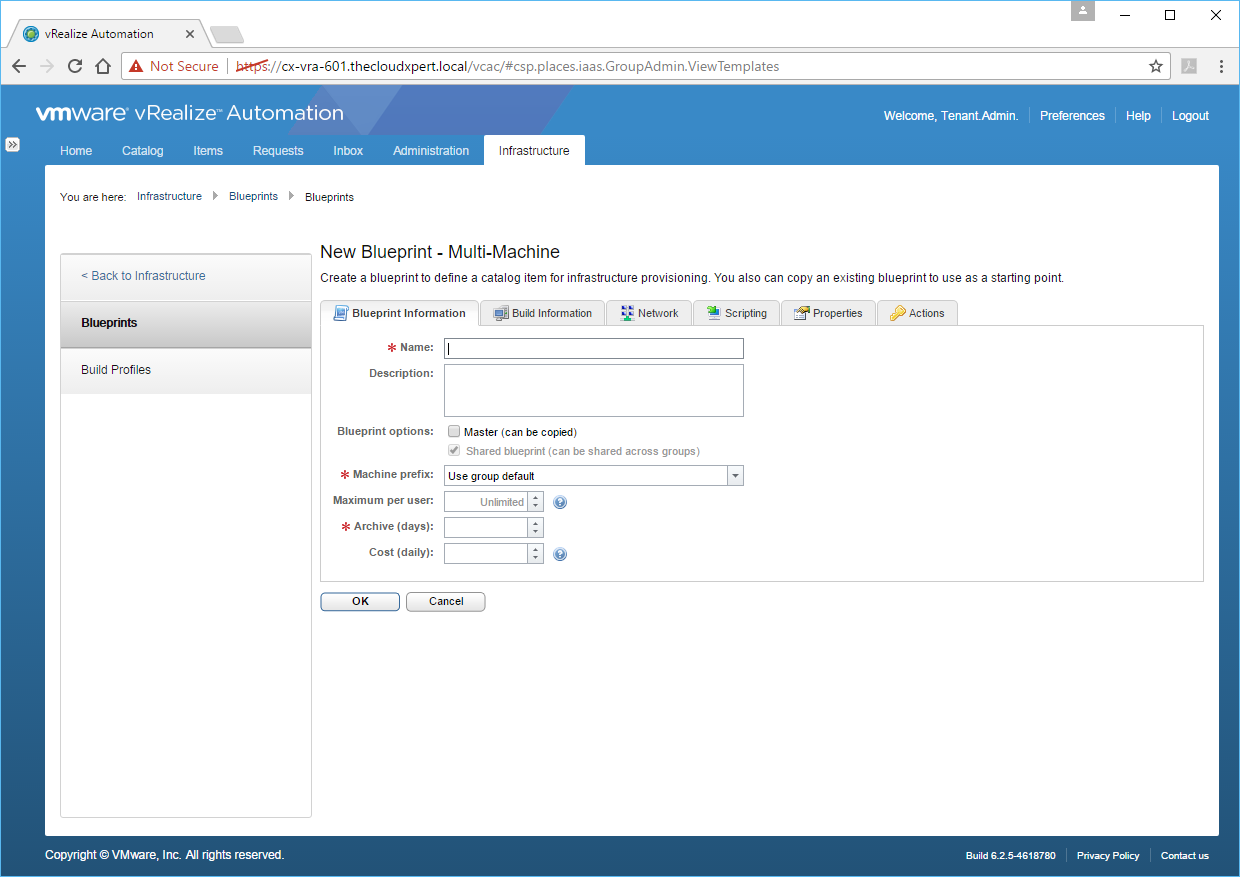
- Select Blueprint Information and enter a name for the Blueprint into the Name text box, (optionally) check the Master (can be copied) checkbox, (optionally) select a Machine prefix from the drop down and enter 0 into the Archive (days) text box.
- Click the Build Information Tab.
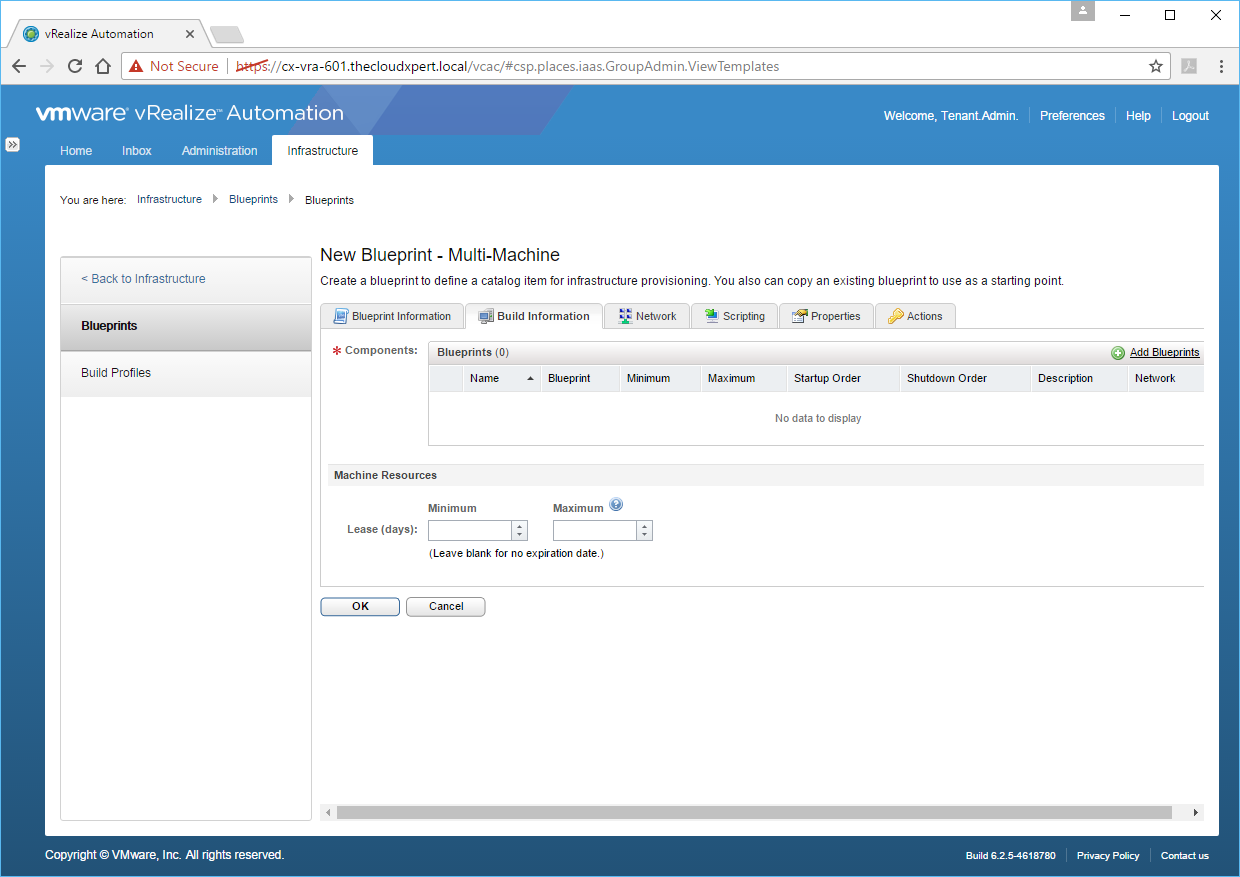
- Click Add Blueprints.
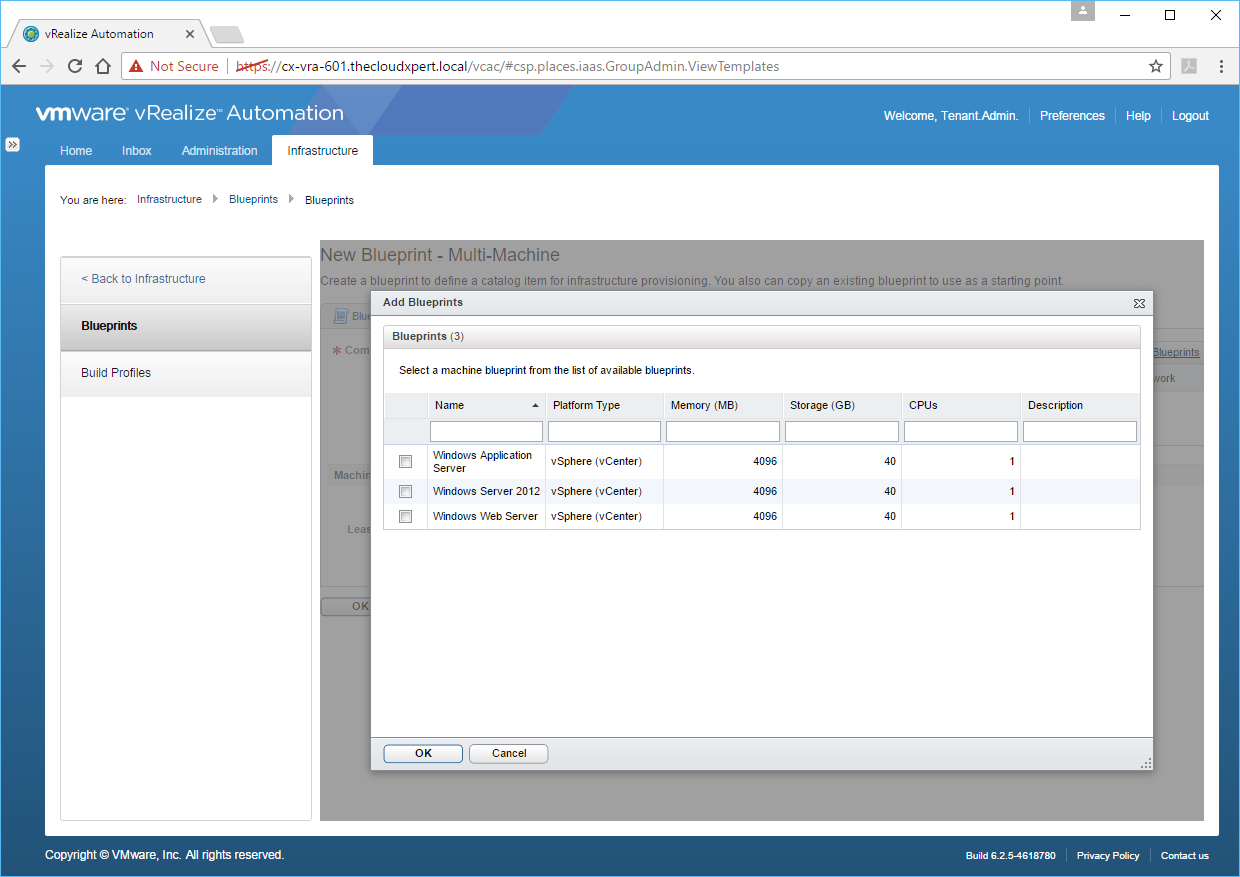
- Select the Blueprint(s) to add to the Multi-Machine Blueprint by checking their checkbox and then click OK.
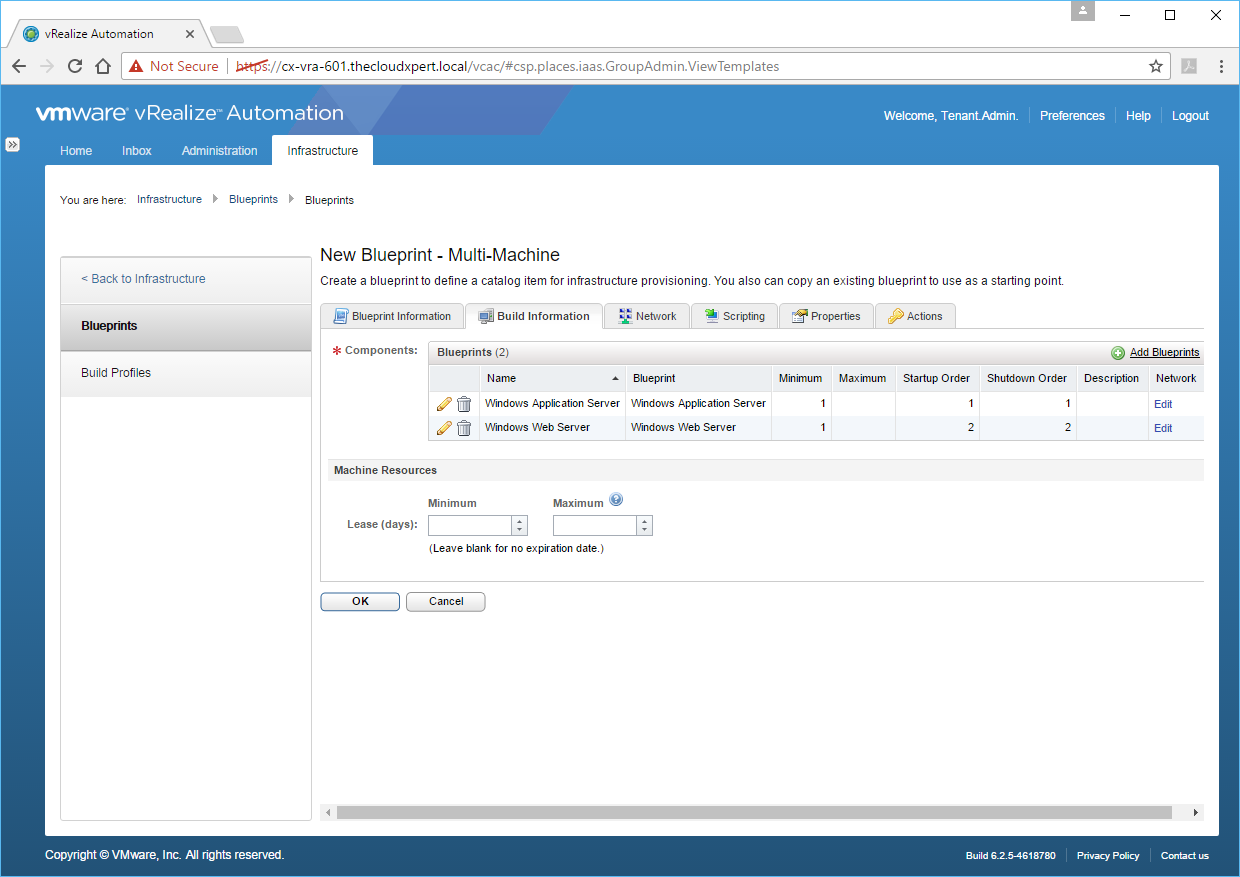
-
If you need to change the quantity or startup order click the edit icon (pencil).
-
If you need to add additional Network Adapter(s), Load Balancer(s) or Security configuration, click Edit in the Network Column.
-
Click OK.
Published on 5 February 2017 by Christopher Lewis. Words: 1640. Reading Time: 8 mins.
- VCAP6-CMA Deploy - Objective 5.1: Configure vRO for vRA ()
- HOWTO: Deploy the vRealize Orchestrator 6.x Appliance for vRealize Automation ()
- VCAP6-CMA Deploy - Objective 1.3: Deploy and Manage vRealize Automation Center Infrastructure Components ()
- HOWTO: Deploy VMware vRealize Automation 6.x IaaS Proxy Agent (Distributed Install) ()
- HOWTO: Deploy VMware vRealize Automation 6.x IaaS DEM Worker (Distributed Install) ()
