VMware Aria Automation Advanced Workload Placement using Allocation-based Capacity Metrics
VMware VMware Aria VMware Aria Operations VMware Aria Automation
Published on 17 September 2023 by Christopher Lewis. Words: 3017. Reading Time: 15 mins.
In this post we will look at how and why we would use Advanced Workload Placement using allocation-based capacity metrics. In doing this we will review the basics of workload placement and Demand vs Allocation capacity metrics, look how to enable Advanced Workload Placement in VMware Aria Automation and how we can configure Advanced Workload Placement in Aria Operations to use allocation rather than demand-based metrics.
Introduction
Advanced Workload placement has been around in Aria Automation since 8.0 using Demand metrics but only recently (in Aria Operations 8.10) have VMware started to support the ability to place workloads based on Allocation metrics.
We will cover:
- What is Advanced Workload Placement?
- What is the difference between Allocation and Demand metrics in VMware Aria Operations?
- How to configure Advanced Workload Placement in VMware Aria Automation
- How can we configure allocation-based capacity metrics in VMware Aria Operations?
What is Advanced Workload Placement?
Advanced Workload Placement is a feature that can be enabled when you have successfully integrated both VMware Aria Automation and VMware Aria Operations together. But before we get too deep into Advanced Workload Placement, I think we should consider Cloud Zones, Placement Policies, what we mean by Workload Placement,why we need it and what exists out of the box in VMware Aria Automation.
What are Cloud Zones in VMware Aria Automation?
TL;DR - A Cloud Zone is essentially a provisioning target for VMware Aria Automation Projects that contains one or more Compute Resources.
If we, just for a minute, take a step back and think about how we configure VMware Aria Automation so that we can deploy workloads a cloud. First we create a Cloud Account that allows us to connect VMware Aria Automation to the target Cloud. Once we have a Cloud Account, we need to create a Cloud Zone to enable the provisioning of workloads to a Region within the target Cloud t. A Cloud Zone contains (by default) all of the compute resources available in the Region. However, we can also change the configuration of a Cloud Zone to have a single Compute Resource or multiple Compute Resources. When we want to specify which Compute Resources are included, we can choose all of them, select individual Compute Resources manually or use tag-based logic. If we do not include all Compute Resources from a Region, we can configure multiple Cloud Zones in that Region.
In the context of a vSphere-based Cloud, we create a Cloud Account that connects VMware Aria Automation to vCenter Server using an account that has appropriate permissions. The Regions are Virtual Data Centers and the Compute Resources are the vSphere DRS-enabled clusters.
In the context of the Public Cloud, we create a Cloud Account that connects VMware Aria Automation to an AWS/Azure/Google account/subscription with an account/API using appropriate Identity Access Management (IAM) policies. The Regions are equivalent to the Public Cloud Regions (such as AWS eu-west-1) and the Compute Resources are the Availability Zones (such as AWS eu-west-1c).
What are Placement Policies in VMware Aria Automation?
Now we have a Cloud Zone that has one or more Compute Resources from a Region, we need a way for VMware Aria Automation to complete the final selection of the Compute Resource based on a set of logic rules or placement policies.
There are five options for placement policies.
The four out of the box policies, available to all cloud zones, in VMware Aria Automation are:
- Default - Distributes compute resources across clusters and hosts machines based on availability.
- Binpack - Places compute resources on the most loaded host that has enough available resources to run the given compute.
- Spread - Provisions compute resources, at a deployment level, to the cluster or host with the least number of virtual machines.
- Spread By Memory - Provisions compute resources, at a deployment level, to the cluster or host with the greatest amount of free memory.
The fifth (and final) placement policy option (Advanced) is only available for vSphere-based clouds and is only enabled when we have successfully integrated VMware Aria Operations and VMware Aria Automation together.
When we select the Advanced option to enable Advanced Workload Placement, VMware Aria Automation allows VMware Aria Operations (using Operational Intent policies) to make the final hosting recommendation for new workloads being deployed. If, for any reason, no recommendation is returned, VMware Aria Automation can be configured to fallback onto the Default placement policy so it reduces the likelihood of deployments failing due to placement issues.
What is the difference between the Allocation and Demand Model?
In VMware Aria Operations, capacity metrics are split into two categories; Demand and Allocation.
- Demand - Capacity is determined based on what is used by an object (based on current and historical usage trends).
- Allocation - Capacity is determined based on the allocated resources of an object (i.e. CPU, memory or storage). We then can configure the allocation ratio for any or all of the resources so that we can determine how much we would like to overcommit those resources.
To be clear, even when the Allocation Model IS enabled, the Demand Model is still used for certain capacity calculations, including Advanced Workload Placement. Albeit, it does takes into consideration the Allocation Ratios that have been configured on the target Compute Resources.
Realistically, in my view, the Allocation Model is (and should be) typically used to reduce the potential load or stress that a cluster compute resource is under rather than increase it.
Example: Allocation vs Demand
If we consider a vSphere Host server with 2 x 20-core (2.4Ghz) processors and 512GB RAM.
- In the Demand model, the total amount of available resources are:
- CPU (Mhz) = 2 x (20 x 2400Mhz) = 96,000
- Memory (GB) = 512
- In the Allocation model, if we set a CPU allocation of 40:1 and a Memory allocation of 2:1, the total amount of available resources are:
- CPU = (2 x 20) x 40 = 1600
- Memory (GB) = 512 x 2 = 1024
We have a workload on the host that has been allocated 2vCPU and 8GB RAM. However, we can see that based on average based on current and historical usage, the workload only consumes 200Mhz and a 1GB RAM.
How does this affect the capacity of the host?
- In the Allocation model, the workload would take up 2 vCPUs and 8GB RAM. This would leave 1598 vCPUs and 1016GB RAM available.
- In the Demand model, the workload would take up 200Mhz and 1 GB RAM. This would leave 95,800 MHz and 511 GB available.
How many workloads of the same profile could I deploy on the host?
- In the Allocation model:
- Based on CPU allocation, you could have 1600 / 2 = 800 workloads
- Based on Memory allocation, you could have 1024 / 8 = 128 workloads
- In the Demand model:
- Based on CPU demand, you could have 480 workloads
- Based on Memory demand, you could have 512 workloads.
As we can see, in this example, the constraining resource for both Allocation and Demand is Memory. However, it is the Allocation metric that ultimately constrains the resource and (if you believed the allocation metrics) would trigger a need for a capacity increase. However we can also see that, based on Demand, the host has lots of capacity left.
How to configure Advanced Workload Placement in VMware Aria Automation
The steps for configuring Workload Placement in VMware Aria Automation are identical whether we decide to use the Allocation or Demand Models in VMware Aria Operations.
The VMware Documentation article is Advanced Workload Placement for Allocation Model
Prerequisites
The prerequisites for this configuration are:
- In VMware Aria Automation:
- A Cloud Account must be configured for the target vCenter Server with the appropriate credentials, see Credentials required for working with cloud accounts in VMware Aria Automation .
- The VMware Aria Operations integration must be successfully configured, see Integrating with VMware Aria Operations .
- A Cloud Zone must be configured with at least one Compute Resource.
- A Project must be created with at least one Cloud Zone configured.
- The administrator completing the task must have the roles of Organization Member and Aria Assembler Administrator.
- In VMware Aria Operations:
- A Cloud Account must be configured for the target vCenter Server with the appropriate credentials, see Privileges Required for Configuring a vCenter Adapter Instance .
- (OPTIONAL) The VMware Aria Automation adapter should be configured to help troubleshoot issues in VMware Aria Automation, see Configuring VMware Aria Automation with VMware Aria Operations .
Walkthrough
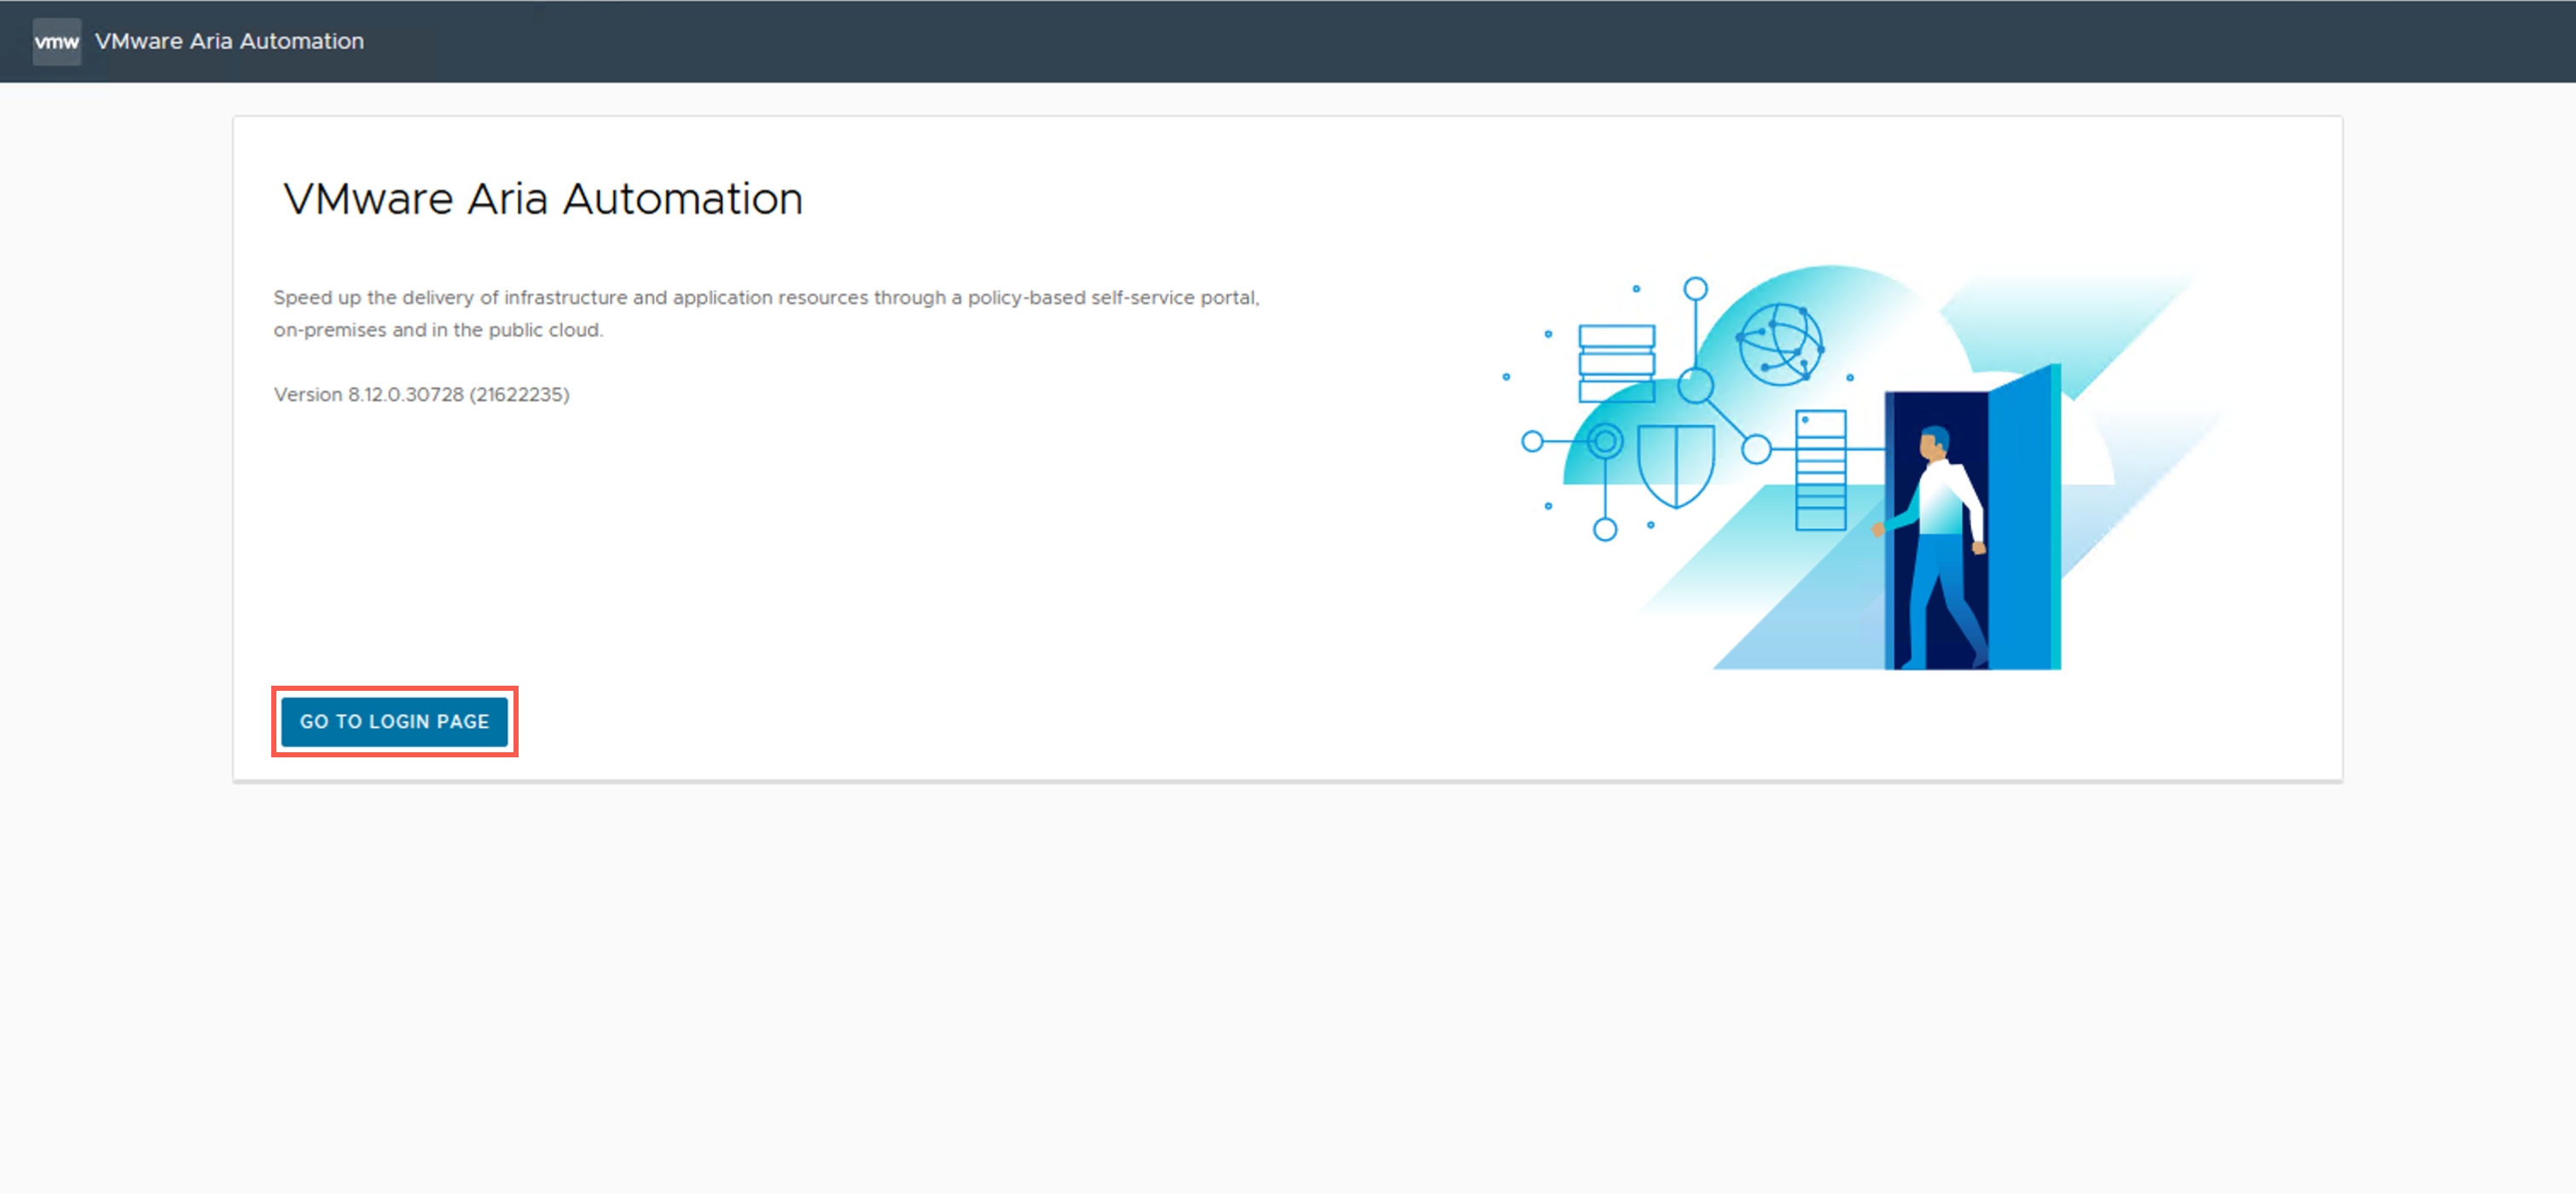
- Navigate to https://<aria-auto.fqdn> and click GO TO LOGIN PAGE.
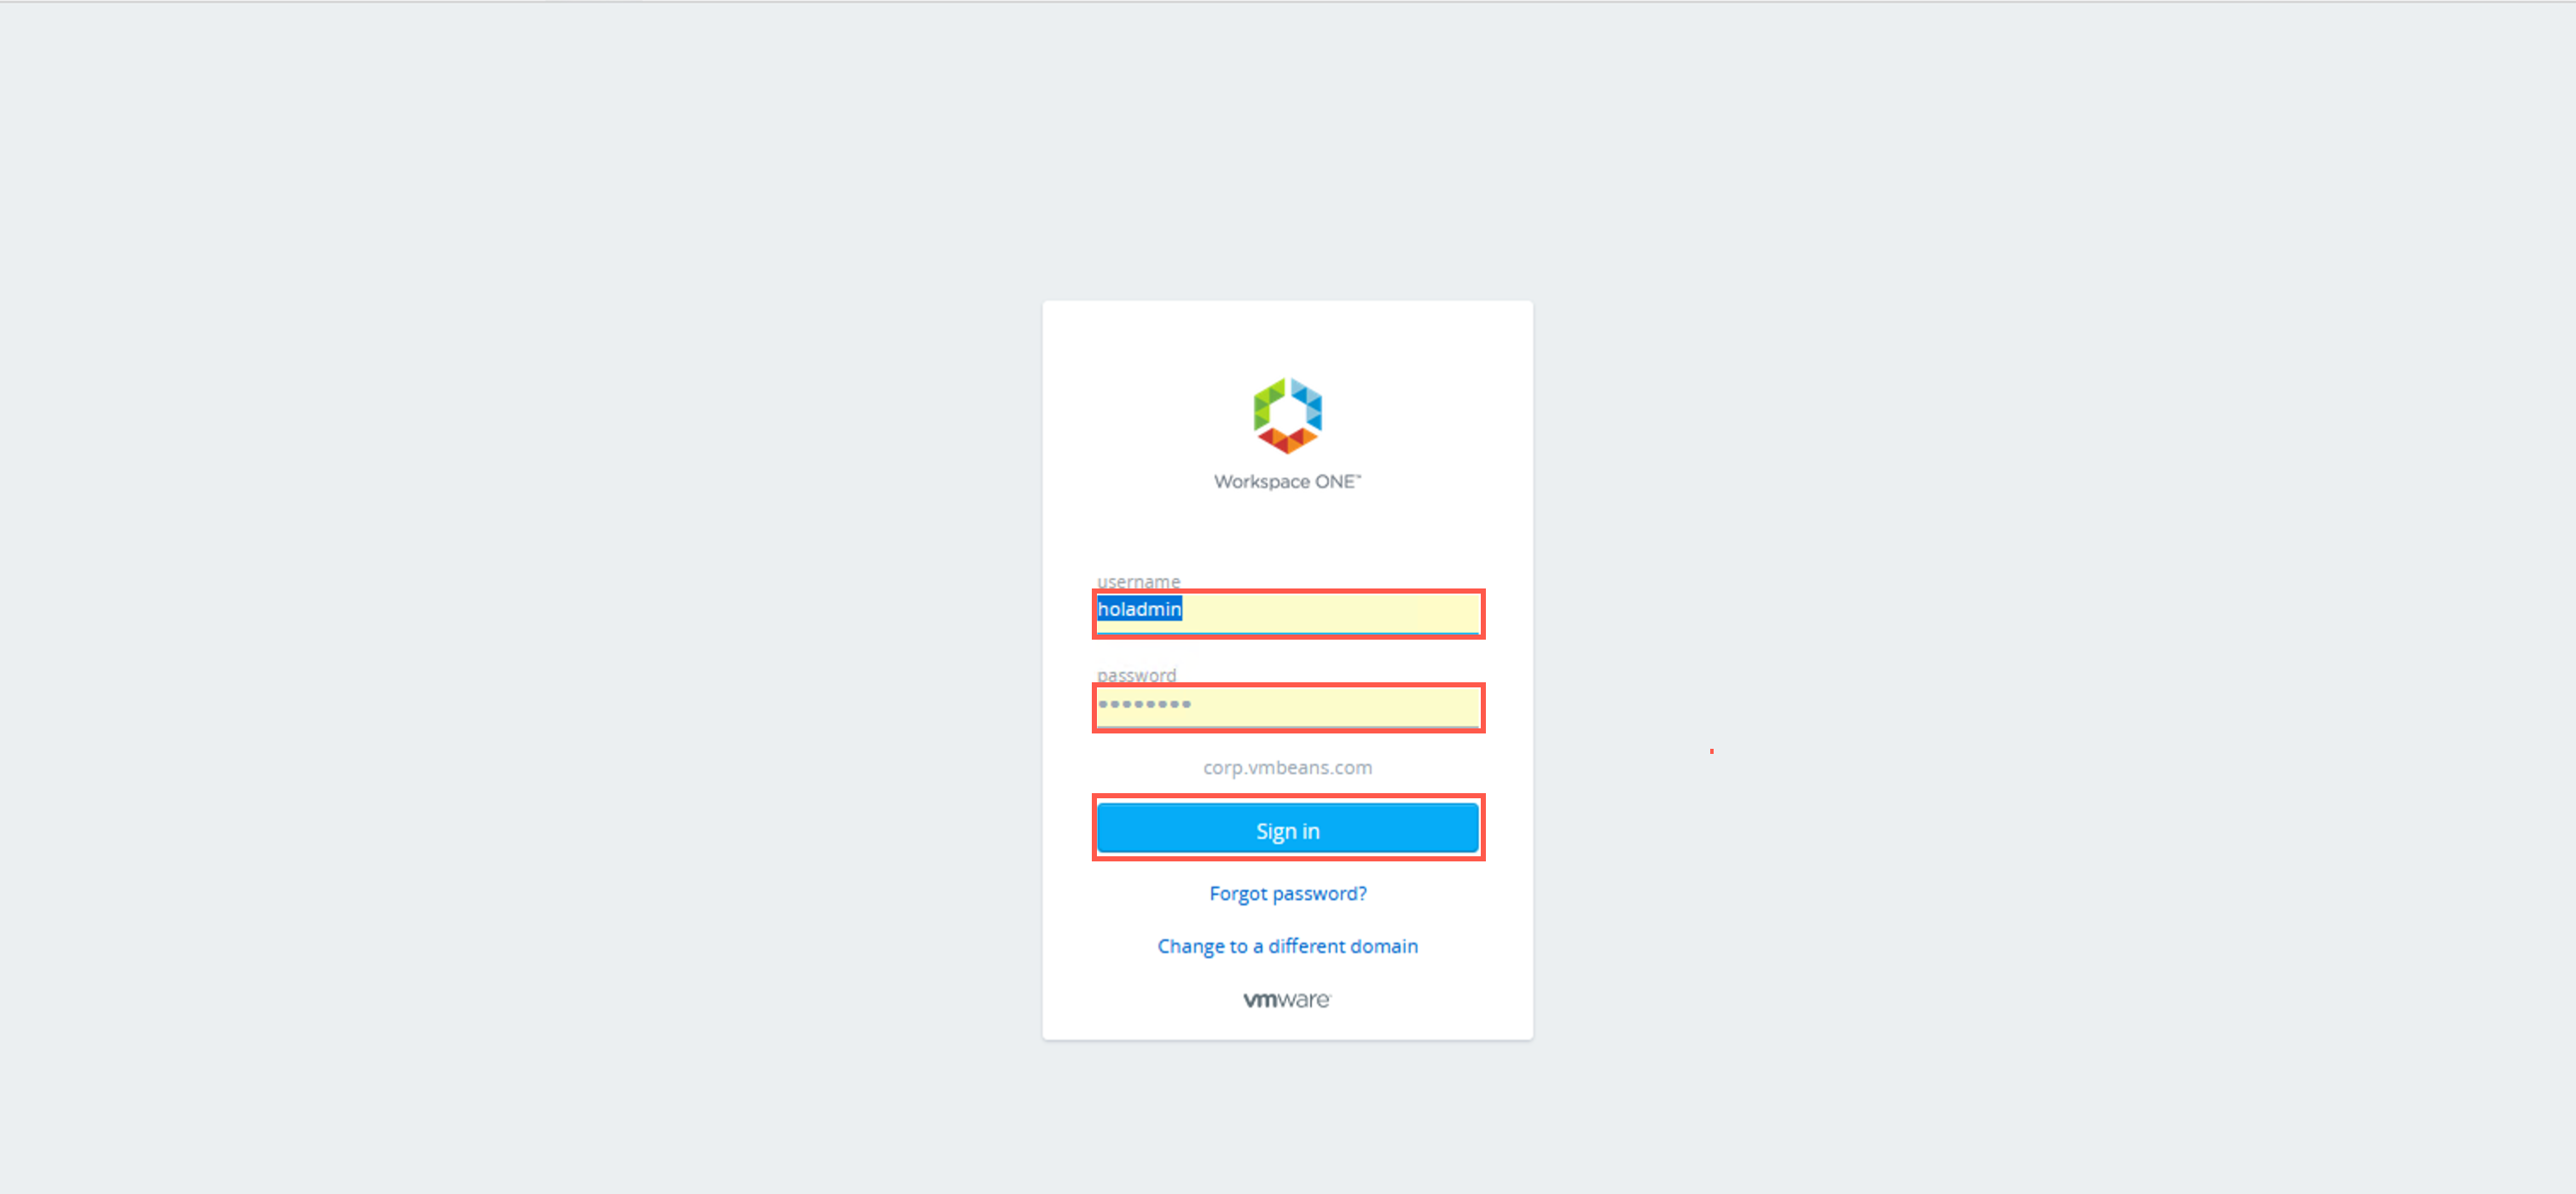
- At the VMware Workspace ONE Access screen, enter the administrative username and password and then click Sign In to log into VMware Aria Automation.
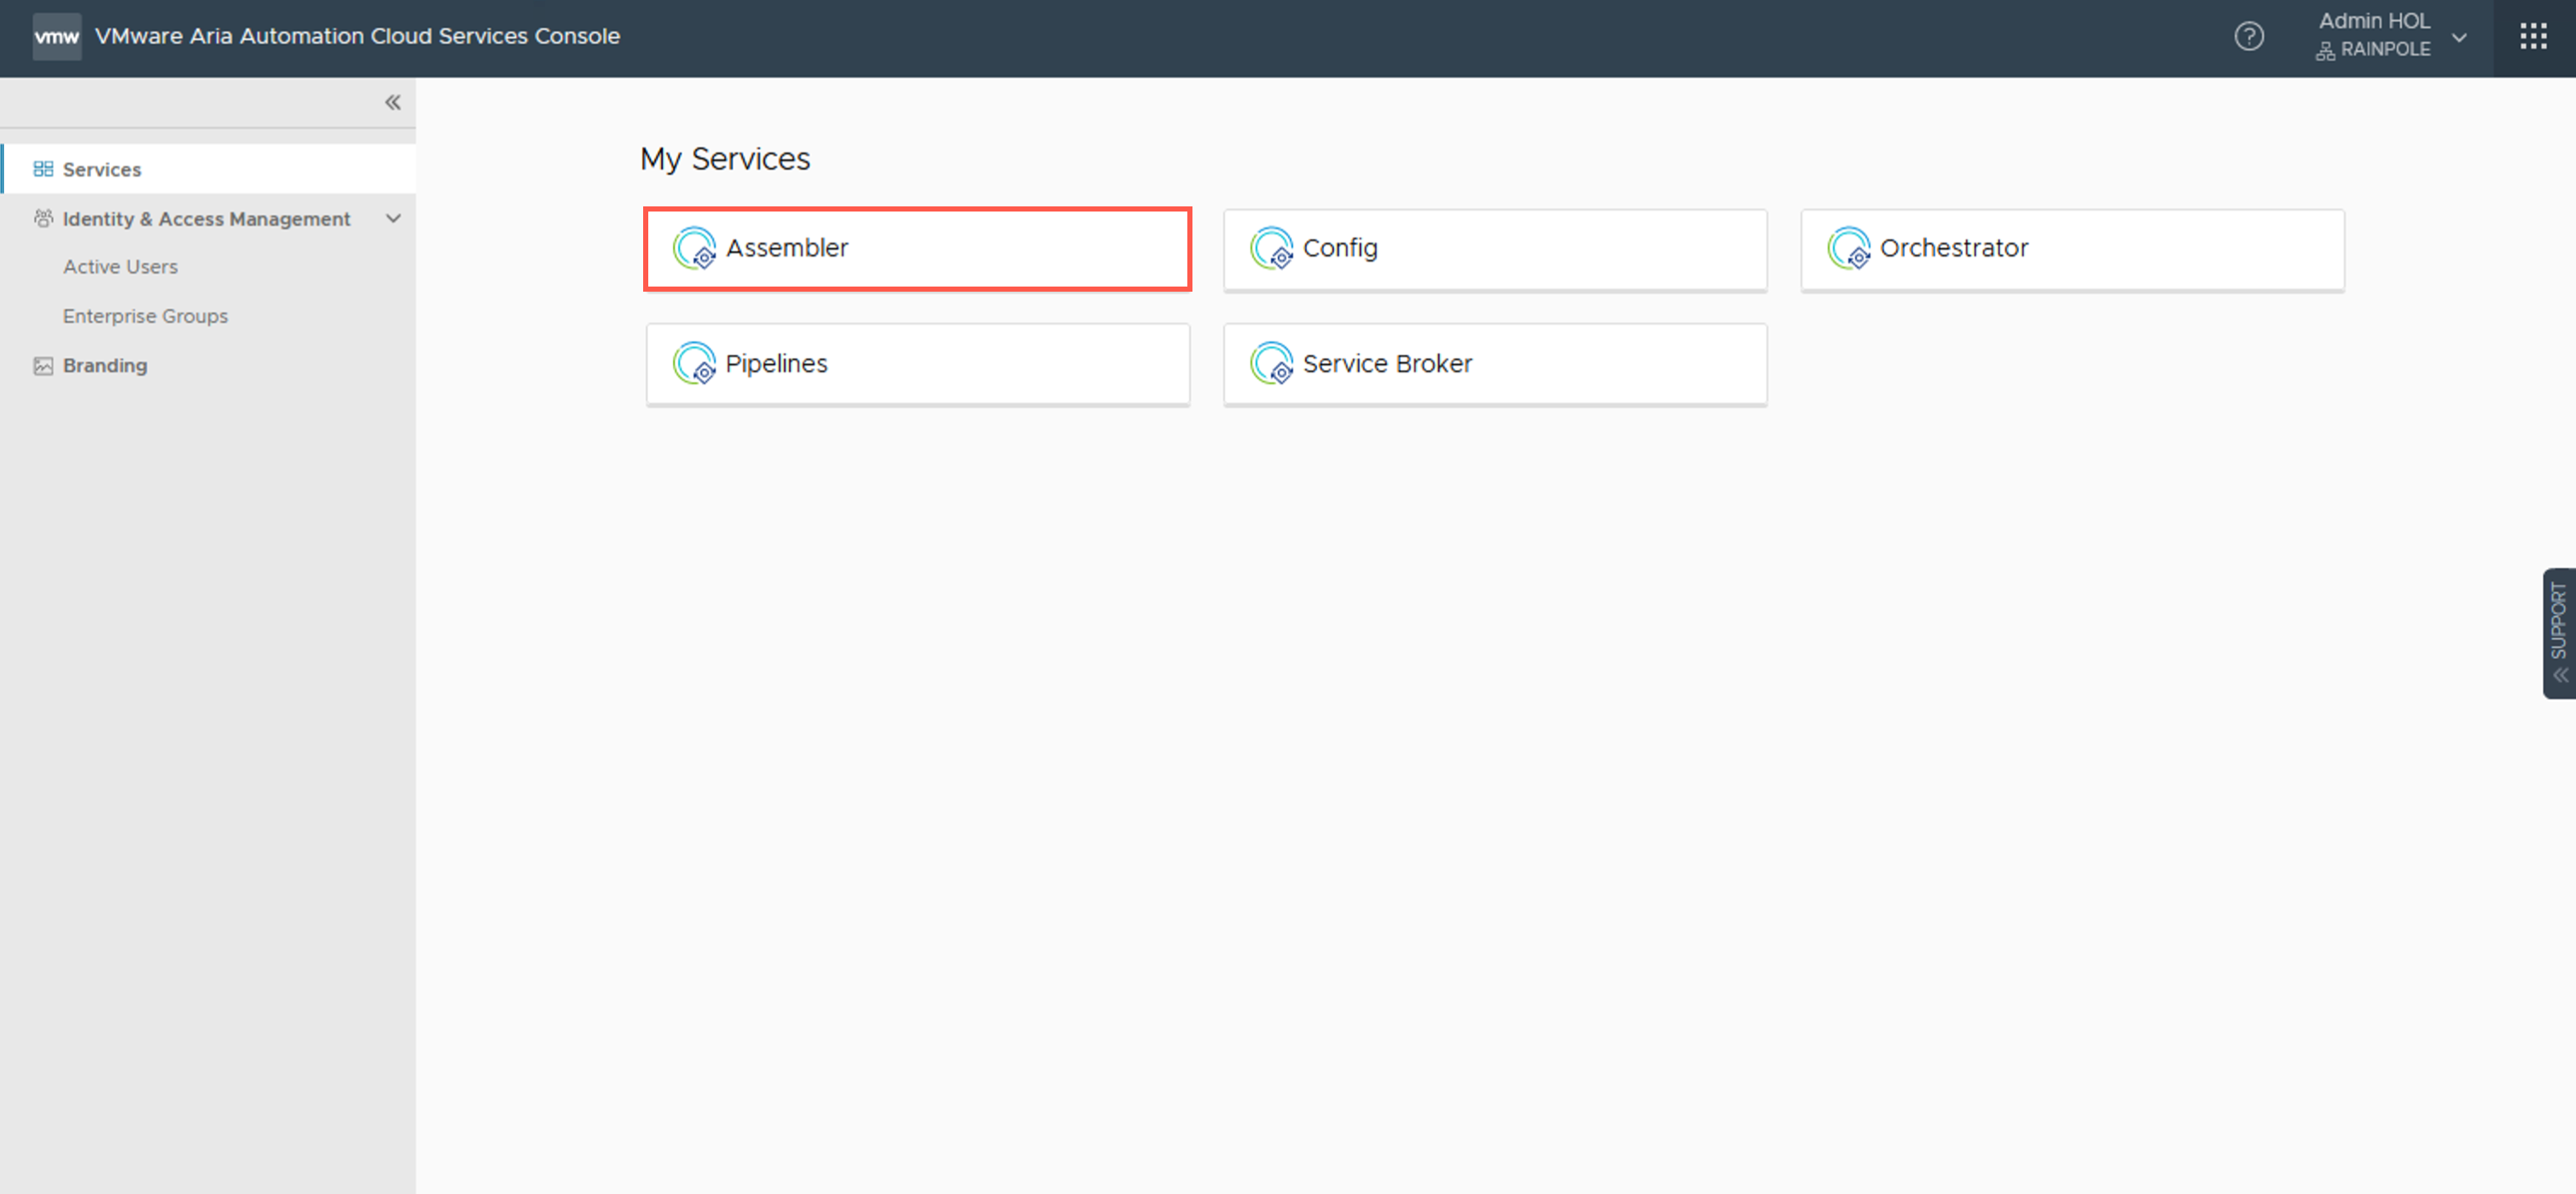
- Under My Services, click on the Assembler Service.
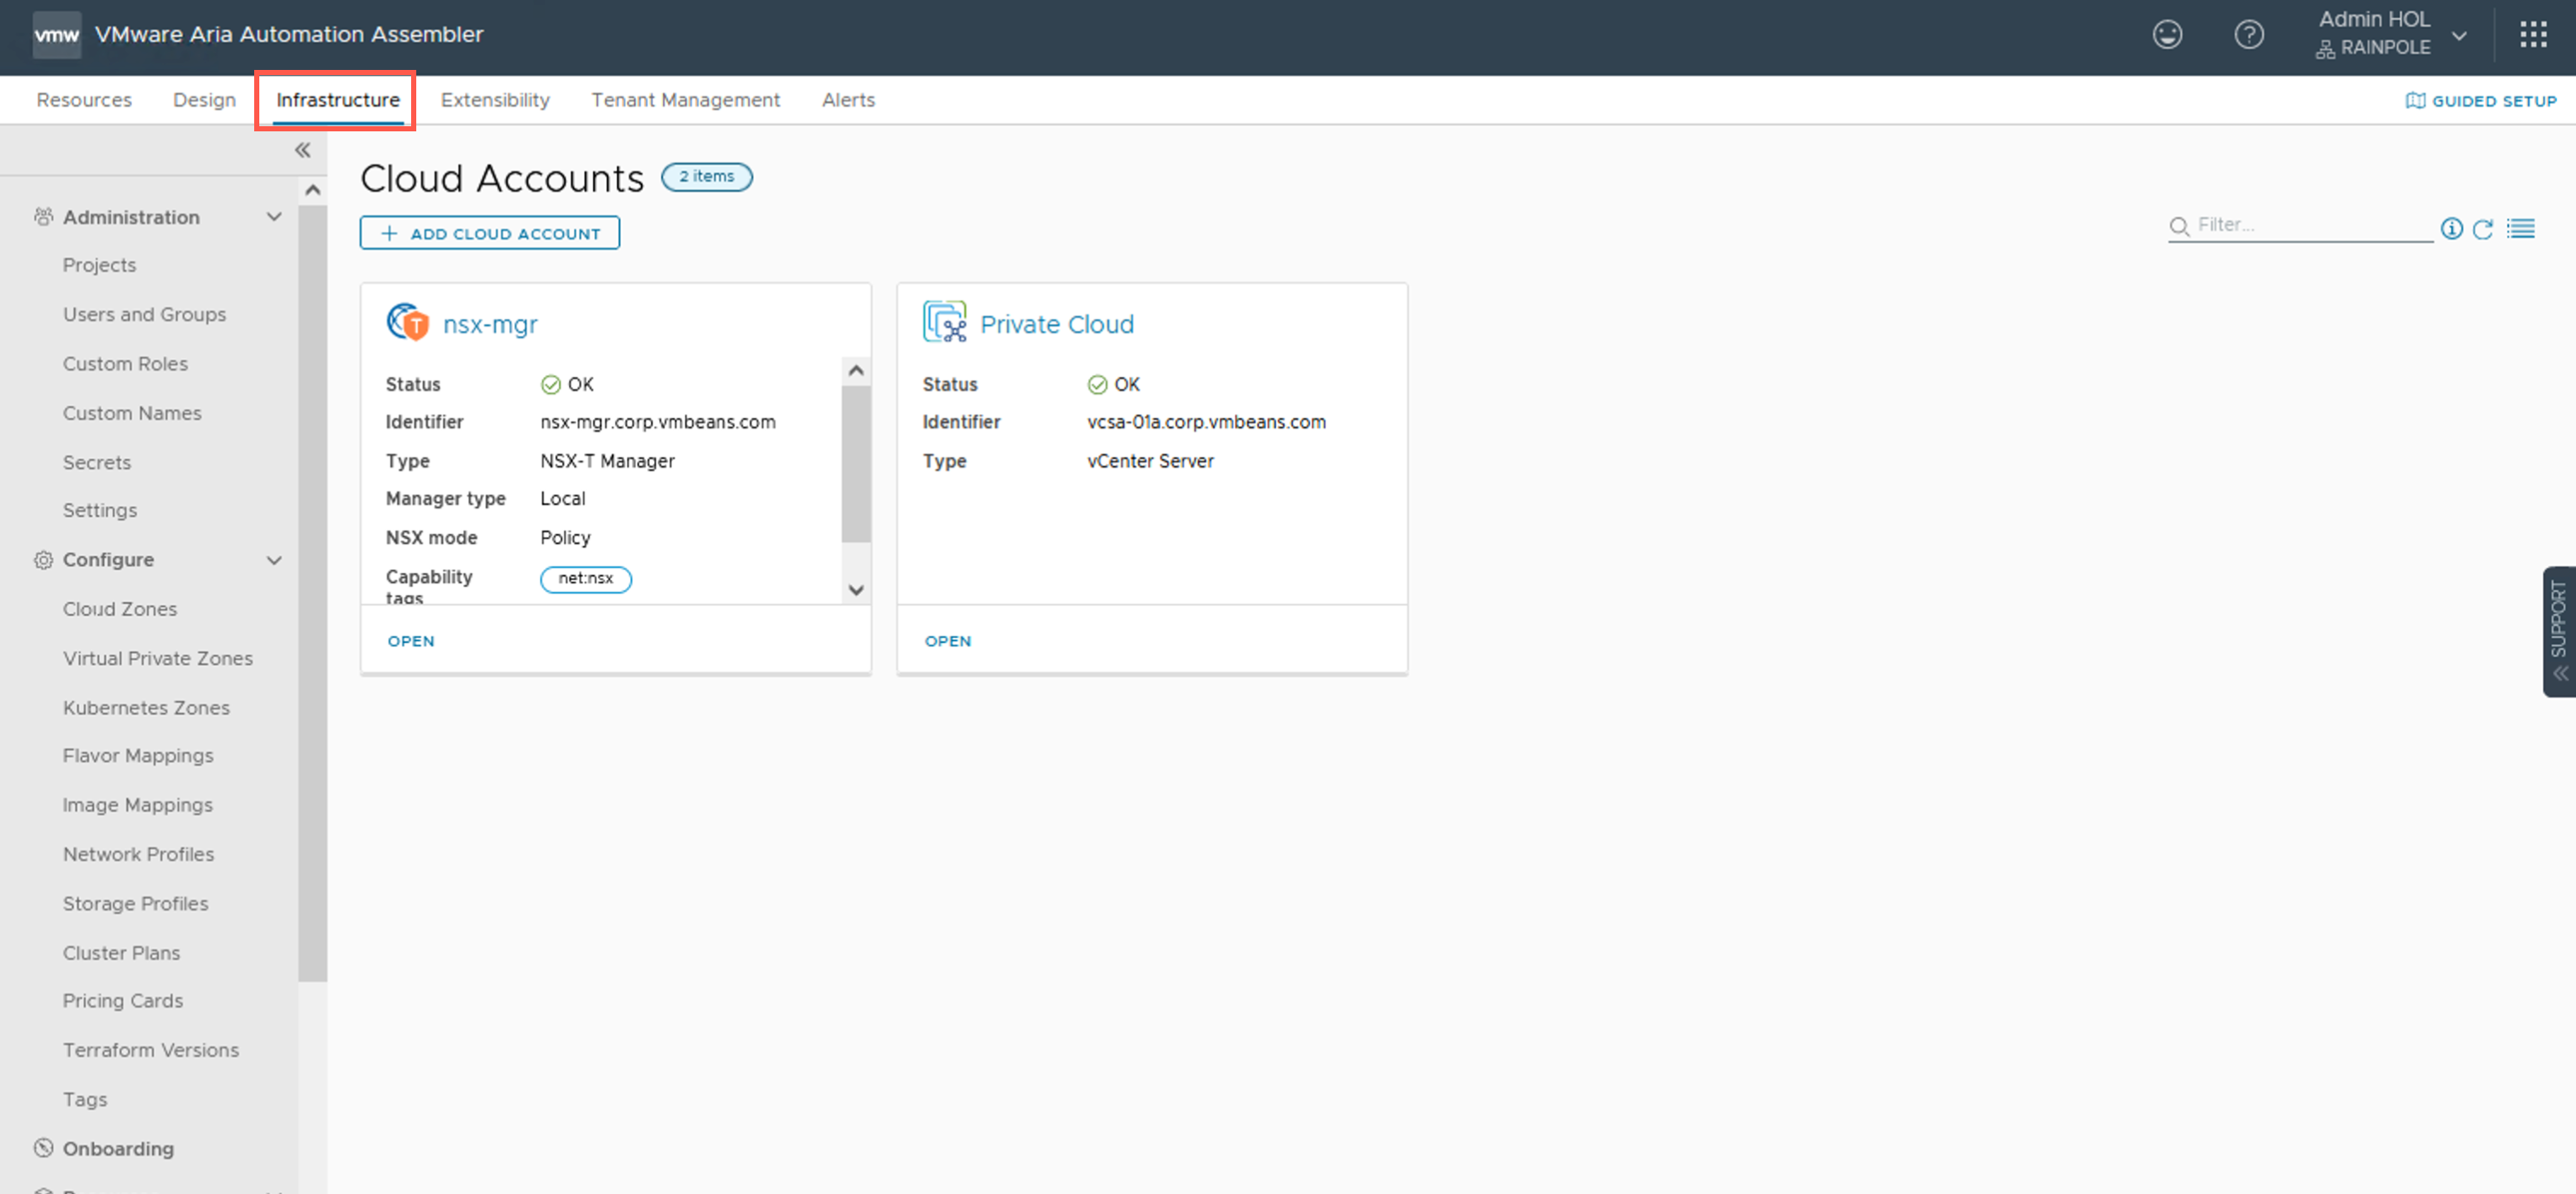
- Click on the Infrastructure tab.
- Under Configure, click Cloud Zones.
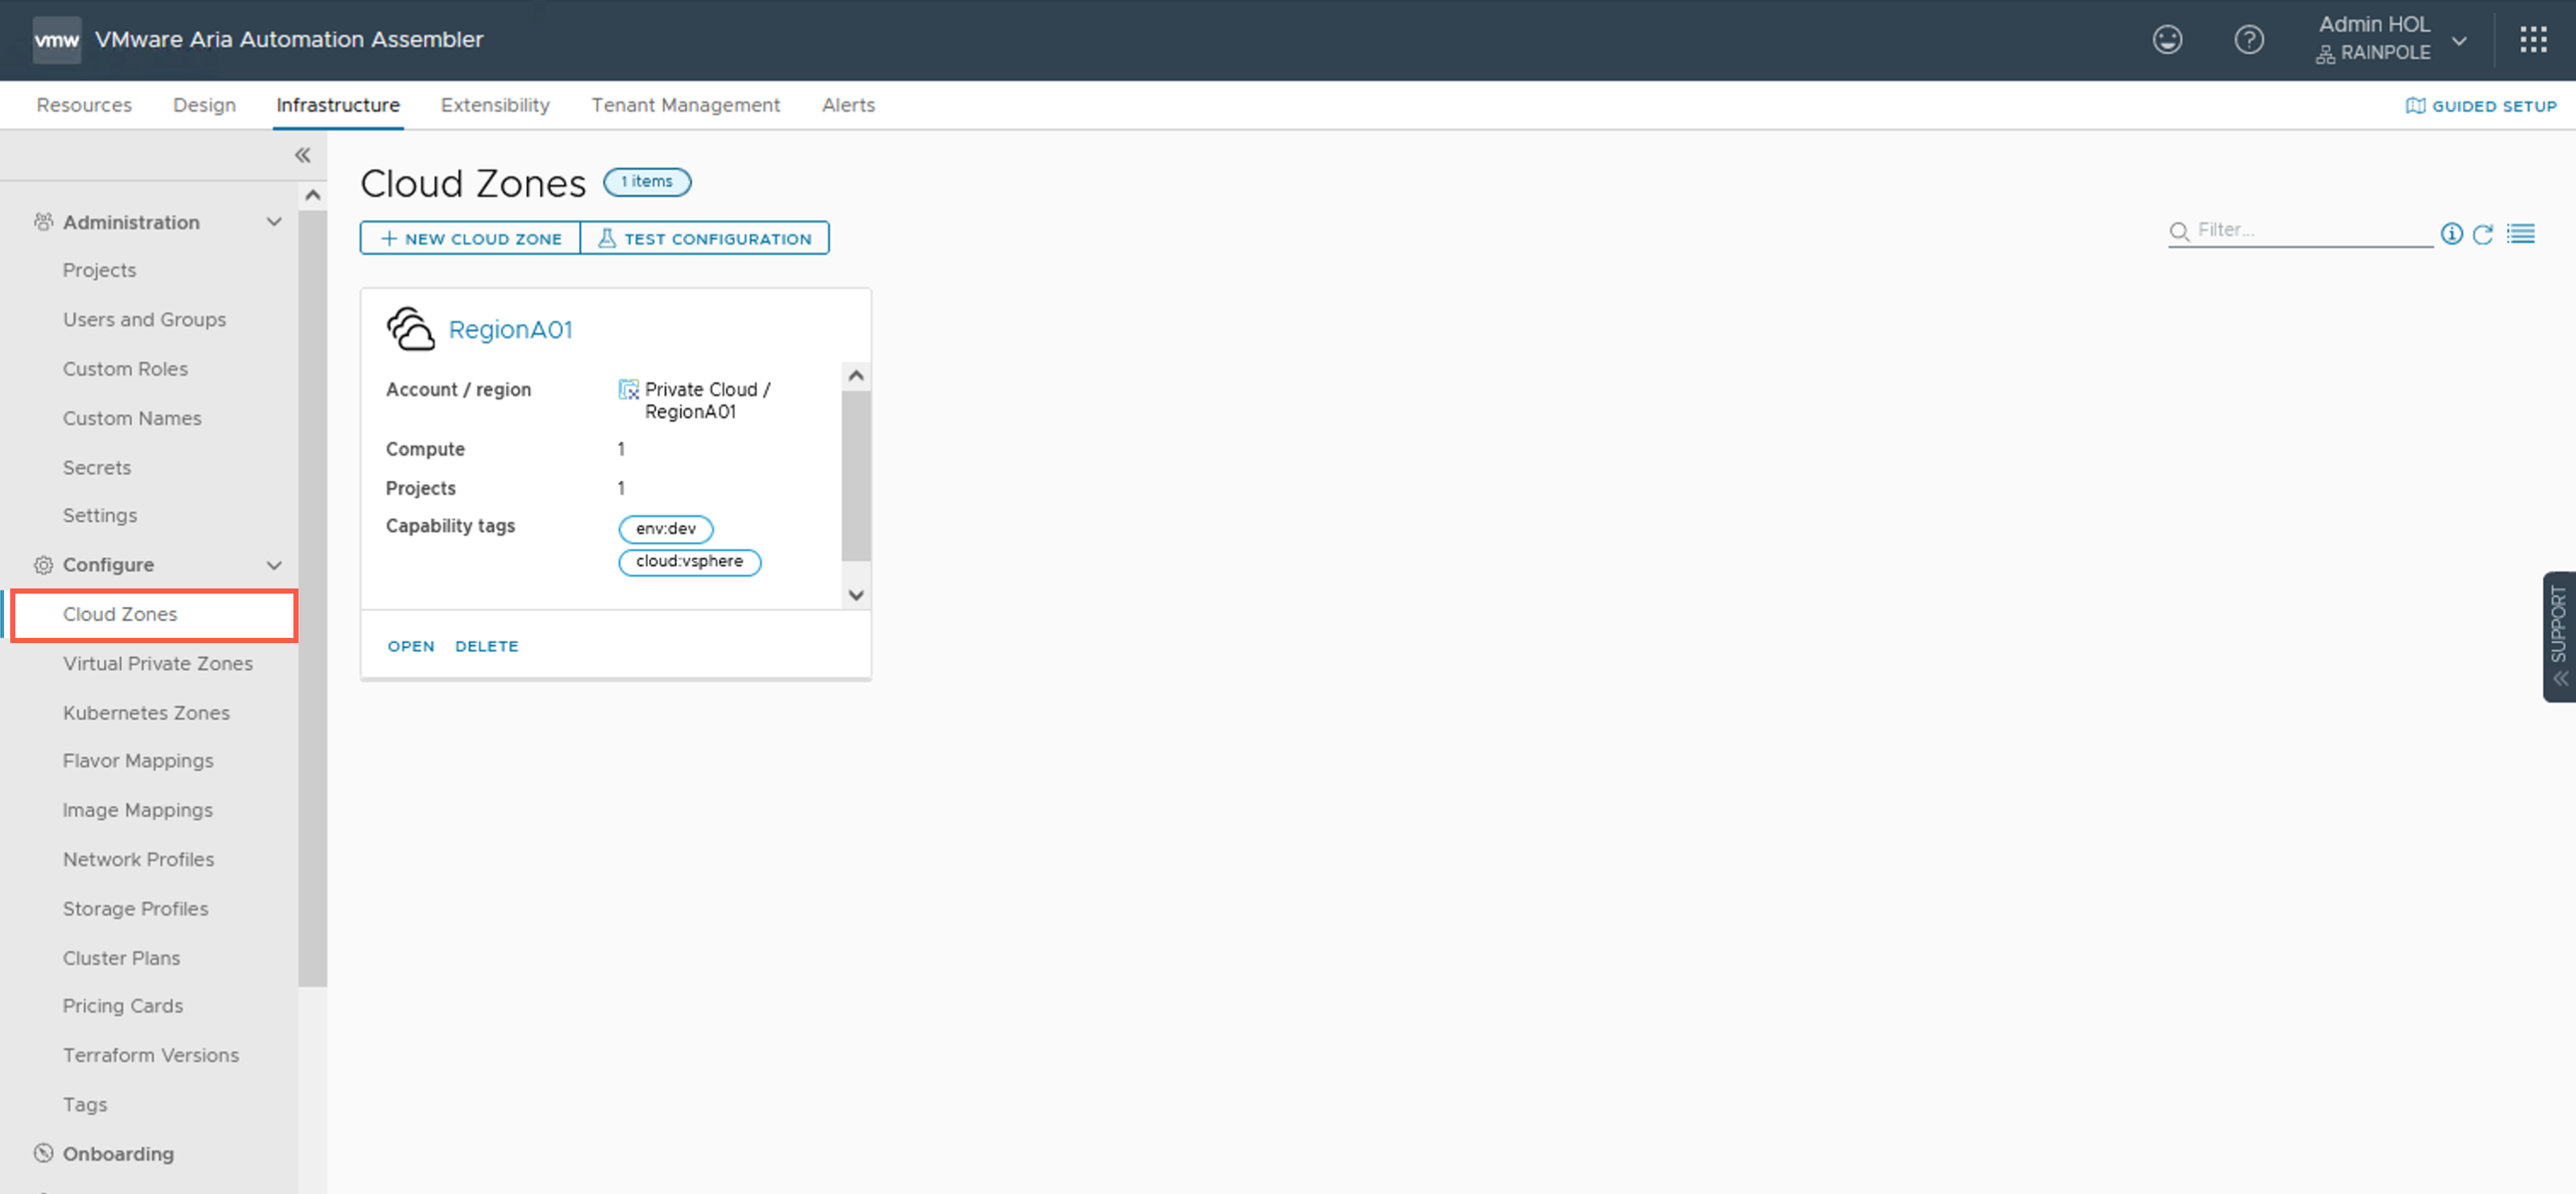
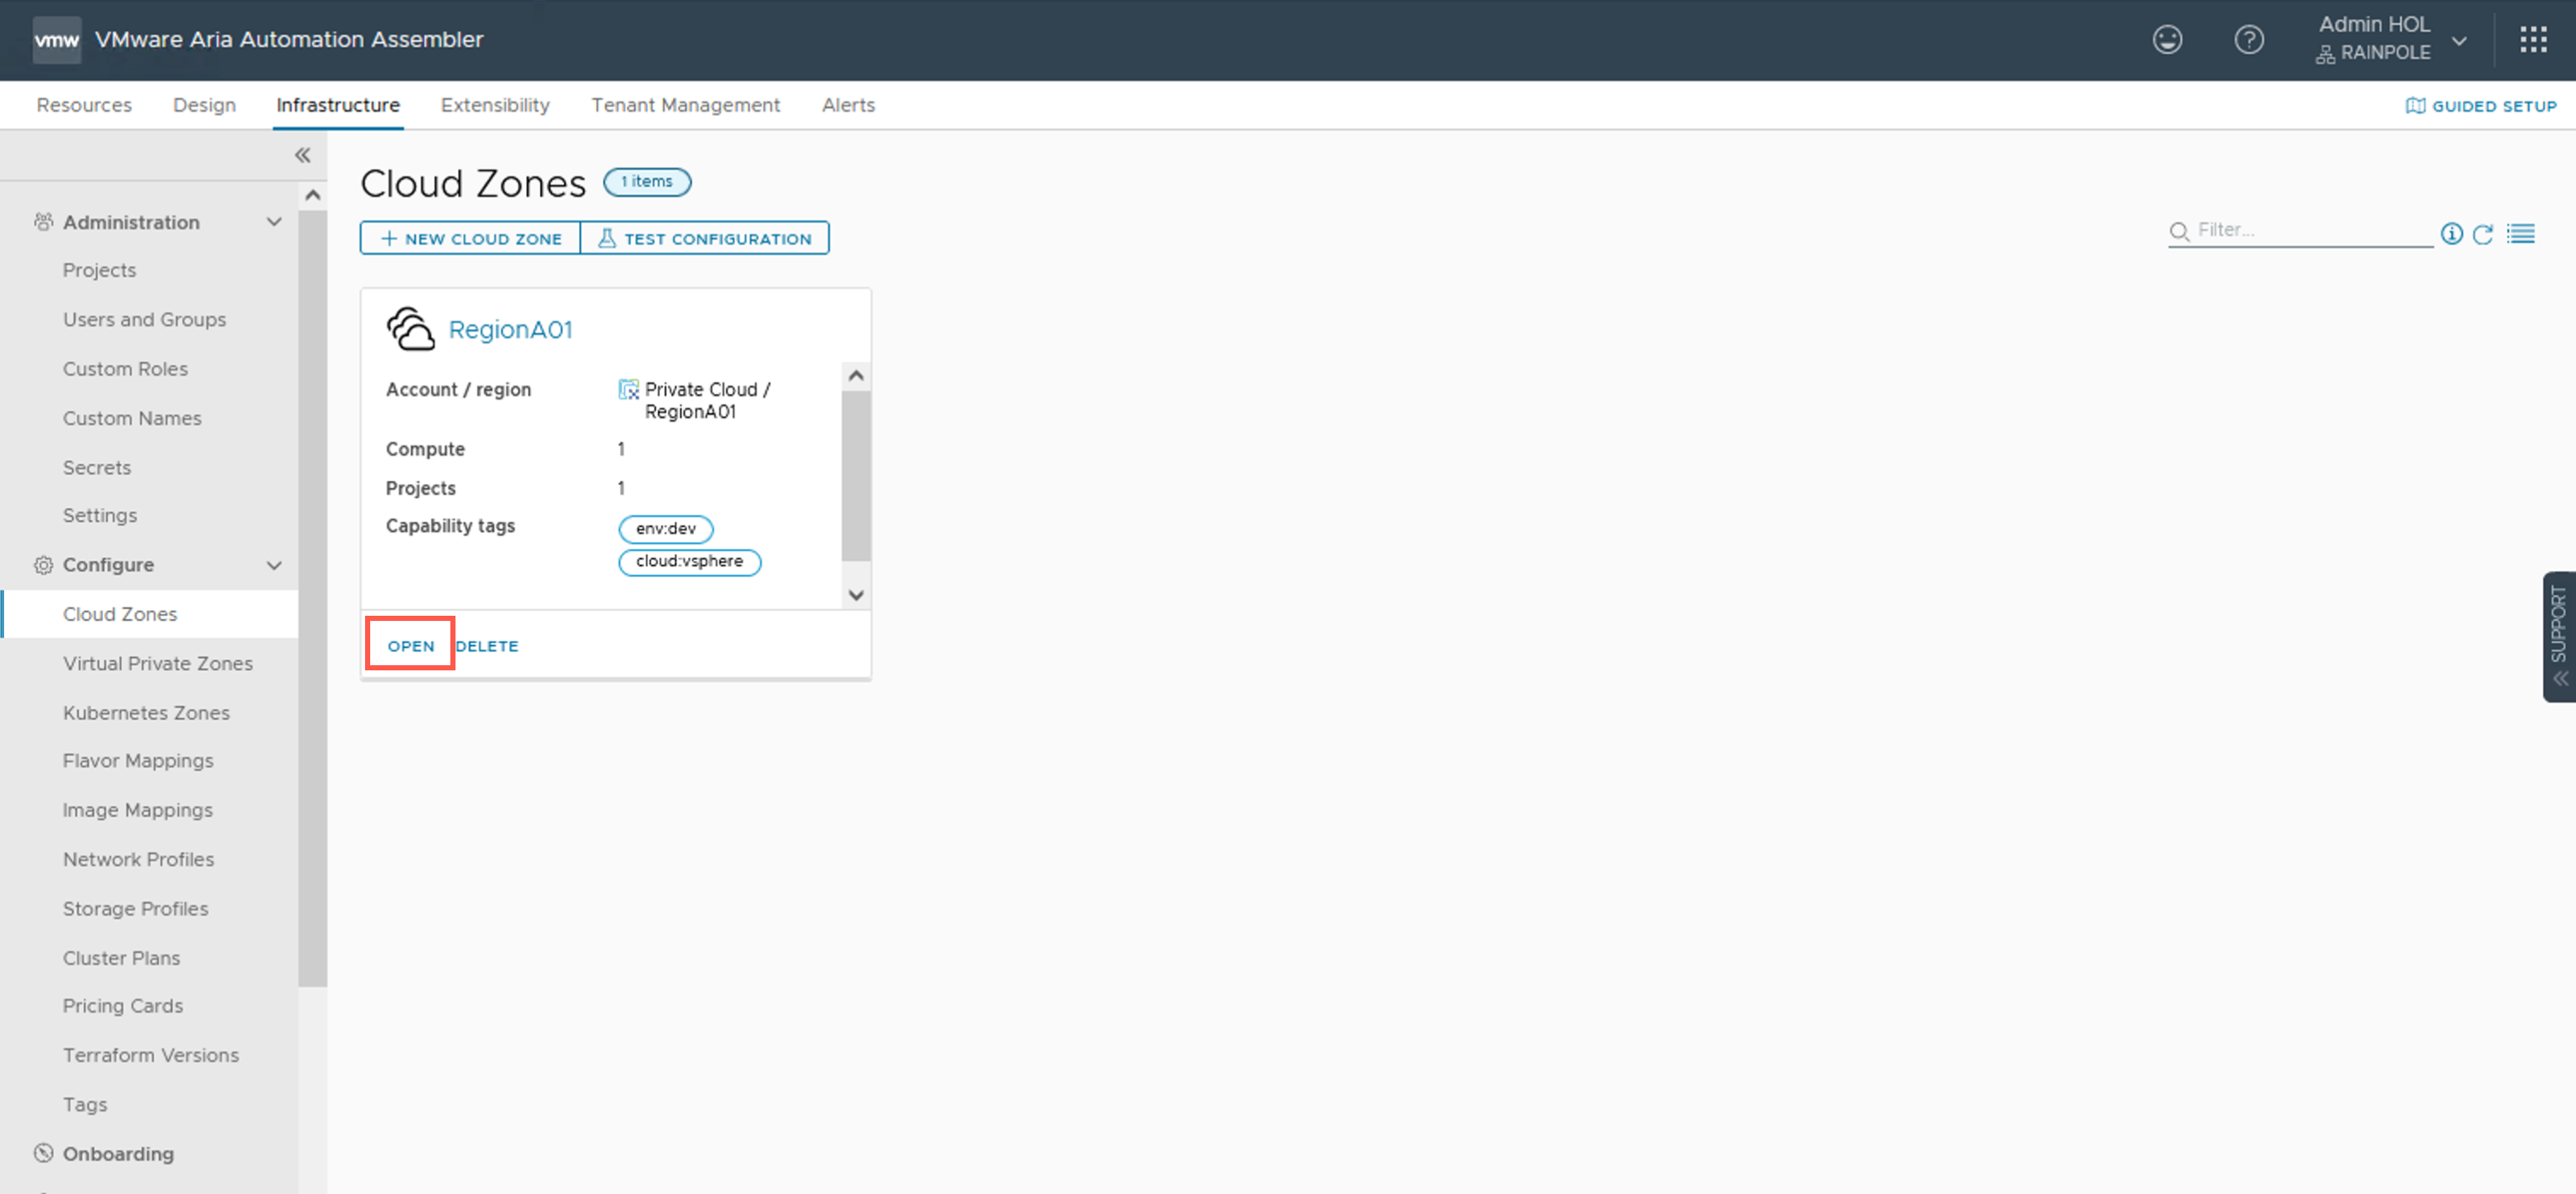
- Locate the target Cloud Zone and click OPEN.
- Within the Cloud Zone, click the Summary tab.

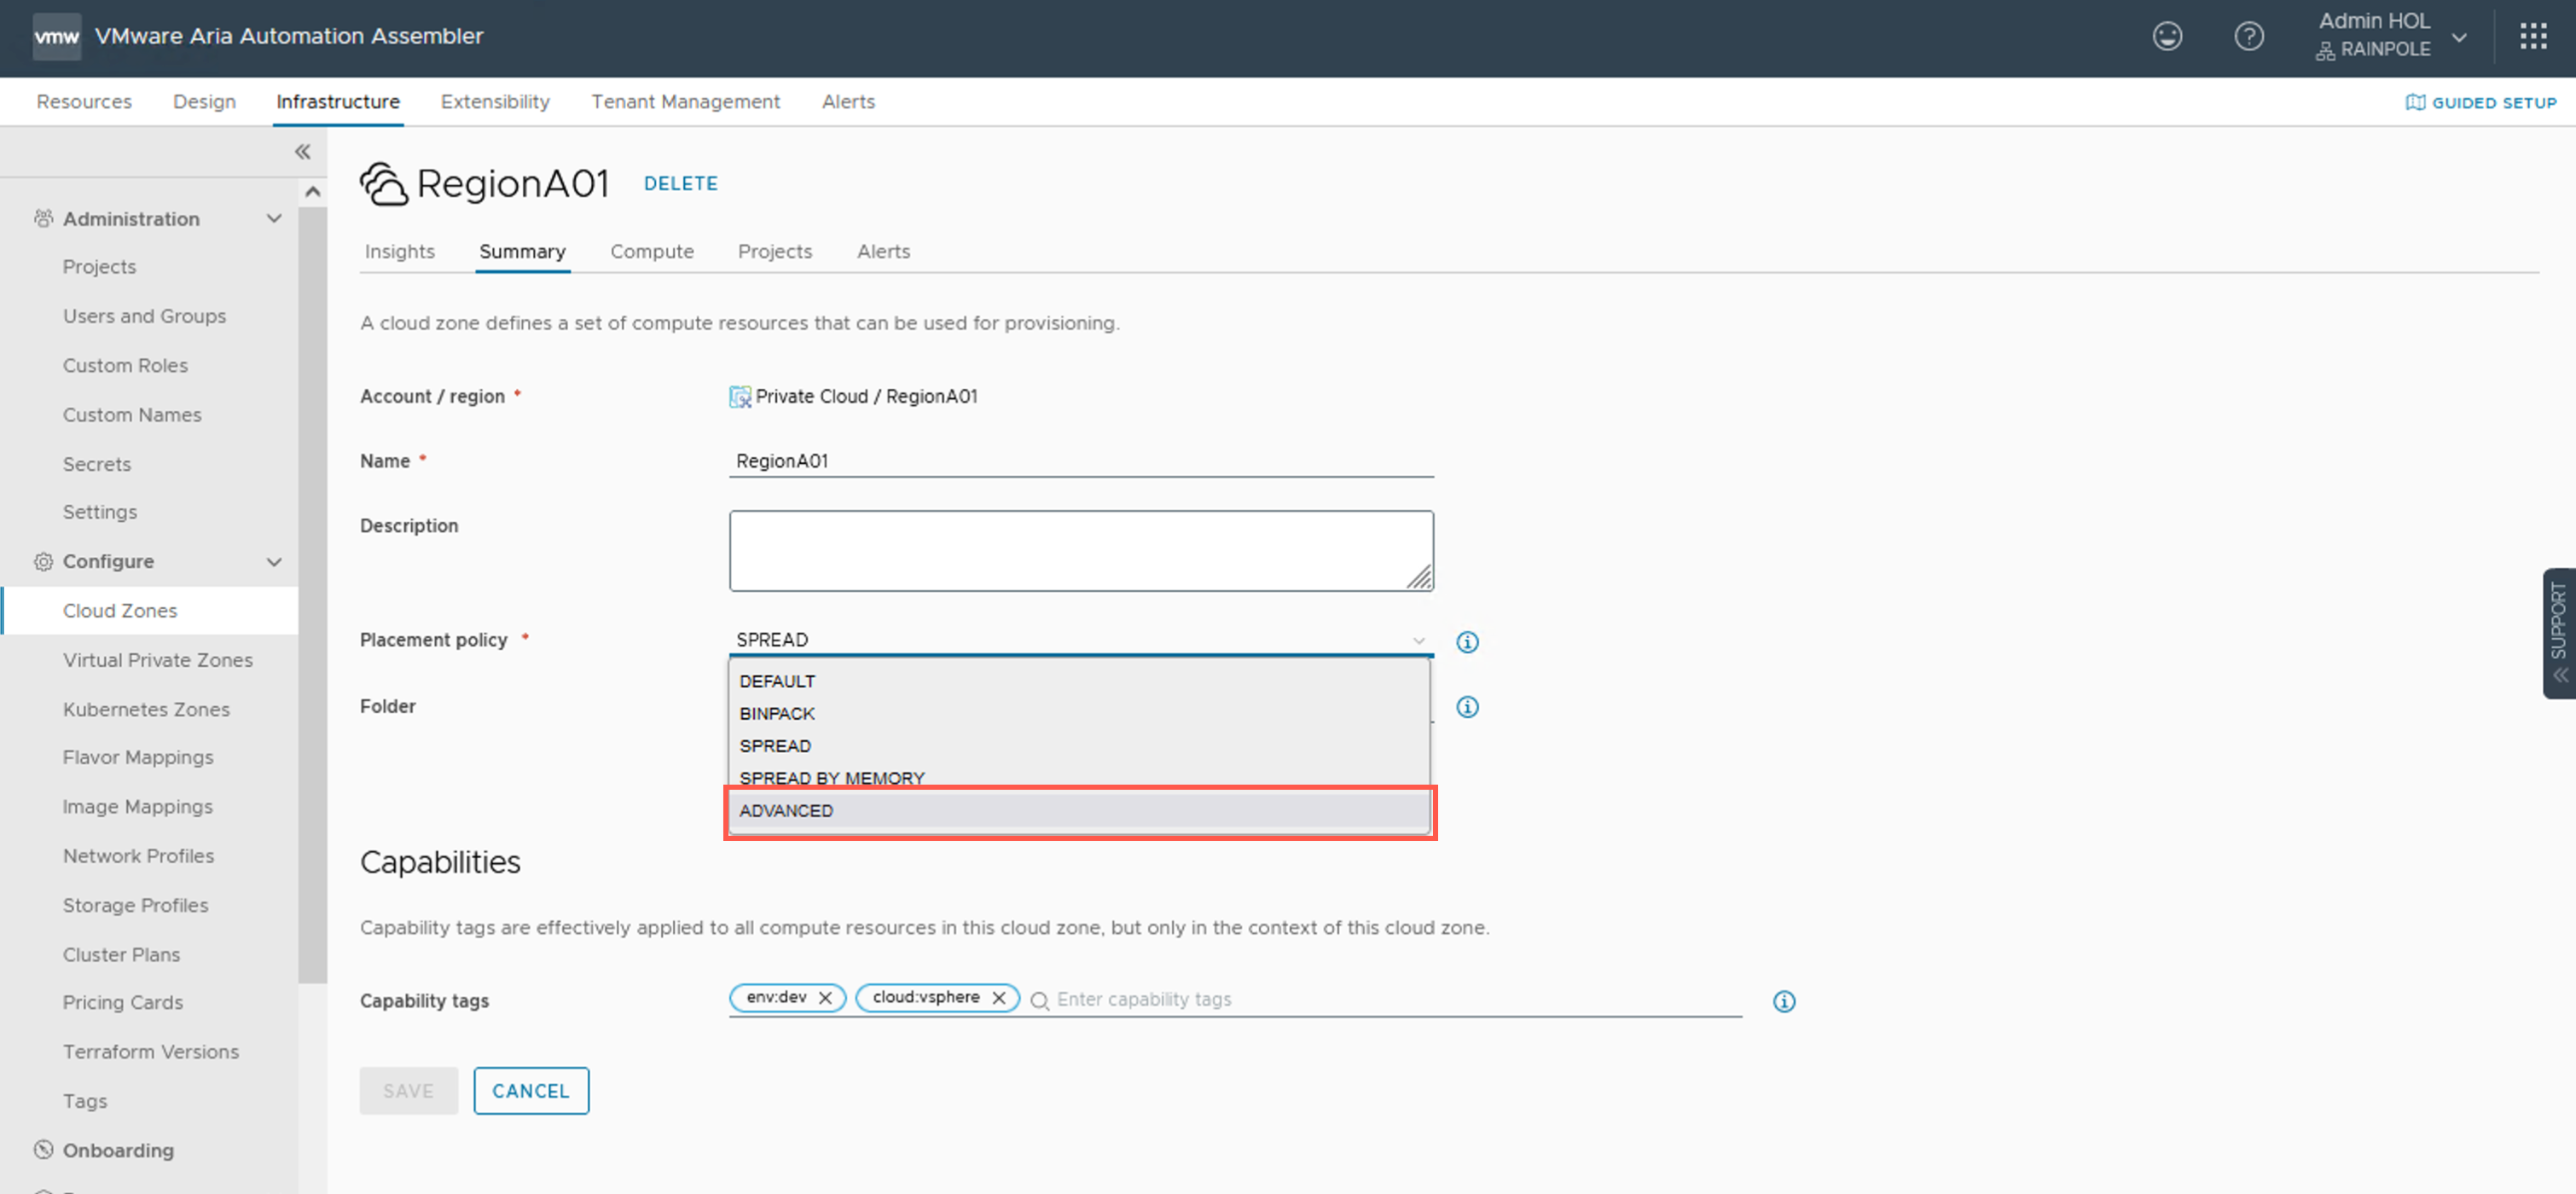
- At the the Placement Policy dropdown, select ADVANCED.
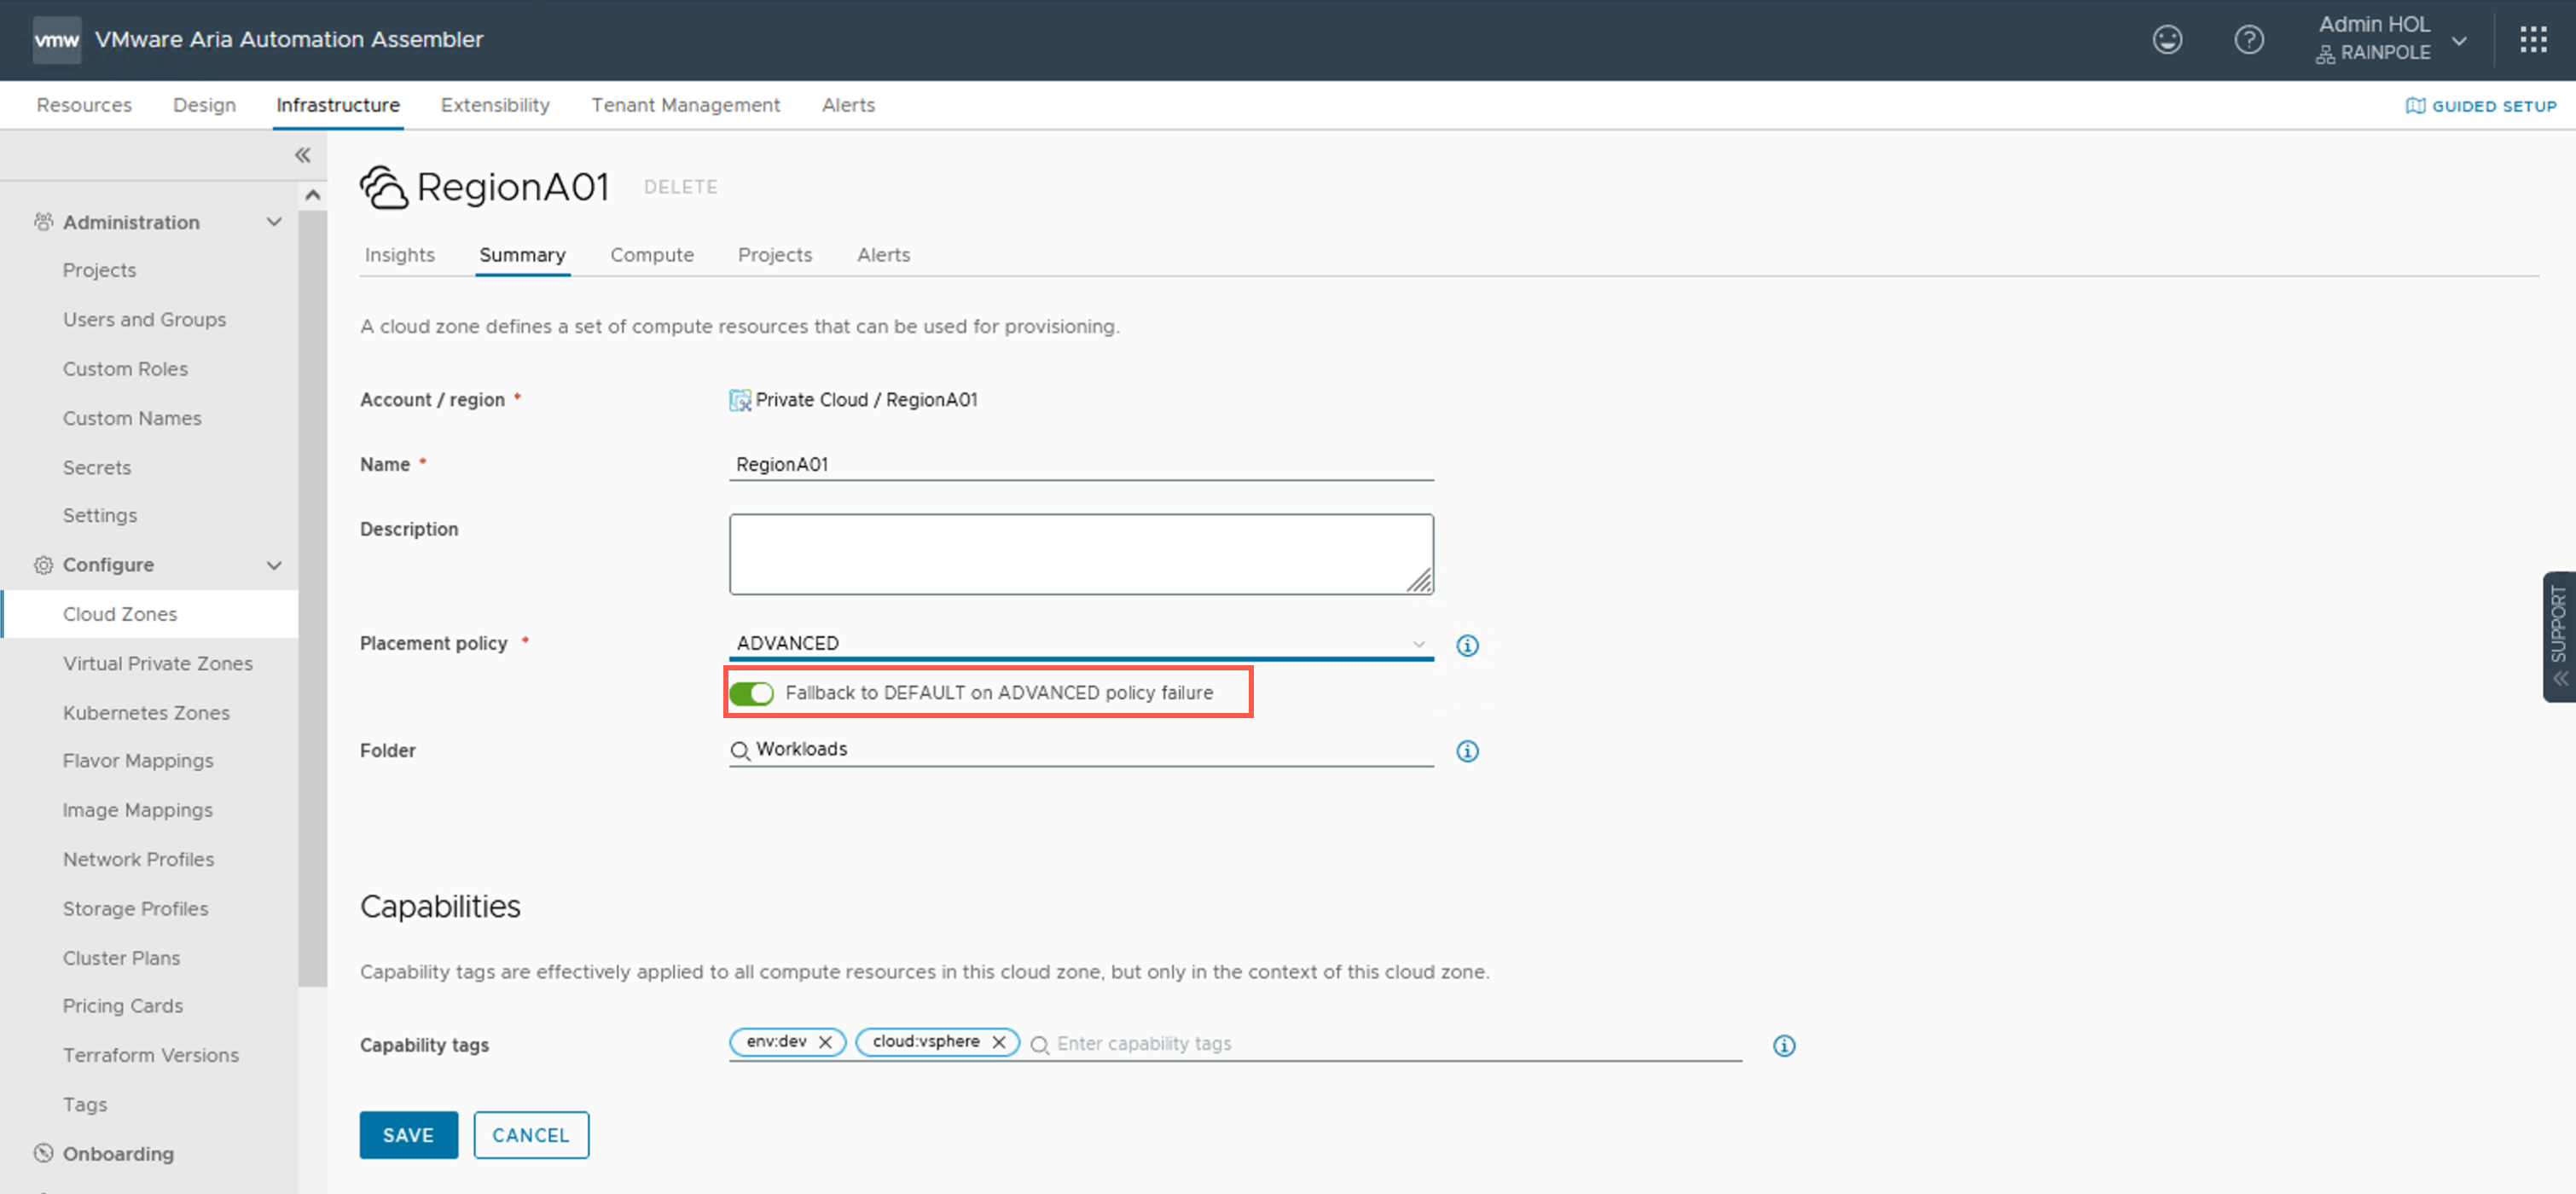
- (OPTIONAL) Ensure that the toggle for Fallback to DEFAULT on ADVANCED policy failure is ON.
- Click SAVE.
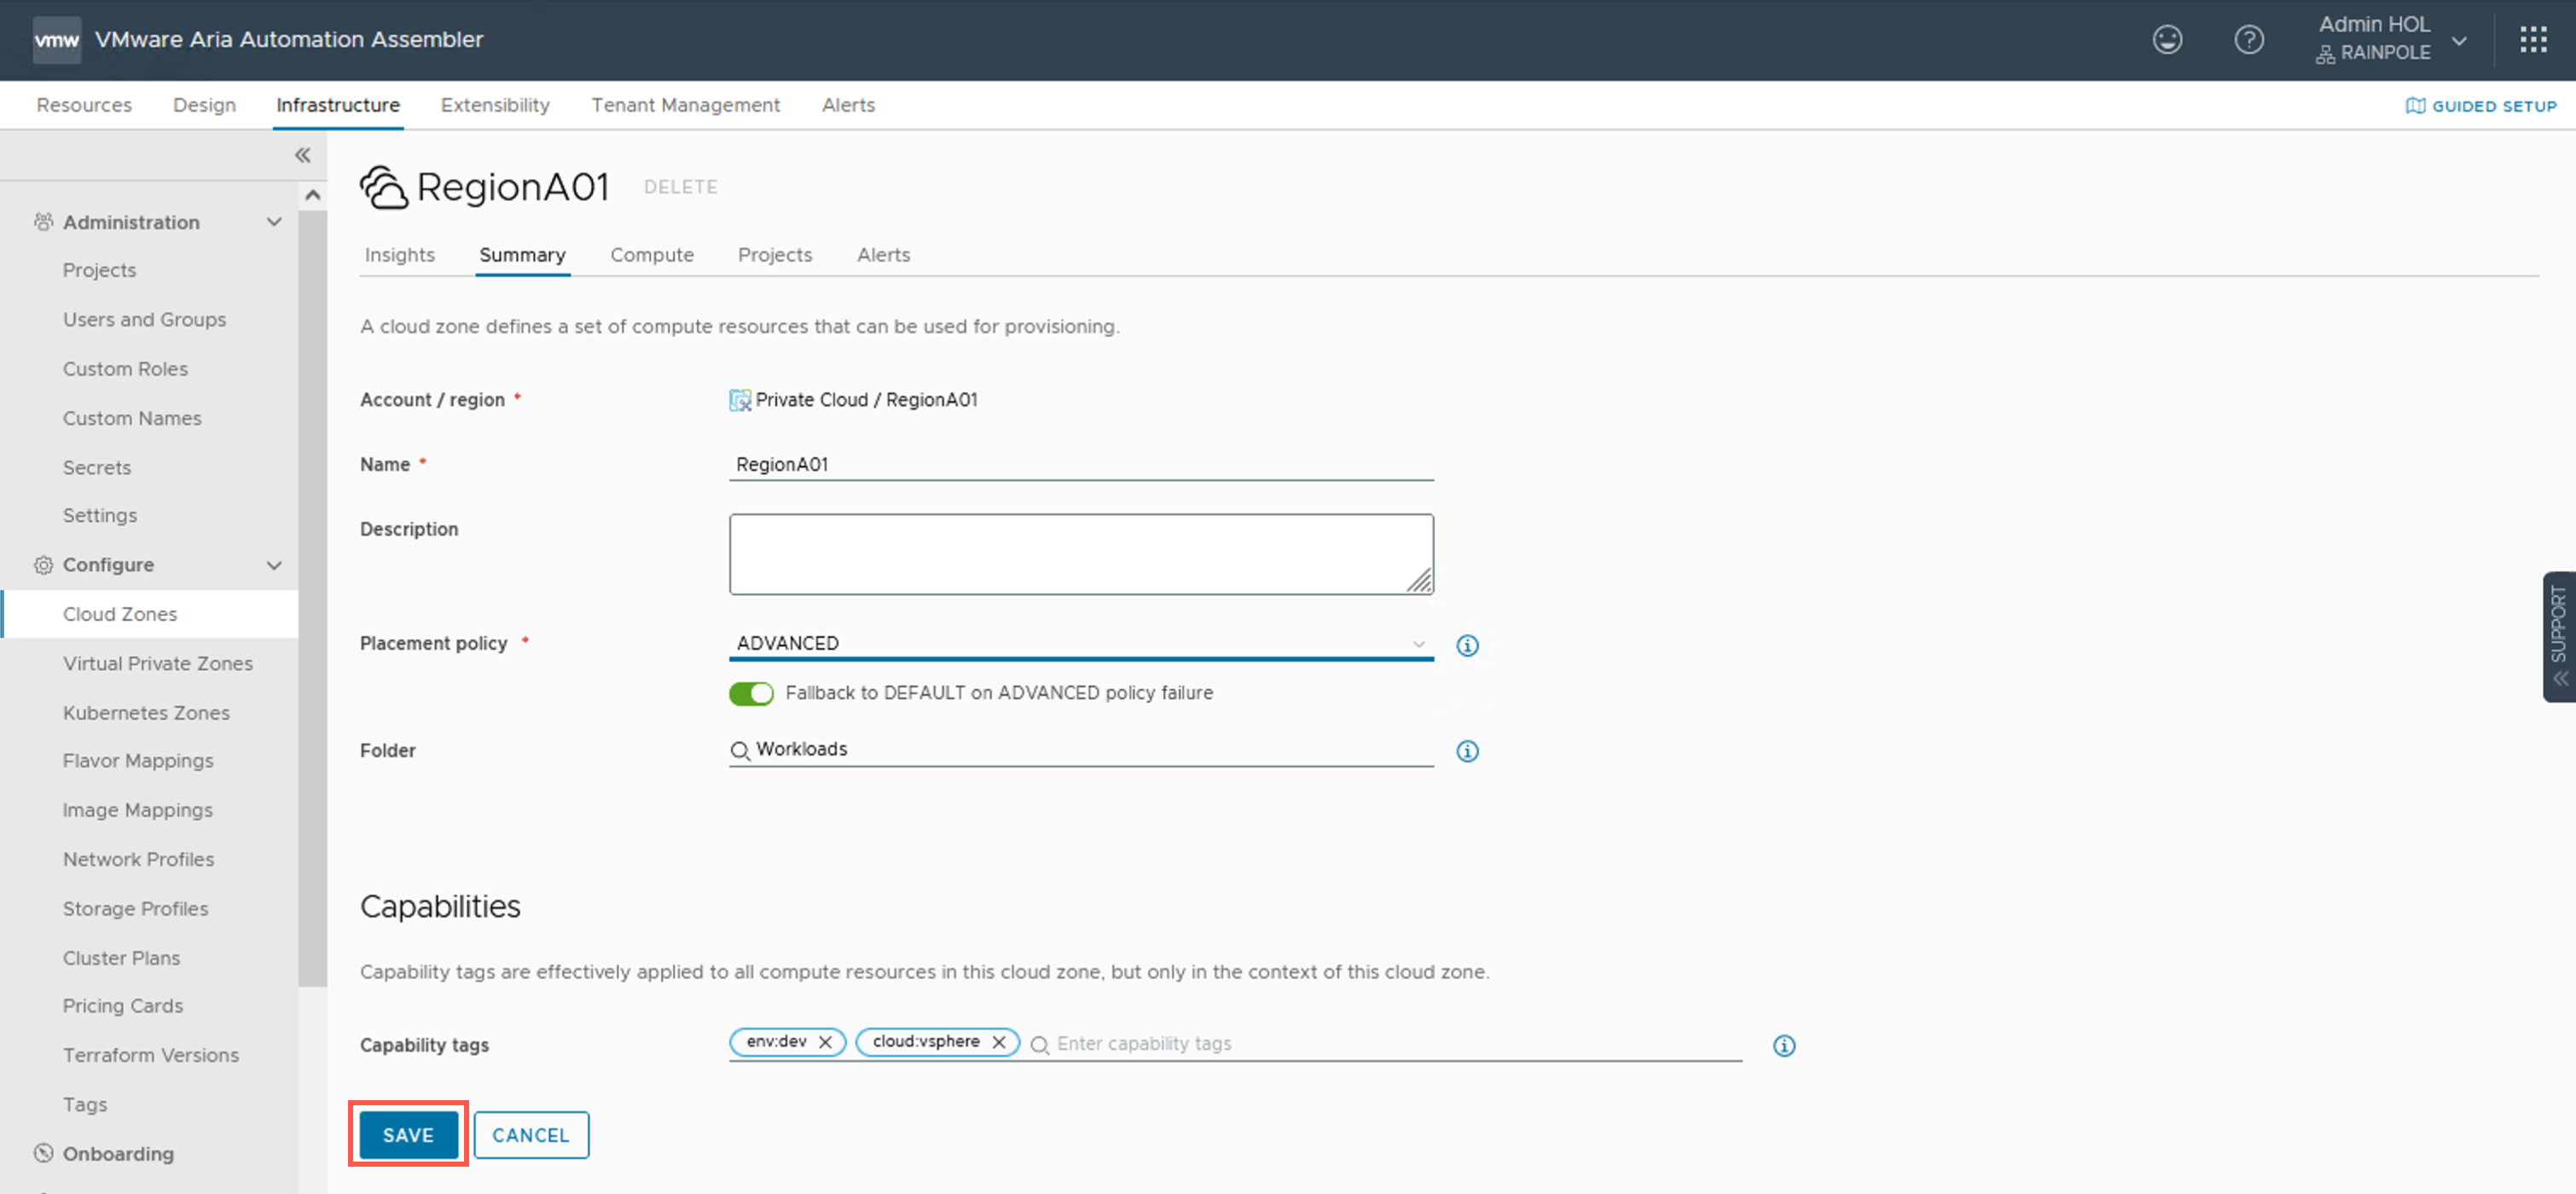
And there we have it! The Cloud Zone is now configured to use Workload Placement via VMware Aria Operations (rather than VMware Aria Automation) for the final workload placement decision.
The VMware official documentation on enabling Workload Placement can be found at How to enable workload placement
How do we configure allocation-based capacity metrics in VMware Aria Operations?
The steps for configuring Advanced Workload Placement in VMware Aria Automation are identical whether we decide to use the Allocation or Demand Models in VMware Aria Operations. We either need to amend the existing/active VMware Aria Operations policy (not recommended), clone the policy and amend it with the new settings or create a new one and inherit the existing active policy settings.
The prerequisites are:
- In VMware Aria Automation:
- The VMware Aria Operations integration must be successfully configured, see Integrating with VMware Aria Operations .
- In VMware Aria Operations:
- A Cloud Account must be configured for the target vCenter Server with the appropriate credentials, see Privileges Required for Configuring a vCenter Adapter Instance .
- (OPTIONAL) The VMware Aria Automation adapter should be configured to help troubleshoot issues in VMware Aria Automation, see Configuring VMware Aria Automation with VMware Aria Operations .
Walkthrough
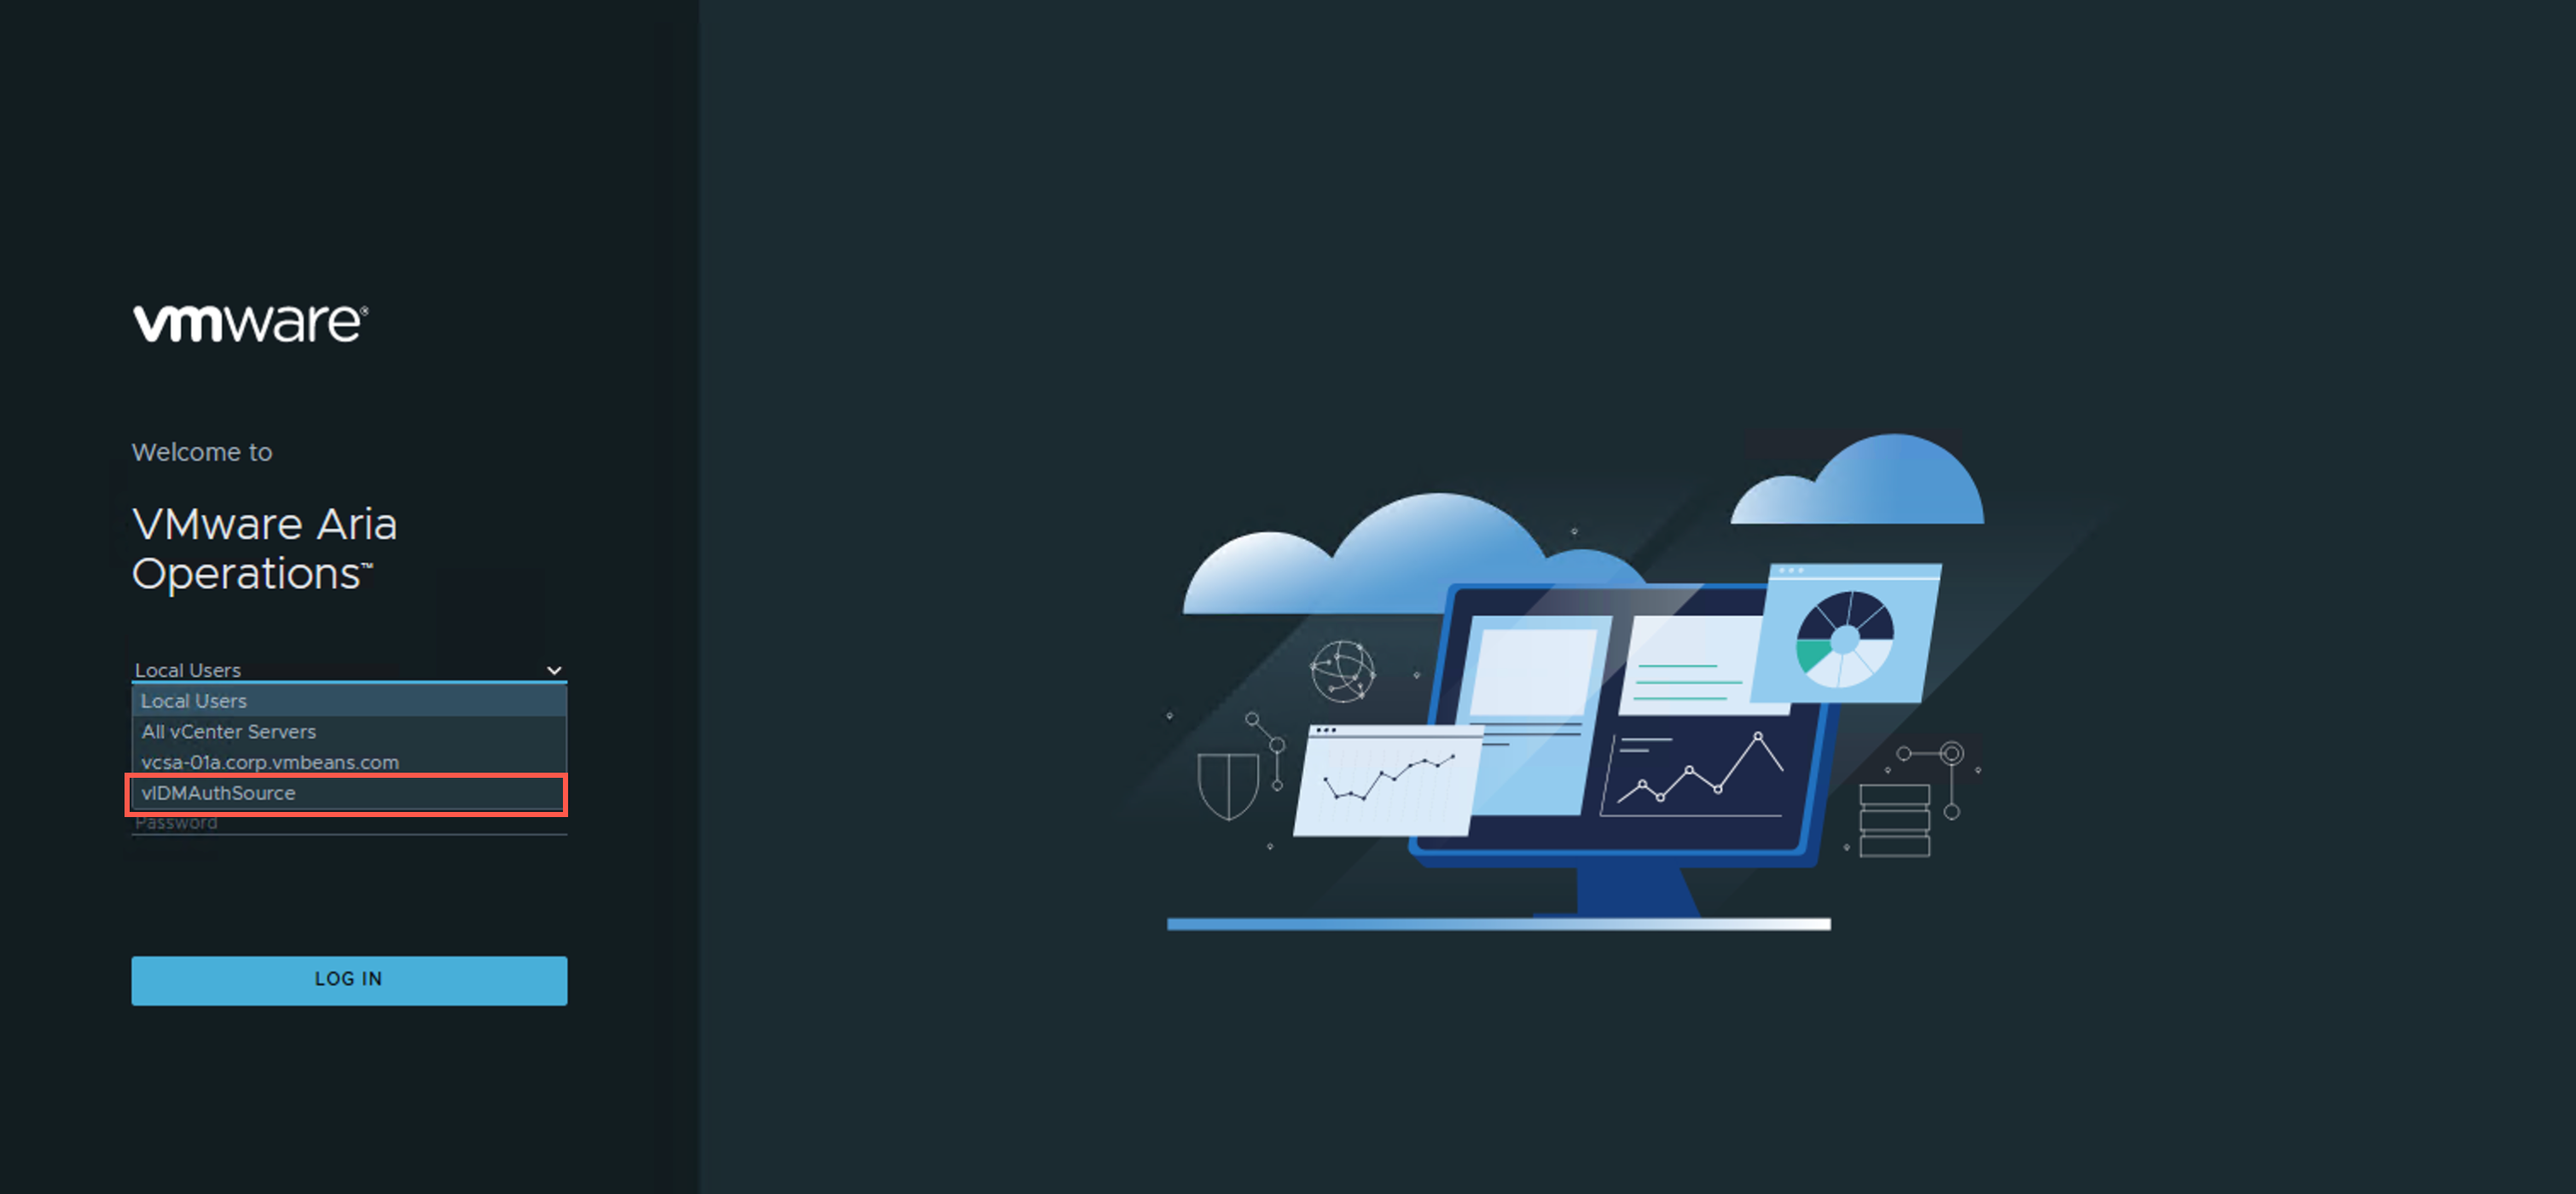
- Navigate to https://<aria-operations.fqdn>.
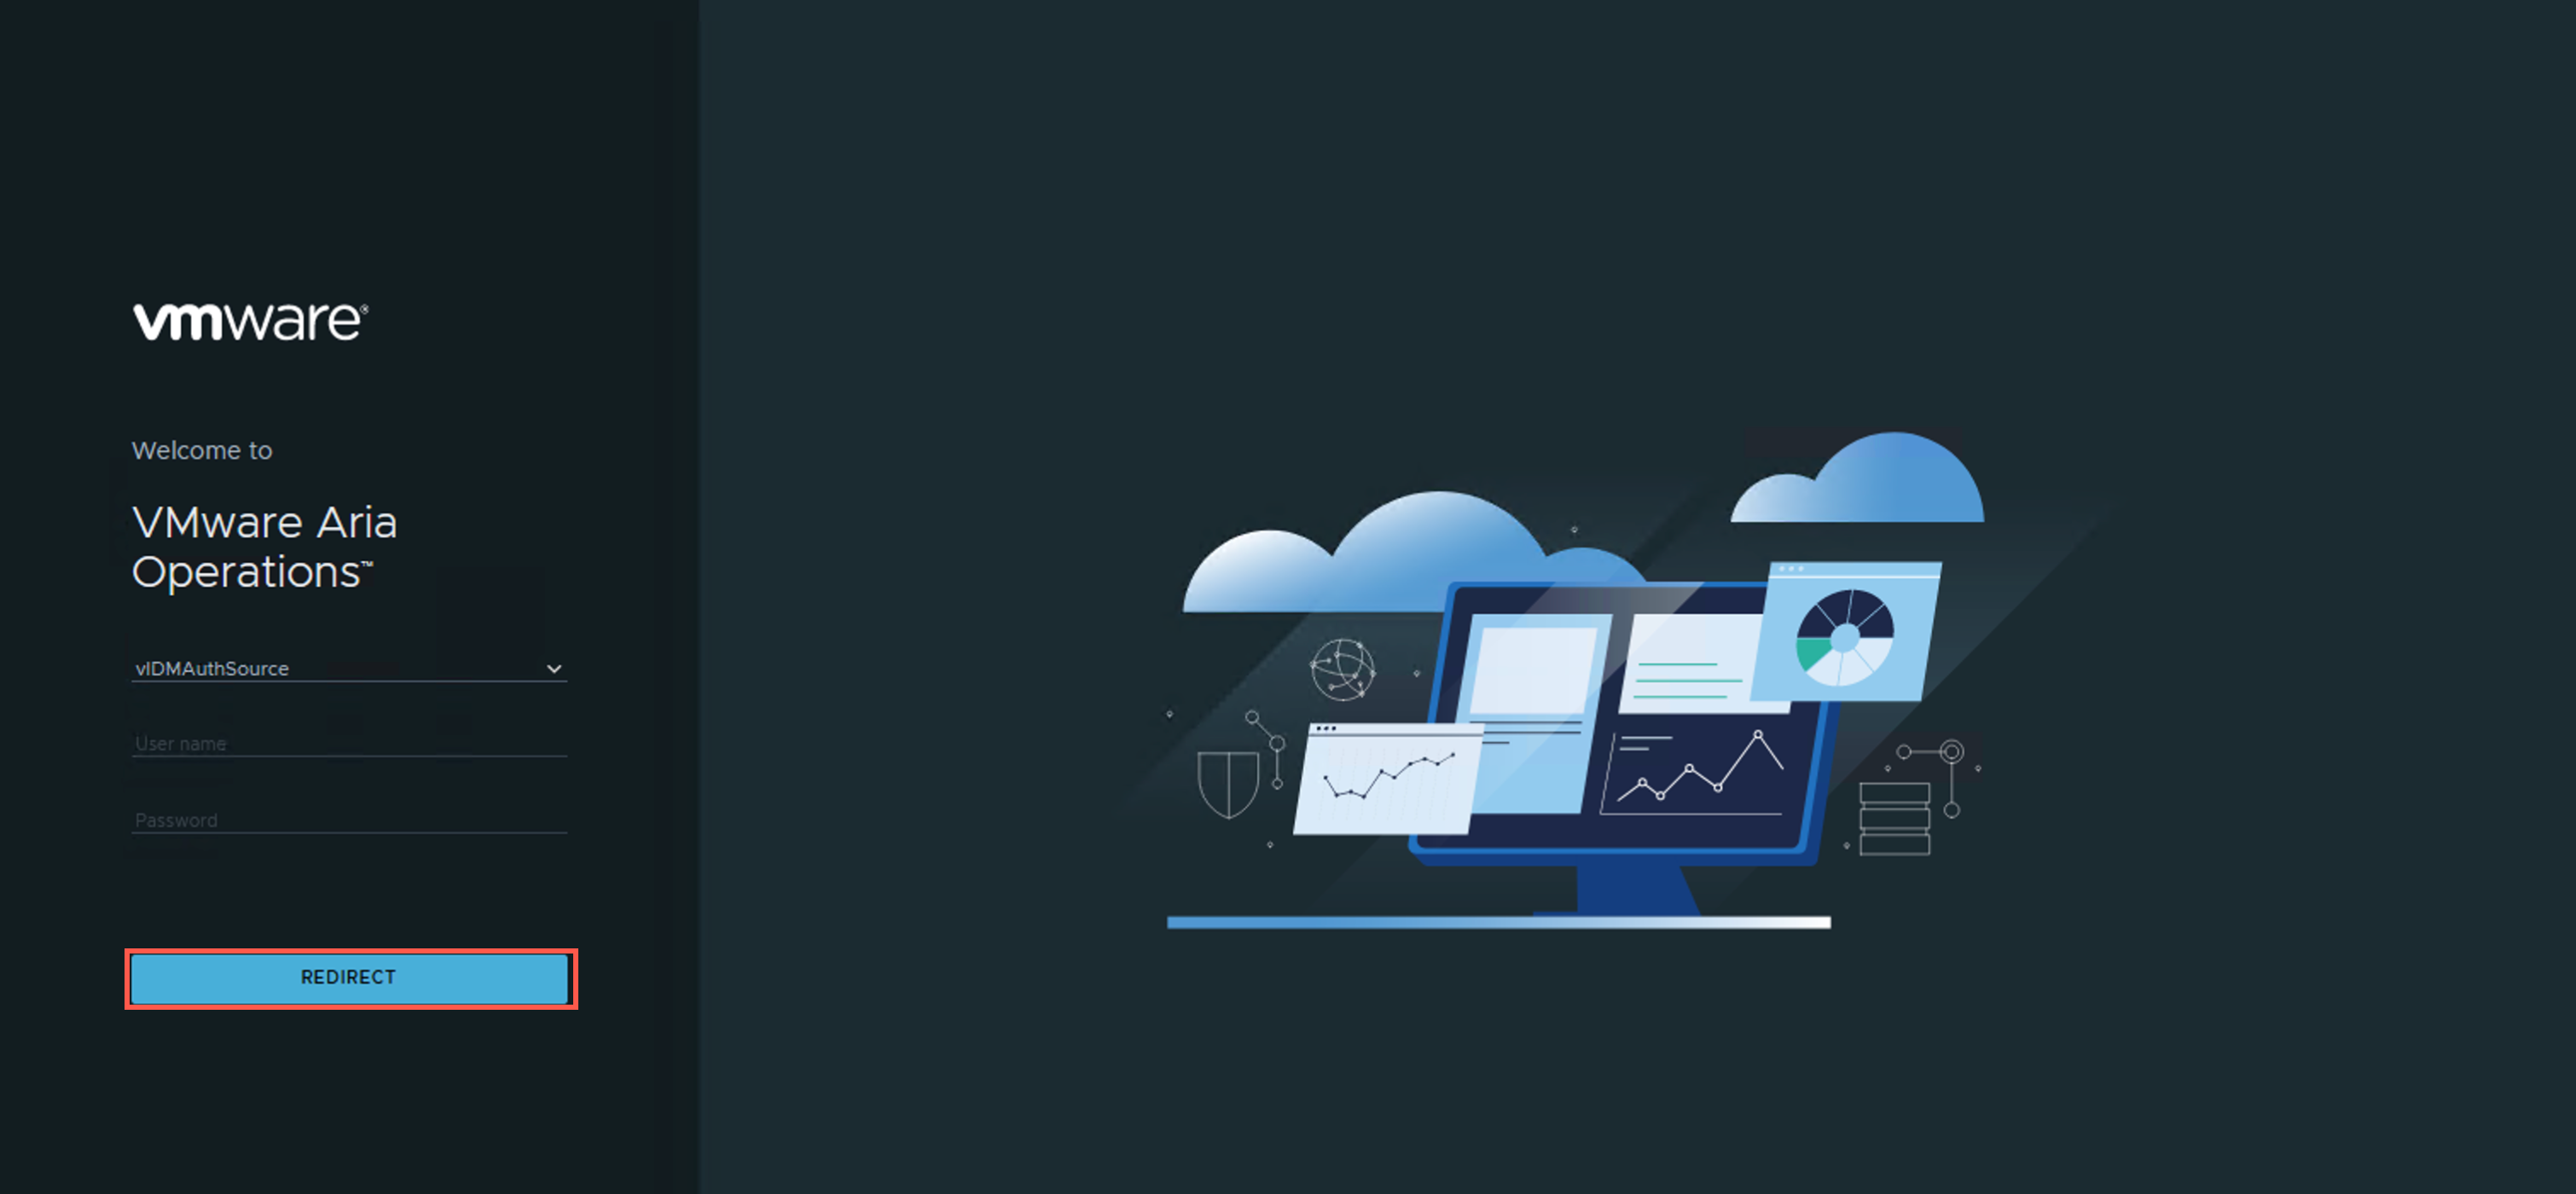
- At the VMware Aria Operations login screen, select vIDMAuthSource from the dropdown of available identity sources.
- At the VMware Aria Operations login screen, click REDIRECT.
- At the VMware Workspace ONE Access screen, enter the administrative username and password and then click Sign In to log into VMware Aria Automation.

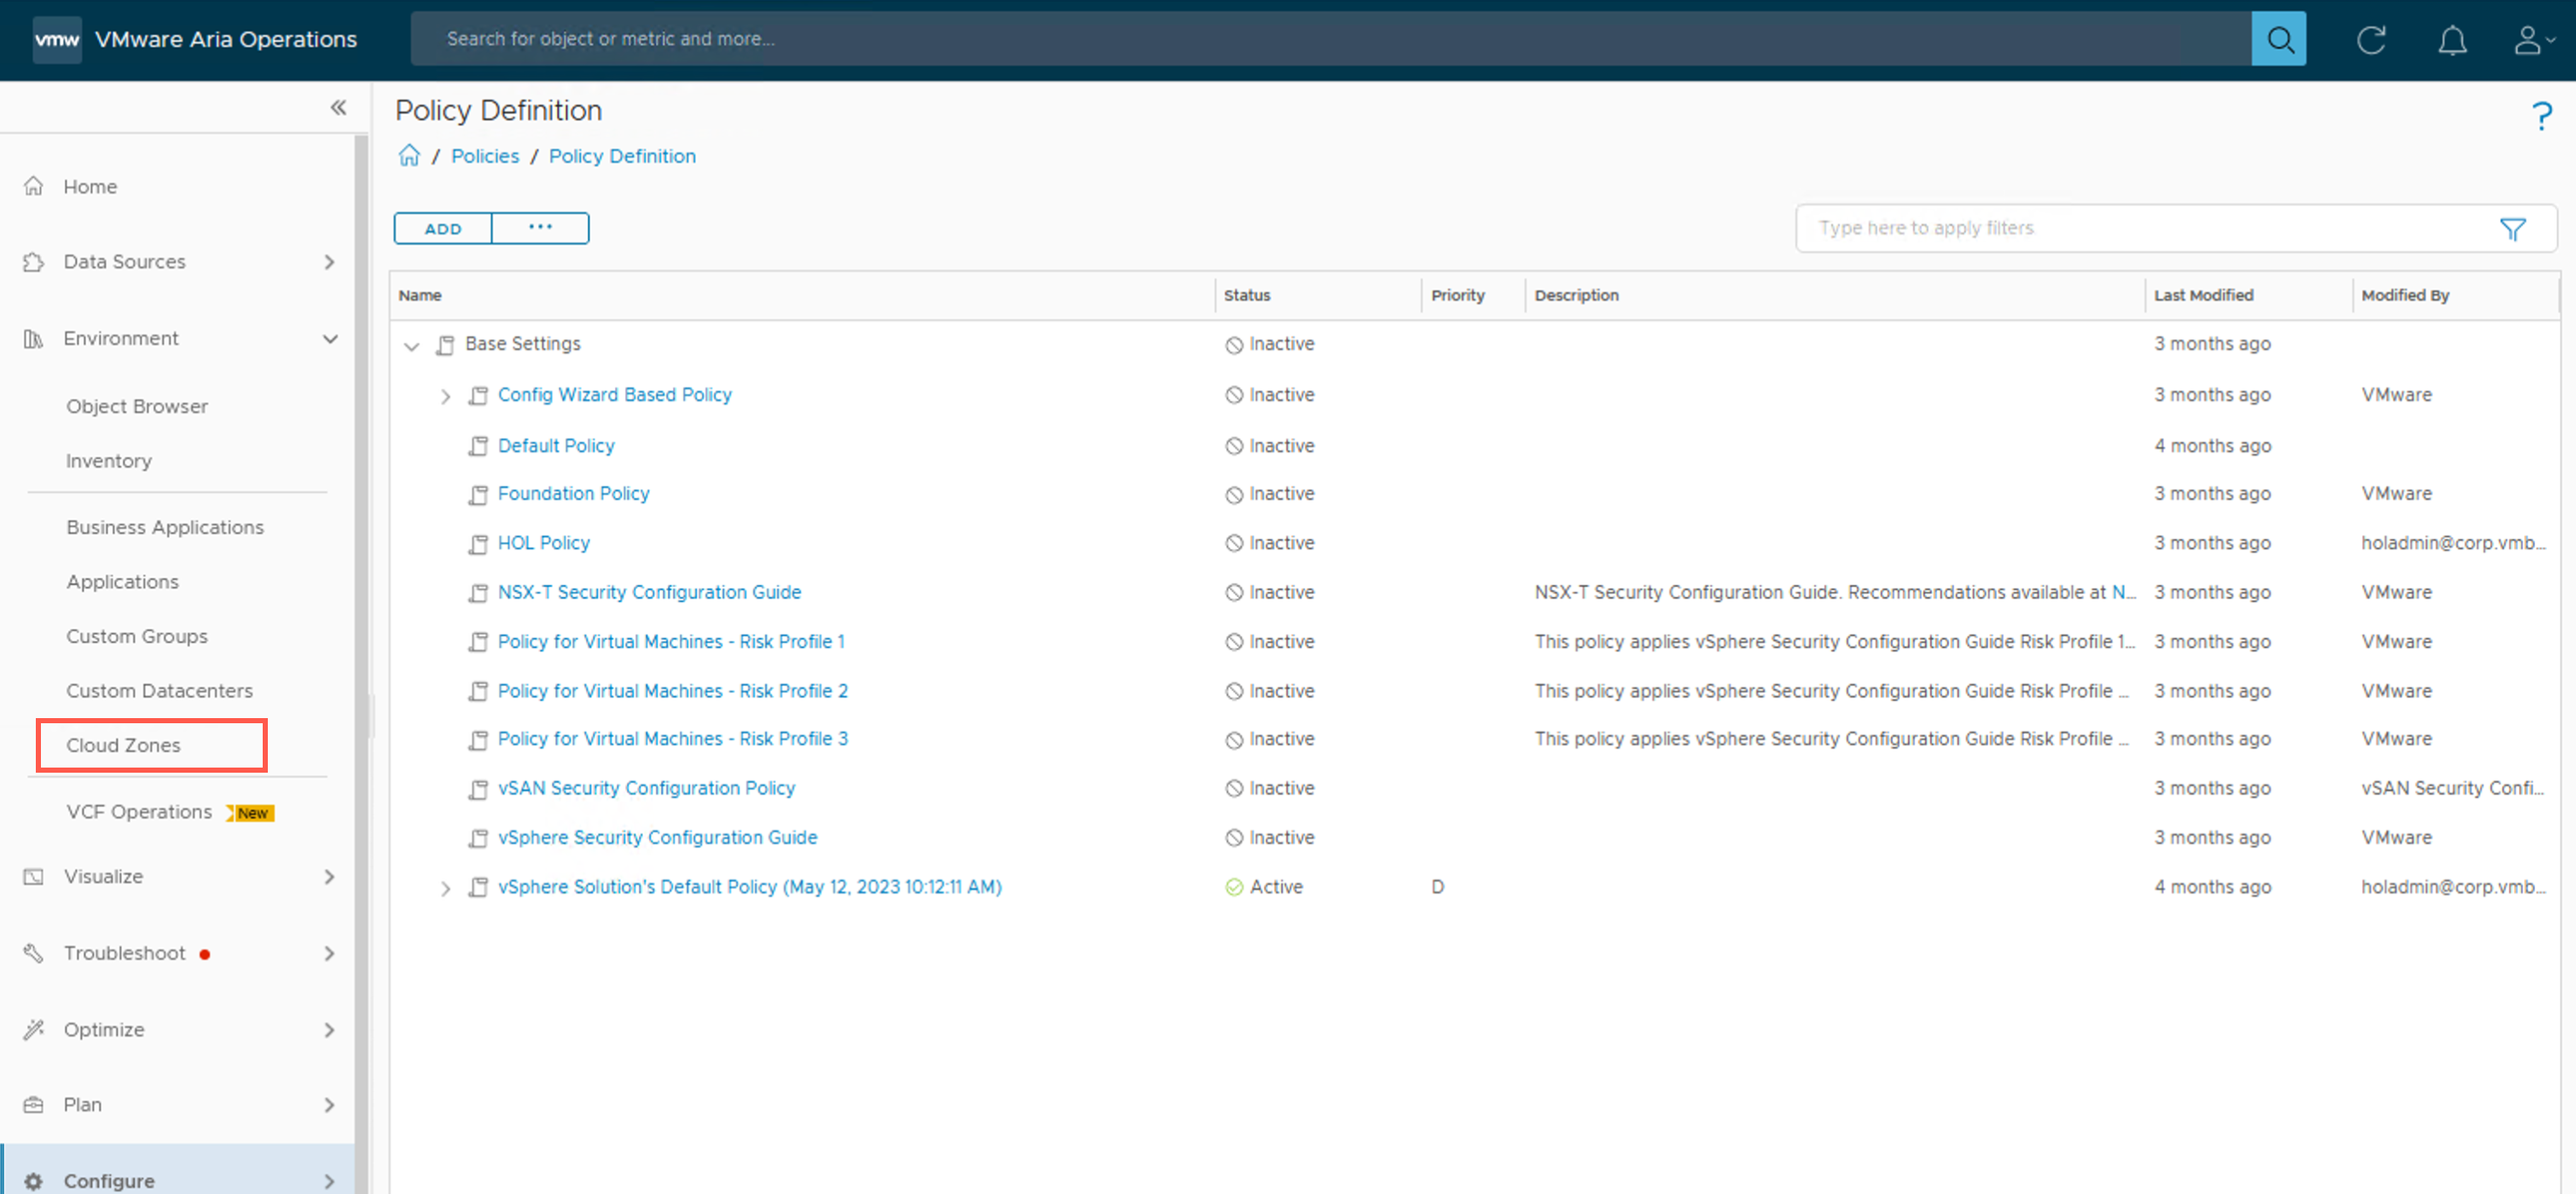
- Under Configure, click Policies.
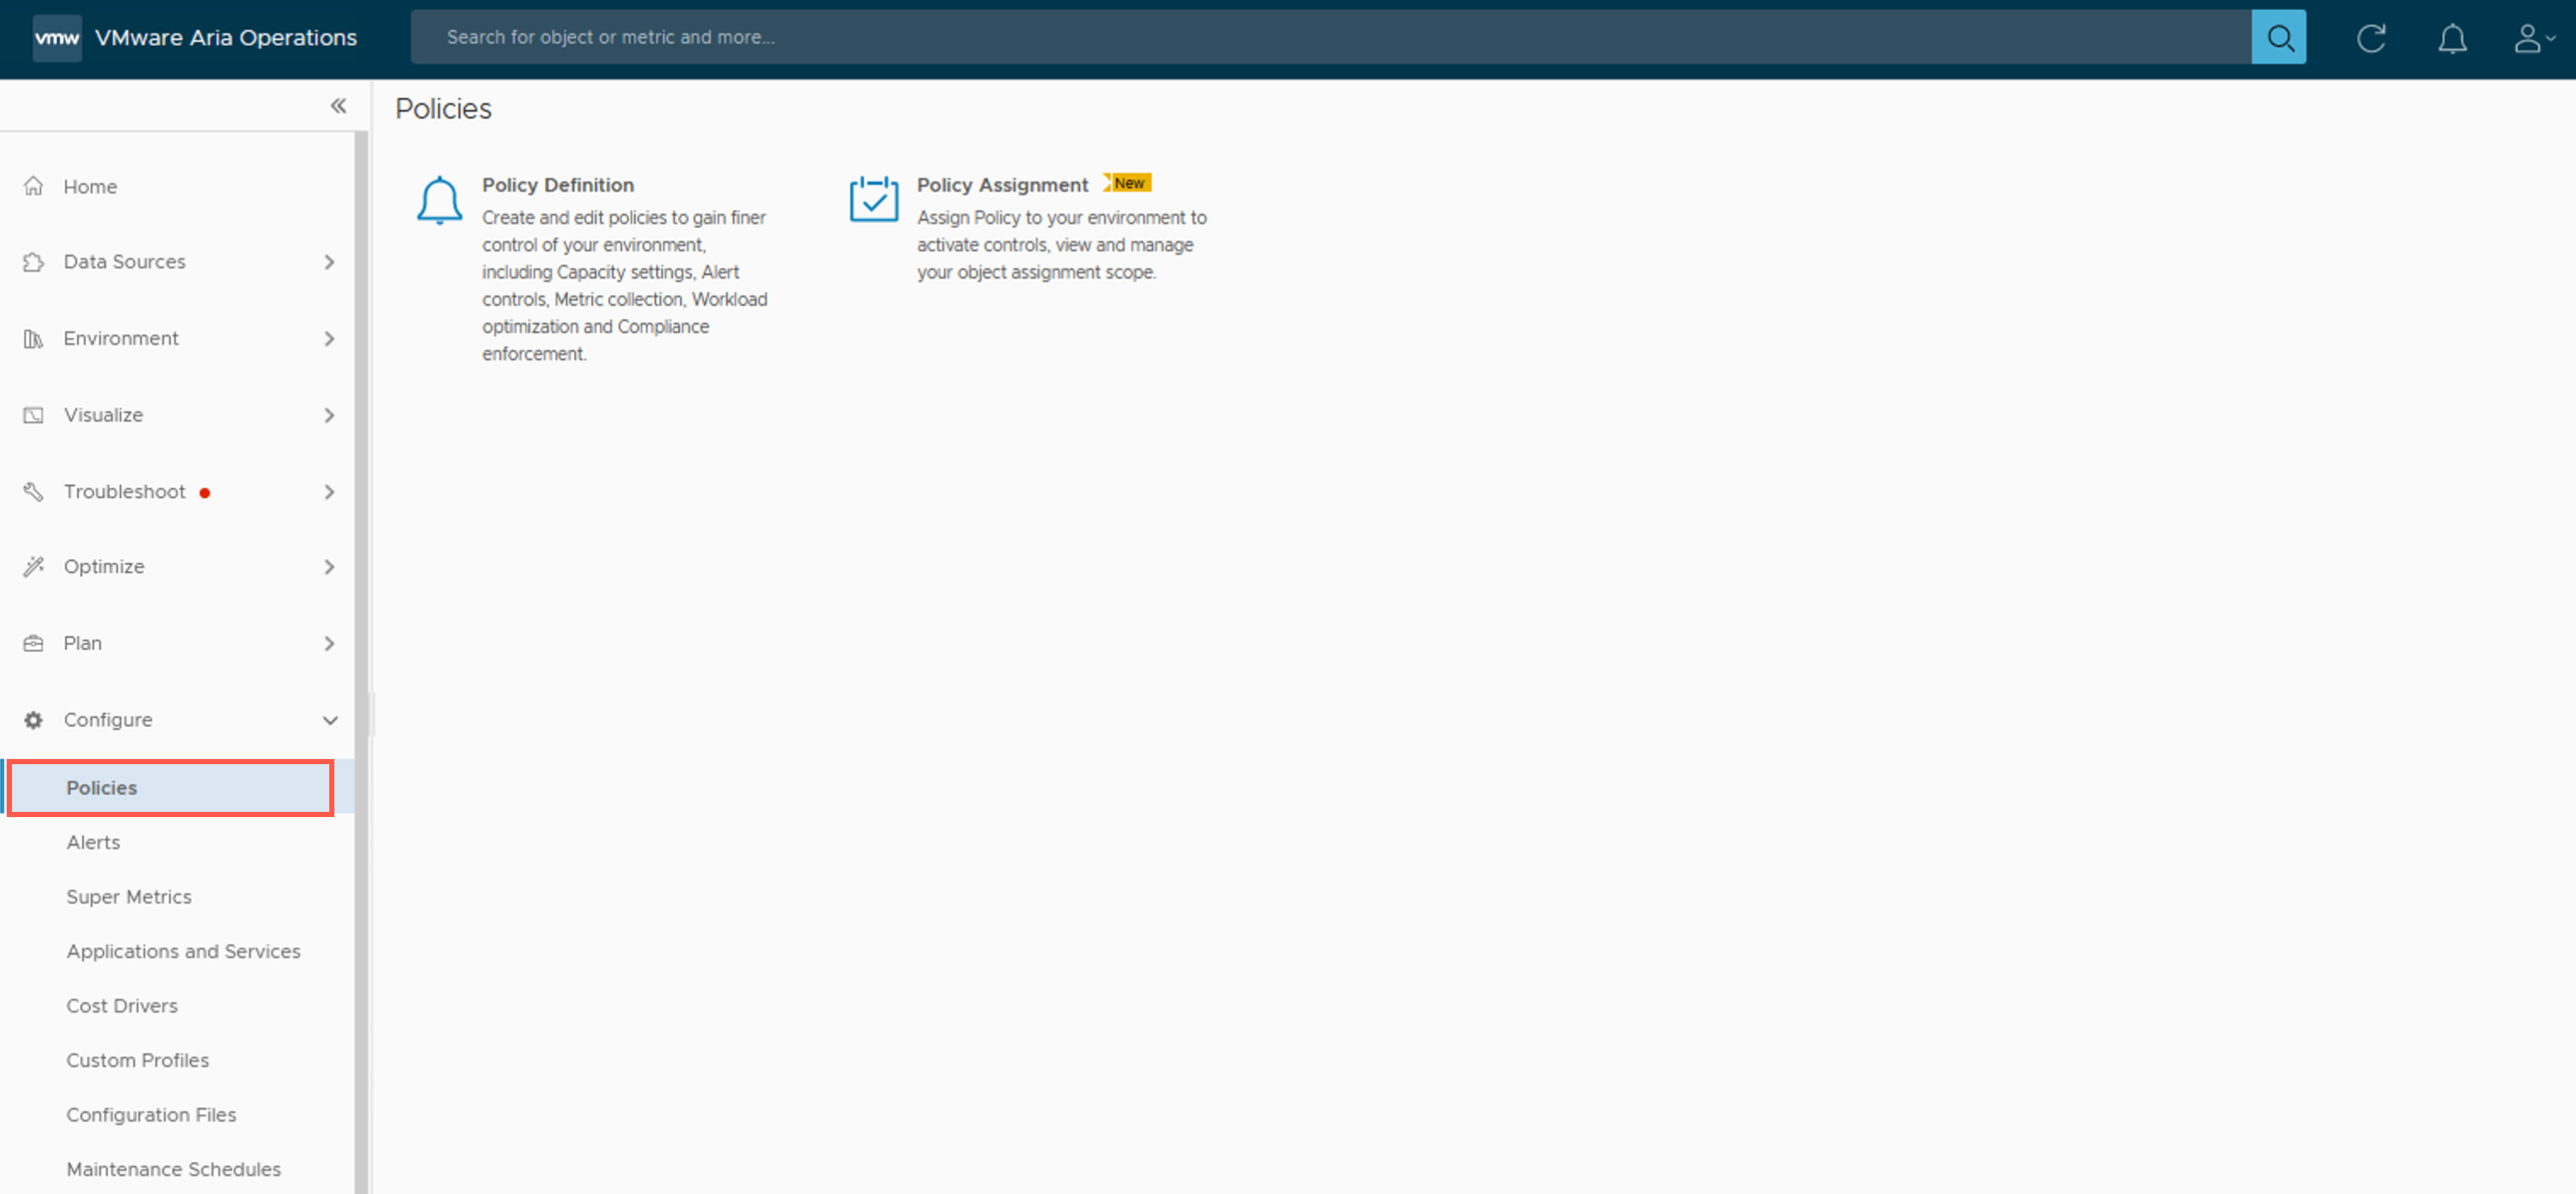
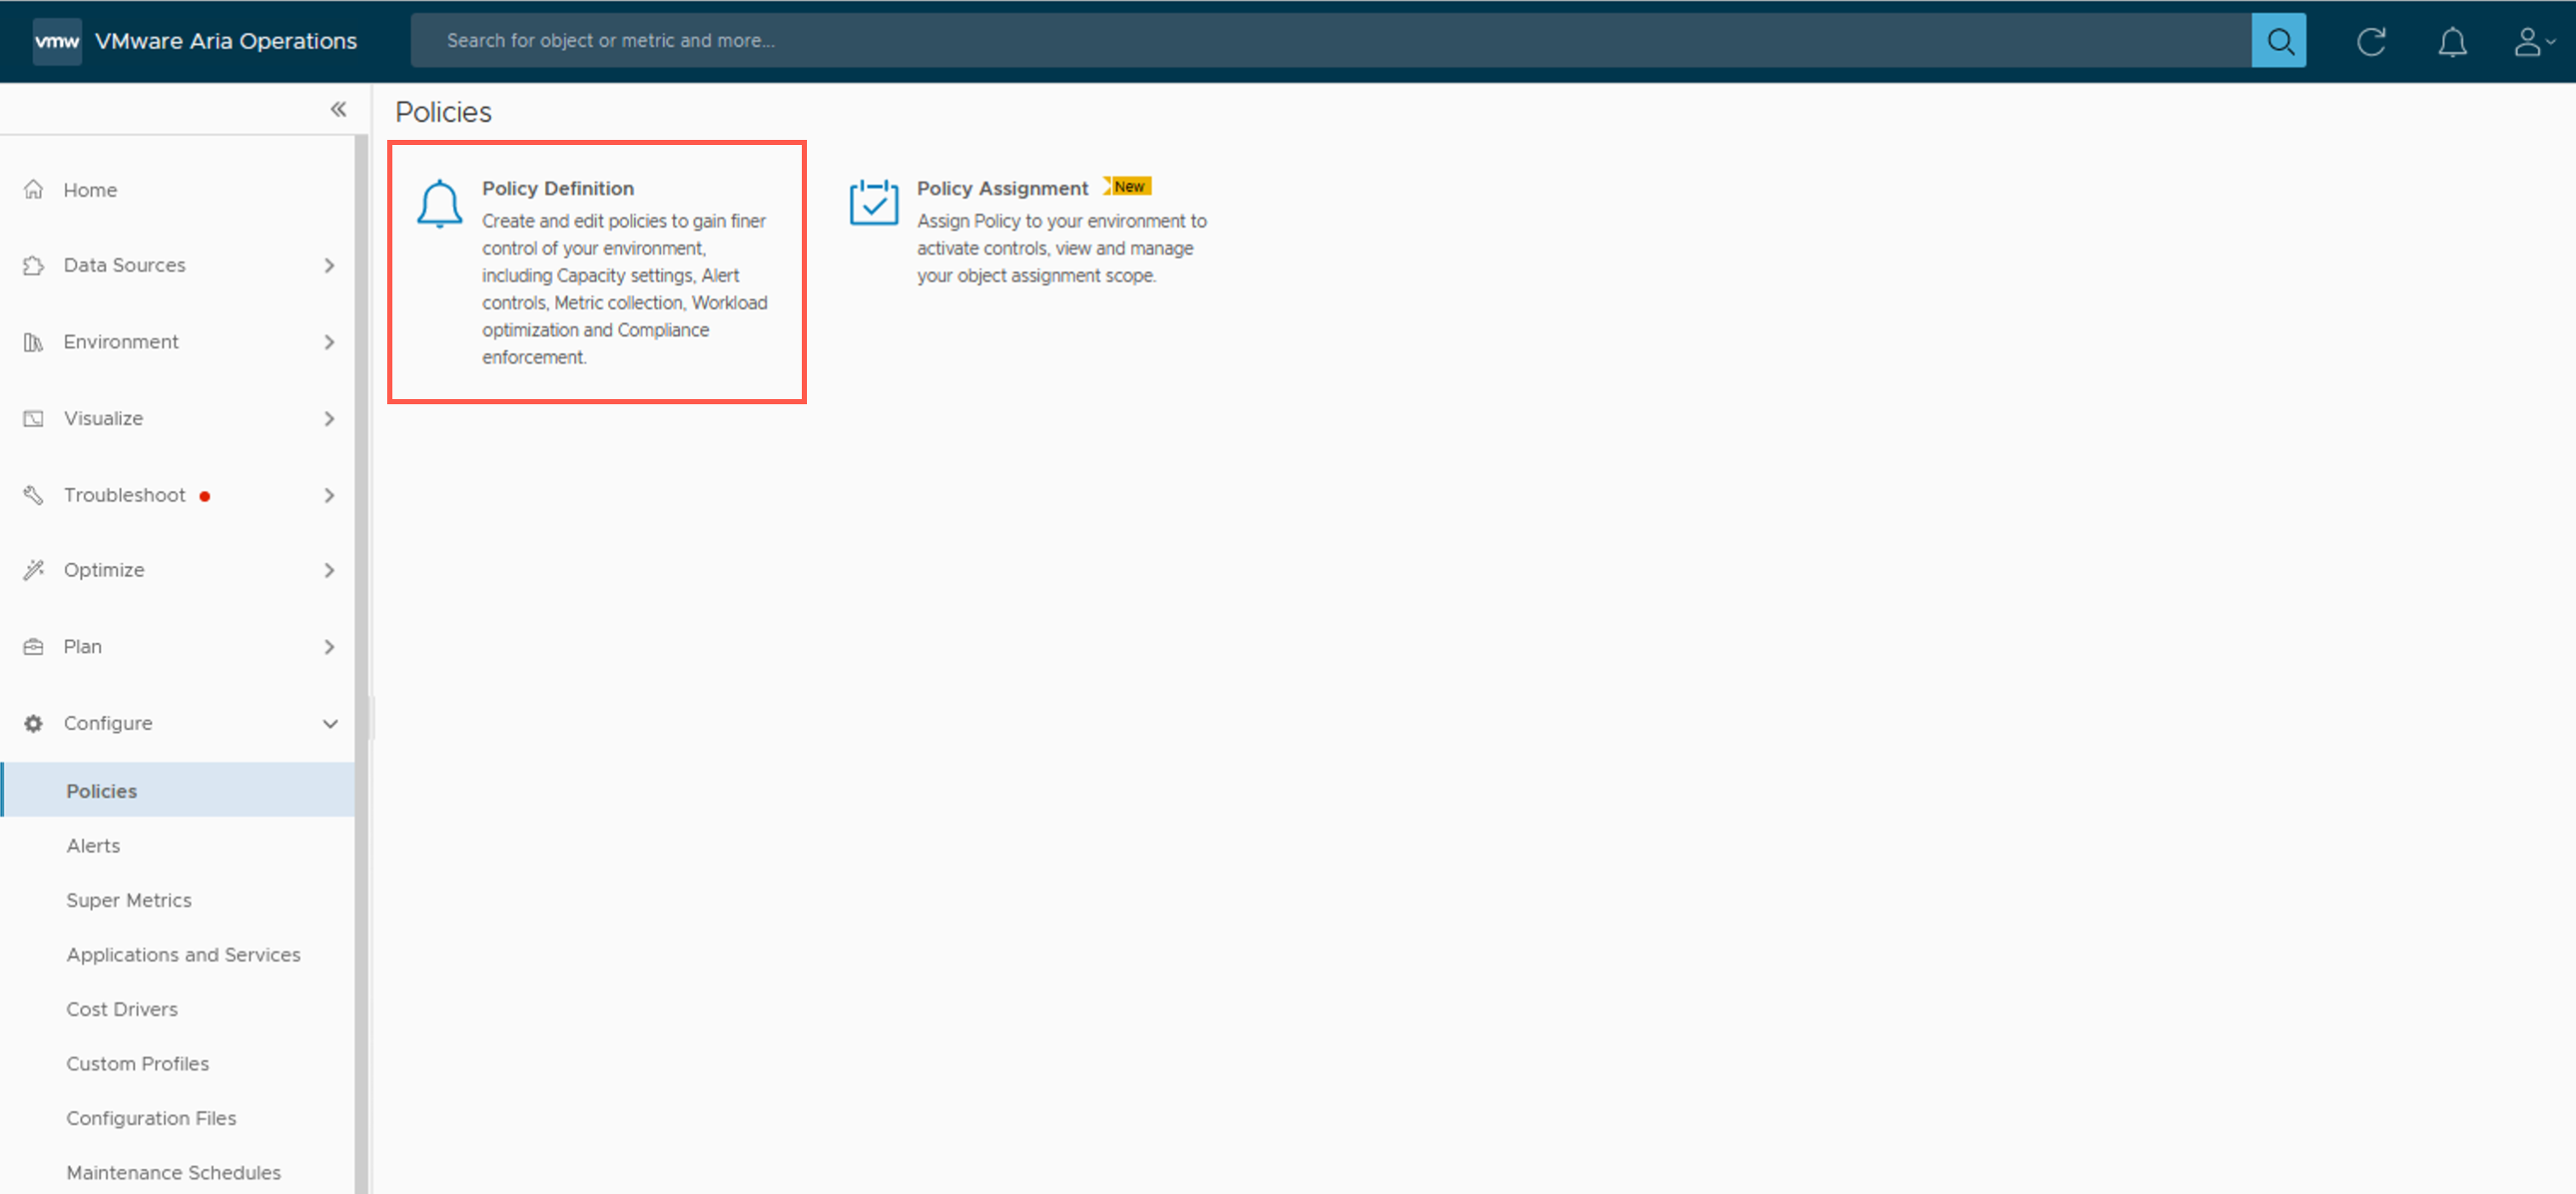
- At the Policies screen, click Policy Definition.
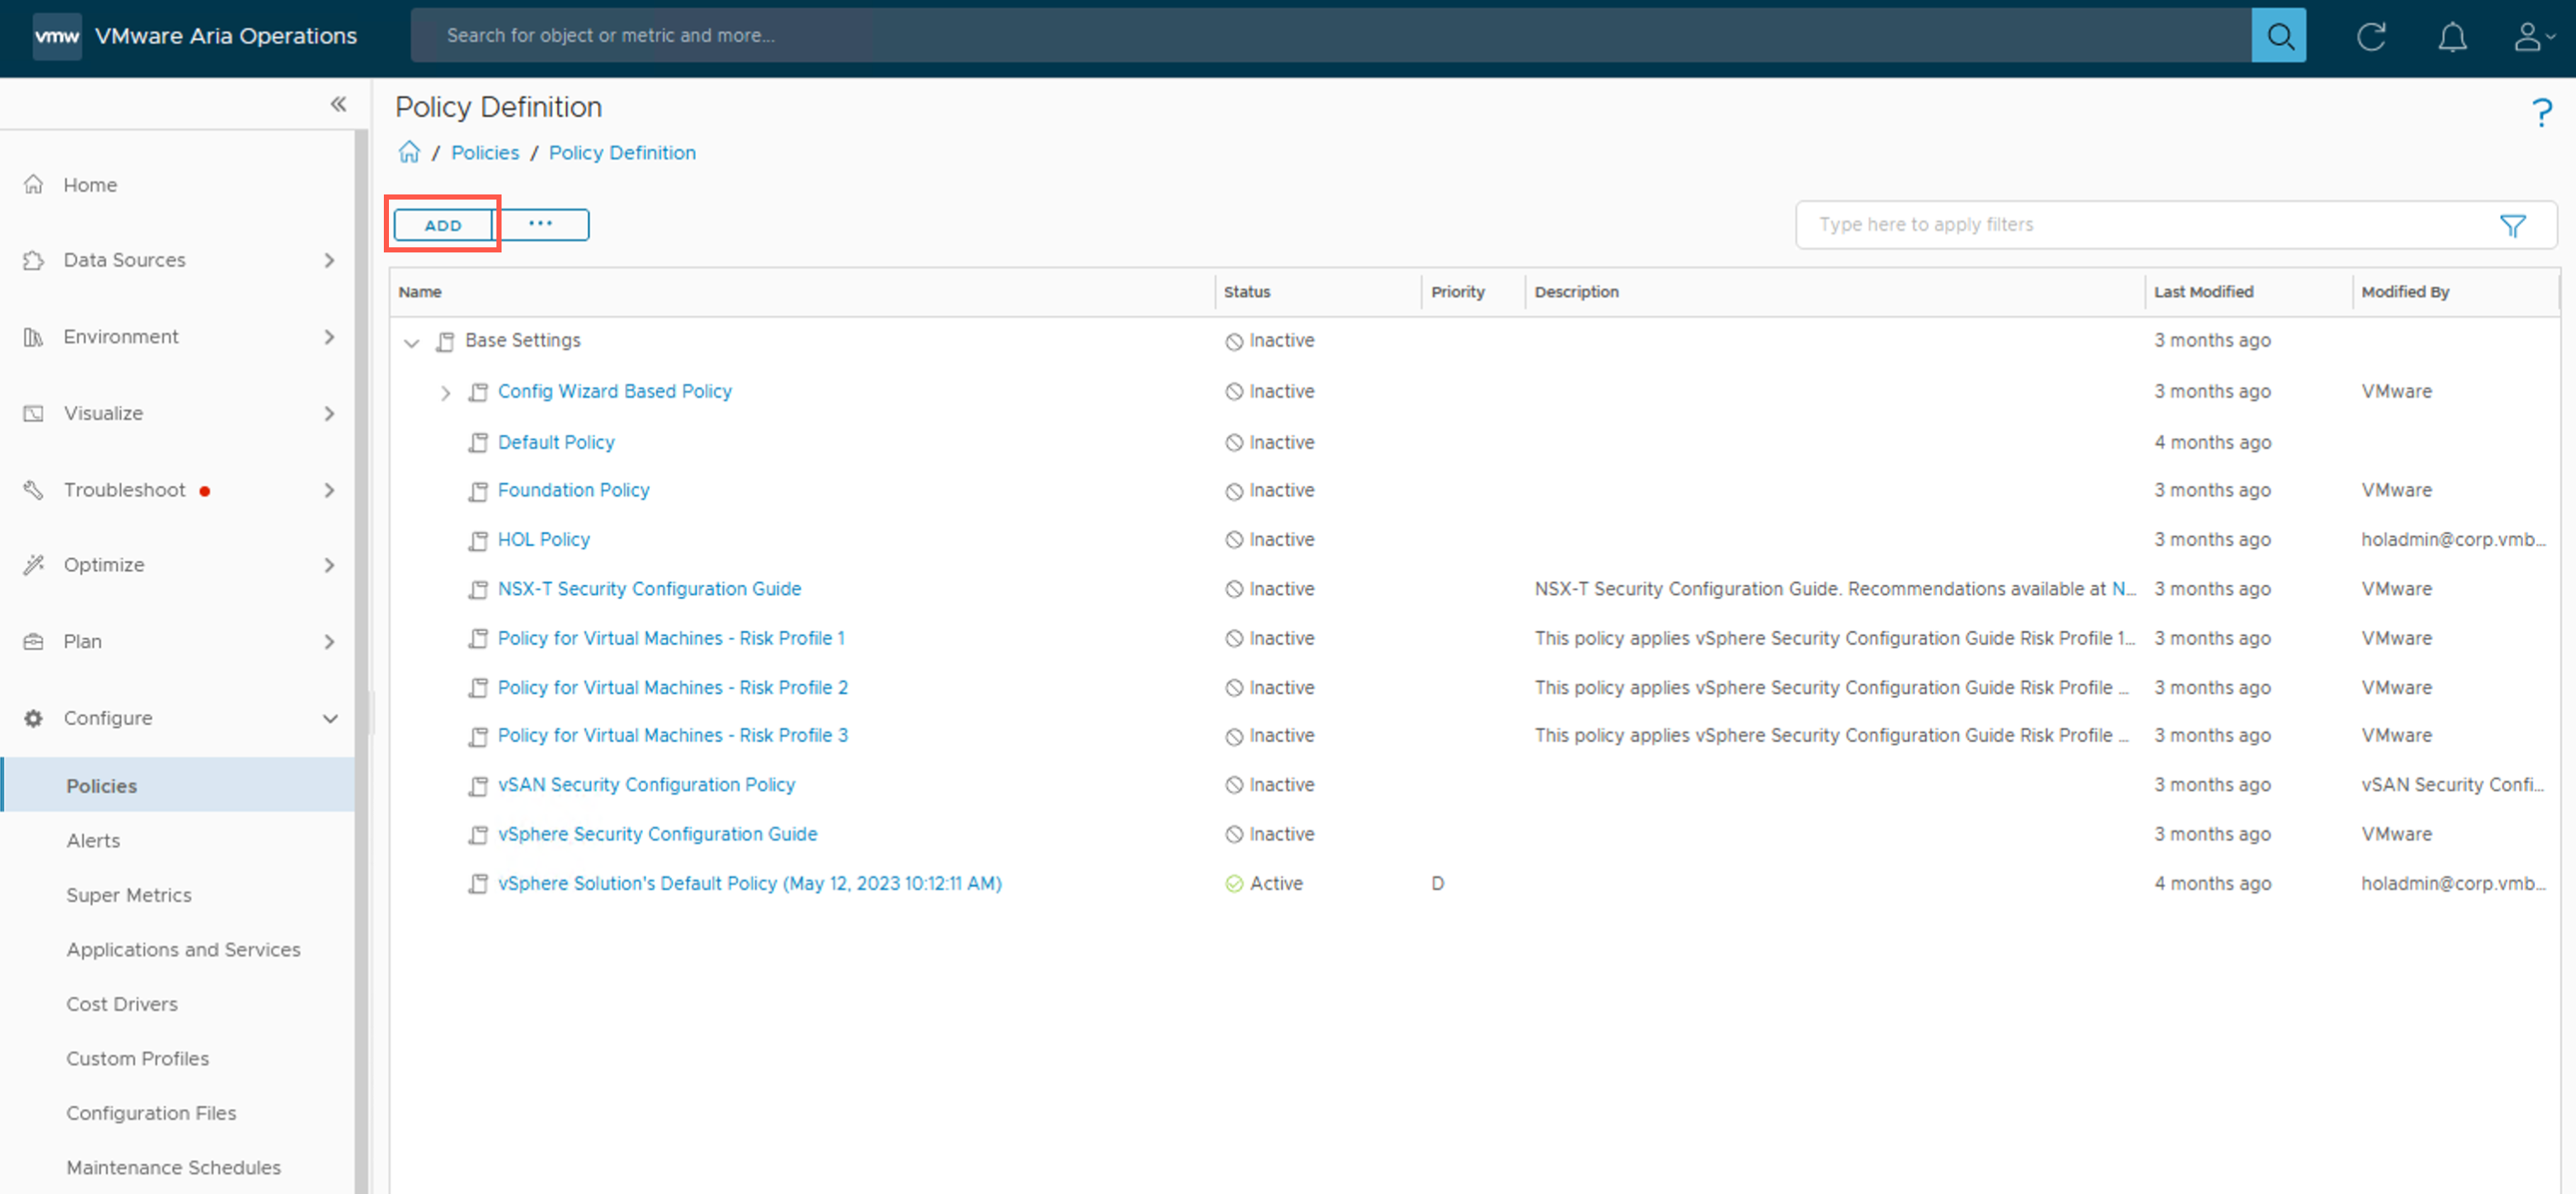
- At the Policy Definition screen, click ADD.
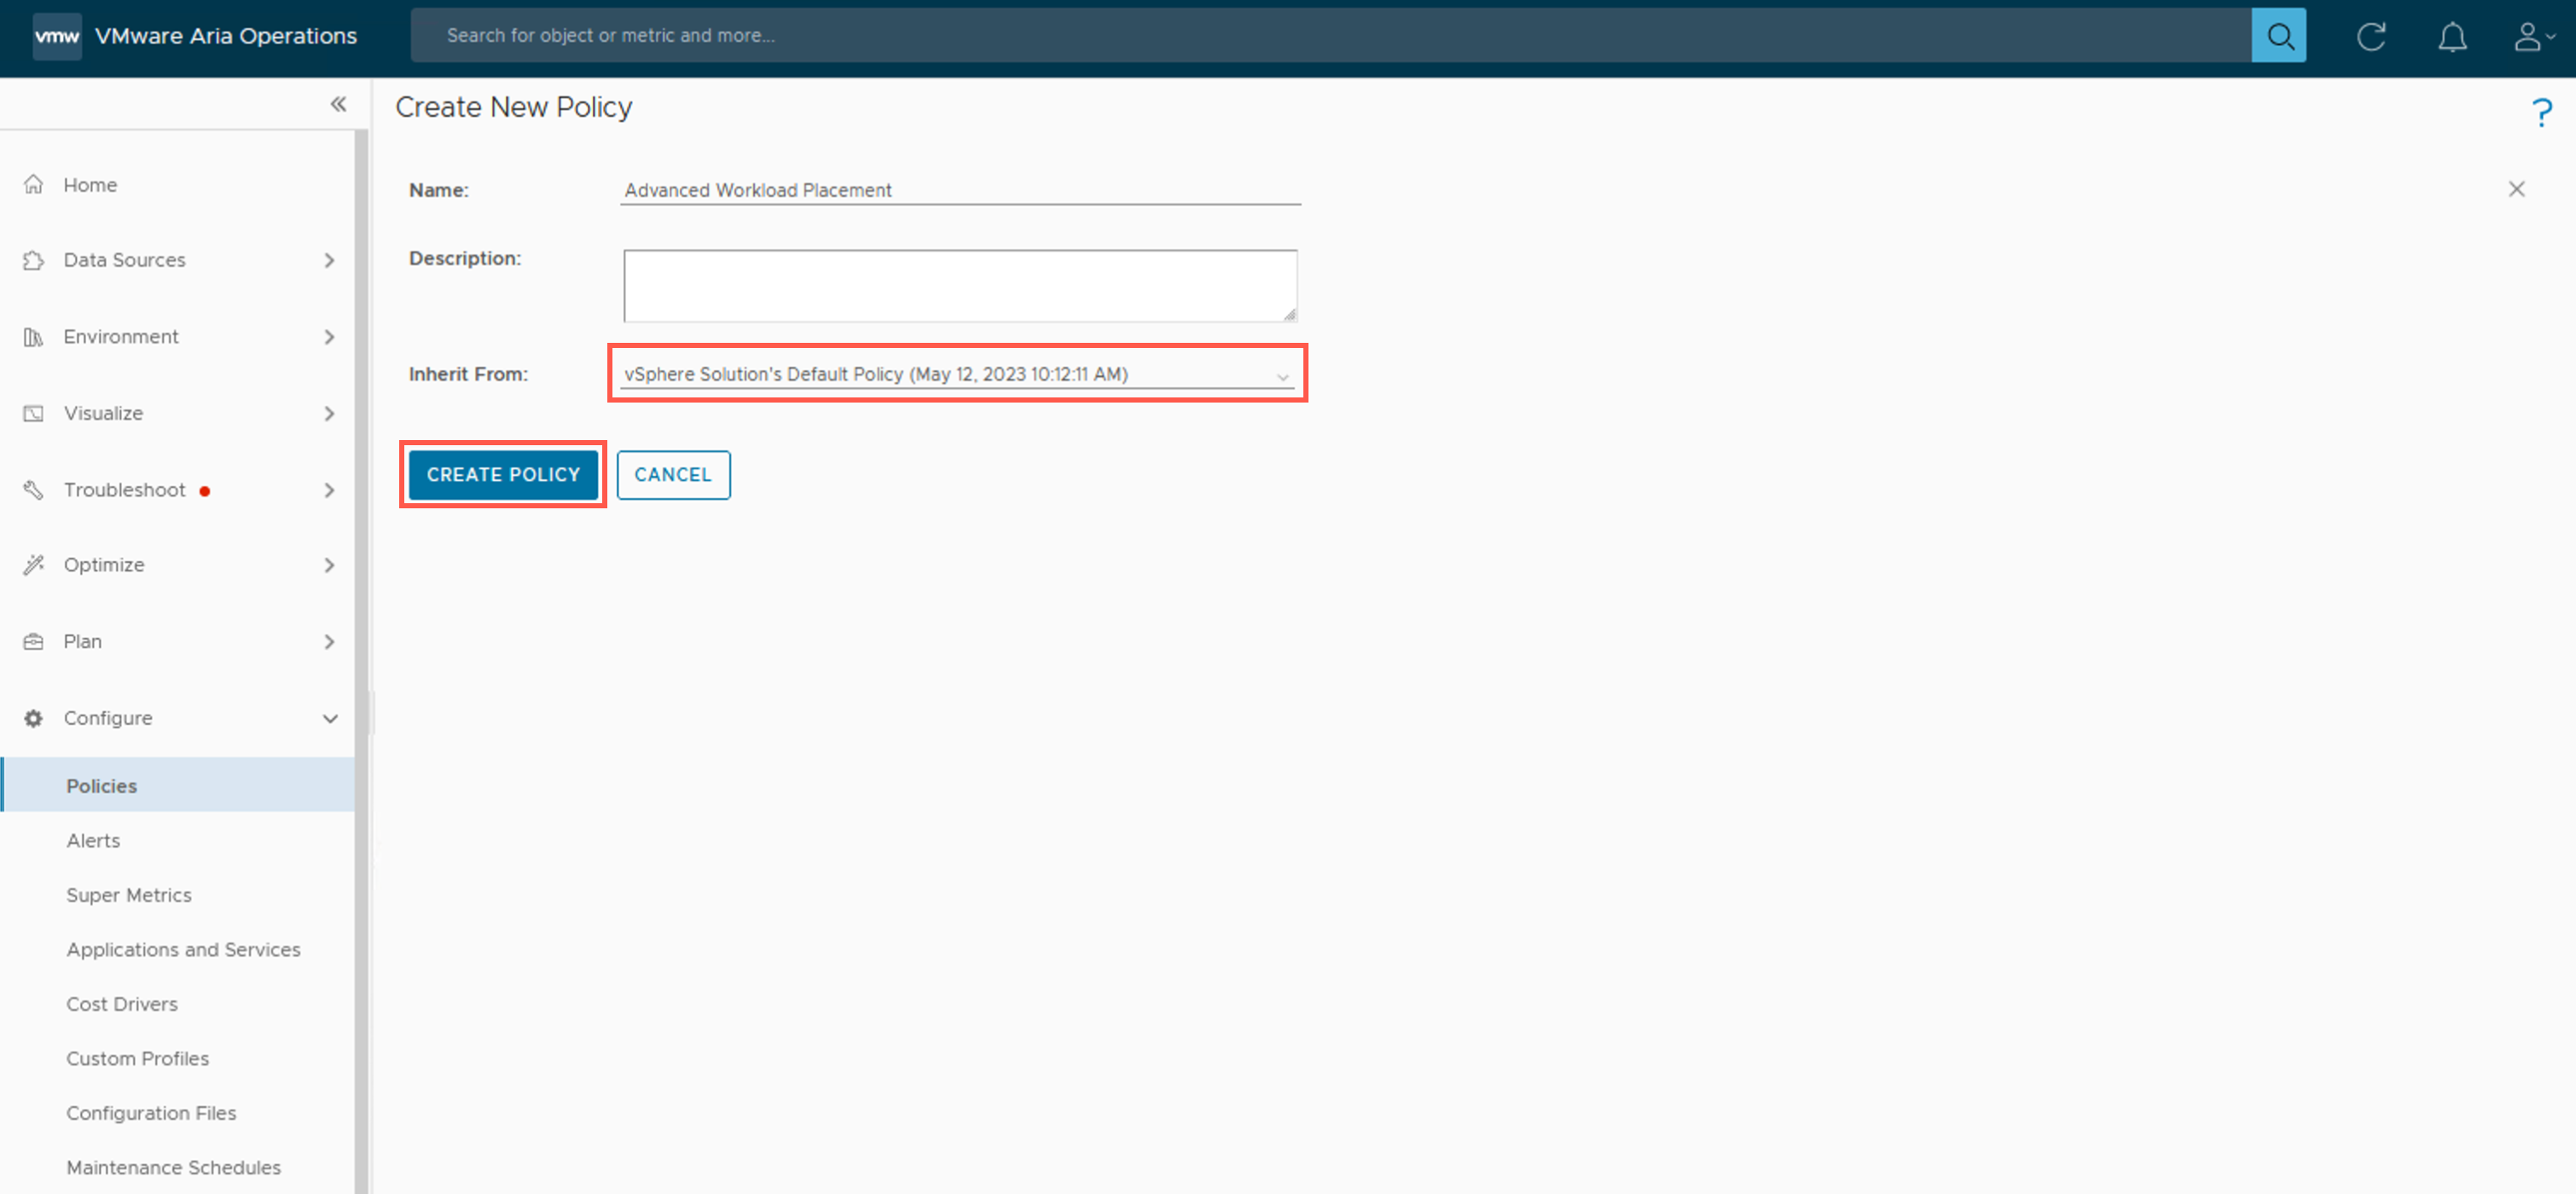
- At the Create New Policy screen, enter the policy name into the Name field.
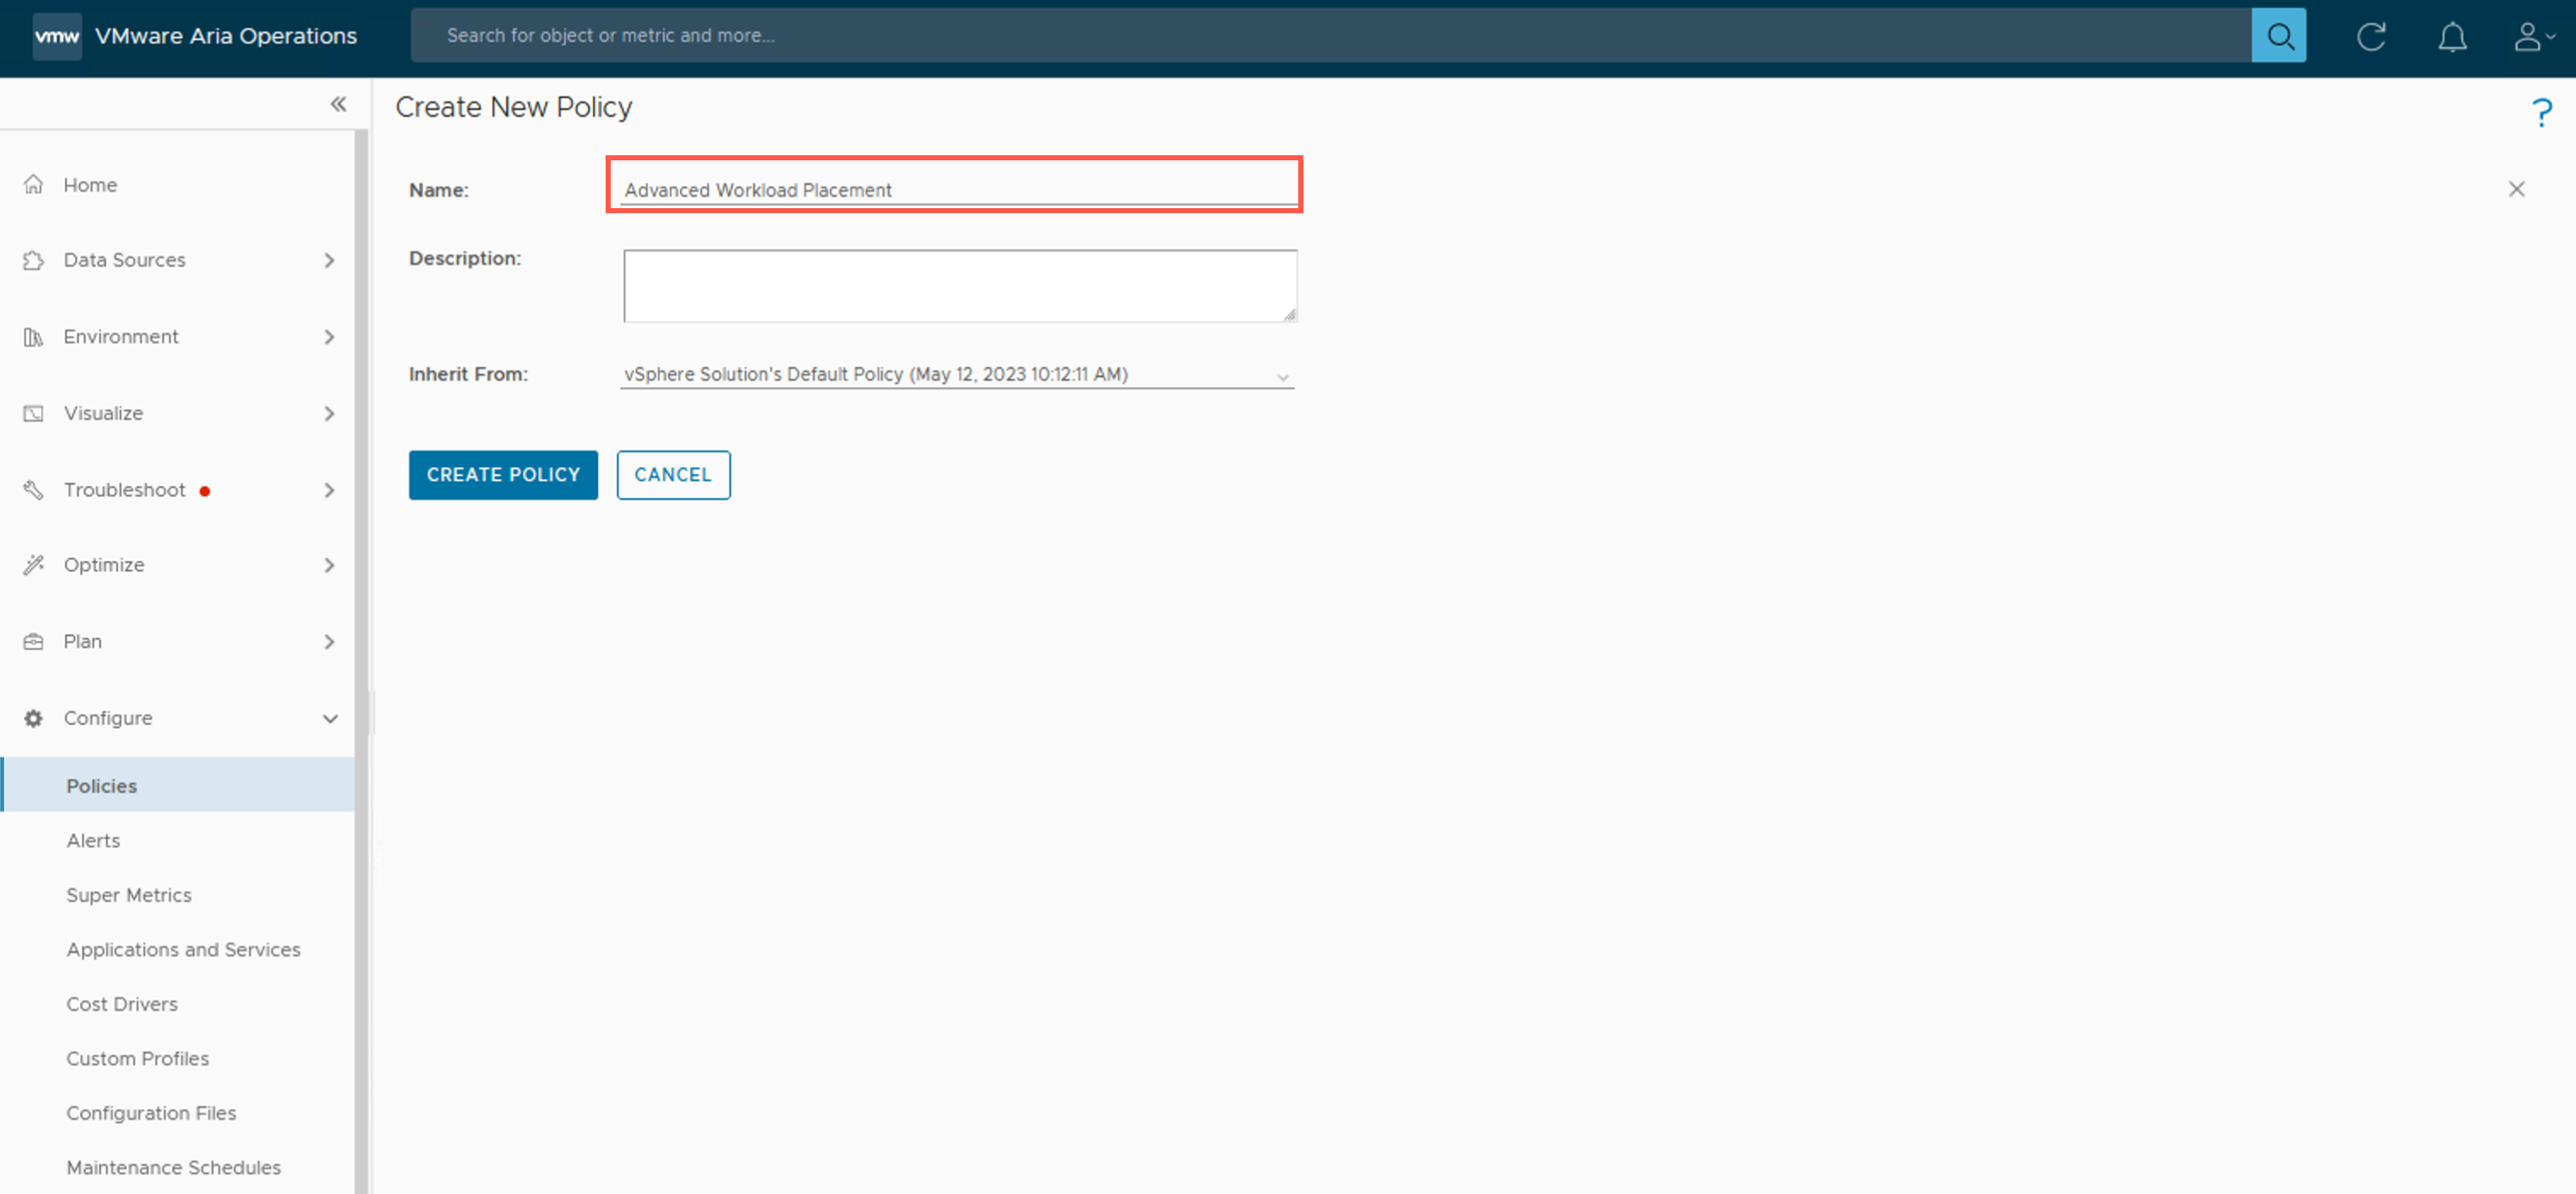
- At the Create New Policy screen, select the currently active policy from the Inherit From dropdown and click CREATE POLICY.
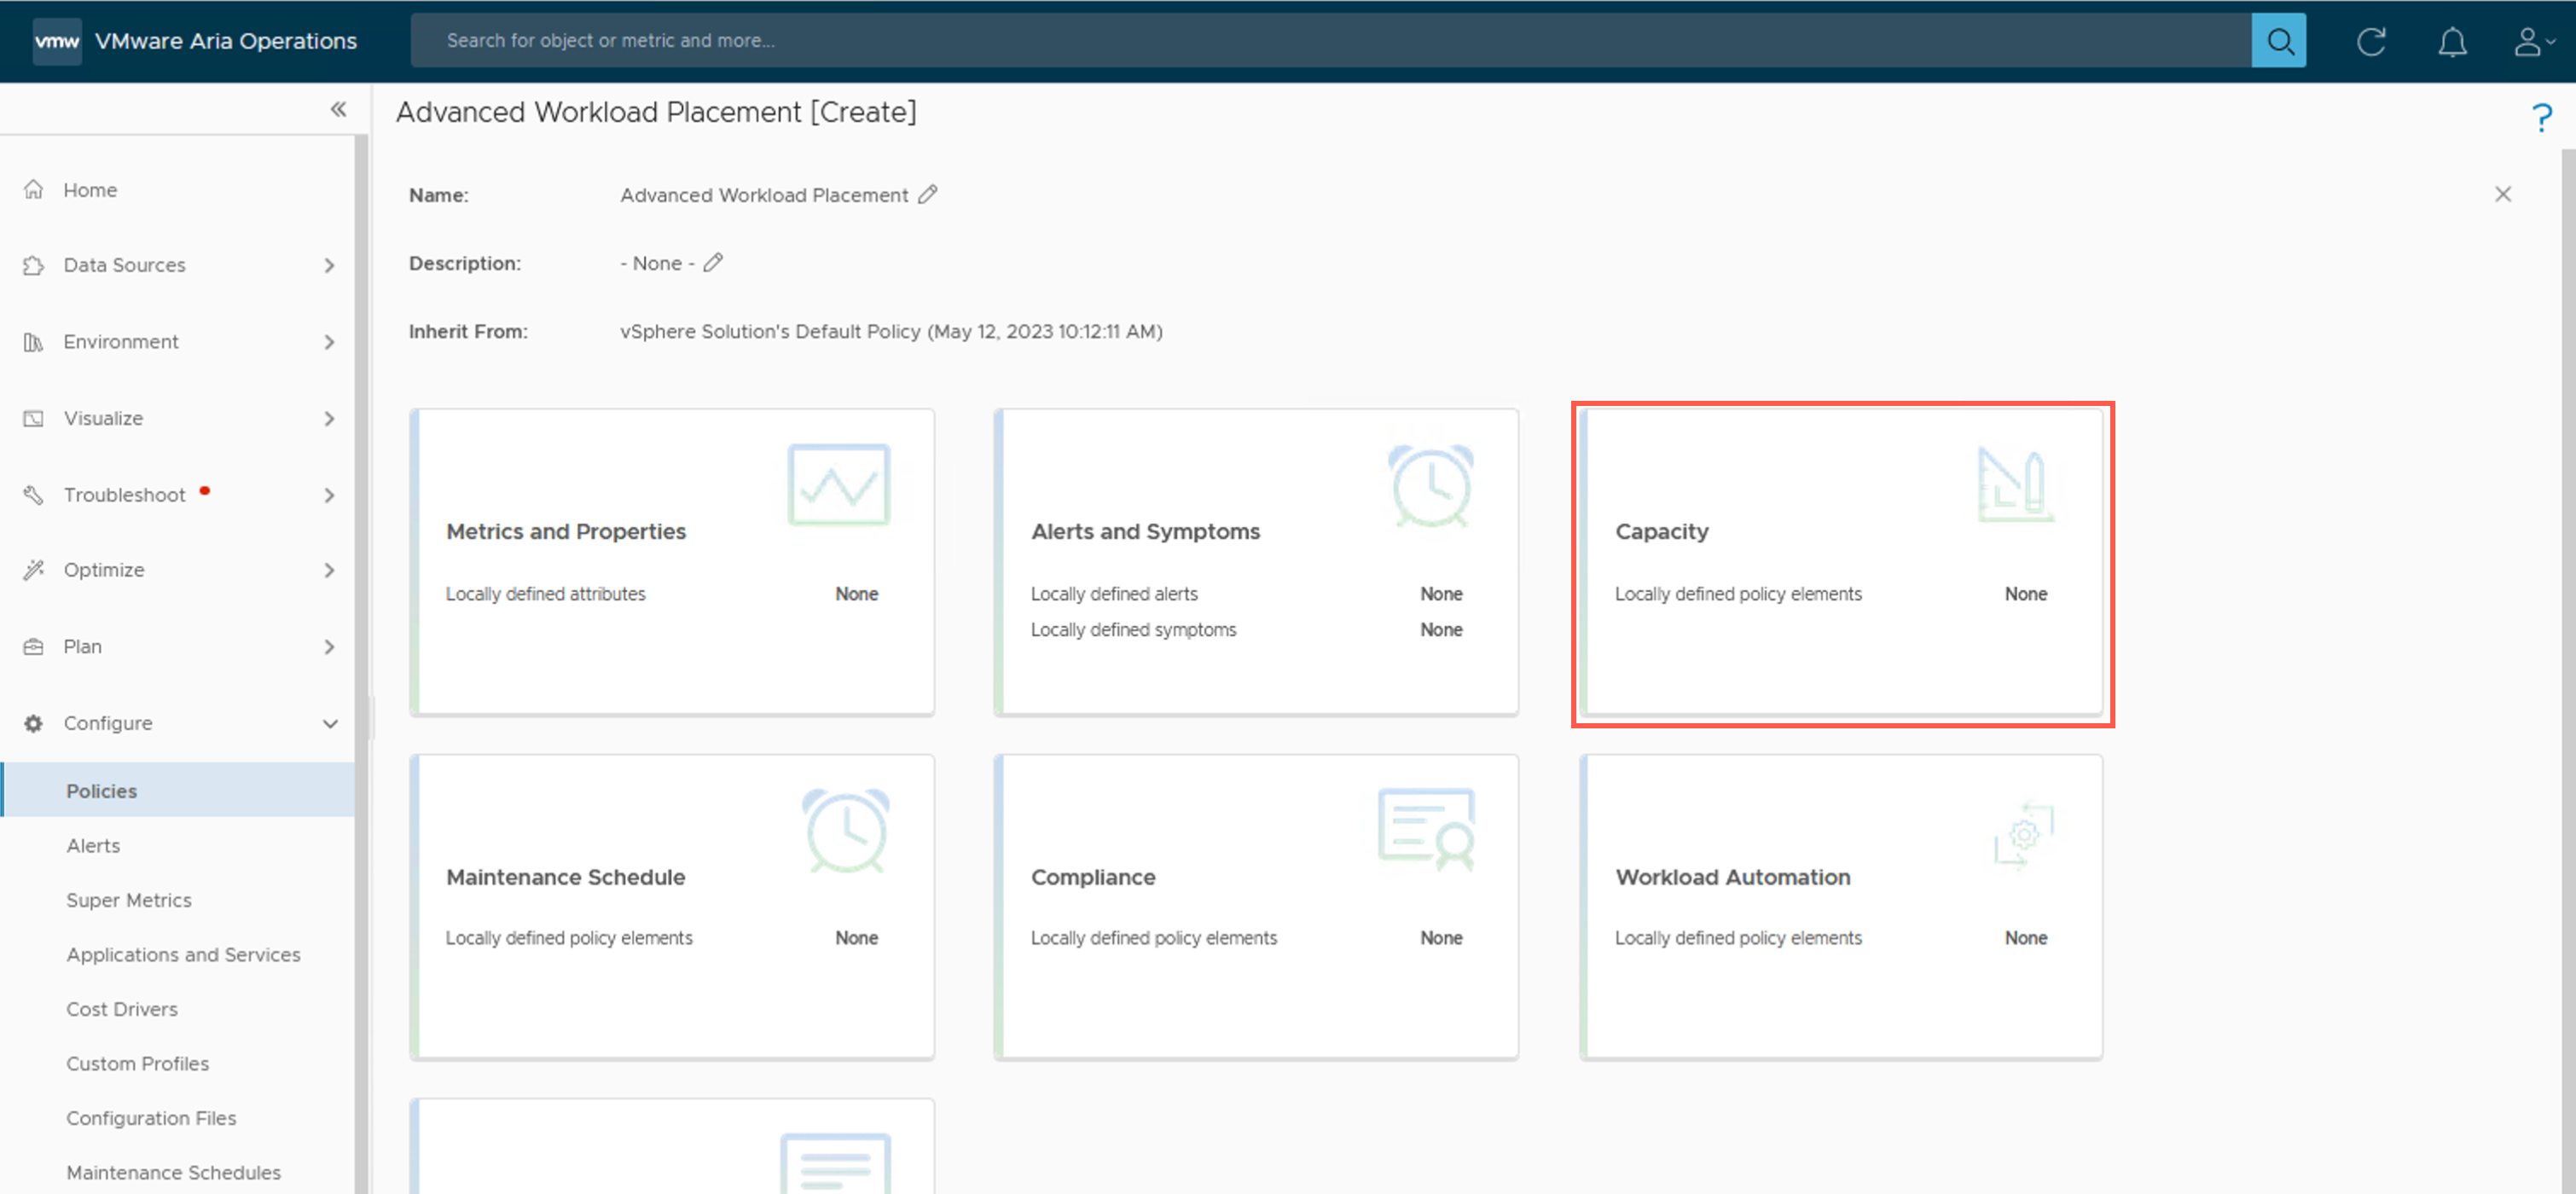
- At the Advanced Workload Placement [Create] screen, click the Capacity tile.
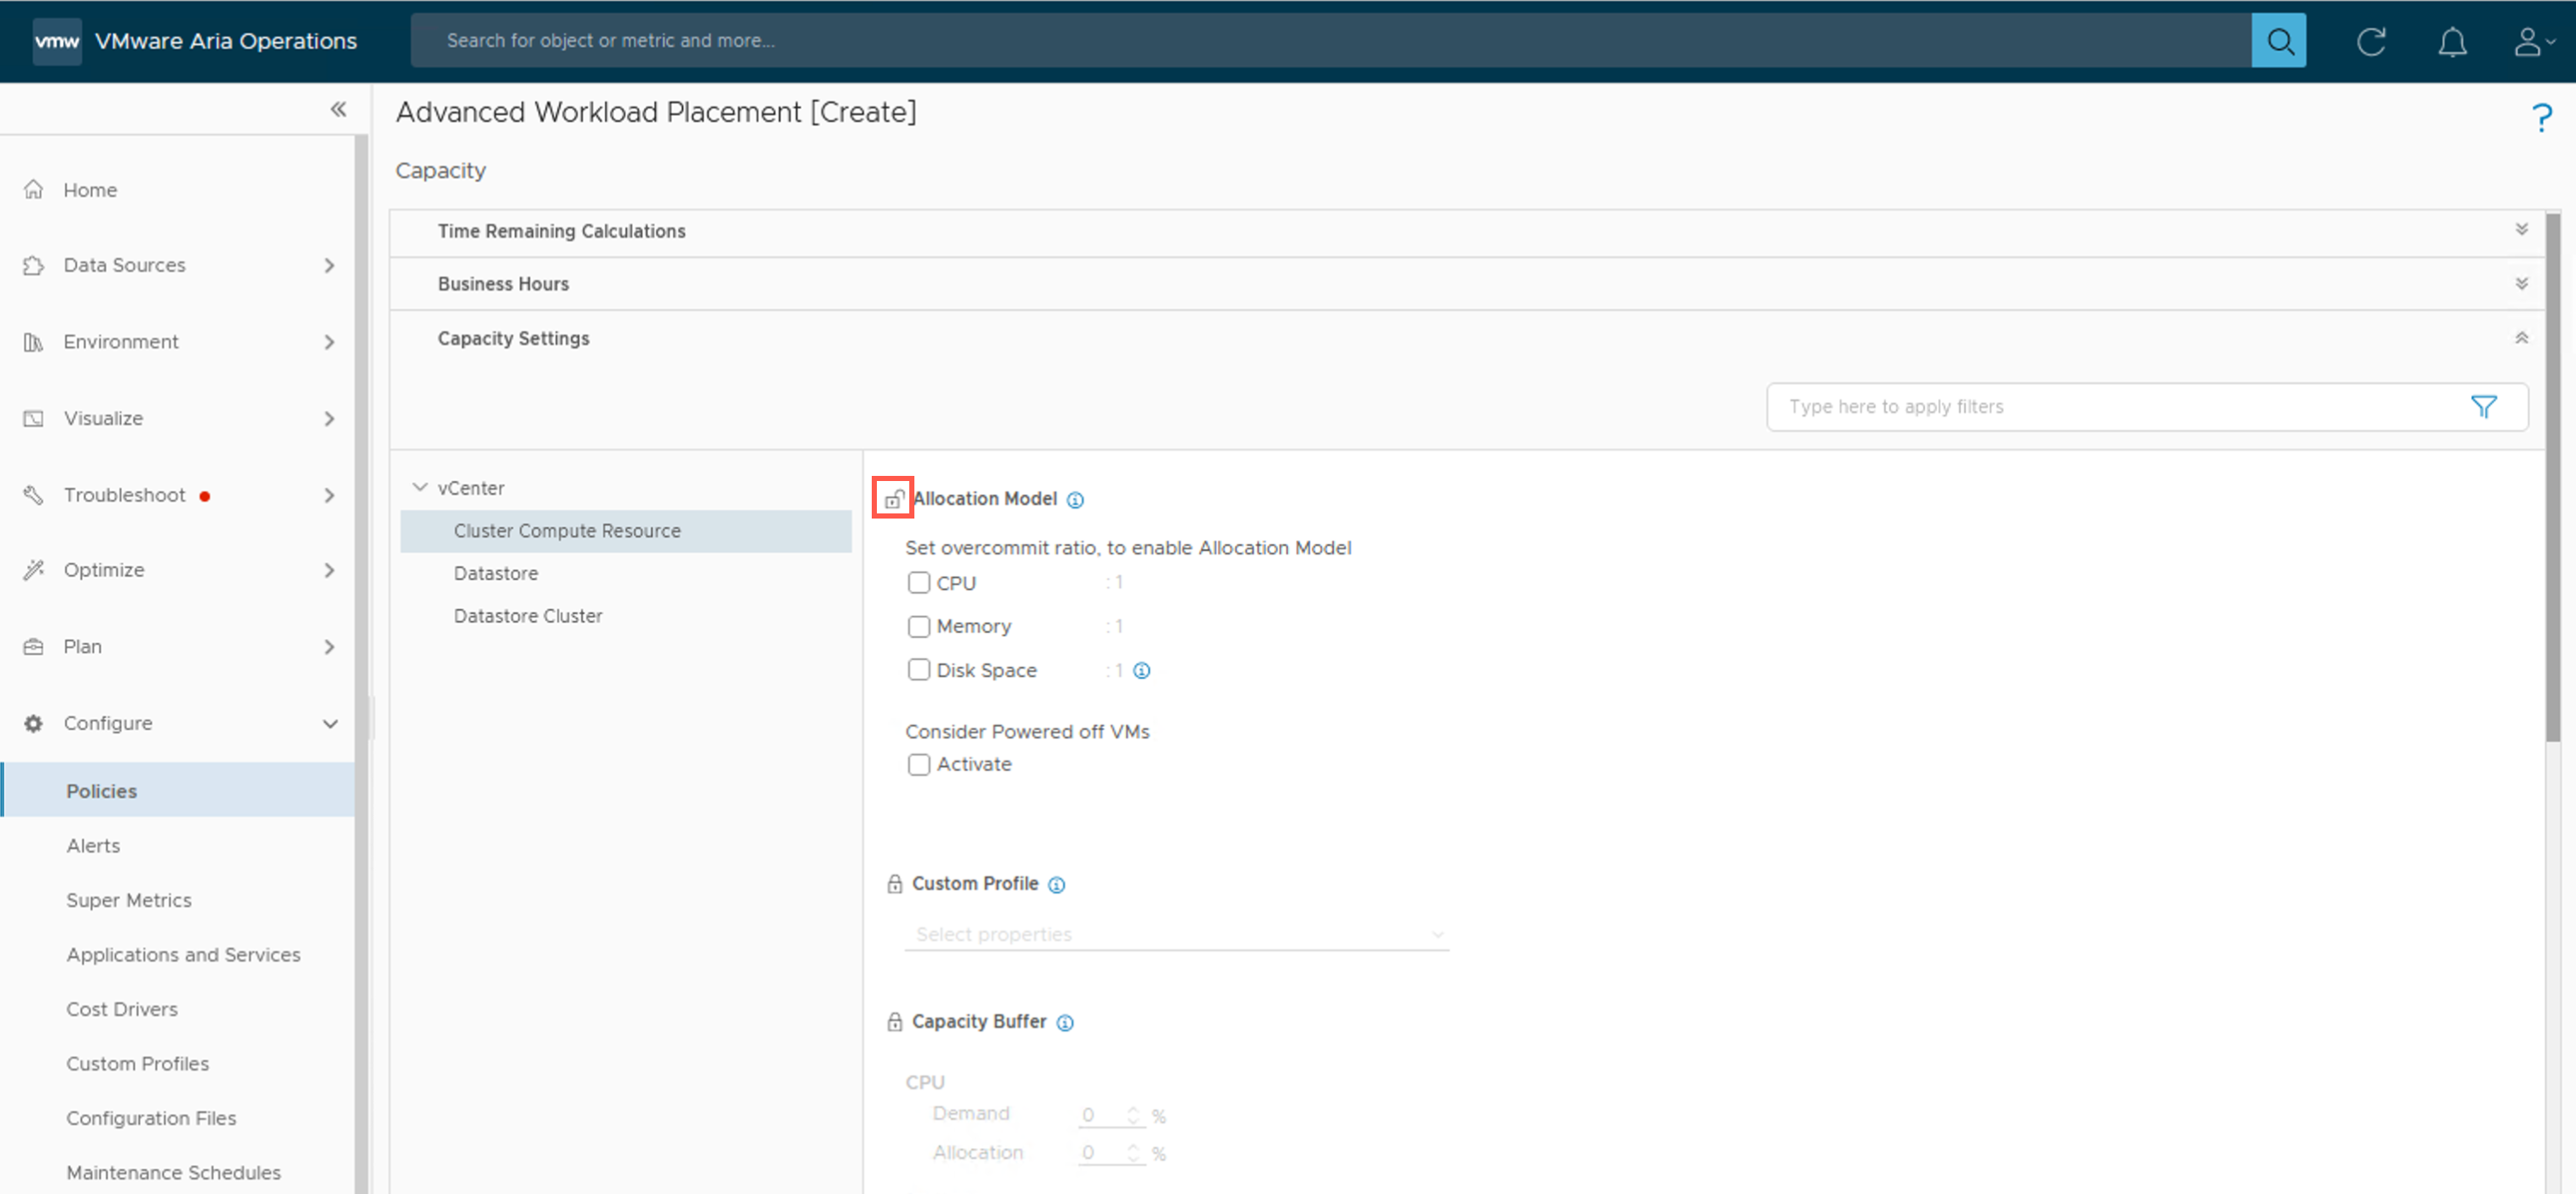
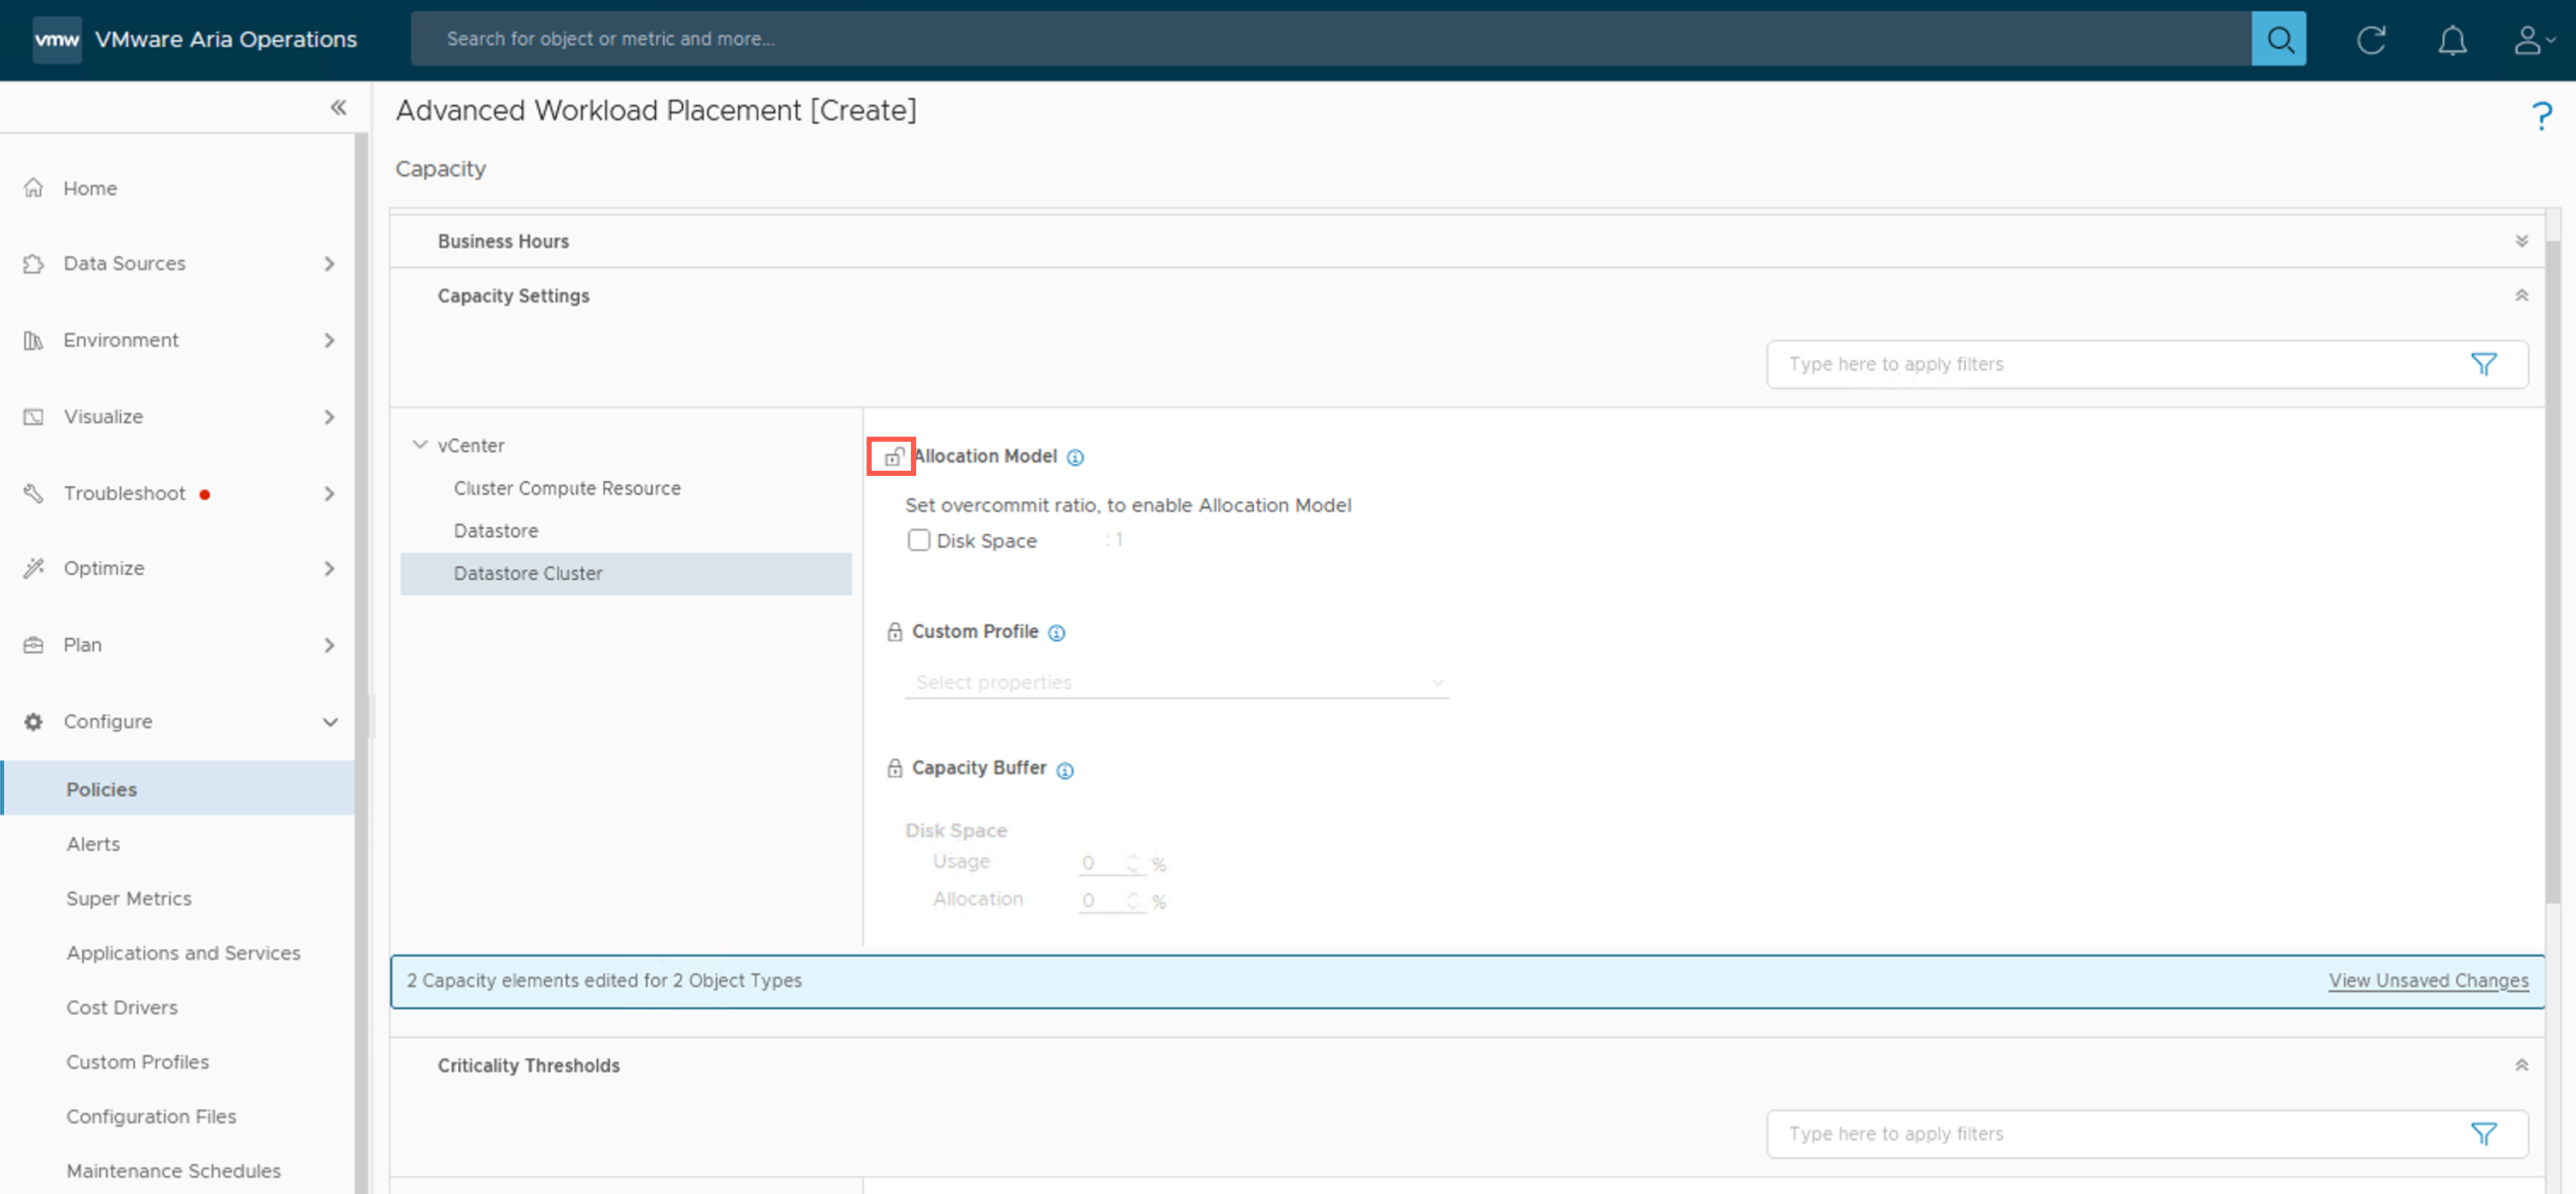
- At the Advanced Workload Placement [Create] - Capacity screen, under vCenter > Cluster Compute Resource, click the padlock to unlock the Allocation Model.
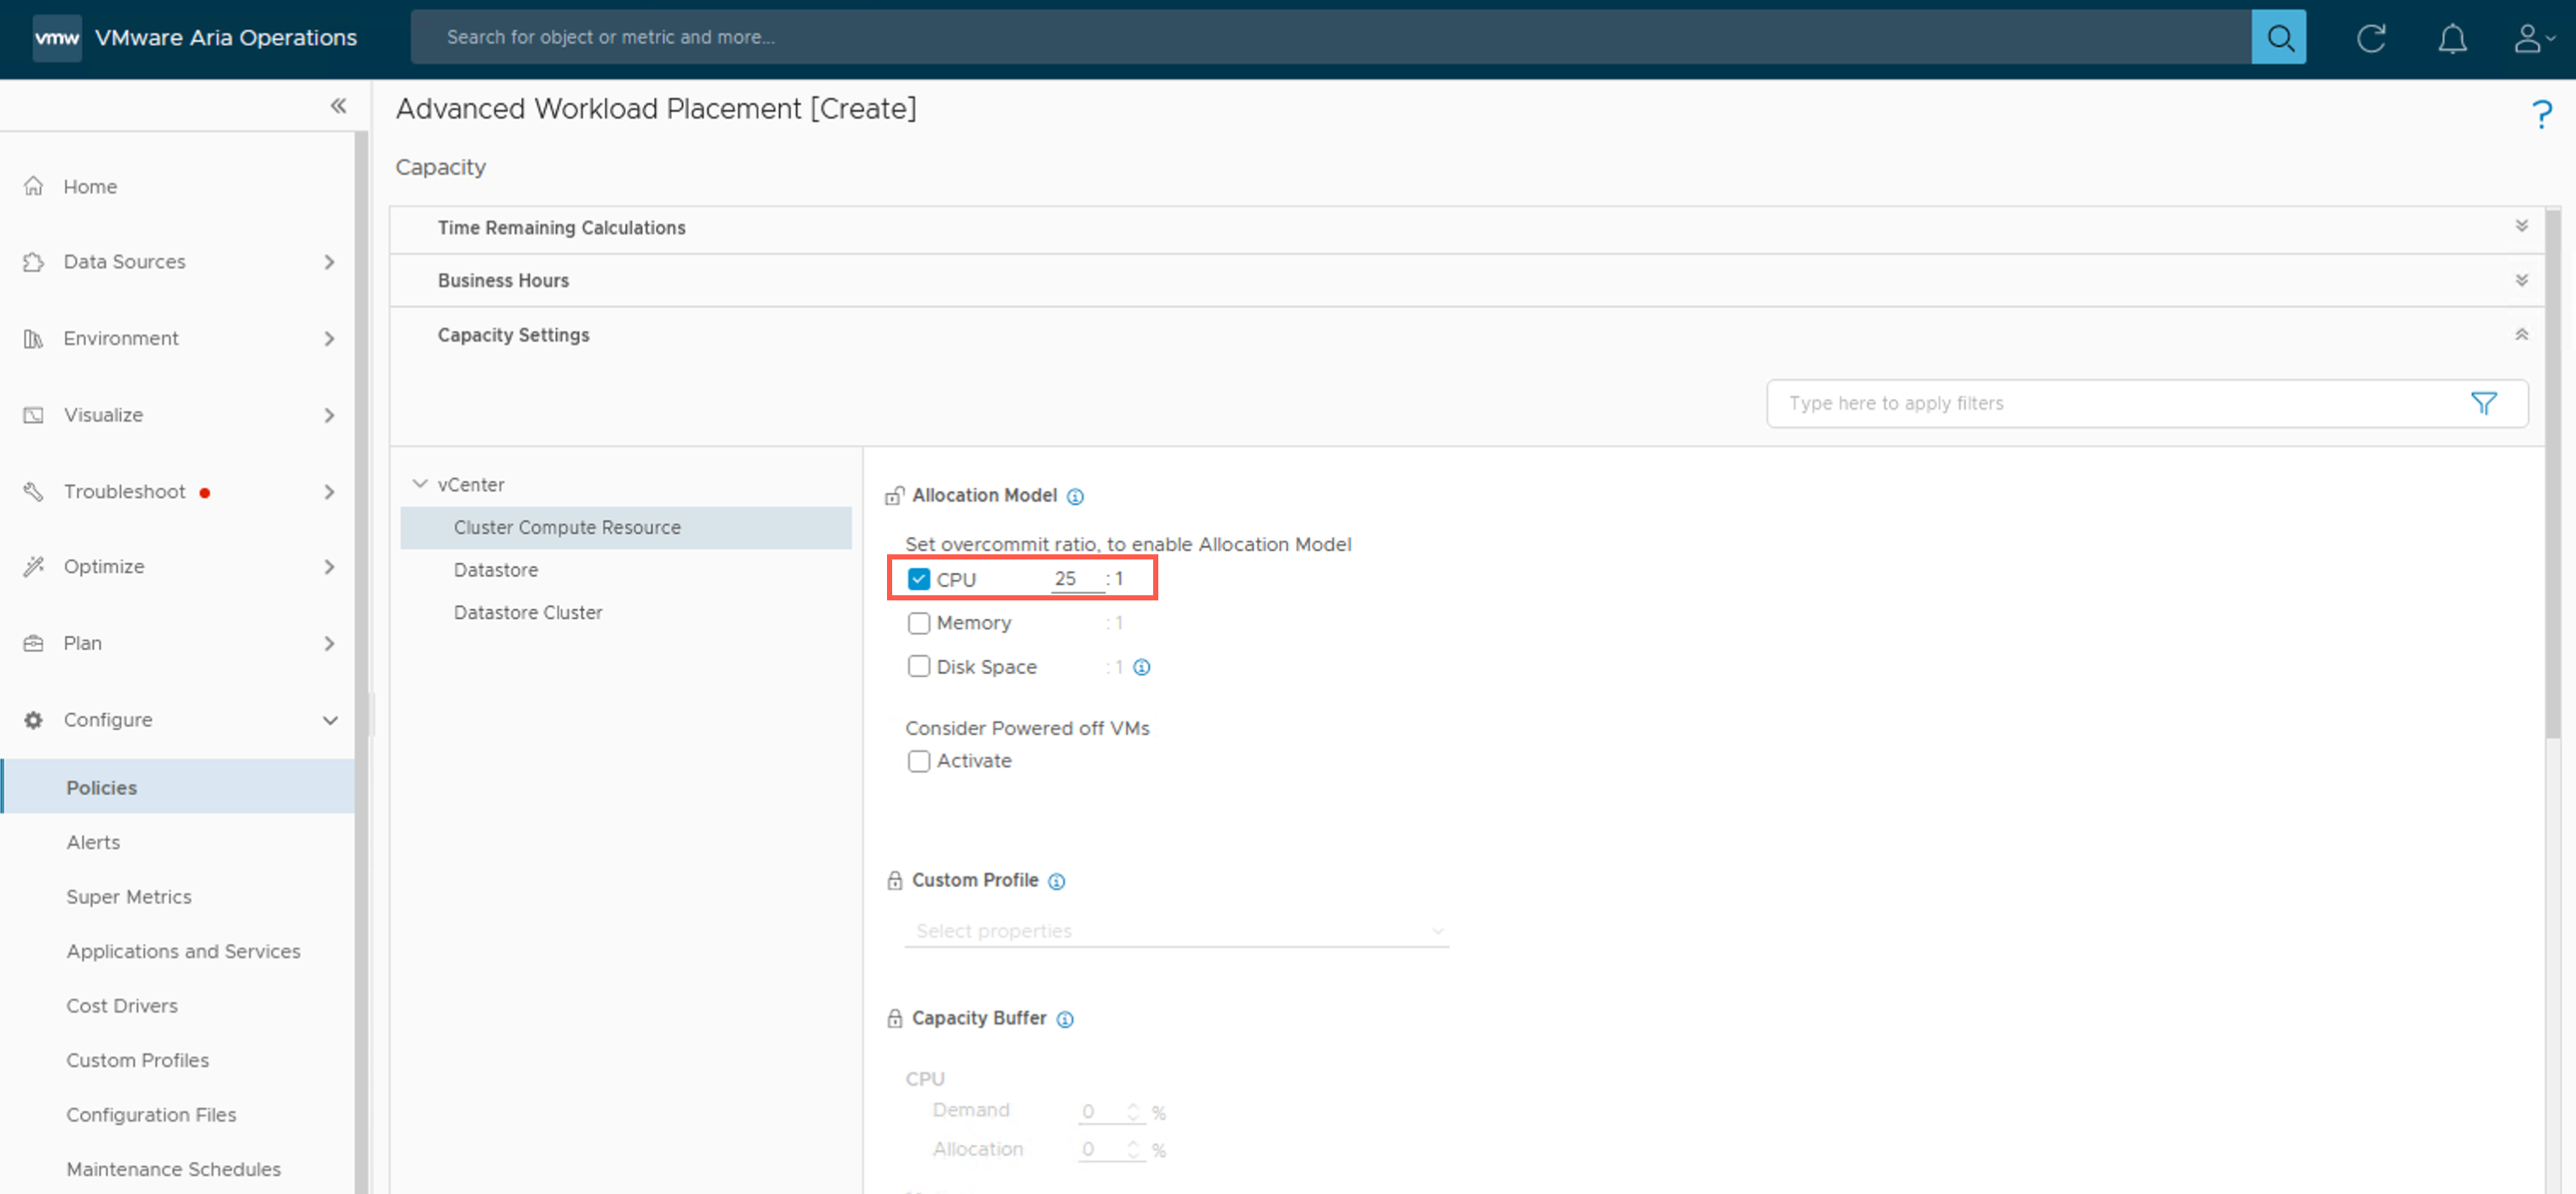
- At the Advanced Workload Placement [Create] - Capacity screen, under vCenter > Cluster Compute Resource, check the CPU checkbox and type 25 into text field to set the overcommit / allocation ratio of CPU resources to 25:1.
- At the Advanced Workload Placement [Create] - Capacity screen, under vCenter > Cluster Compute Resource, check the Memory checkbox and type 2 into text field to set the overcommit / allocation ratio of Memory resources to 2:1.
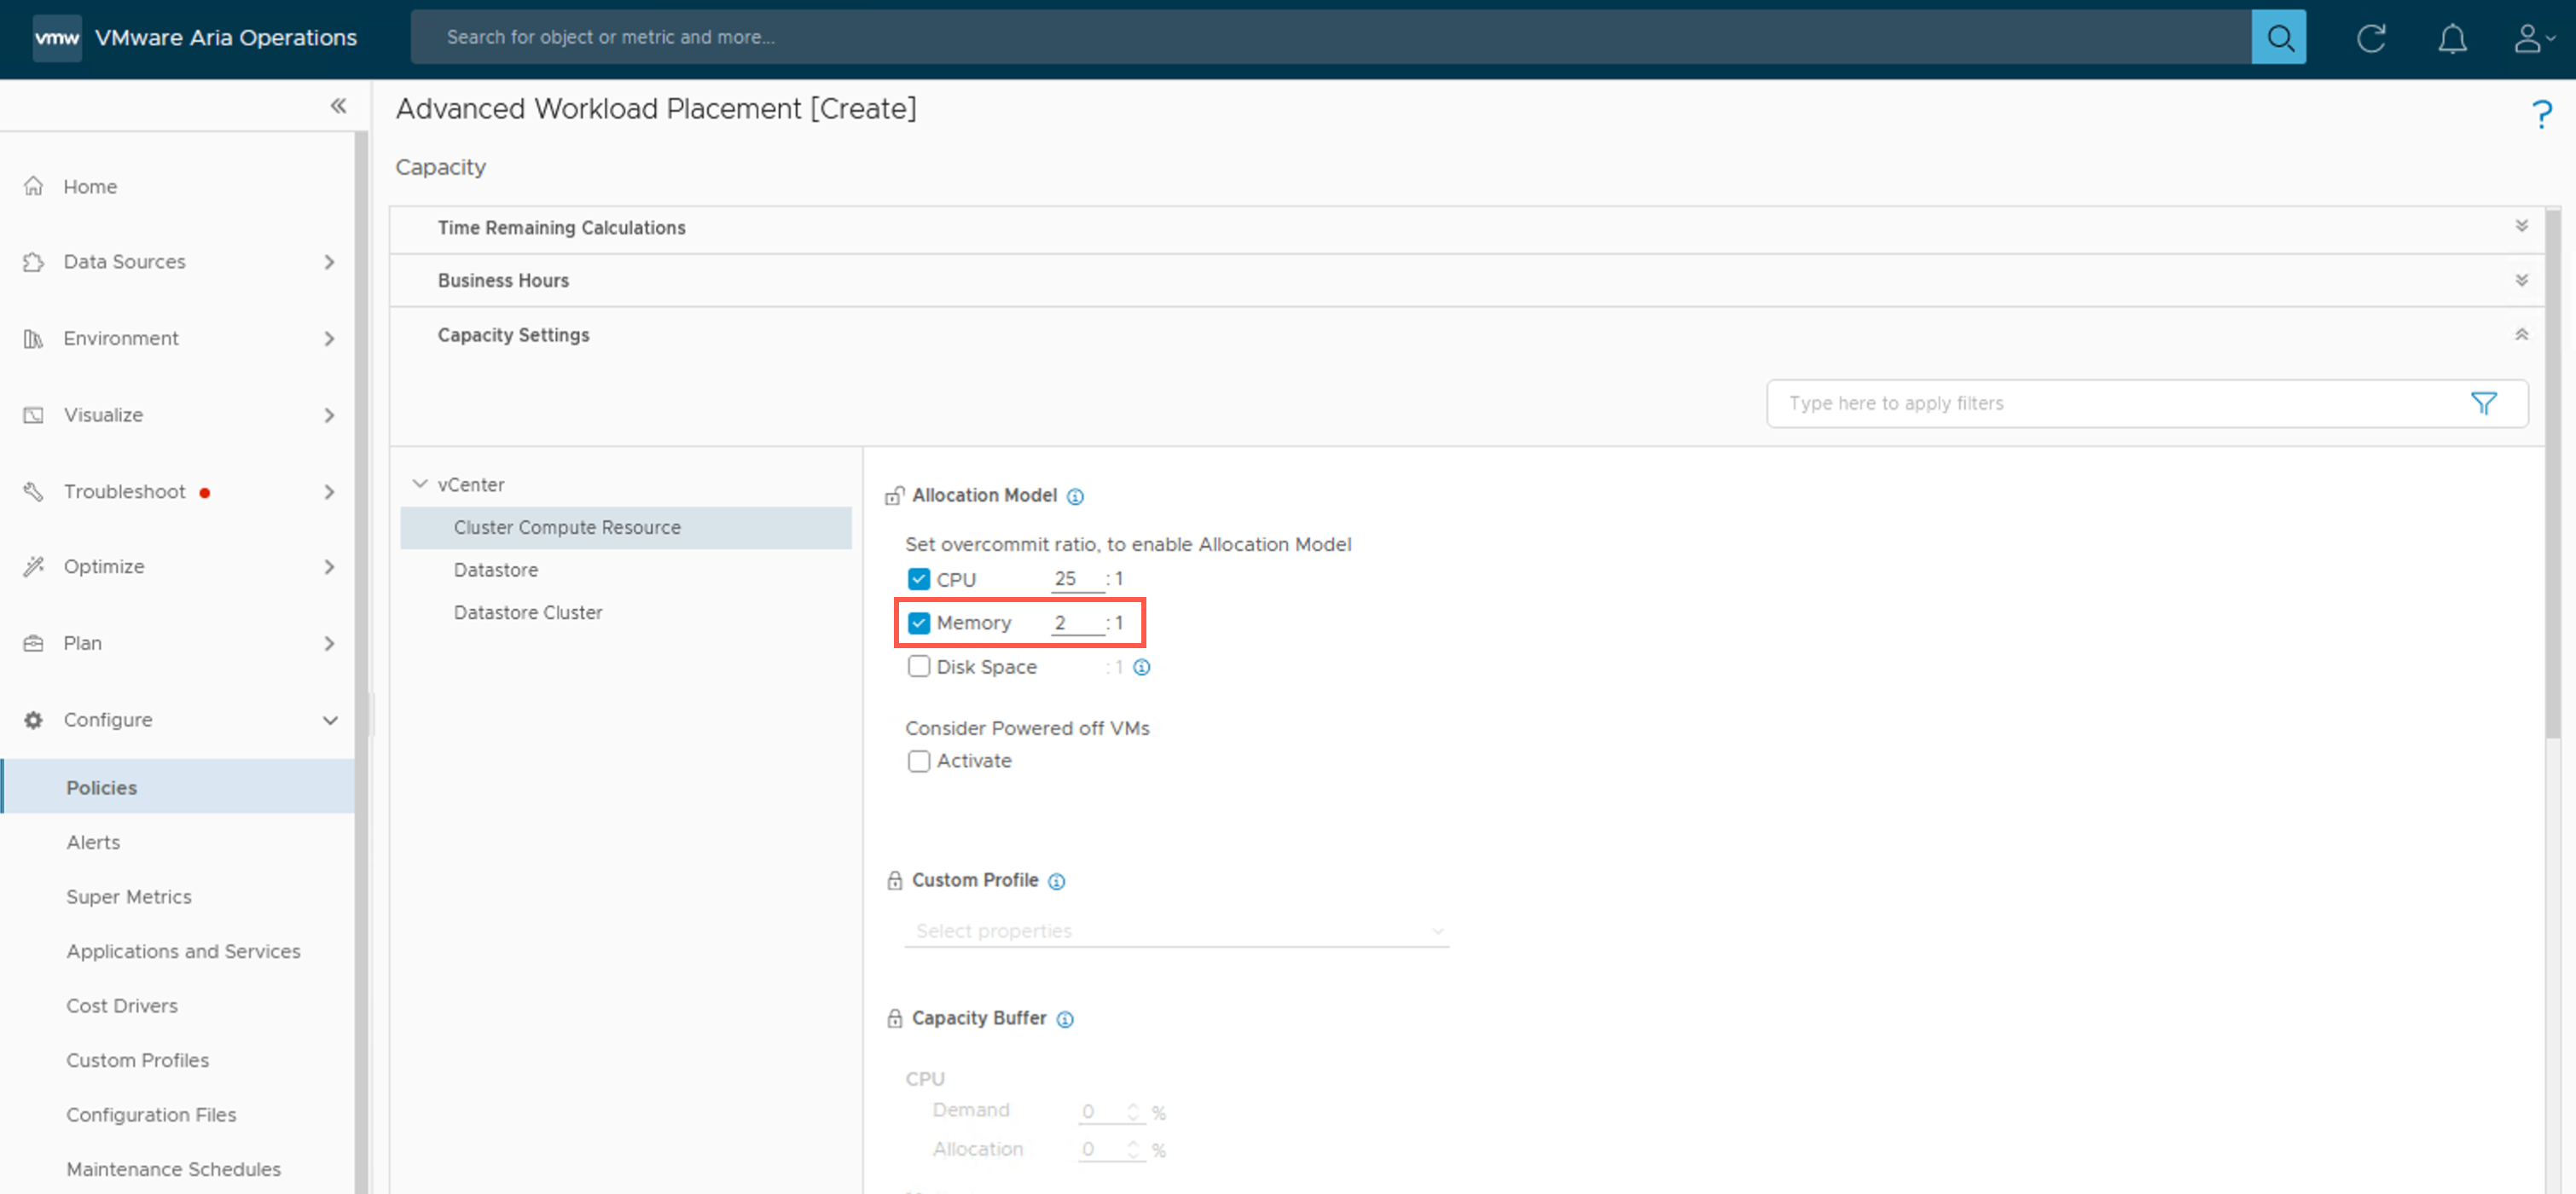
- At the Advanced Workload Placement [Create] - Capacity screen, under vCenter > Cluster Compute Resource, check the Disk Space checkbox and type 1 into text field to set the overcommit / allocation ratio of Disk Space resources to 1:1.

- At the Advanced Workload Placement [Create] - Capacity screen, under vCenter click Datastore.
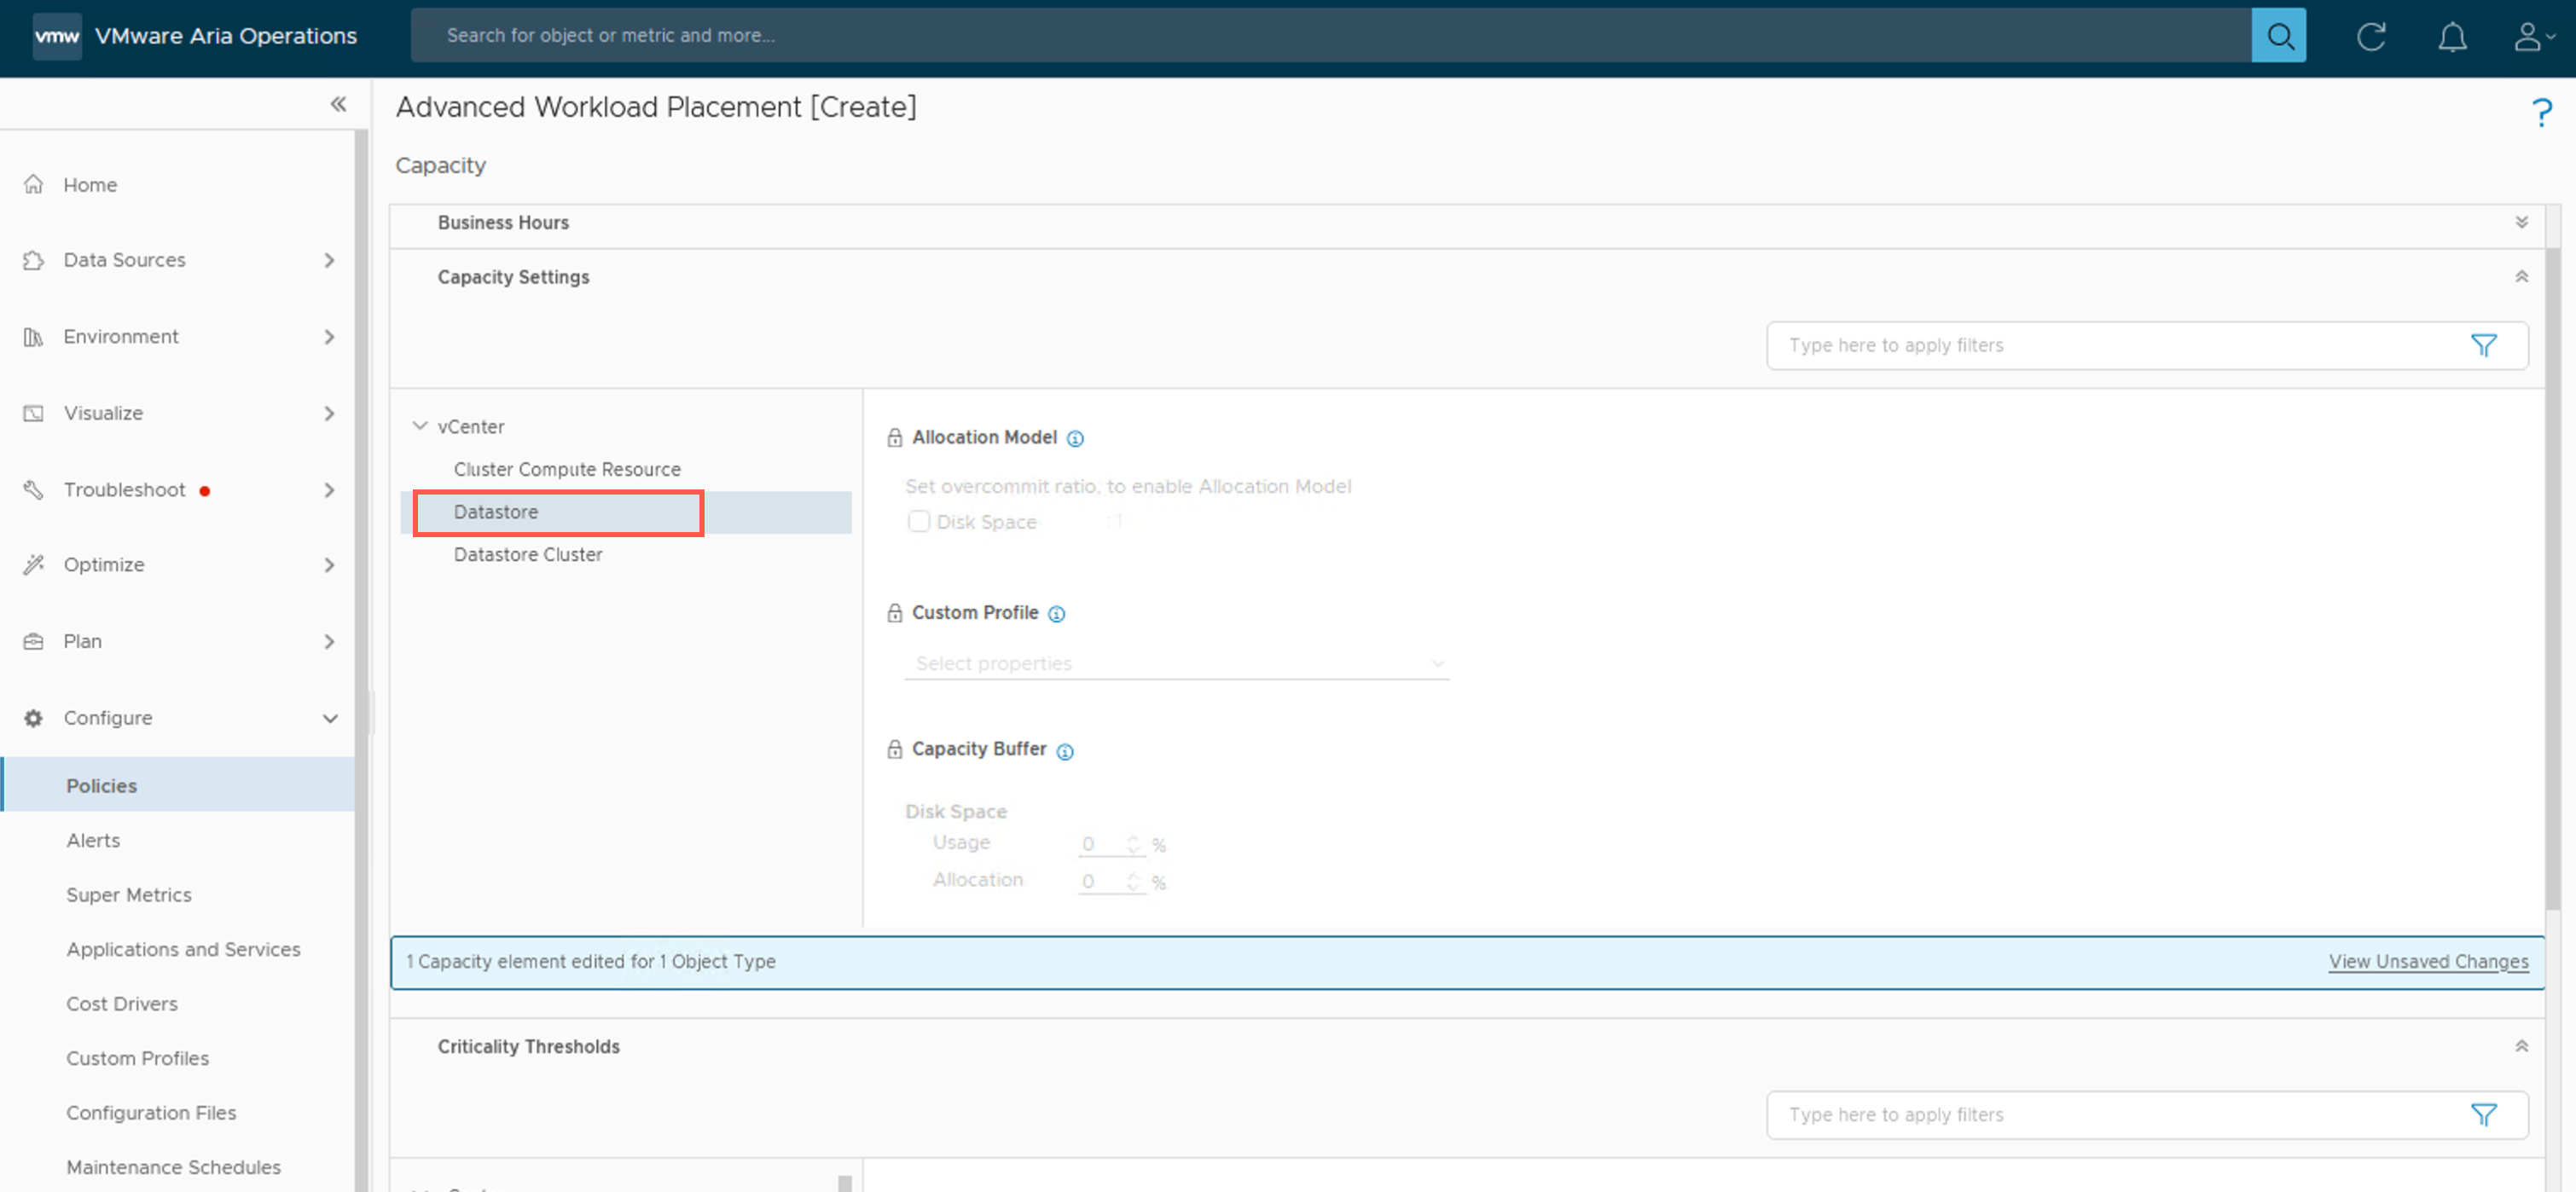
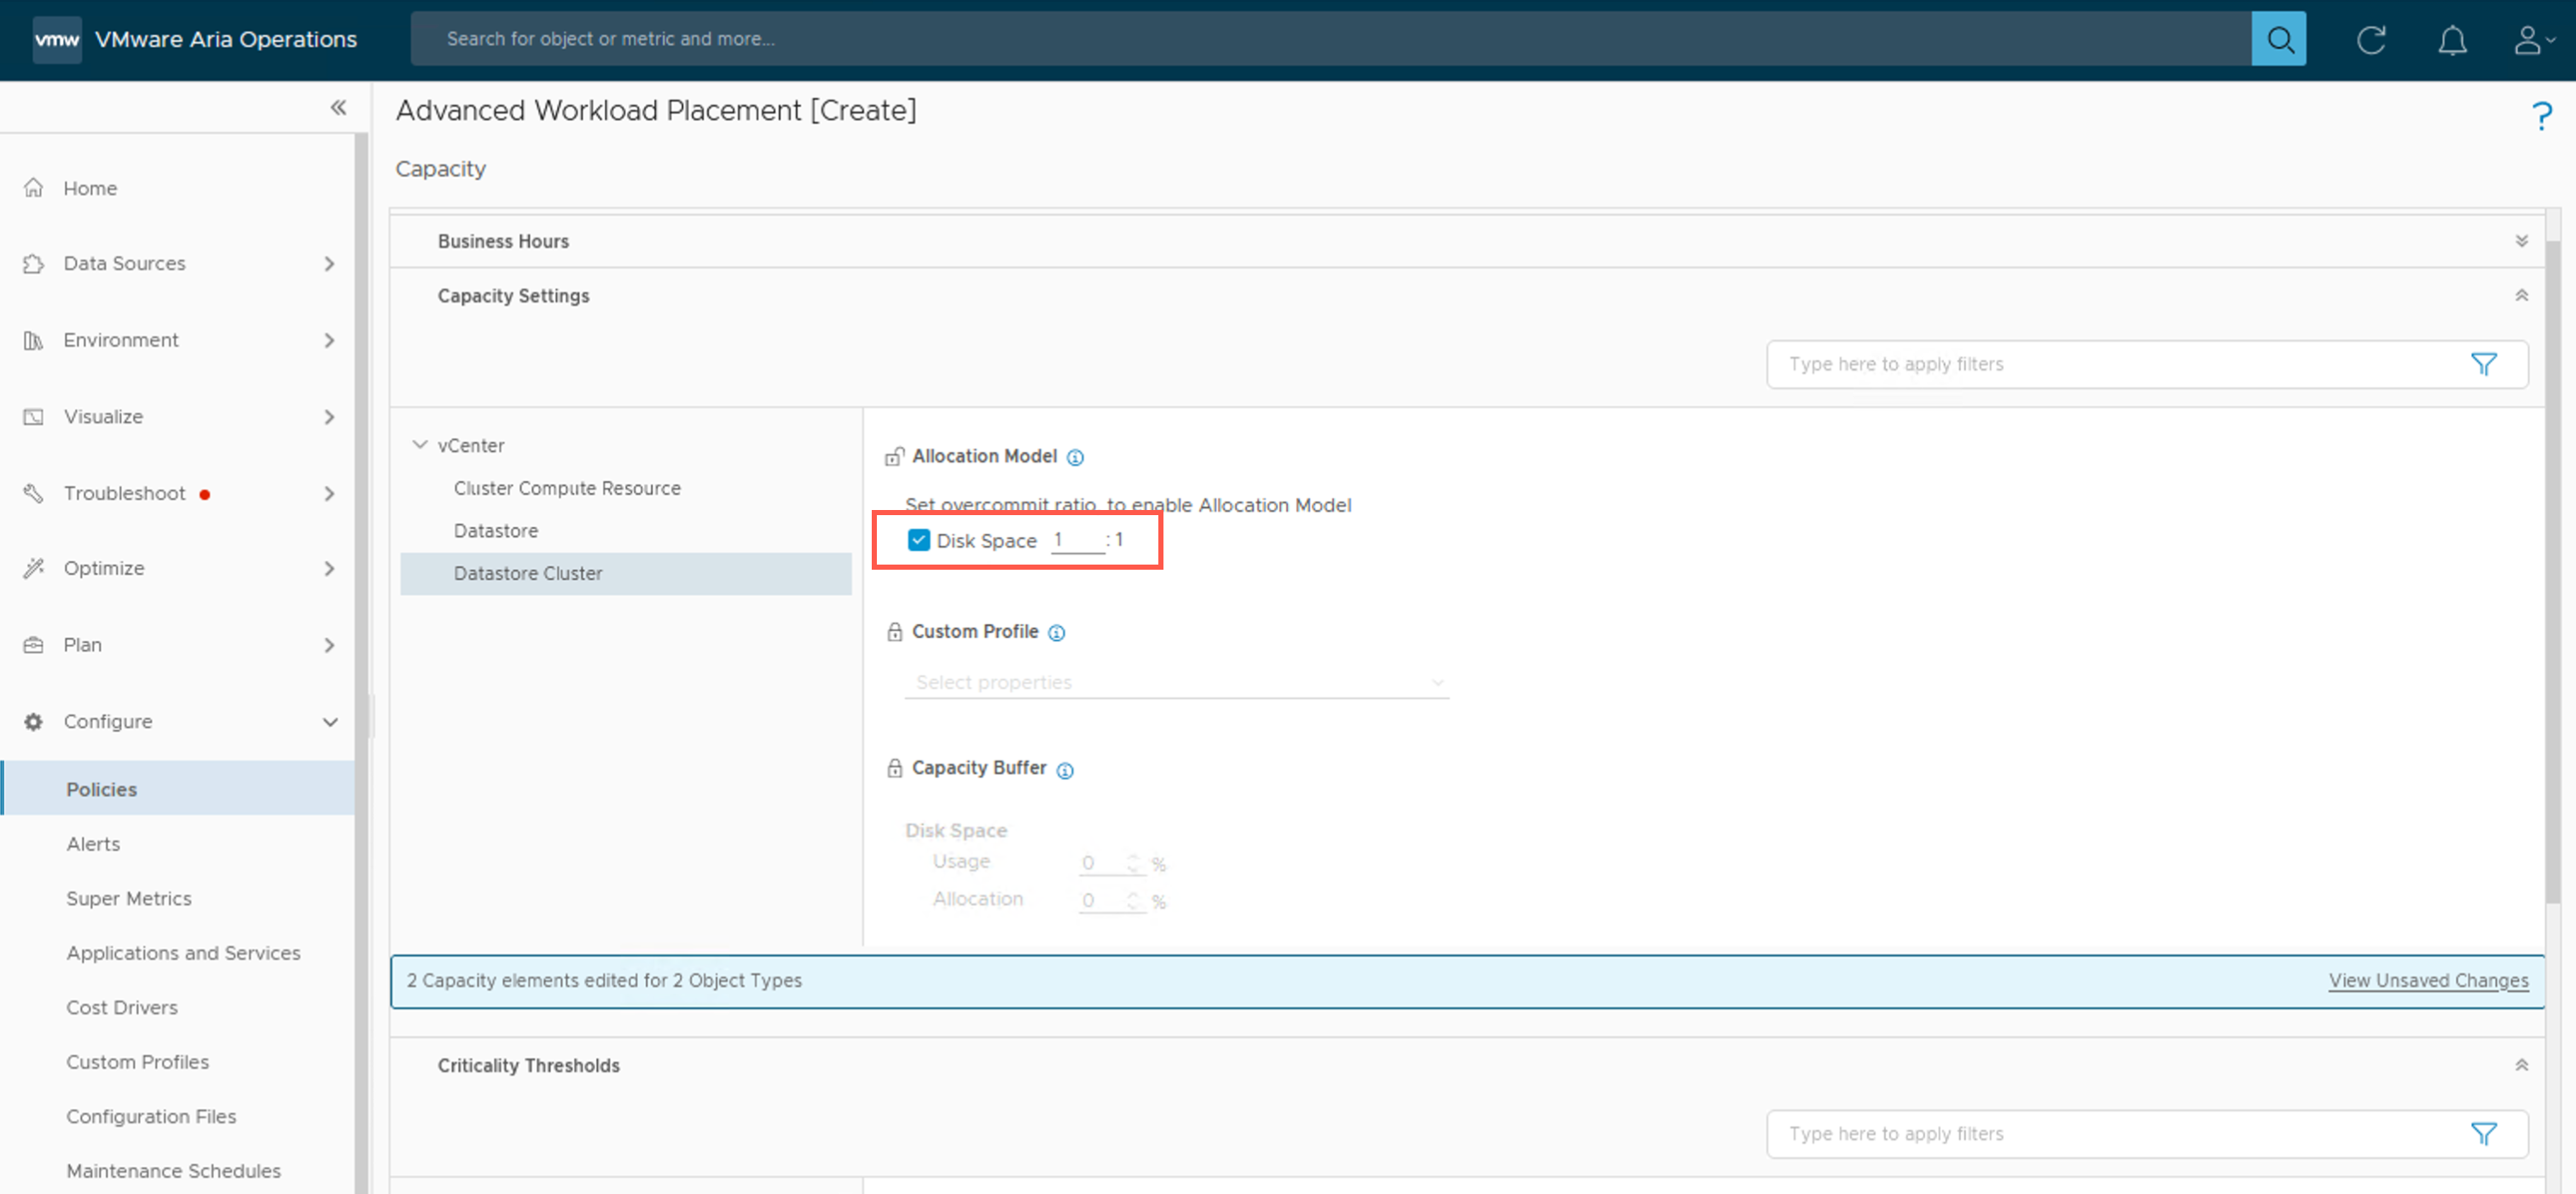
- At the Advanced Workload Placement [Create] - Capacity screen, under vCenter > Datastore, click the padlock to unlock the Allocation Model.

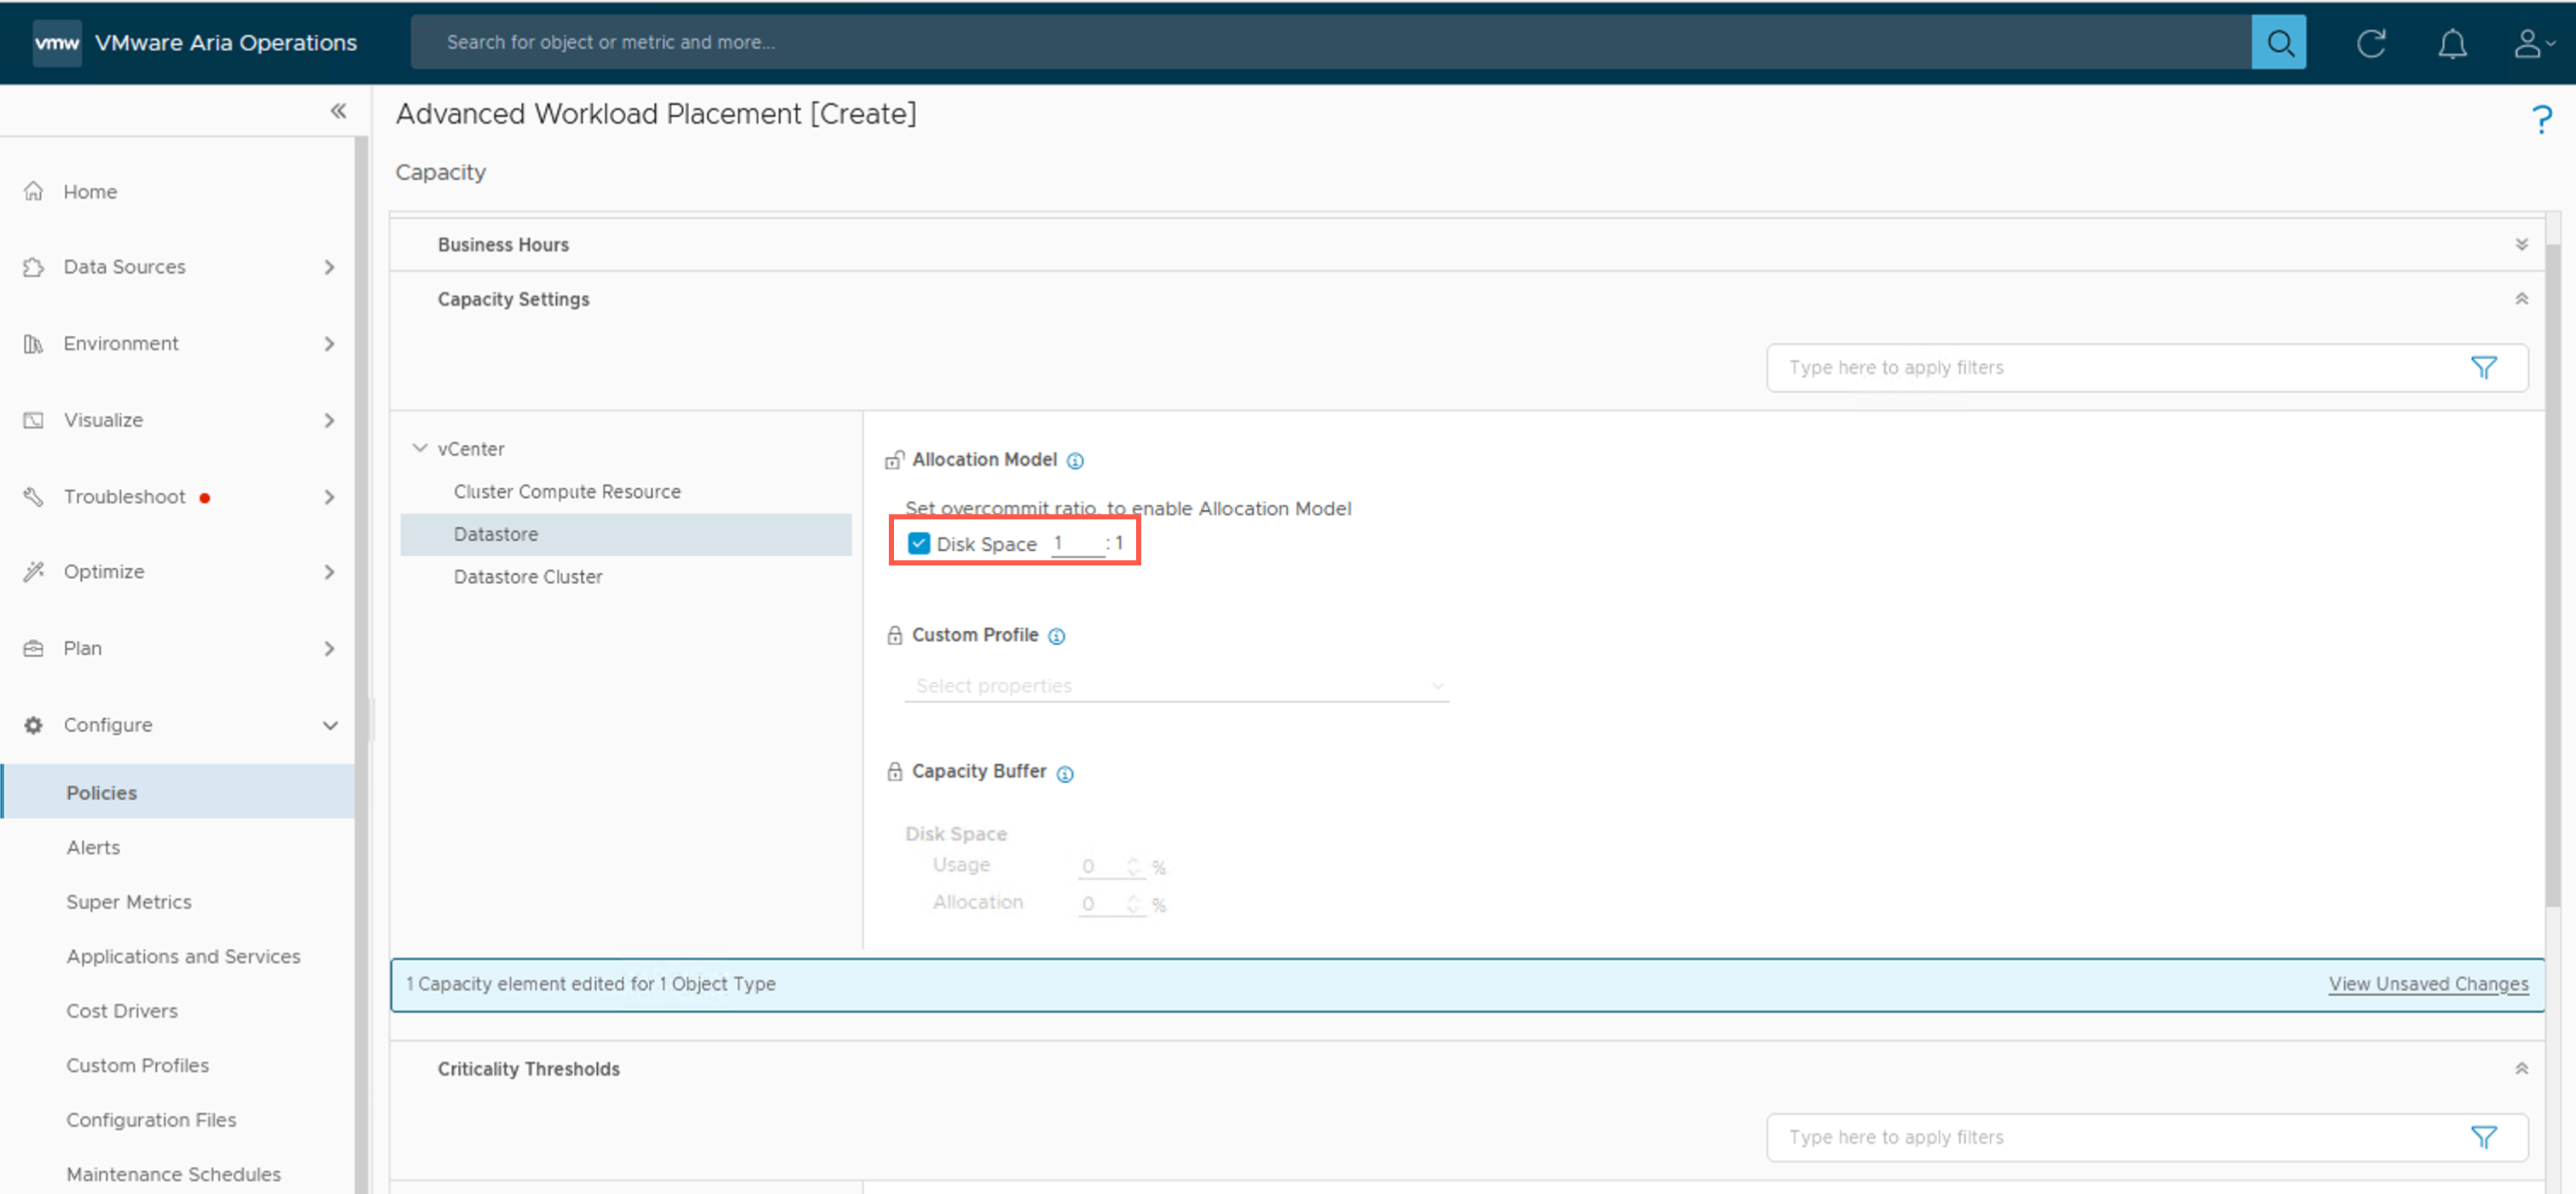
- At the Advanced Workload Placement [Create] - Capacity screen, under vCenter > Datastore, check the Disk Space checkbox and type 1 into text field to set the overcommit / allocation ratio of Disk Space resources to 1:1.
- Click SAVE to save the Capacity settings.
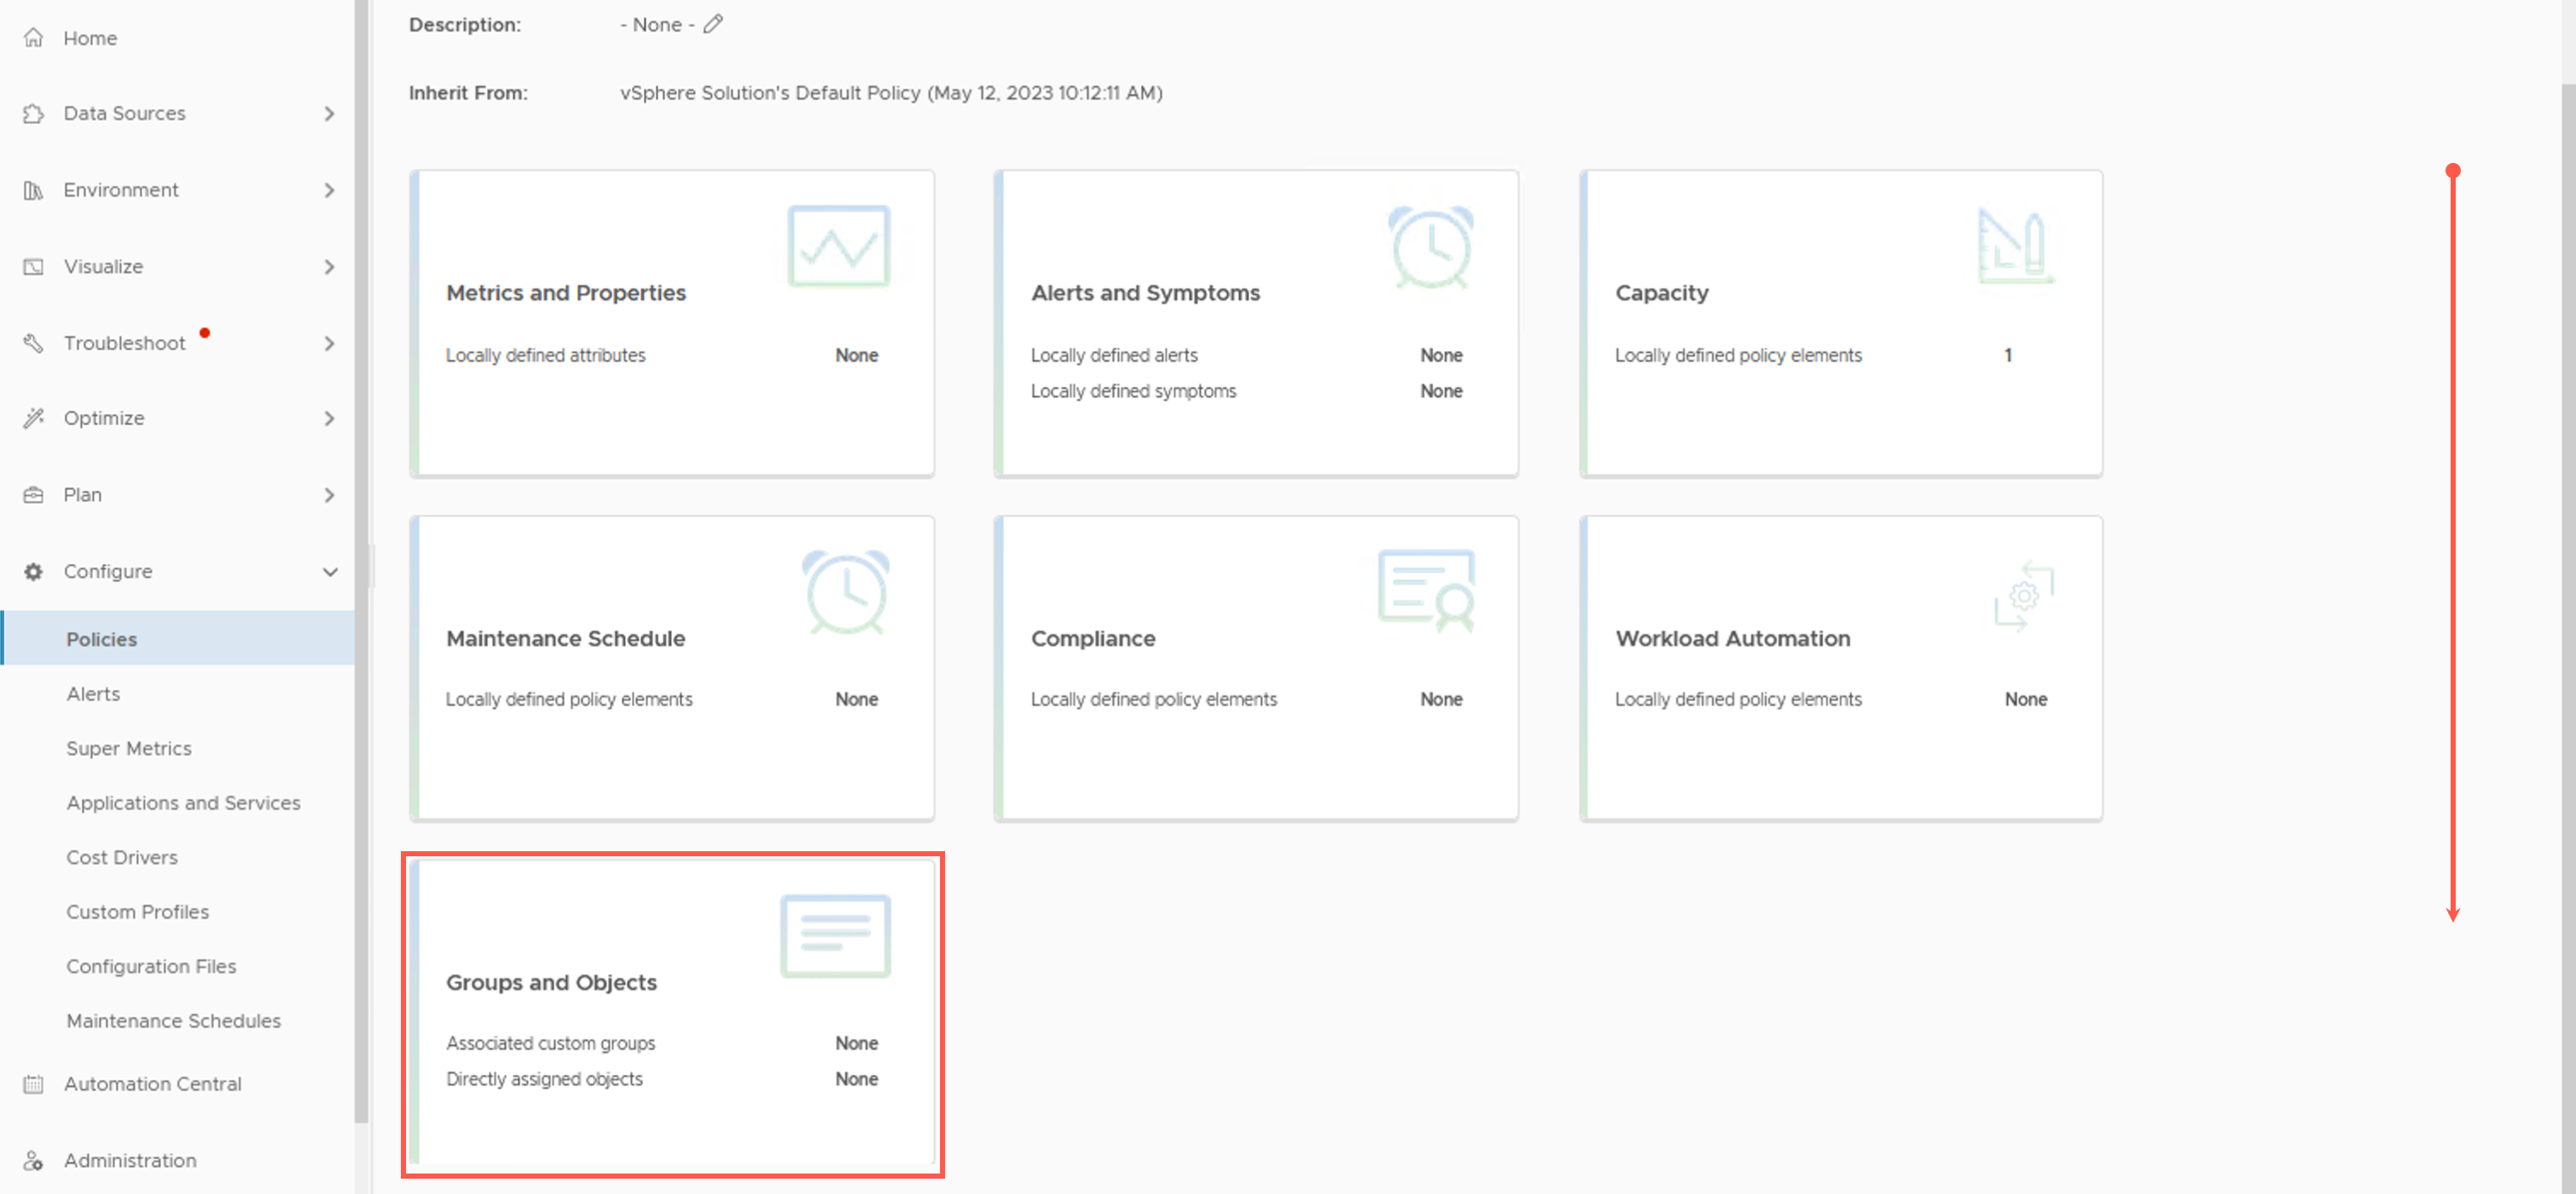
- At the Advanced Workload Placement [Create] screen, scroll down and click the Groups and Objects tile.
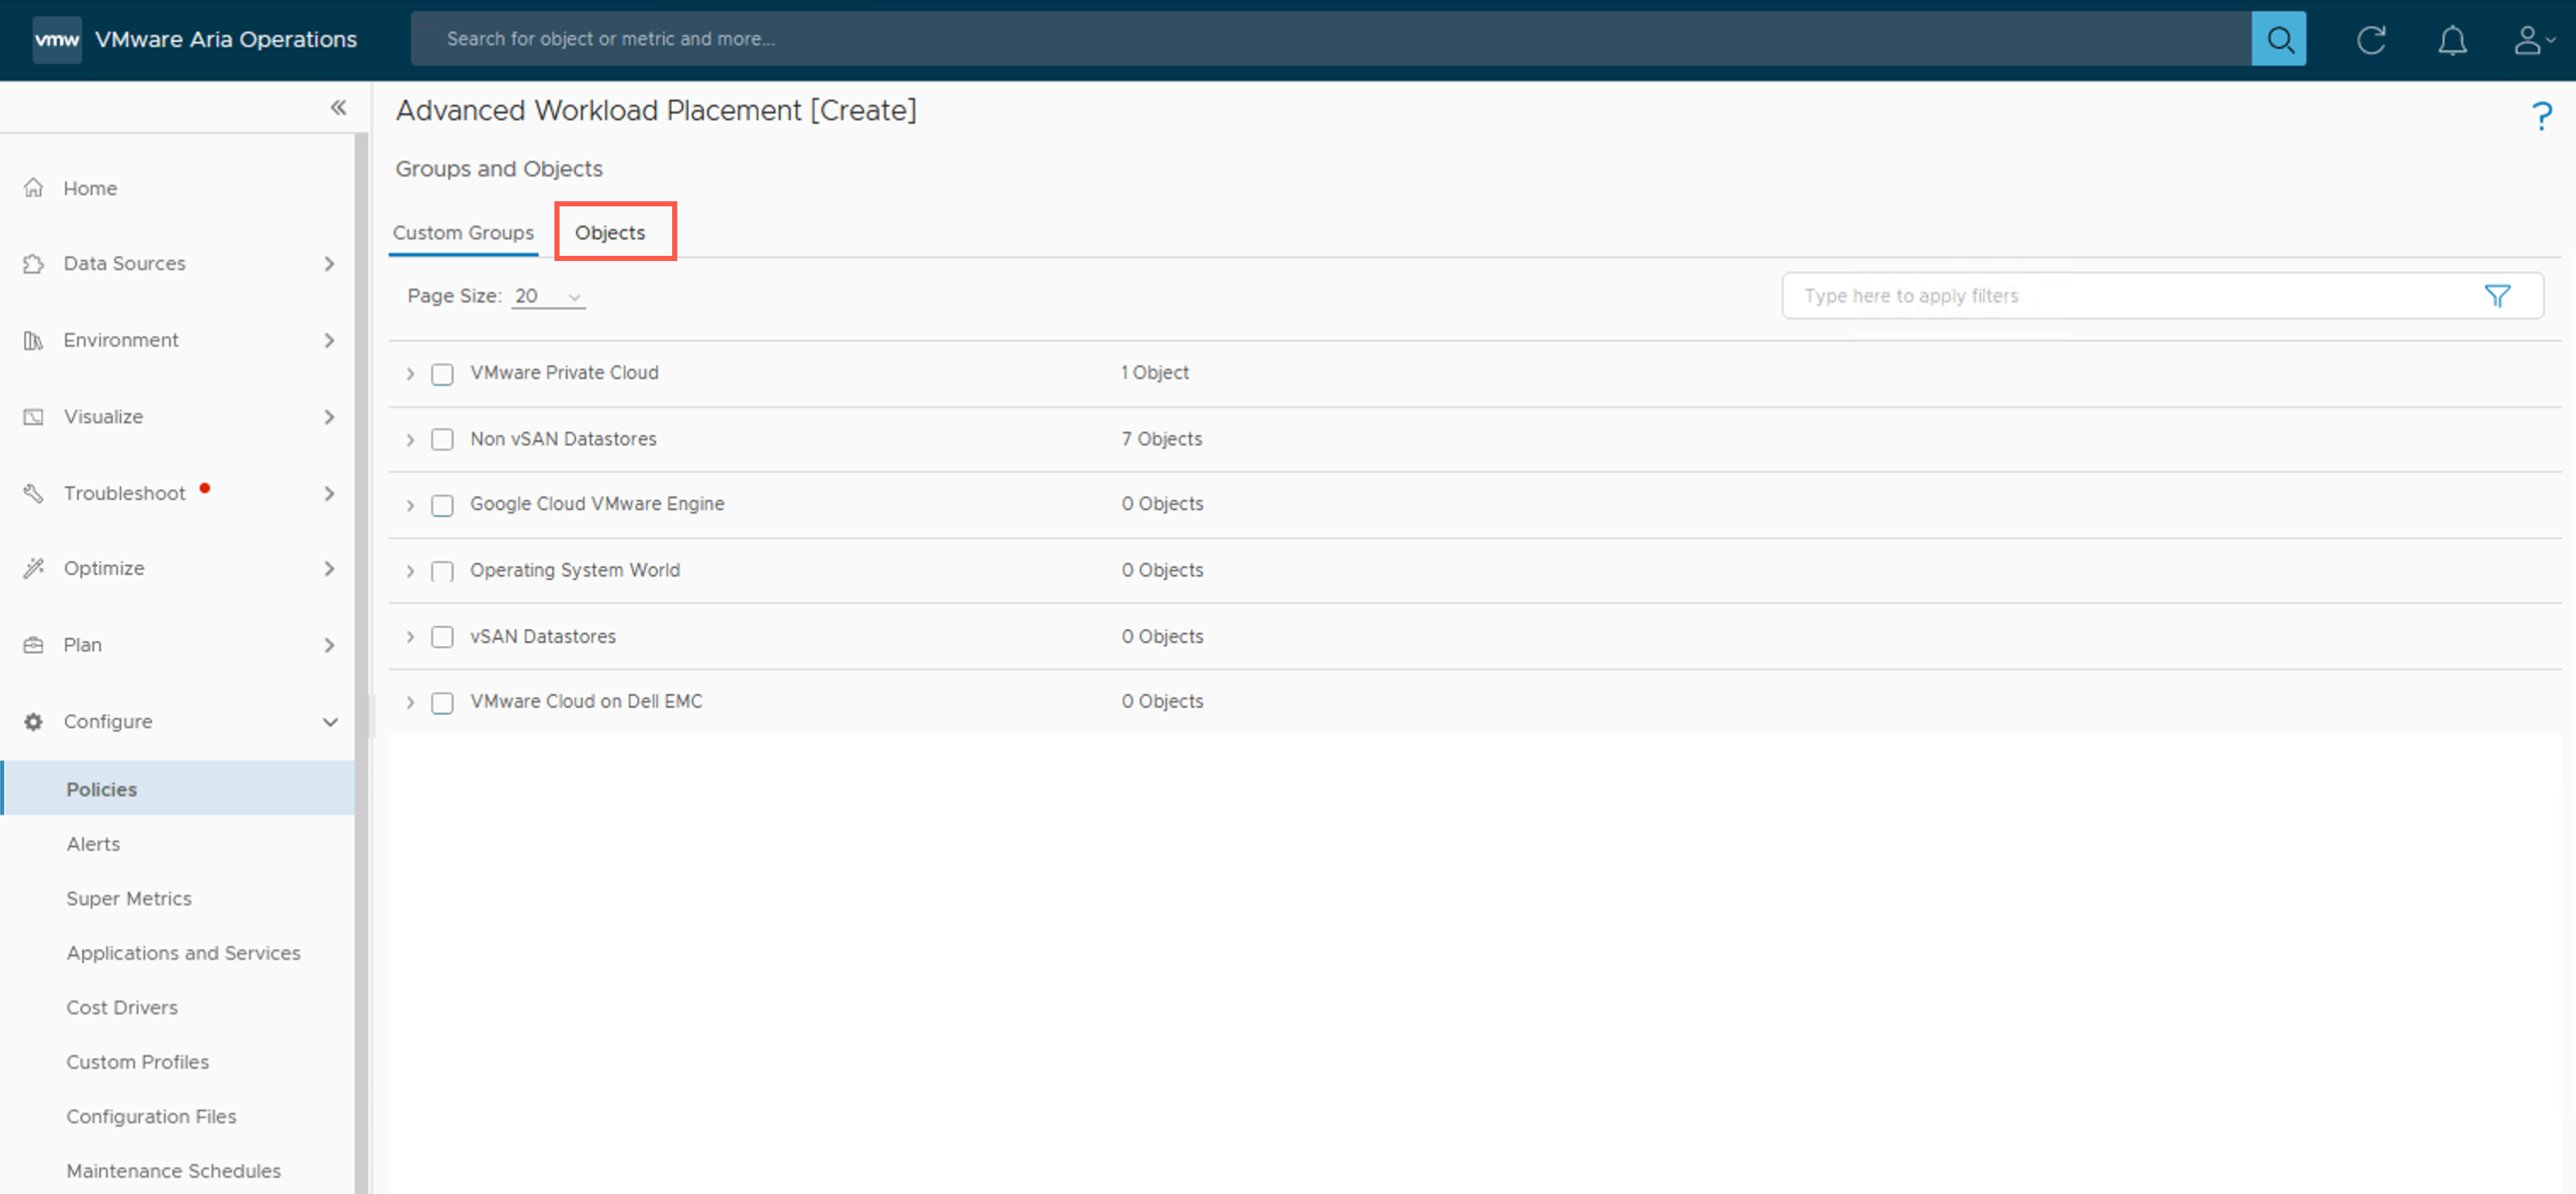
- At the Advanced Workload Placement [Create] - Groups and Objects screen, click Objects,
- At the Advanced Workload Placement [Create] - Groups and Objects screen, in the Select Object Type dropdown, expand vCenter and select Cluster Compute Resource.
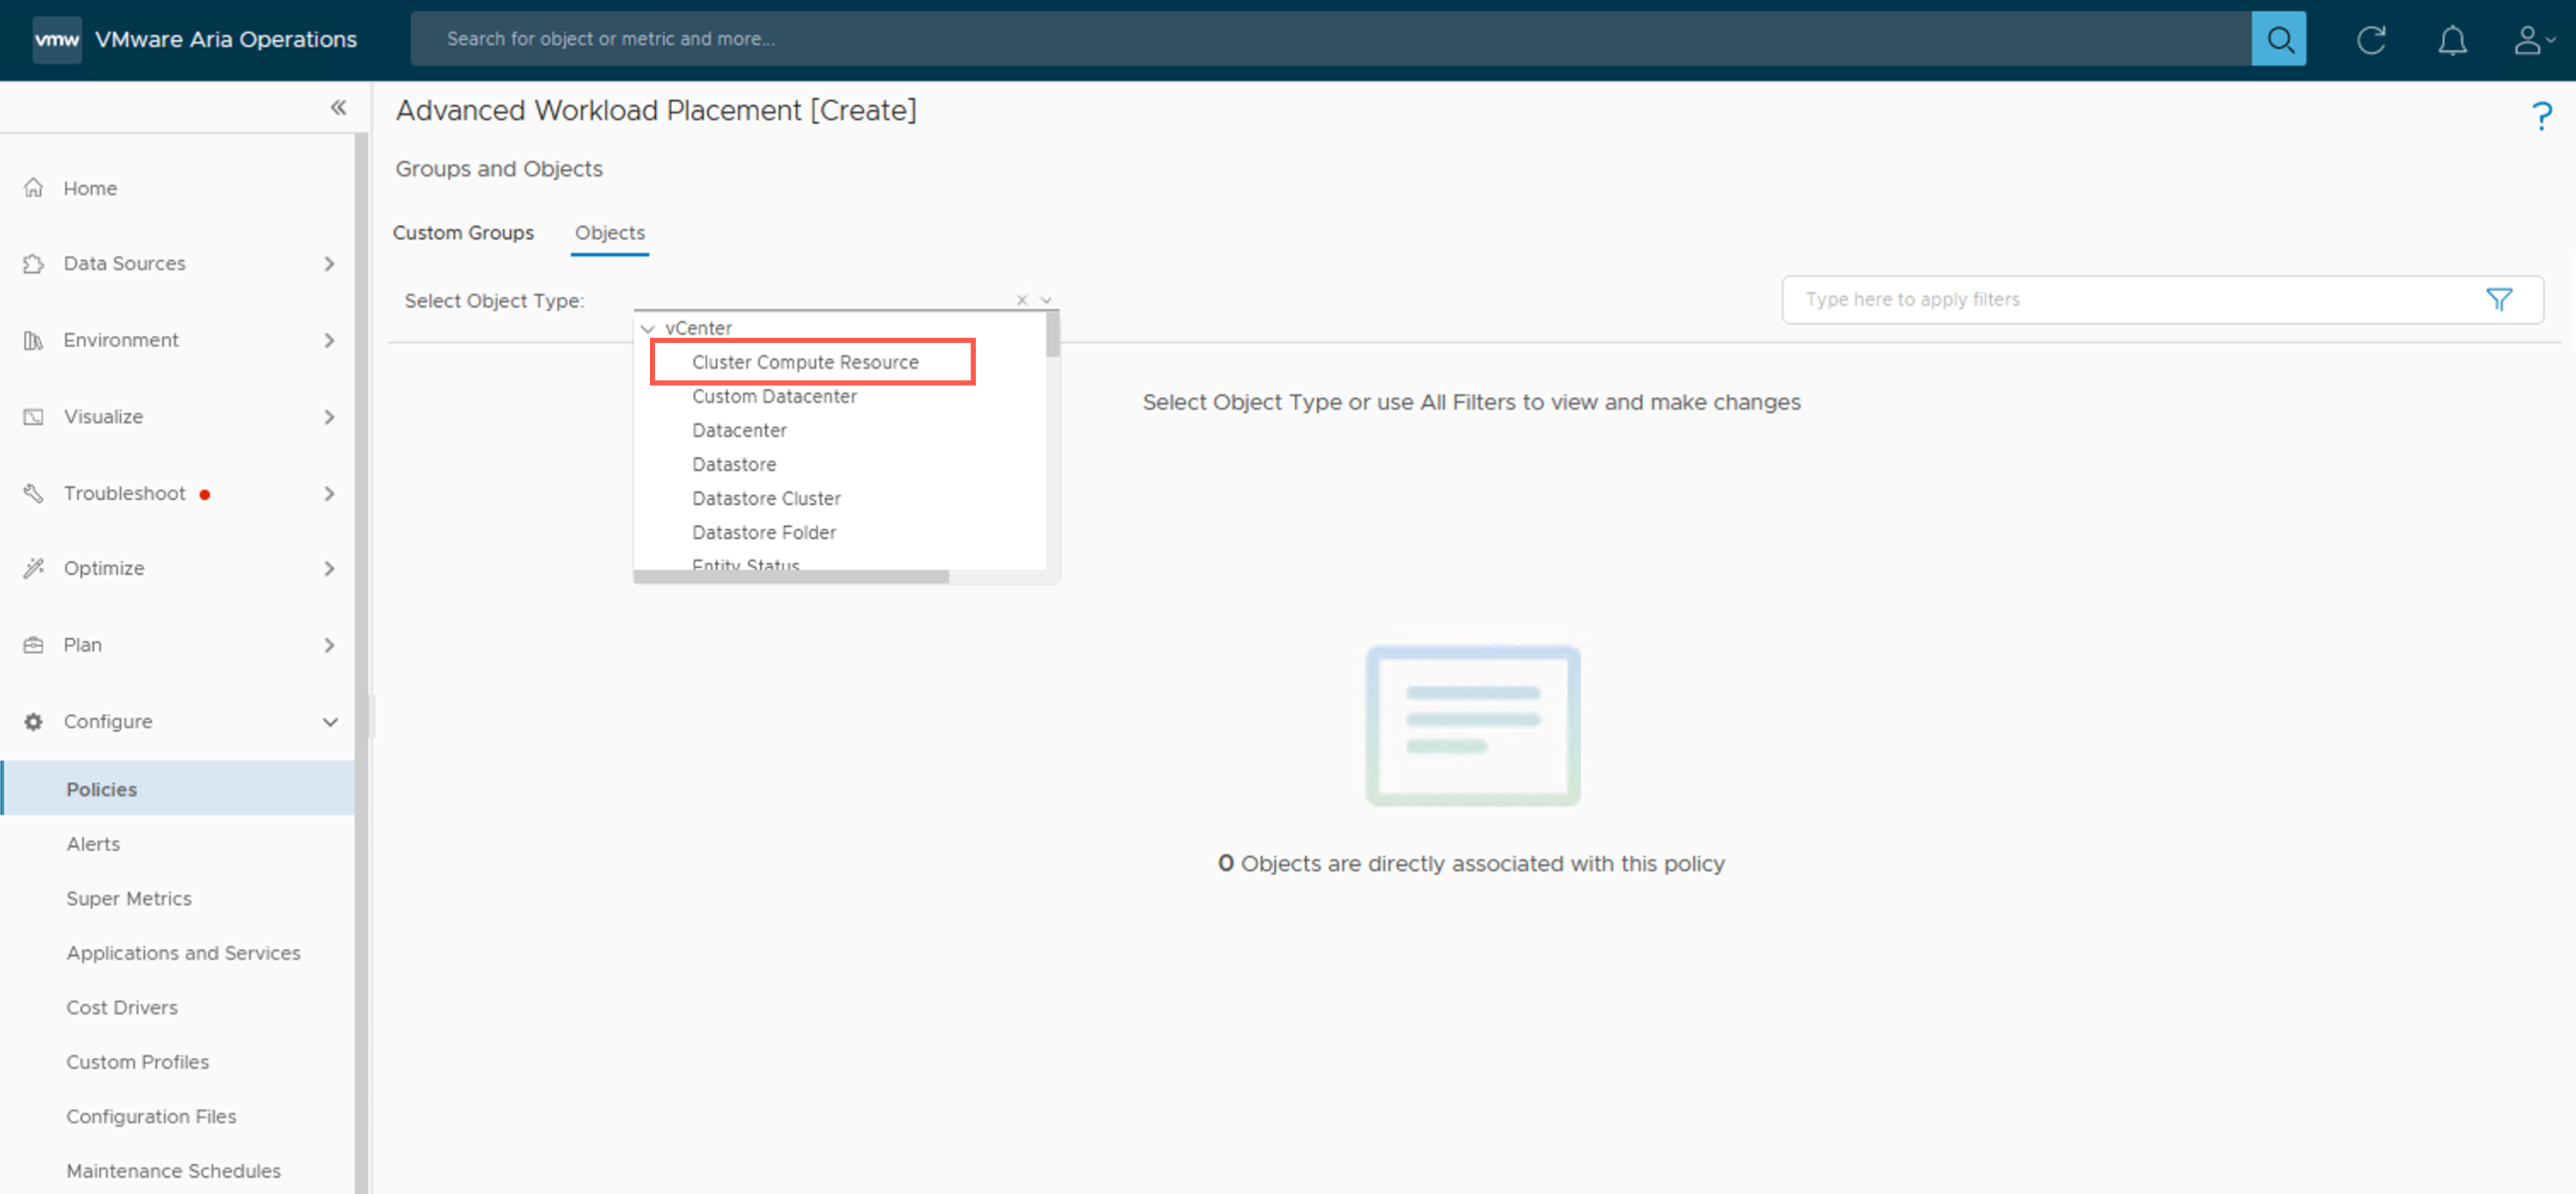
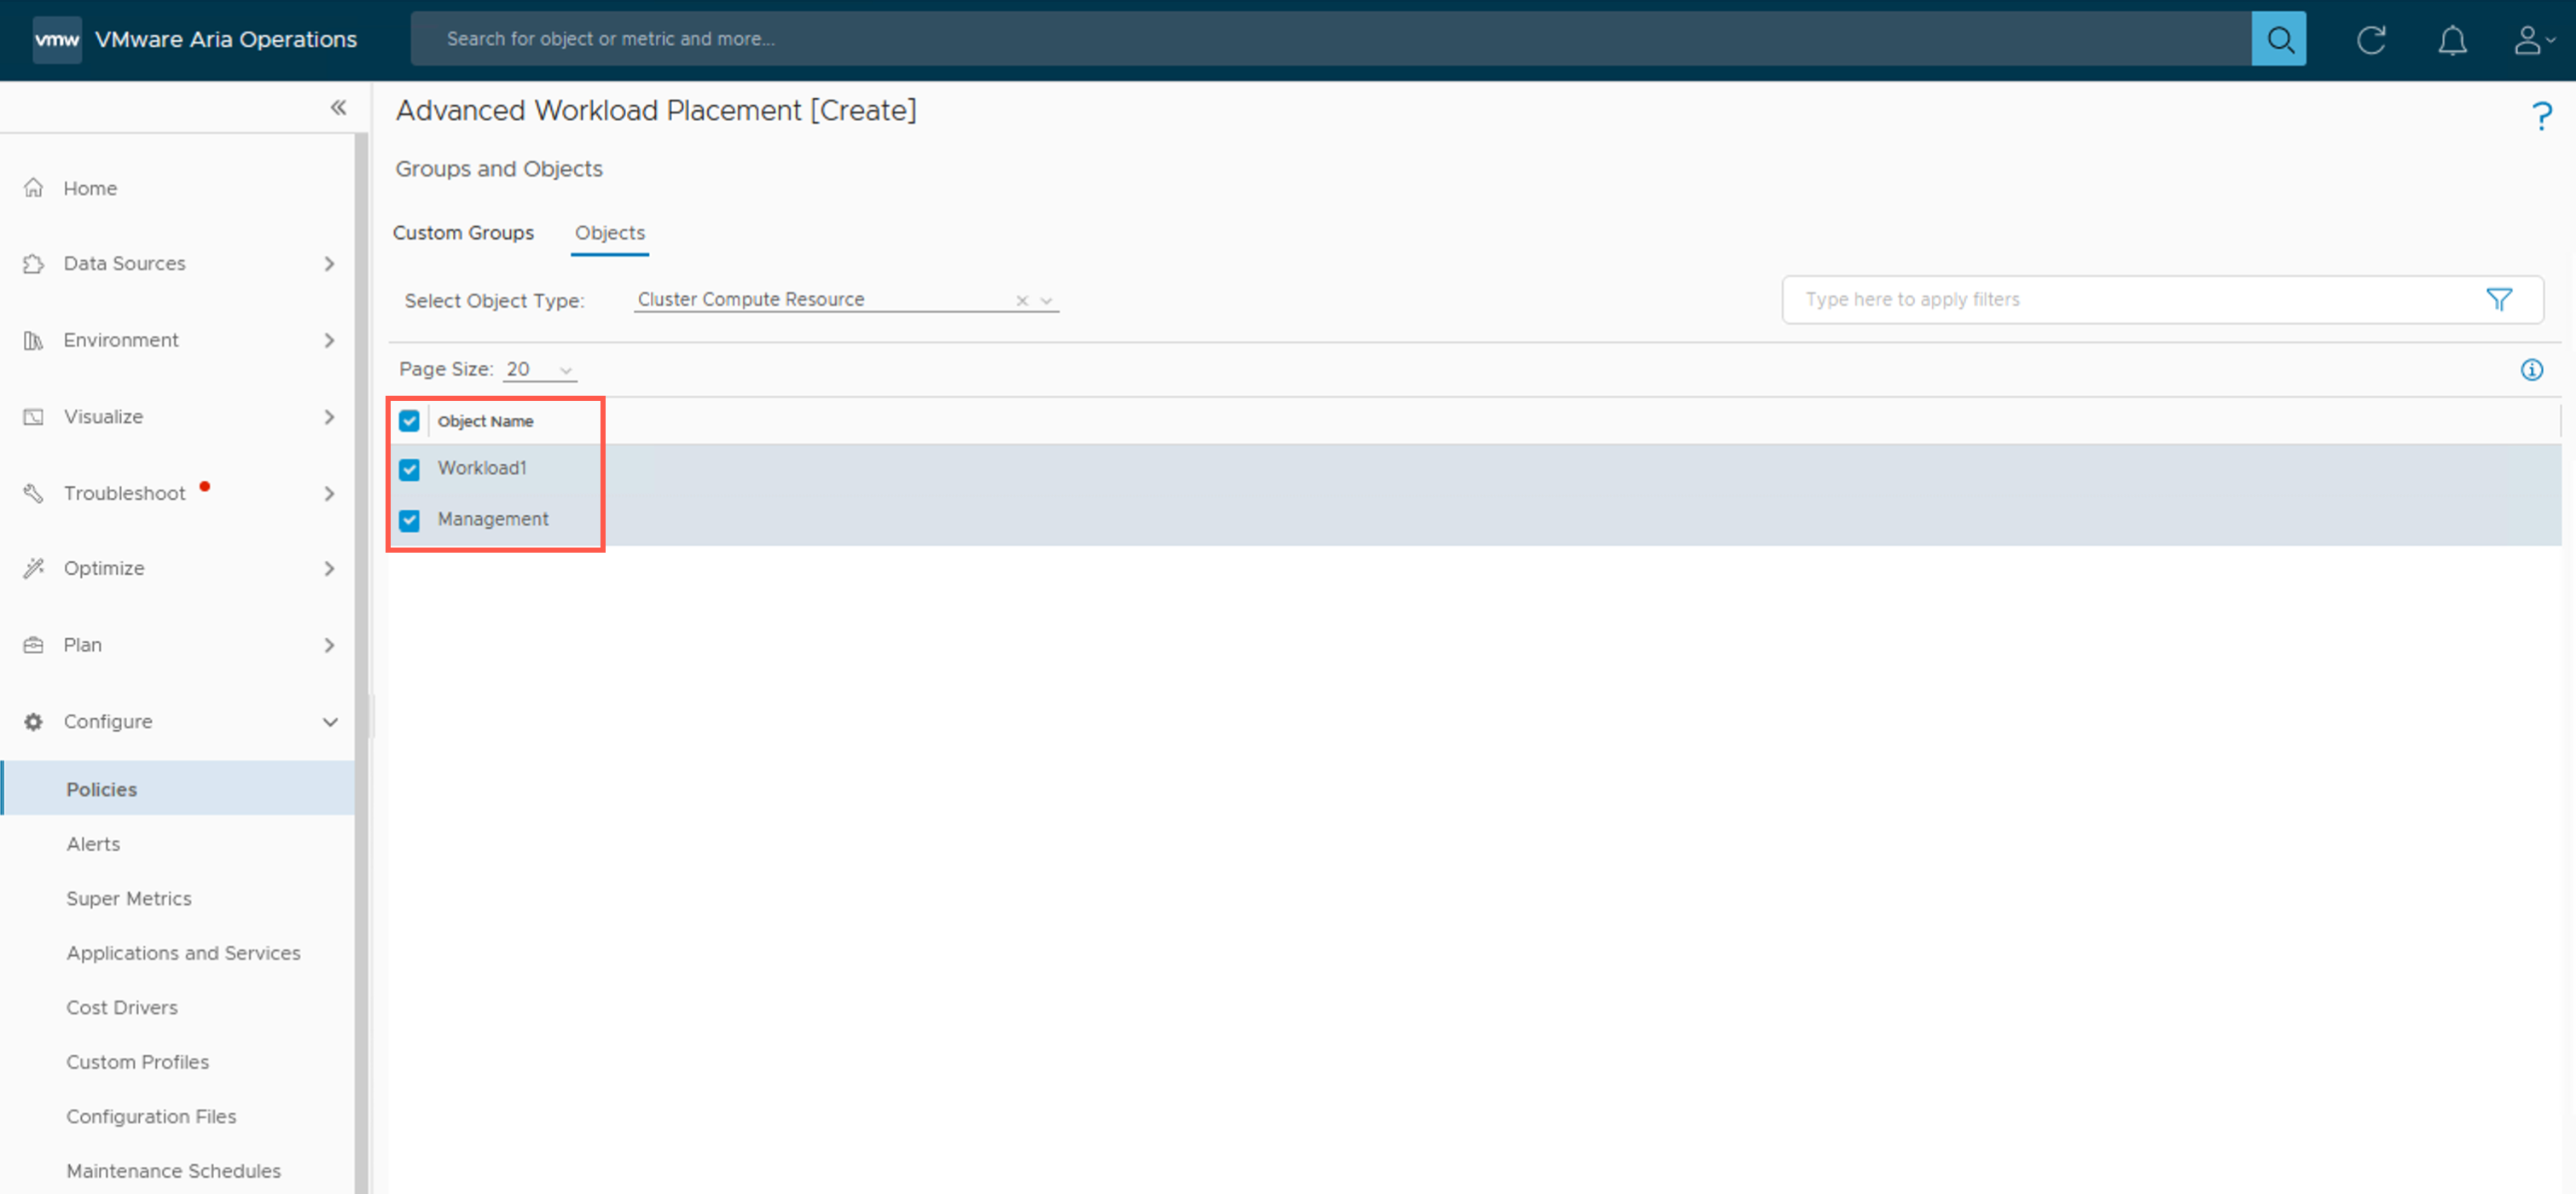
- At the Advanced Workload Placement [Create] - Groups and Objects screen, check the checkbox for all of the clusters that we would like to include in the policy.
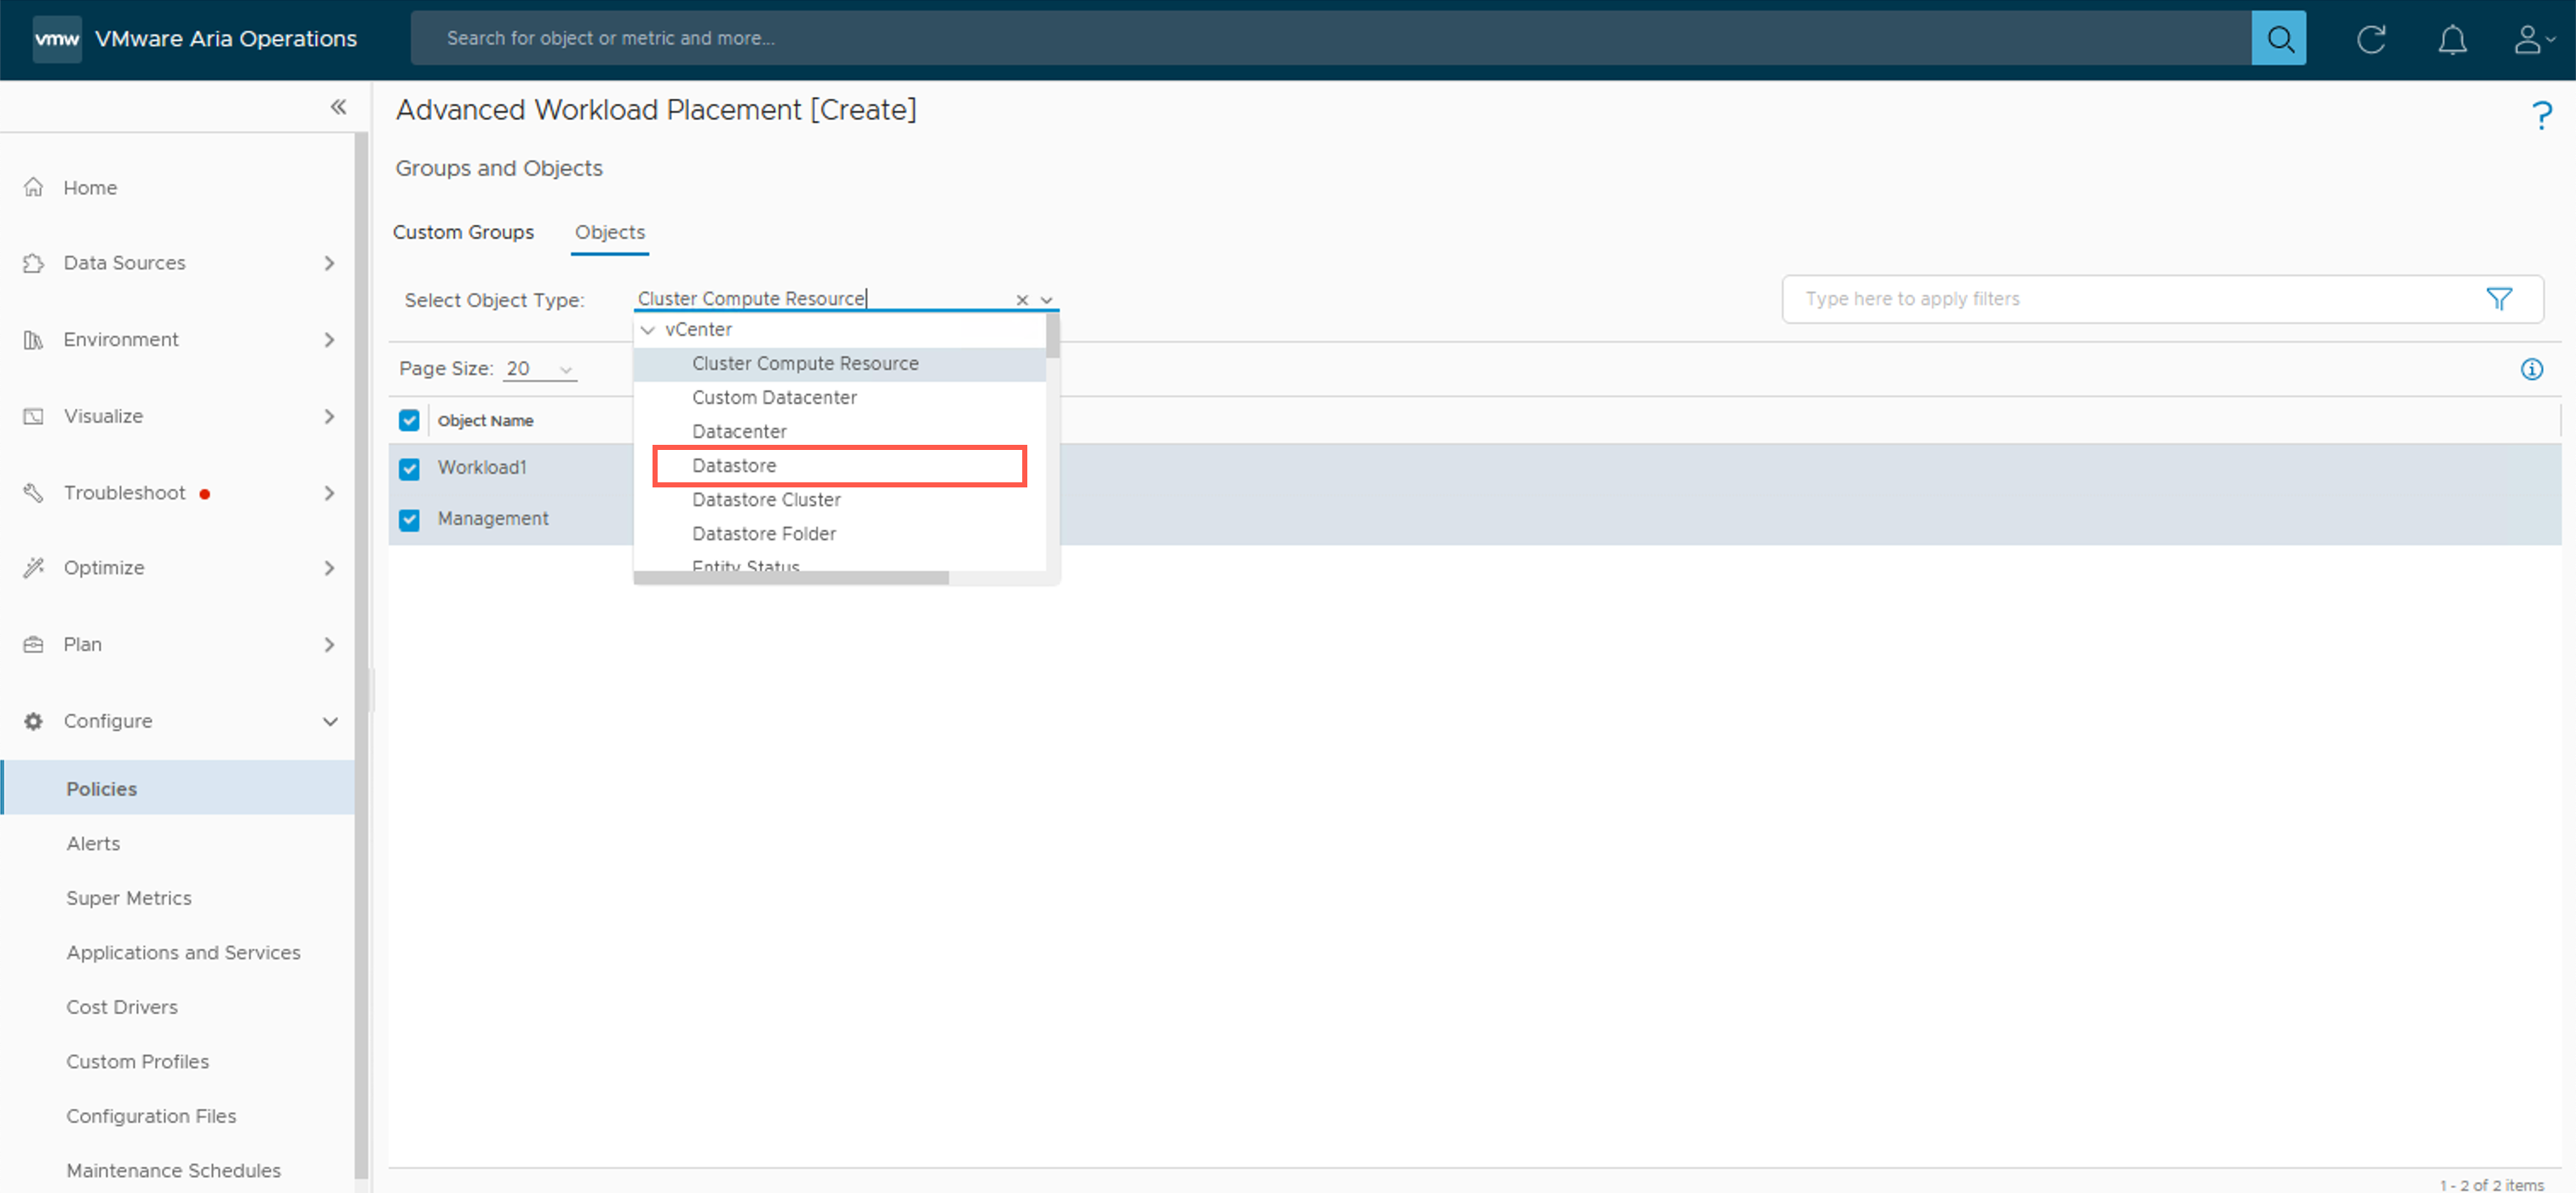
- At the Advanced Workload Placement [Create] - Groups and Objects screen, in the Select Object Type dropdown, expand vCenter and select Datastores.
- At the Advanced Workload Placement [Create] - Groups and Objects screen, check the checkbox for all of the datastores that we would like to include in the policy.

- At the Advanced Workload Placement [Create] - Groups and Objects screen, click SAVE.
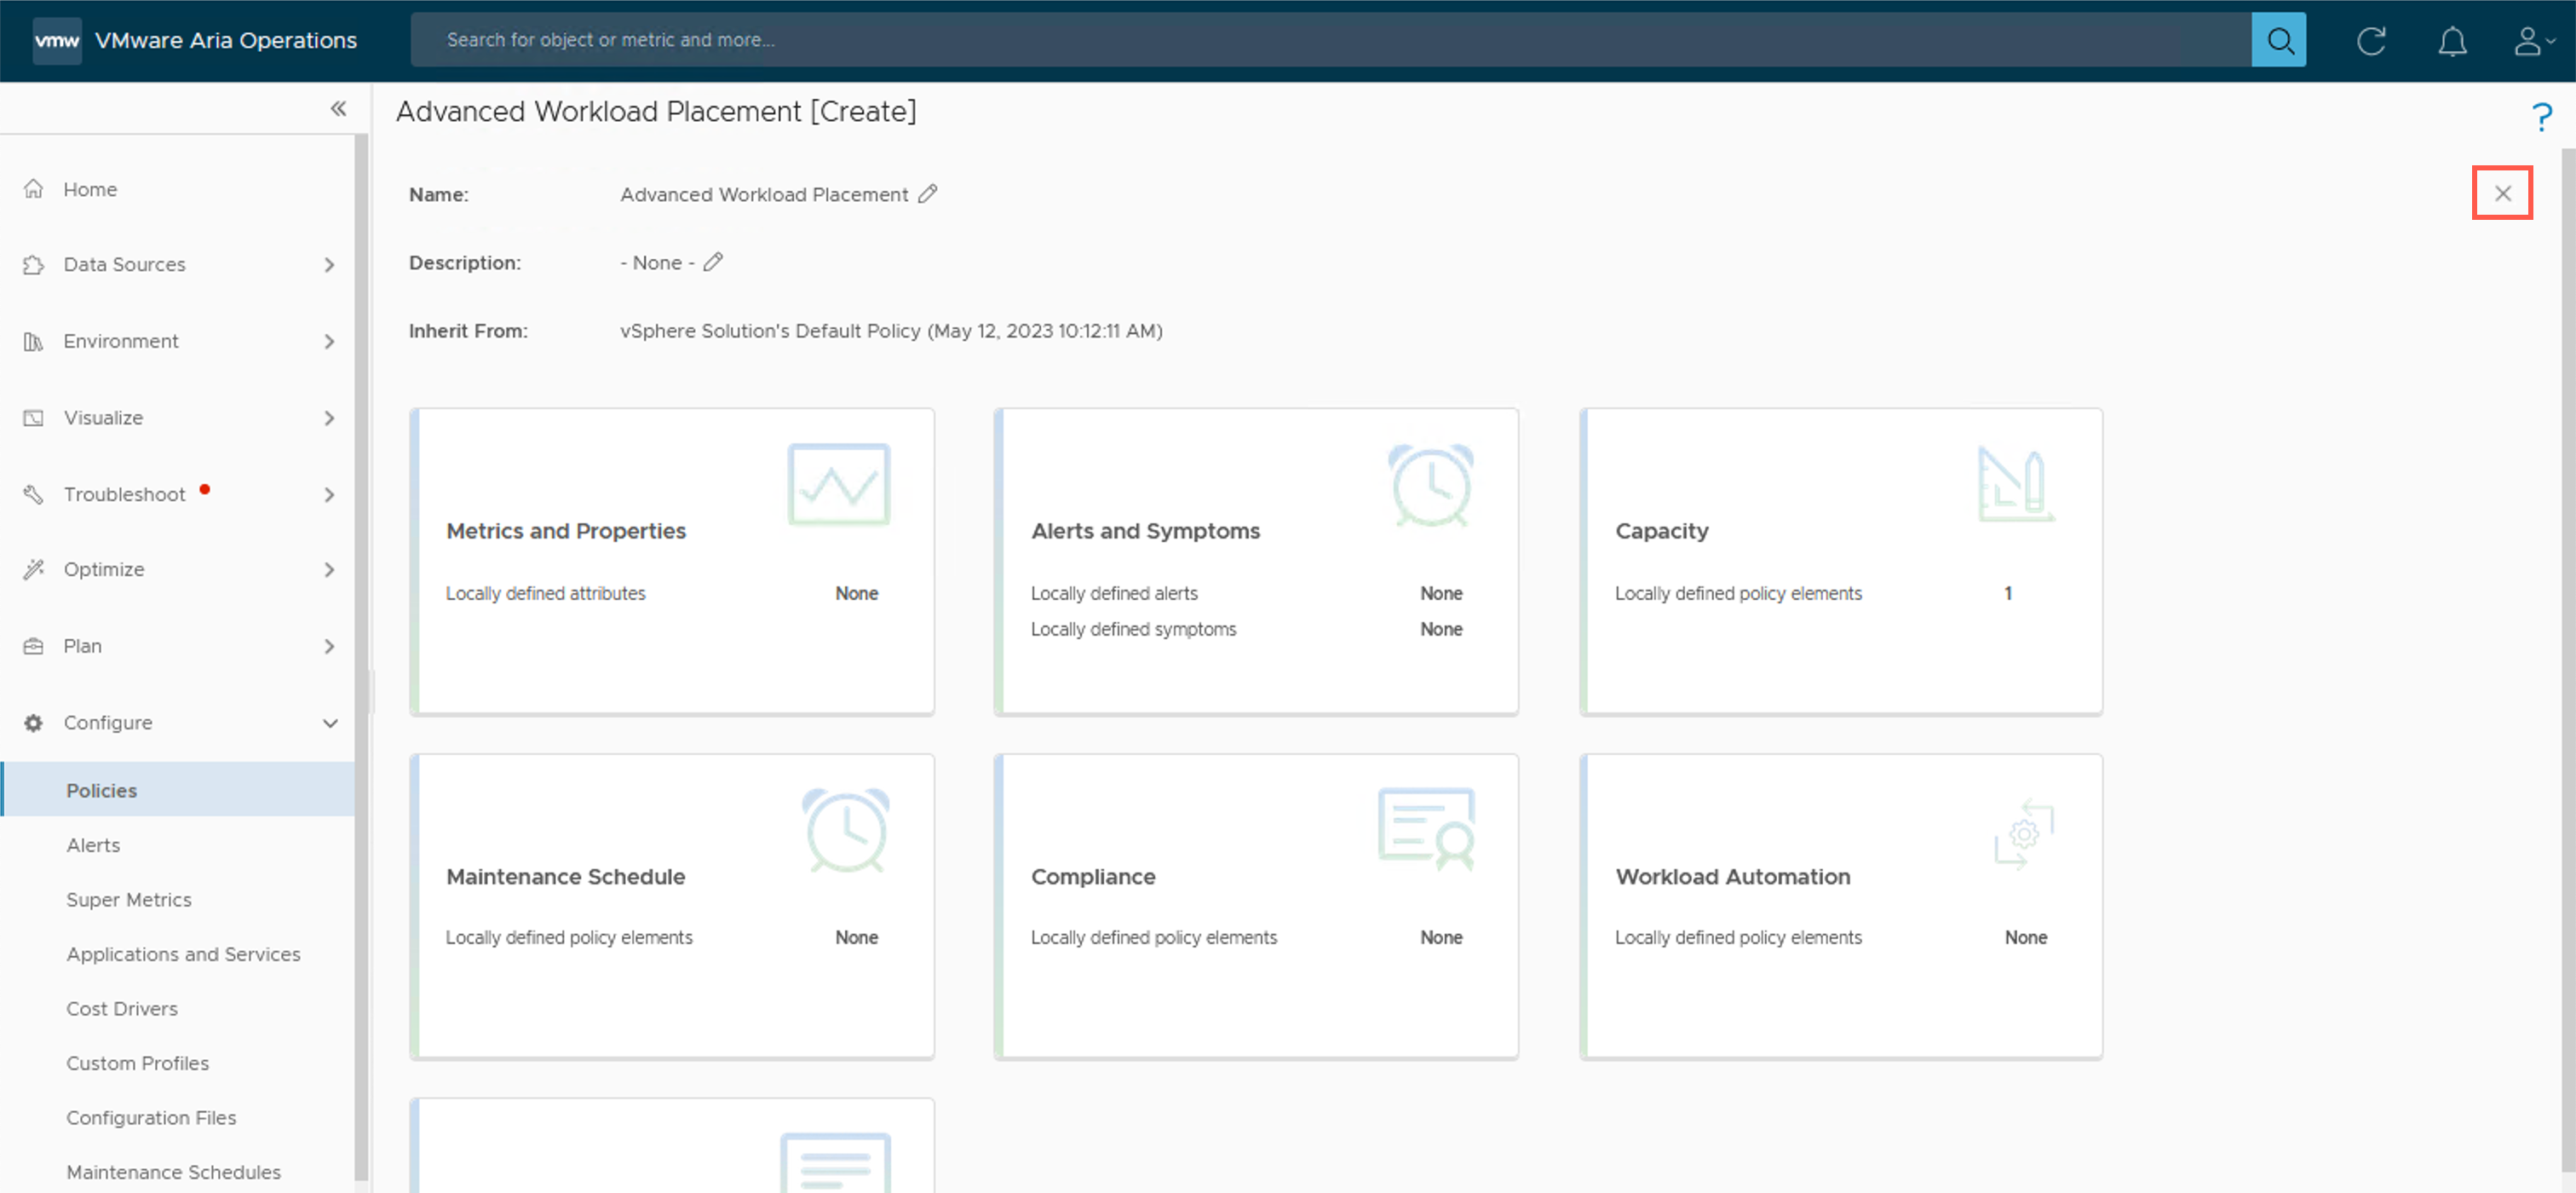
- At the Advanced Workload Placement [Create] screen, click the X to close the policy.
This policy change may take up to 5 minutes to show in the UI because the default collection cycle for VMware Aria Operations is 5 minutes.
So before we close this post out, let us check to make sure that Allocation metrics are showing up in VMware Aria Operations for the vSphere Cluster
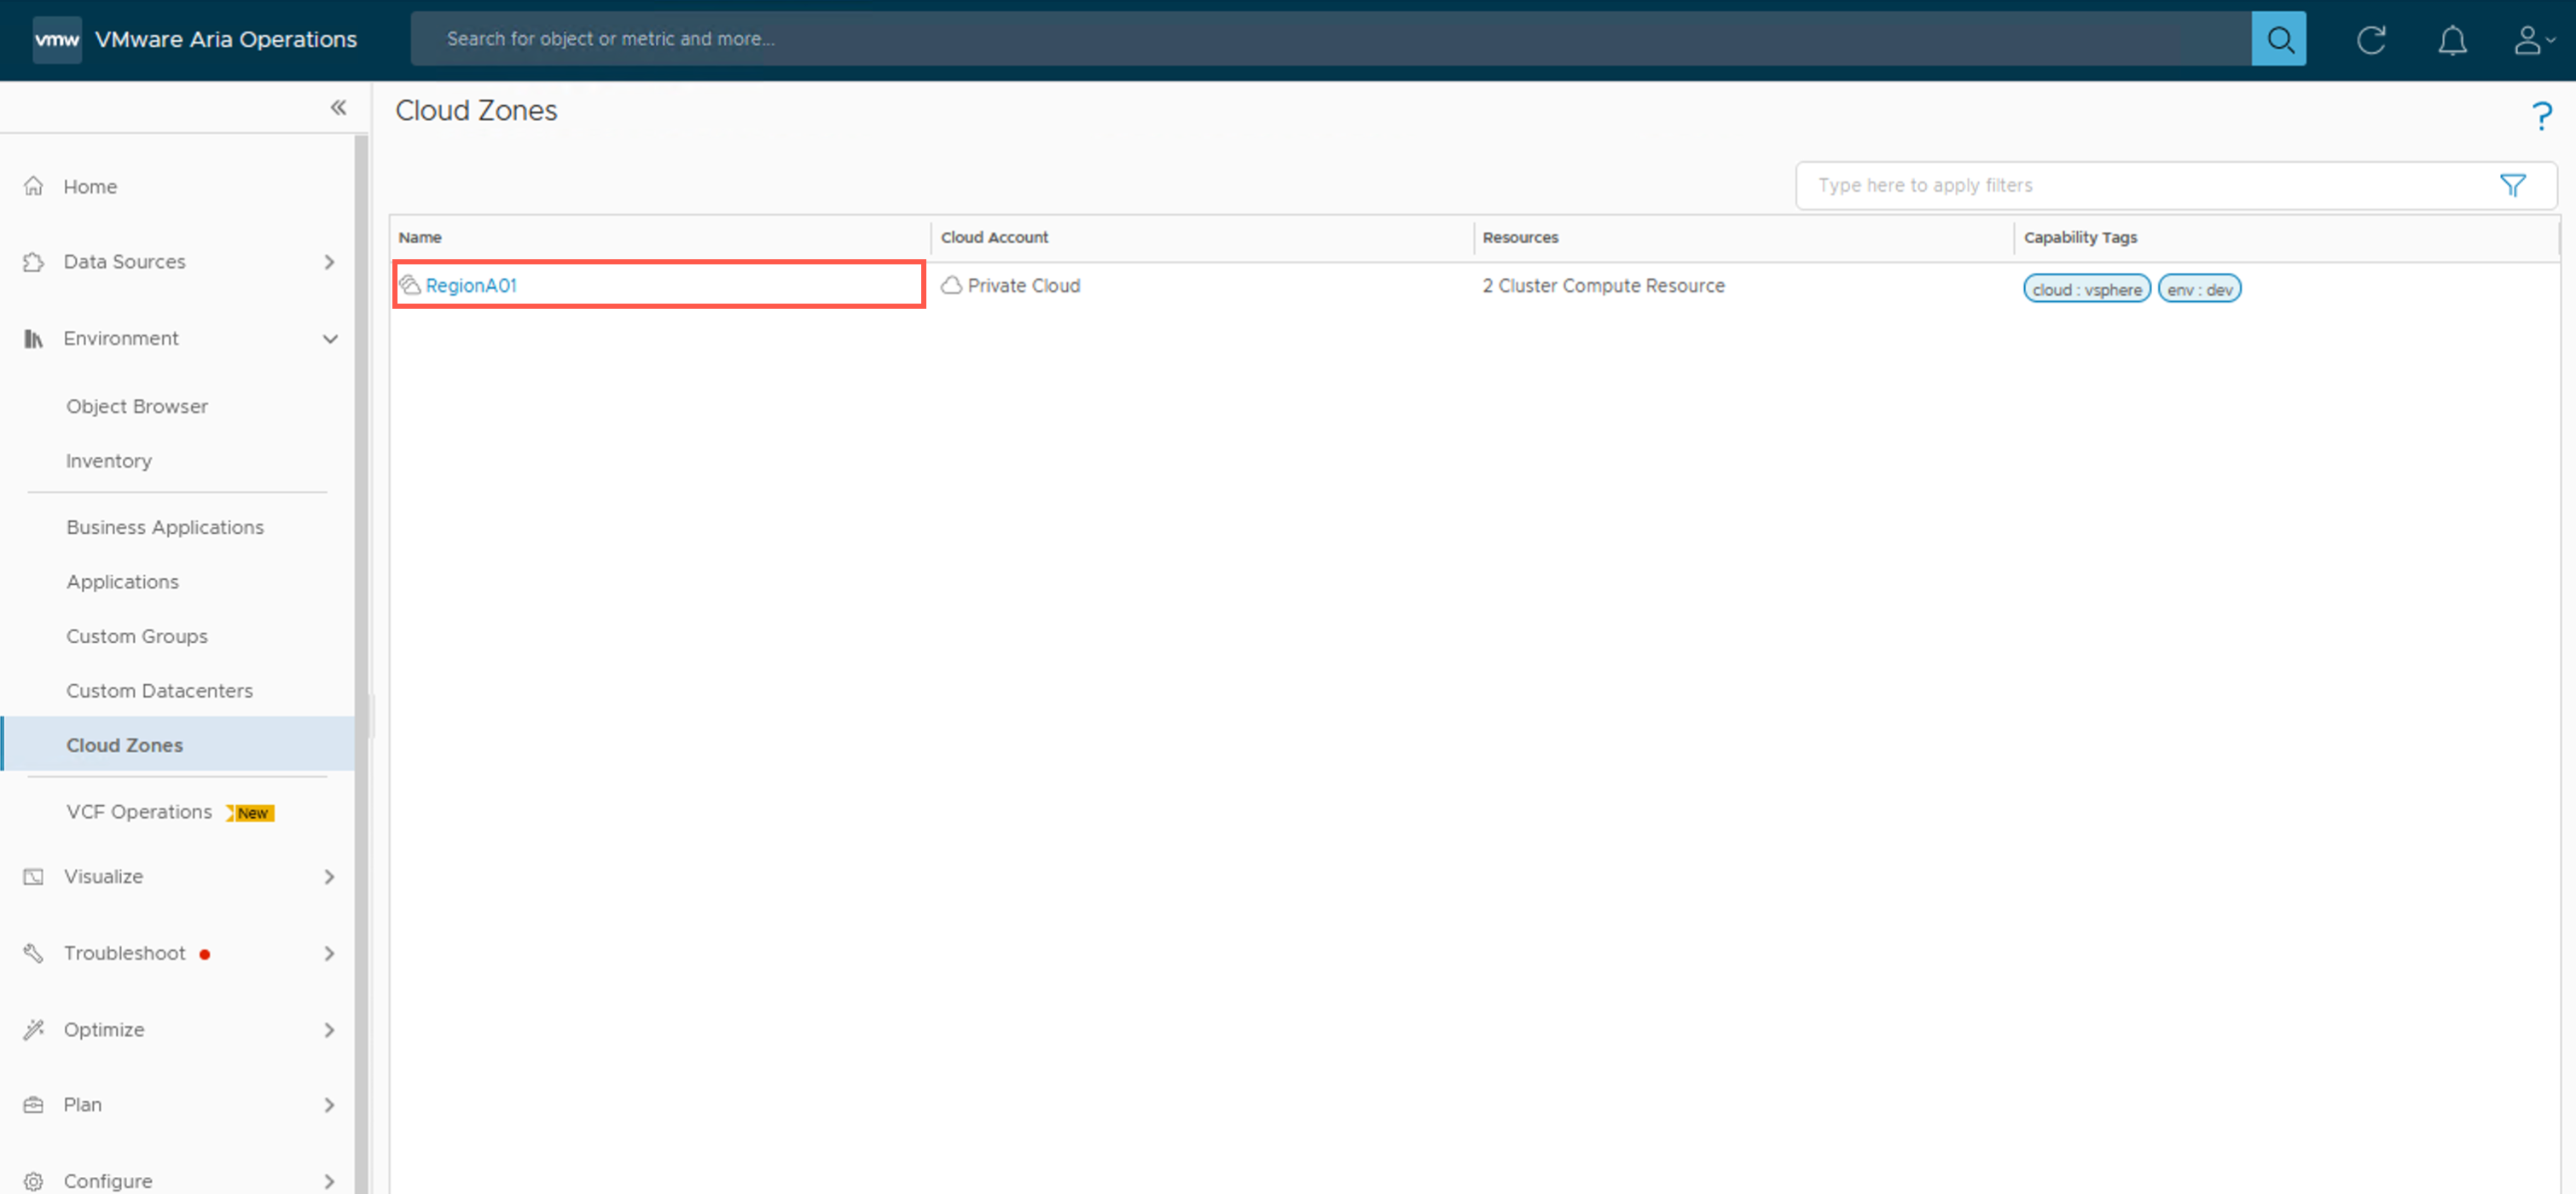
- Under Environment, click Cloud Zones.
- At the Cloud Zones screen, click one of the Cloud Zone that contains the compute has been configured for Allocation-based Advanced Workload Placement.
- At the Object Browser screen, under Environment (All Objects), click the Cluster Compute Resource object in the object hierachy.
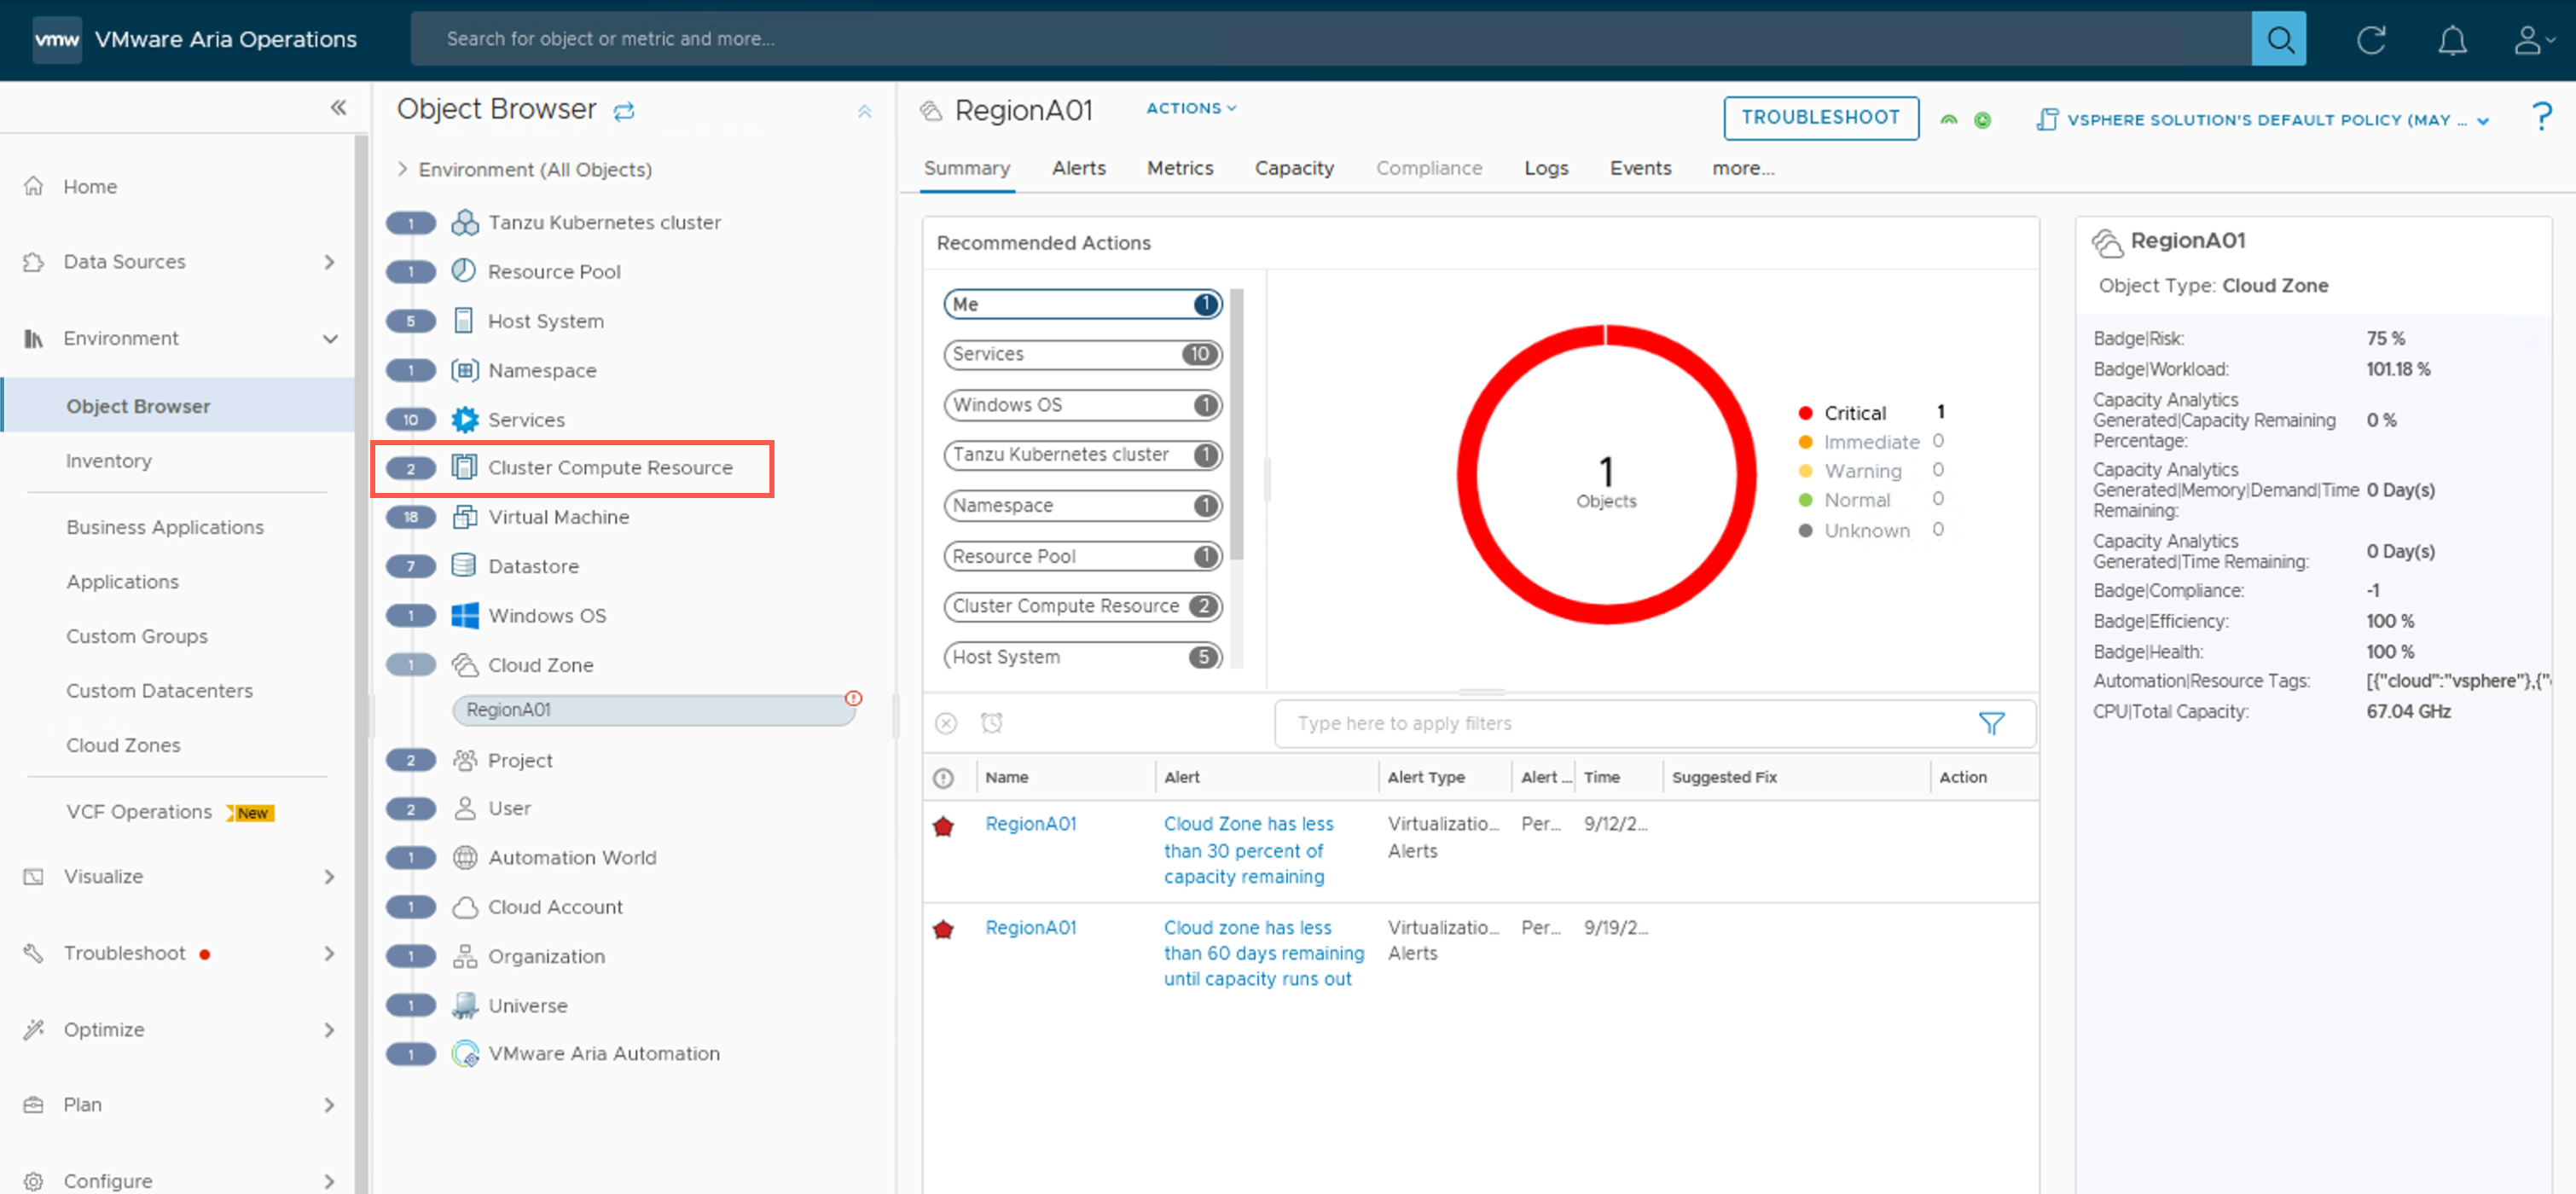
- At the Object Browser screen, under Environment (All Objects), click the Workload1 object in the object hierachy.
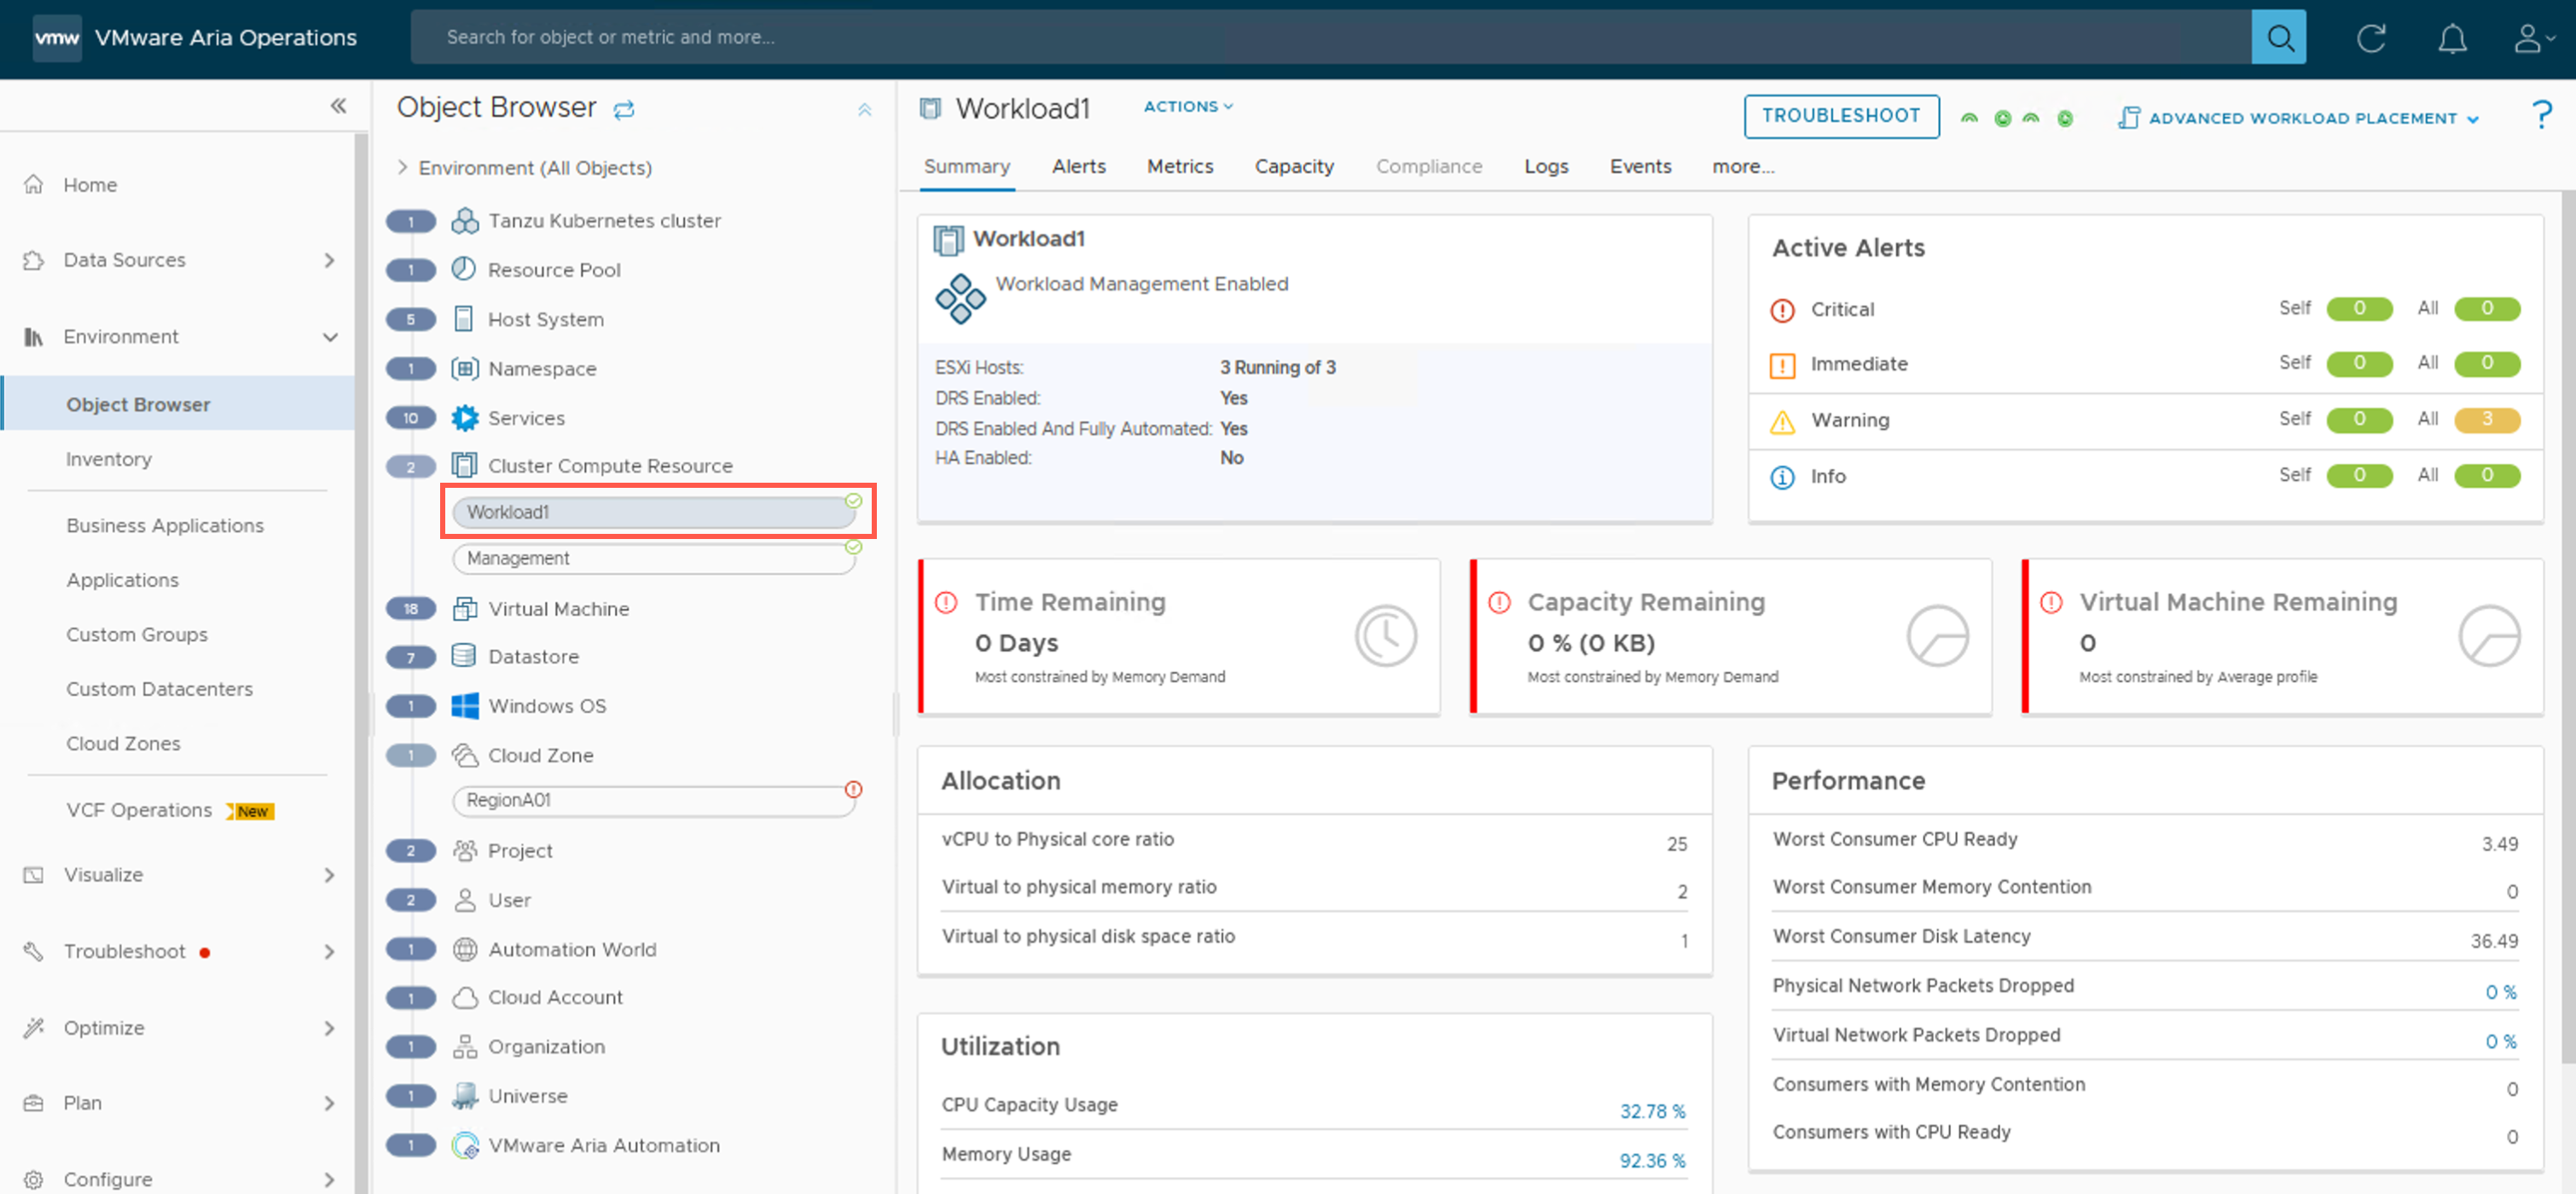
- At the Workload1 screen, click the Capacity tab.
As we can see, we now have two sets of Capacity metrics available to view, Demand and Allocation. In the example shown, the environment is memory constrained embedded environment. This is shown by the fact there is 0 days remaining for the Demand metric. Yet, conversely, looking at just the Allocation-based memory metric we have over 1 year remaining.
This is why it is critically important to still consider what the Demand metrics are telling you even when if we decide to make both placement and capacity decision Allocation-based metrics!
Final Thoughts
In my view, Advanced Workload Placement as a concept makes a tremendous amount of sense for most people looking to provide best utilization of resources. If we are collecting all of the metrics from our vSphere-based environment, then why wouldn’t we use those metrics to inform the final workload placement decision once our tag-based placement decisions have narrowed down the target hosting platforms? I do feel, however, that in most scenarios Demand-based placement makes more sense (and would be preferred) over Allocation-based placement. However, like with all good IT-related debates, it does depend on the situation, requirements and business objectives that need to be met.
Finally, it is worth remembering that irrespective of whether we use the Allocation-based on Demand-based capacity planning, we cannot defy the laws of physics.For example, there is nothing from stopping us setting an allocation ratio of 1000:1 if we wanted too, but once the resources are fully utilized, provisioning will fail because there just isn’t the resources to meet the demand.
Remember folks: Advanced Workload Placement is not magic and cannot conjure up resources that do not exist!
Published on 17 September 2023 by Christopher Lewis. Words: 3017. Reading Time: 15 mins.
