Warning! The content within this article is over 36 months old and, therefore, may be out of date.
HOWTO: Install the VMware vRealize Automation 6.x IaaS Components (Simple Install)
Share this article on:


VMware vRealize Automation VCAP6 VCAP6-CMA
Published on 12 January 2017 by Christopher Lewis. Words: 430. Reading Time: 3 mins.
Introduction
This post is a part of a series of posts for preparation for the VCAP6-CMA Deploy exam. For the full exam prep resources check here .
Prerequisites
- Deploy a Windows Virtual Machine to be used as a IaaS Server.
- Install and Configure the VMware vRealize Automation IaaS Prerequisites
- Configure Service Account permissions in SQL Server
- Download the IaaS Installer from the VMware vRealize Automation Appliance
Configuration Overview
The high level configuration steps for this are:
- Log onto the IaaS Server as the vRealize Automation Service Account.
- Install VMware vRealize Automation IaaS.
Install VMware vRealize Automation IaaS
- Locate the IaaS Installer (
setup_cx-vra-601.thecloudxpert.local@5480.exe) and right-click and select Run as Administrator.
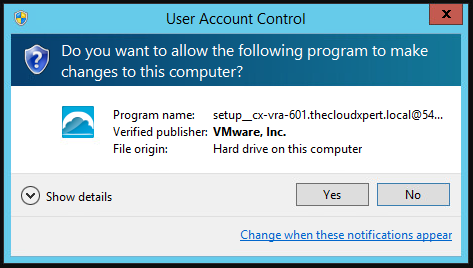
- If prompted by a User Account Control dialog, click Yes.
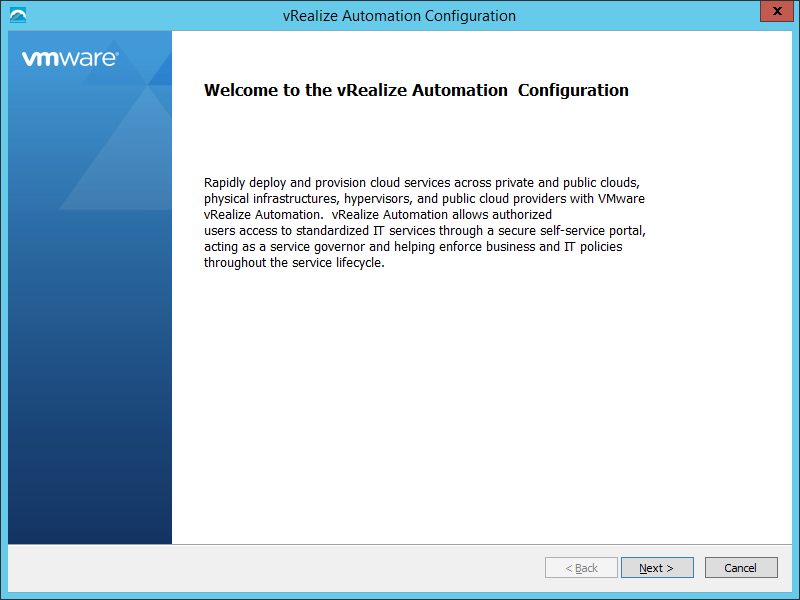
- Click Next.
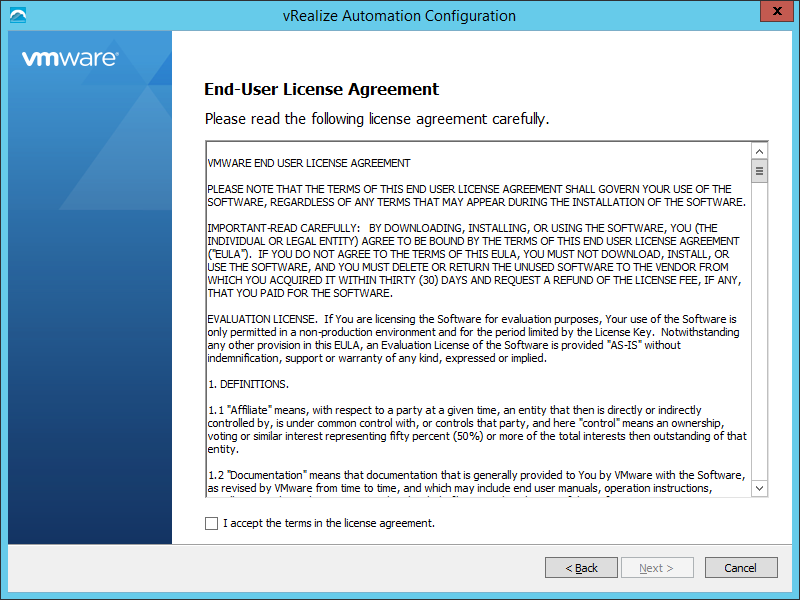
- Check the I accept the terms in the license agreement checkbox and click Next.
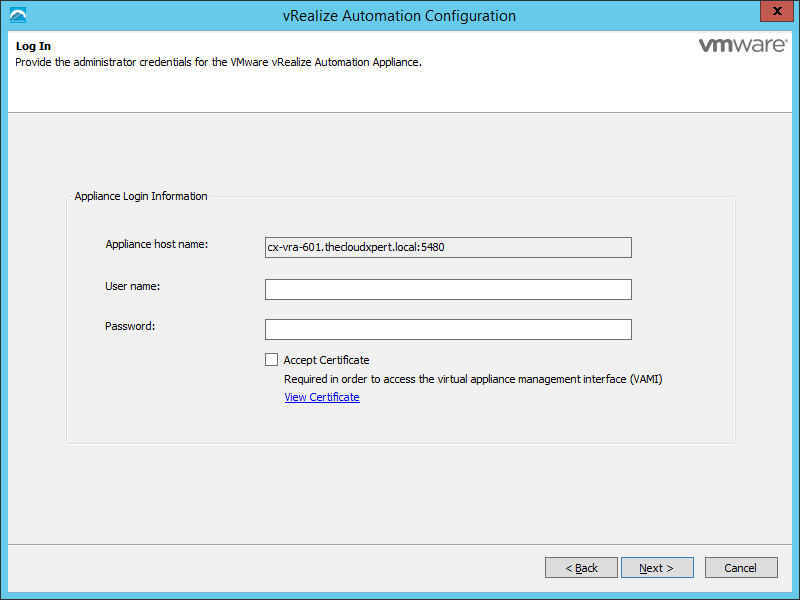
- Enter the root credentials (Username and Password) of the vRealize Automation Appliance (where you downloaded this IaaS installer from) and check the Accept Certificate checkbox.
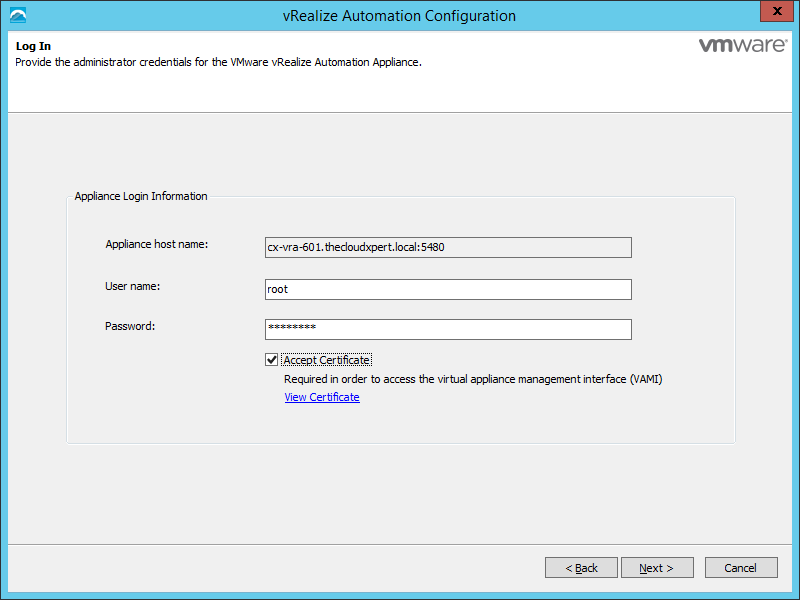
- Click Next.
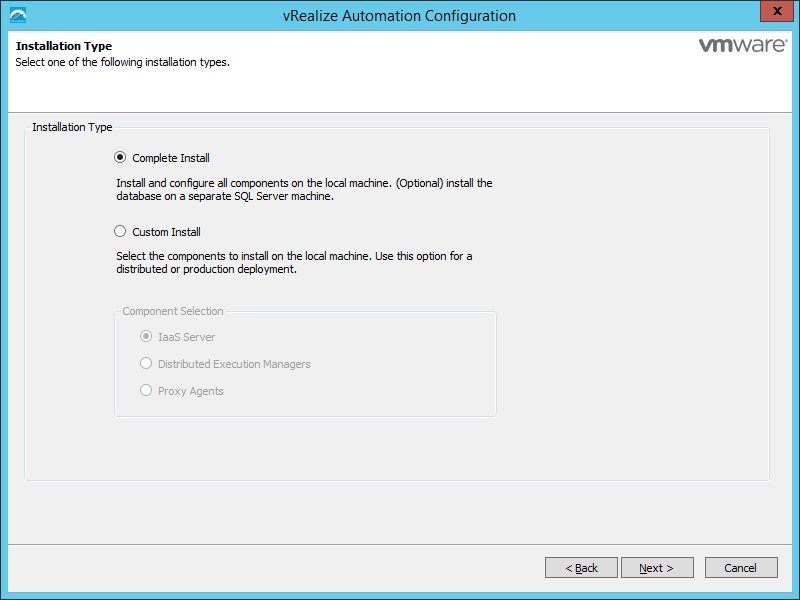
- Select the Complete Install option and click Next.
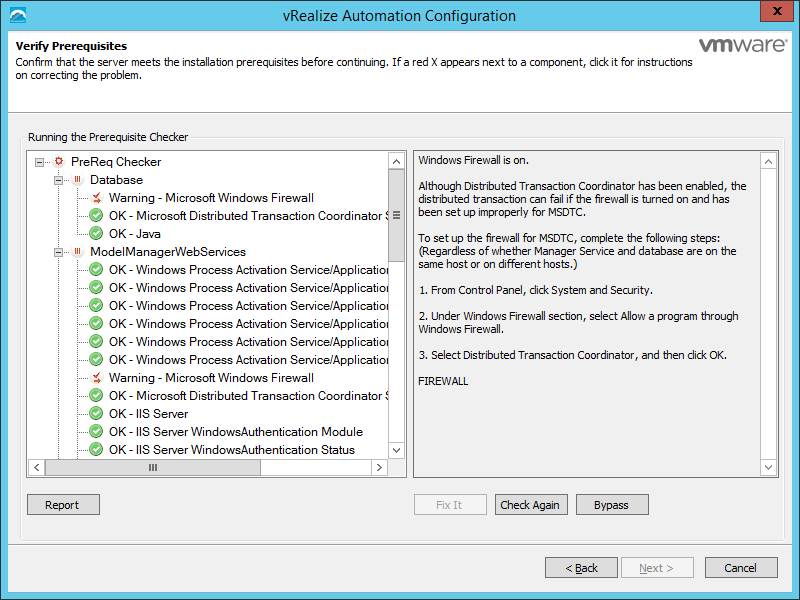
- Check to ensure the prerequisites have all been completed and click Next.
Note:
You will see that the Next button is still greyed out and a Windows firewall warning exists regarding the firewall ports for MSDTC. As I know I have completed this configuration, I can safely click Bypass before I can click Next.
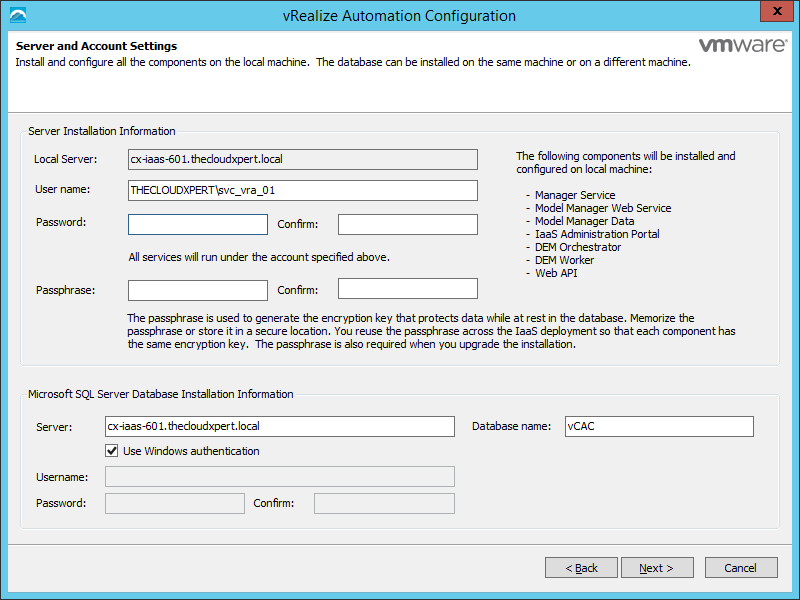
- Enter the Password for the vRealize Automation Service Account (this should be automatically populated as it should be the currently logged on user), enter and confirm a Passphrase for the encryption at rest for the IaaS Database, and then confirm (and update where necessary) the information on the SQL Server.
Note:
My SQL server uses a named SQL Instance called VRA.

- Click Next.
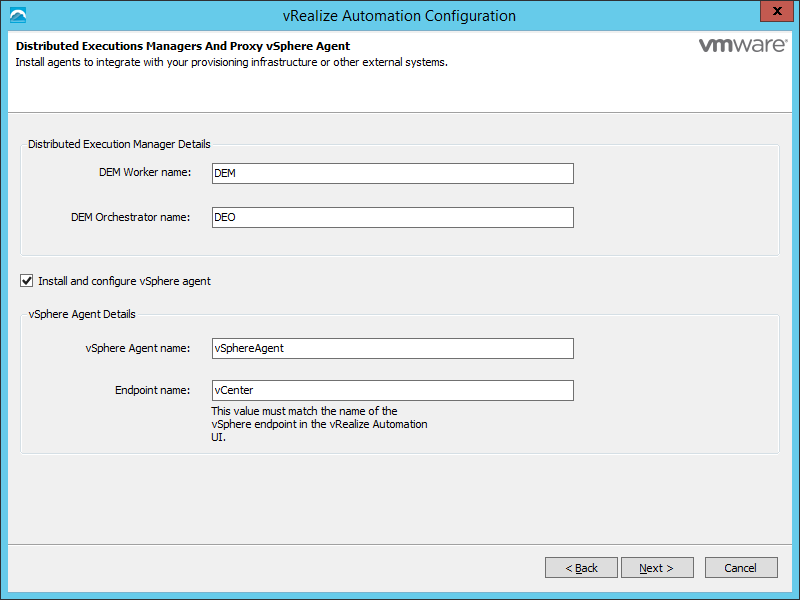
- Change the information on this screen as appropriate to meet any naming standards/conventions and then click Next.
Note:
If you do not want to install a vSphere Agent at this time then uncheck the Install and configure vSphere agent checkbox.
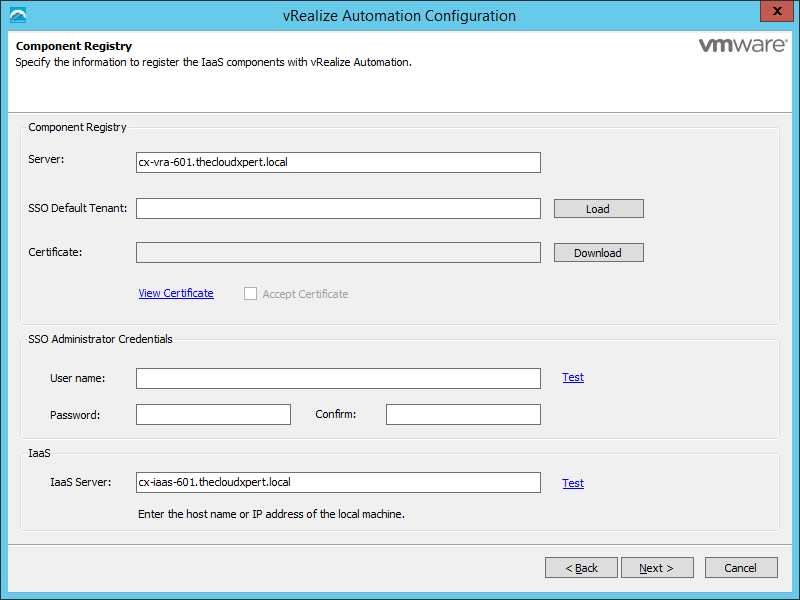
- Complete the following:
- Click Load to update the SSO Default Tenant text box with the name of the default tenant, vSphere.local
- Click Download to download the certificate from the vRealize Automation Appliance.
- Check the Accept Certificate checkbox
- Enter administrator@vsphere.local into the User Name textbox, enter (and confirm) the password for the account, then click Test.
- Confirm the FDQN in the IaaS Server name text field is correct and click Test.
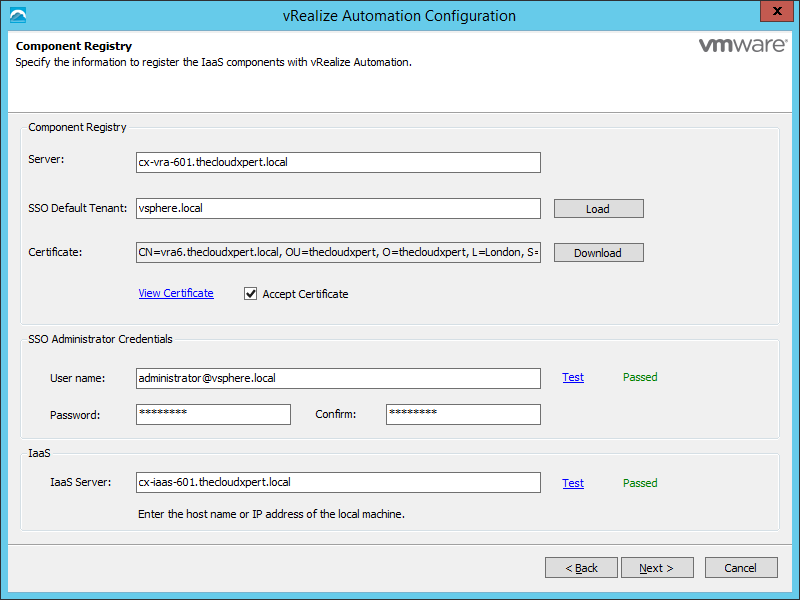
- Click Next.
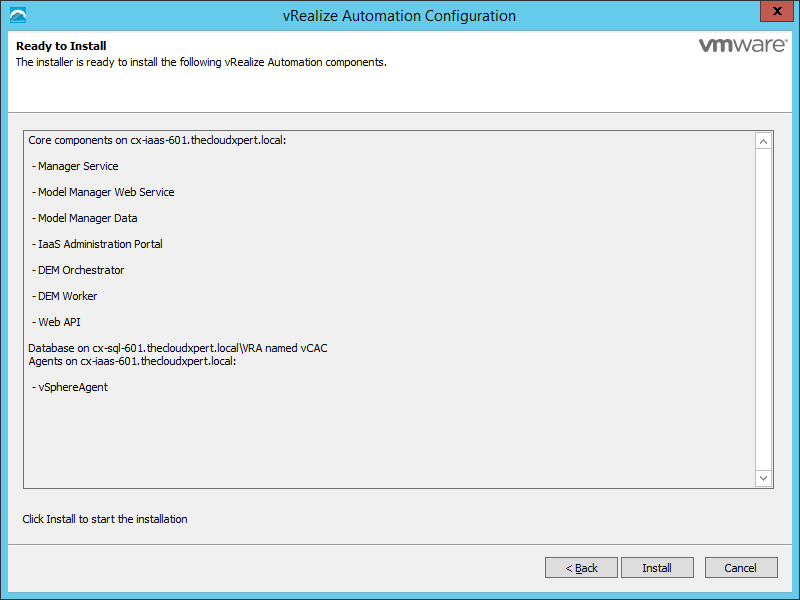
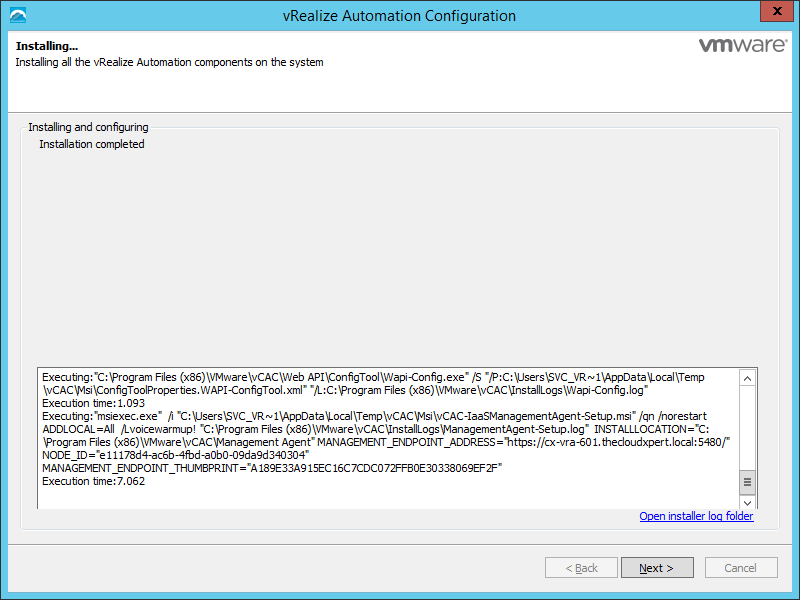
- Click Install.
- Click Next.
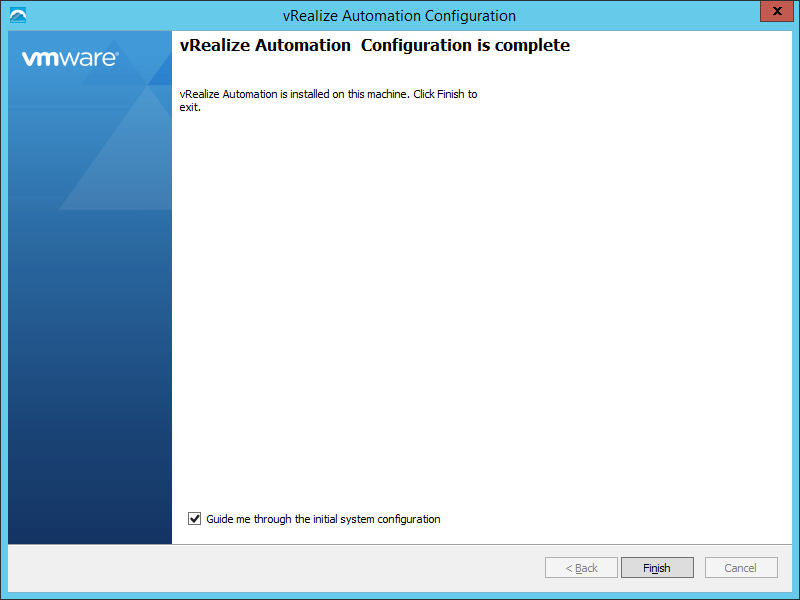
- Uncheck the Guide me through the initial system configuration checkbox and click Finish.
There we have the installation of vRealize Automation IaaS in an all-in-one simple/rainpole configuration!
Published on 12 January 2017 by Christopher Lewis. Words: 430. Reading Time: 3 mins.
Share this article on:
Related Post(s):
- HOWTO: Install the VMware vRealize Automation 6.x IaaS Prerequisites ()
- VCAP6-CMA Deploy - Objective 1.1: Deploy and Manage a vRA Appliance and IaaS Server as Single nodes ()
- HOWTO: Configure the VMware vRealize Automation 6.x Appliance (Minimal Deployment) ()
- HOWTO: Deploy the Identity Appliance for vRealize Automation 6.x ()
- HOWTO: Configure the VMware Identity Appliance for vRealize Automation 6.x ()
About the Author:

Name: Christopher Lewis
Twitter/X: thecloudxpert
Role: Domain Expert - VCF Automation & VCF Operations
Company: Broadcom
Recent Posts by Christopher Lewis:
Blog Categories:
active directory 6
aria automation 9
aria operations 2
aws 2
certificate authority 5
certificates 5
certification 91
general 9
home lab 2
microsoft 7
nsx 45
nsx v 41
powercli 8
powershell 6
vcap 48
vcap6 2
vcenter 4
vcf 5
vcix 2
vexpert 9
vmug 5
vmware 99+
vmware aria automation 9
vmware aria operations 5
vmware cloud 3
vmware explore 2
vmware identity manager 2
vmworld 36
vrealize automation 80
vrealize business 2
vrealize operations manager 5
vrealize orchestrator 13
vrealize suite 14
vrealize suite lifecycle manager 20
vsan 5
vsphere 9
windows 6
Top Tags:
active directory 6
api 18
barcelona 24
certificates 11
certification 7
howto 33
microsoft 7
multi tenancy 9
nsx v 43
platform services controller 8
powercli 8
powershell 7
psc 6
vcap 9
vcap6 45
vcap6 cma 48
vcap6 nv 37
vcix6 nv 36
vexpert 19
vmug 8
vmware 99+
vmware aria 12
vmware aria automation 9
vmworld 35
vmworld 2016 13
vmworld 2017 9
vra 13
vrealize automation 74
vrealize operations 8
vrealize orchestrator 21
vrealize suite lifecycle manager 11
vrslcm 20
vsan 7
vsphere 12