VCAP6-NV Deploy - Objective 2.3 - Configure and Manage Routing
VMware NSX-V VCAP6-NV VCIX6-NV
Published on 30 July 2017 by Christopher Lewis. Words: 664. Reading Time: 4 mins.
Objective 2.3 - Configure and Manage Routing
Objective Overview
- Deploy the appropriate NSX Edge (ESG/DLR) device according to a deployment plan.
- Configure centralized and distributed routing.
- Configure default gateway parameters.
- Configure static routes.
- Select and configure appropriate dynamic routing protocol according to a deployment plan:
- OSPF
- BGP
- IS-IS
- Configure route redistribution to support a multi-protocol environment.
Objective Prerequisites
The following prerequisites are assumed for this Objective:
- A working VMware vSphere 6.x environment.
- A working VMware NSX 6.x environment.
Objective Breakdown
Deploy the appropriate NSX Edge (ESG/DLR) device according to a deployment plan
A VMware NSX Edge Services Gateway (ESG) is deployed for North/South traffic and the additional services, such as NAT and Load Balancing. In most circumstances, a VMware NSX Distributed Logical Router (DLR) is deployed for East/West traffic. Although it is possible to configure a uplink to allow North/South traffic on a DLR.
For DLR, see HOWTO: Deploy a VMware NSX Distributed Logical Router (DLR)
For ESG, see HOWTO: Deploy a VMware NSX Edge Services Gateway (ESG)
Configure centralized and distributed routing
I’m not sure what specific things I should cover here that isn’t covered in other parts of this objective.
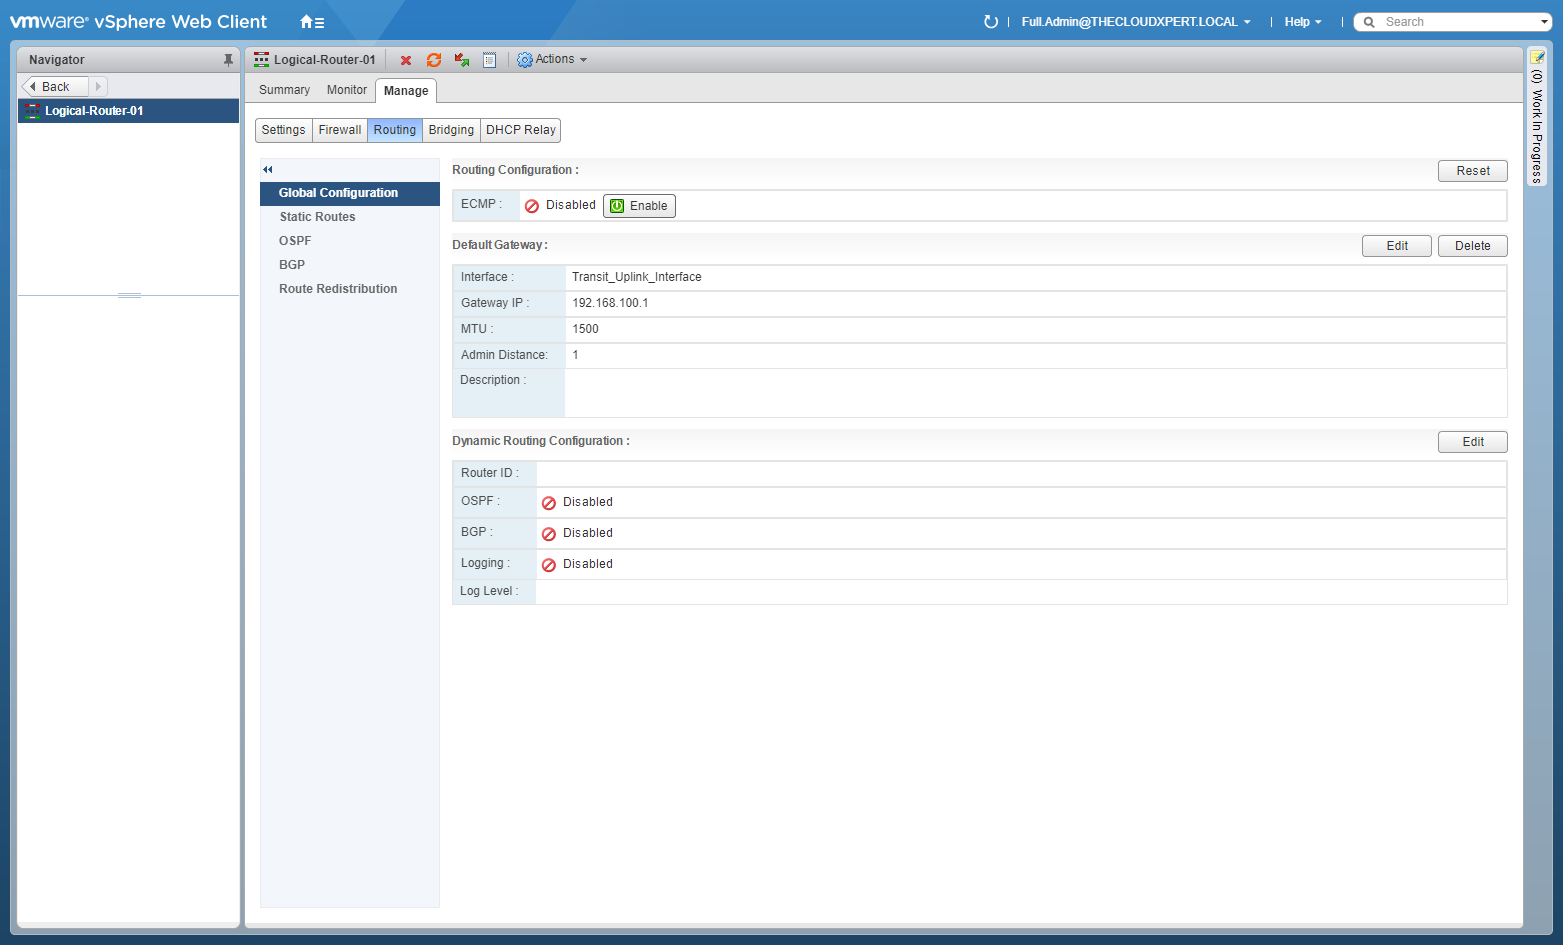
Configure Default Gateway parameters
- Using your favourite web browser, navigate to the vCenter Server login page (
https://vcenter.fqdn).
- Type the administrator User name and Password and click Login.
- Click Networking and Security.
- Click NSX Edges.
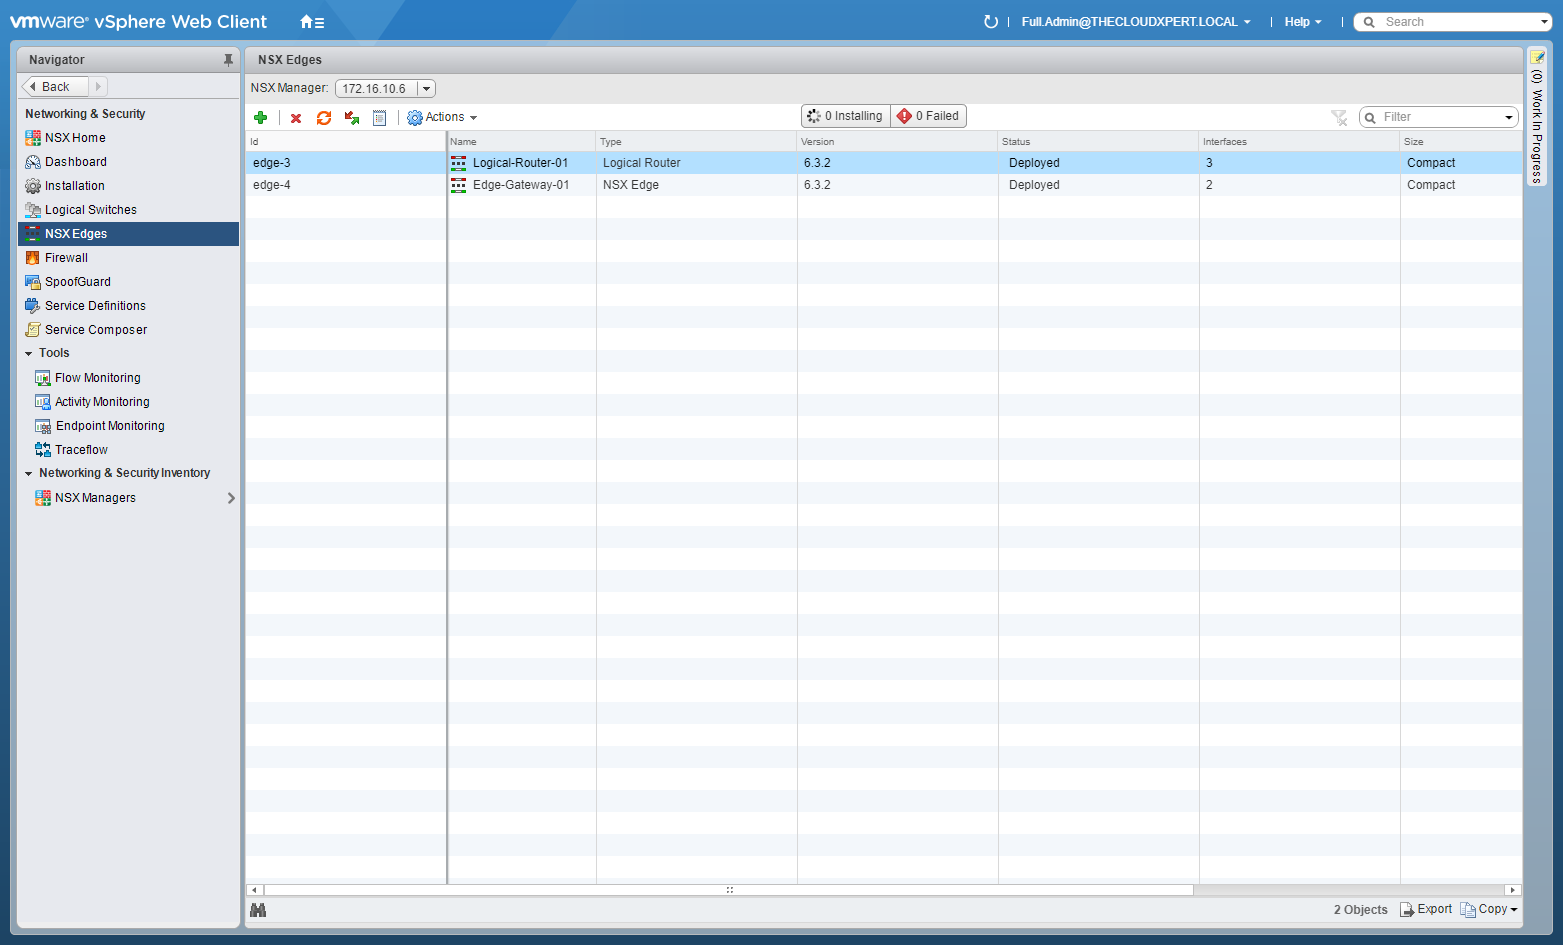
- Double-Click on the target NSX Edge.
- Click the Manage Tab, select Routing and click Global Configuration.
- At Default Gateway, click Edit.

- Select the Interface from the dropdown, enter the Gateway IP address, (optional) update the MTU value and Admin Distance.
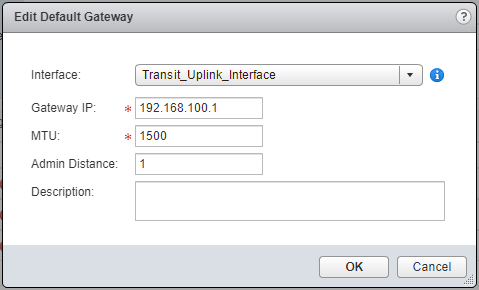
- Click OK.
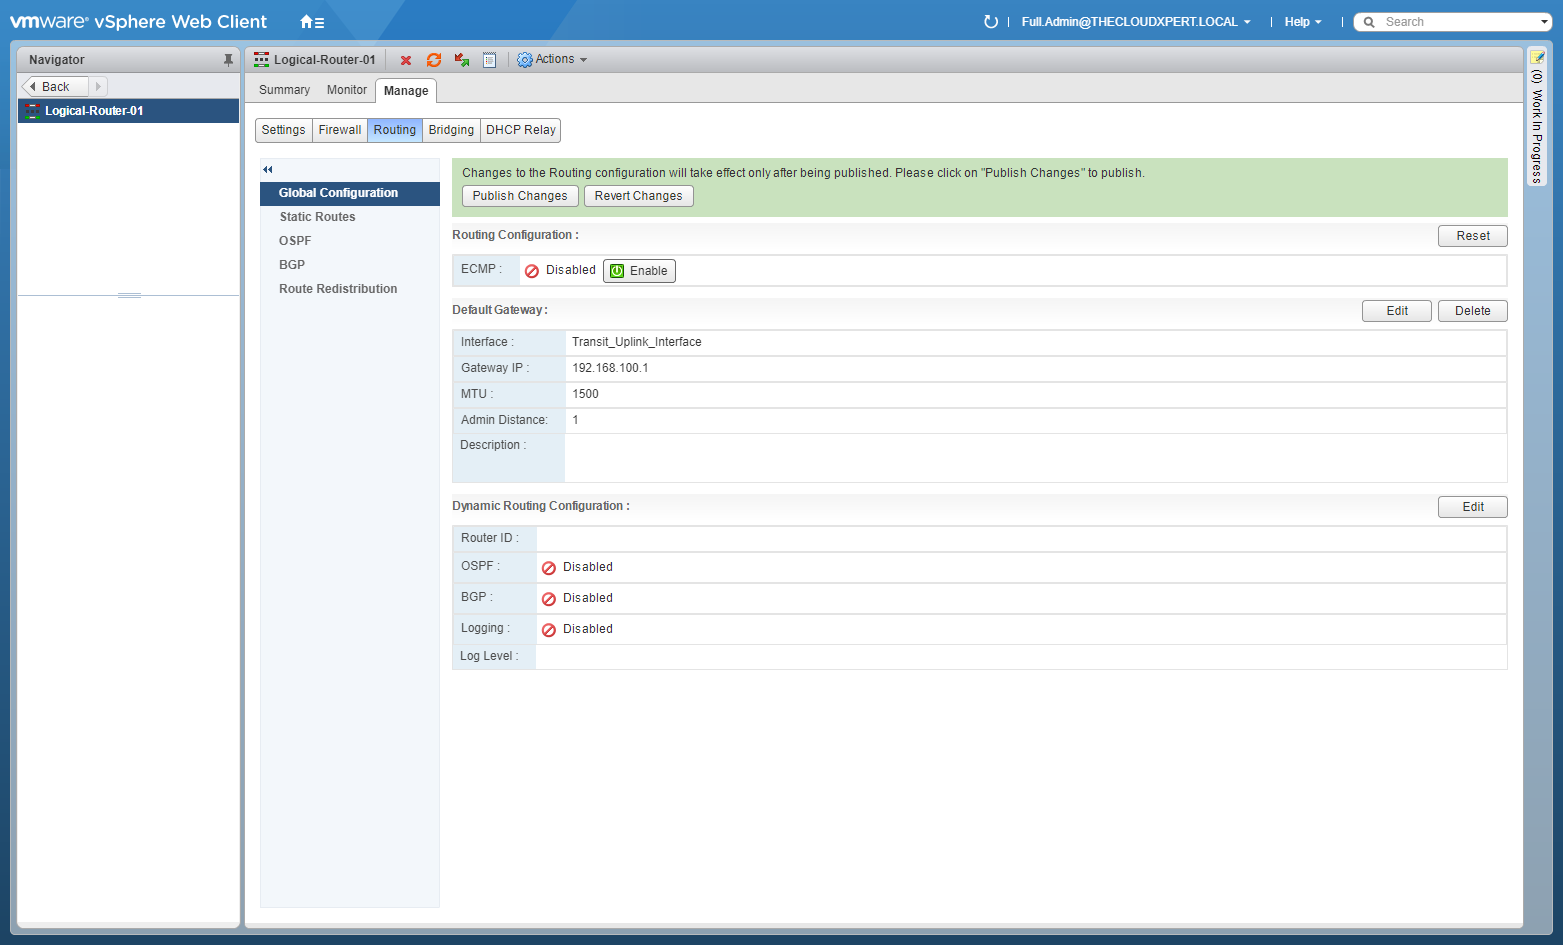
- Click Publish Changes.
Configure Static Routes
- Using your favourite web browser, navigate to the vCenter Server login page (
https://vcenter.fqdn).
- Type the administrator User name and Password and click Login.
- Click Networking and Security.
- Click NSX Edges.
- Double-Click on the target NSX Edge.
- Click the Manage Tab, select Routing.
- Click Static Routes.
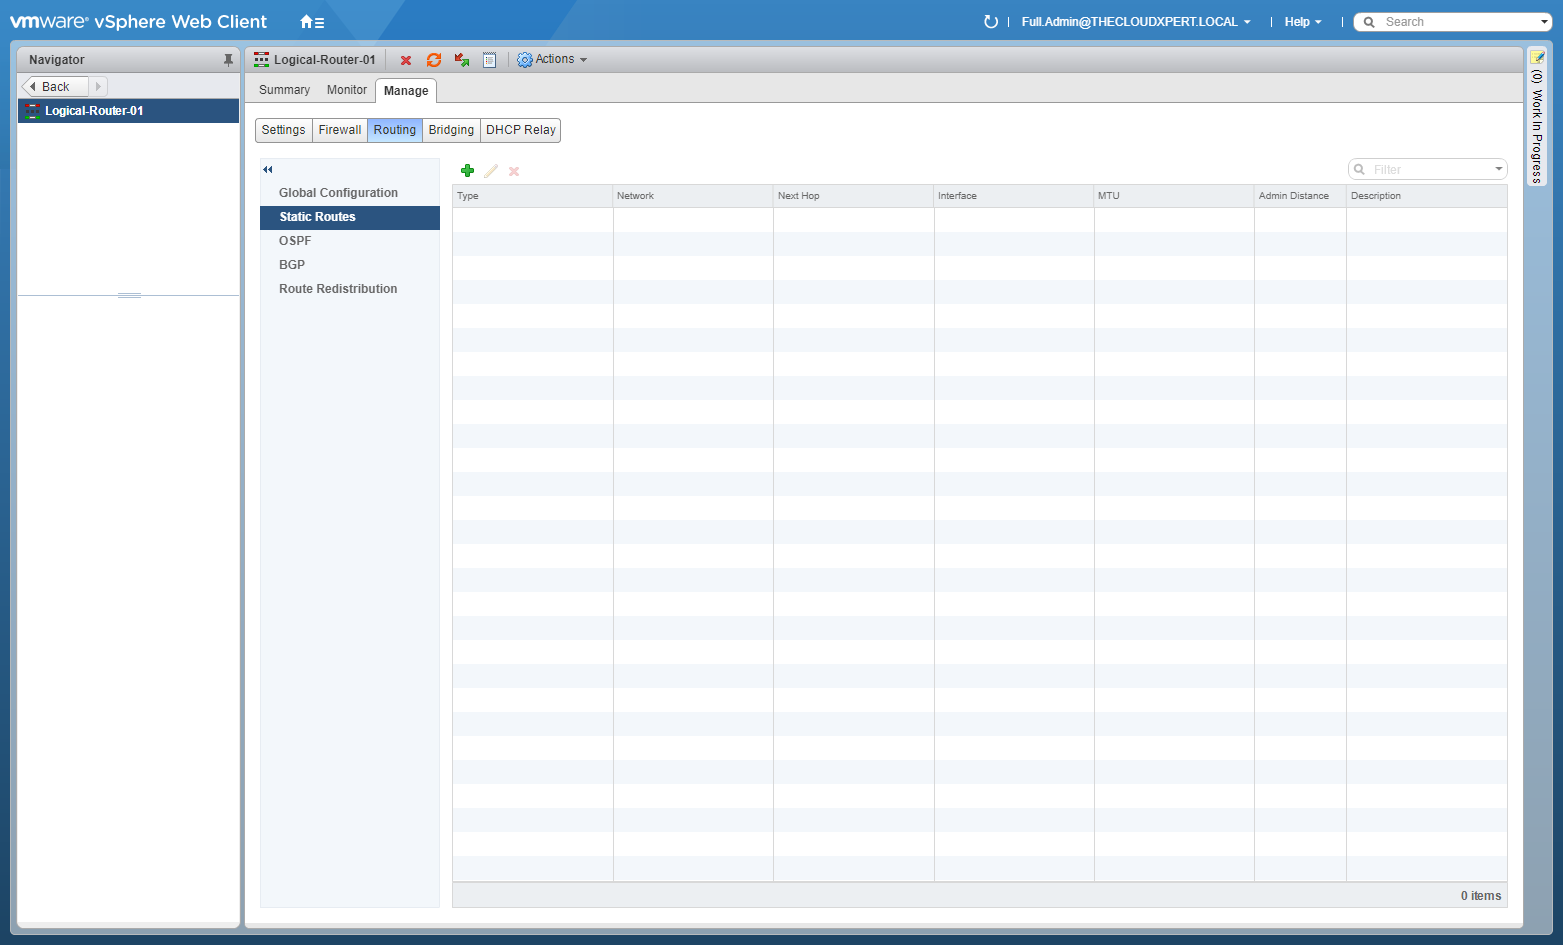
- Click Add(+).
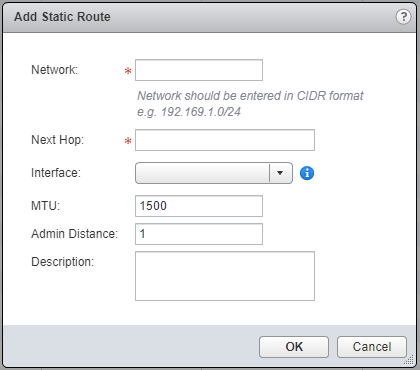
- Enter the Network (CIDR format) address, enter the Next Hop, select the Interface from the dropdown.
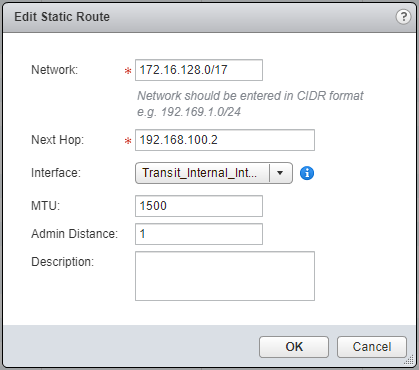
- Click OK.
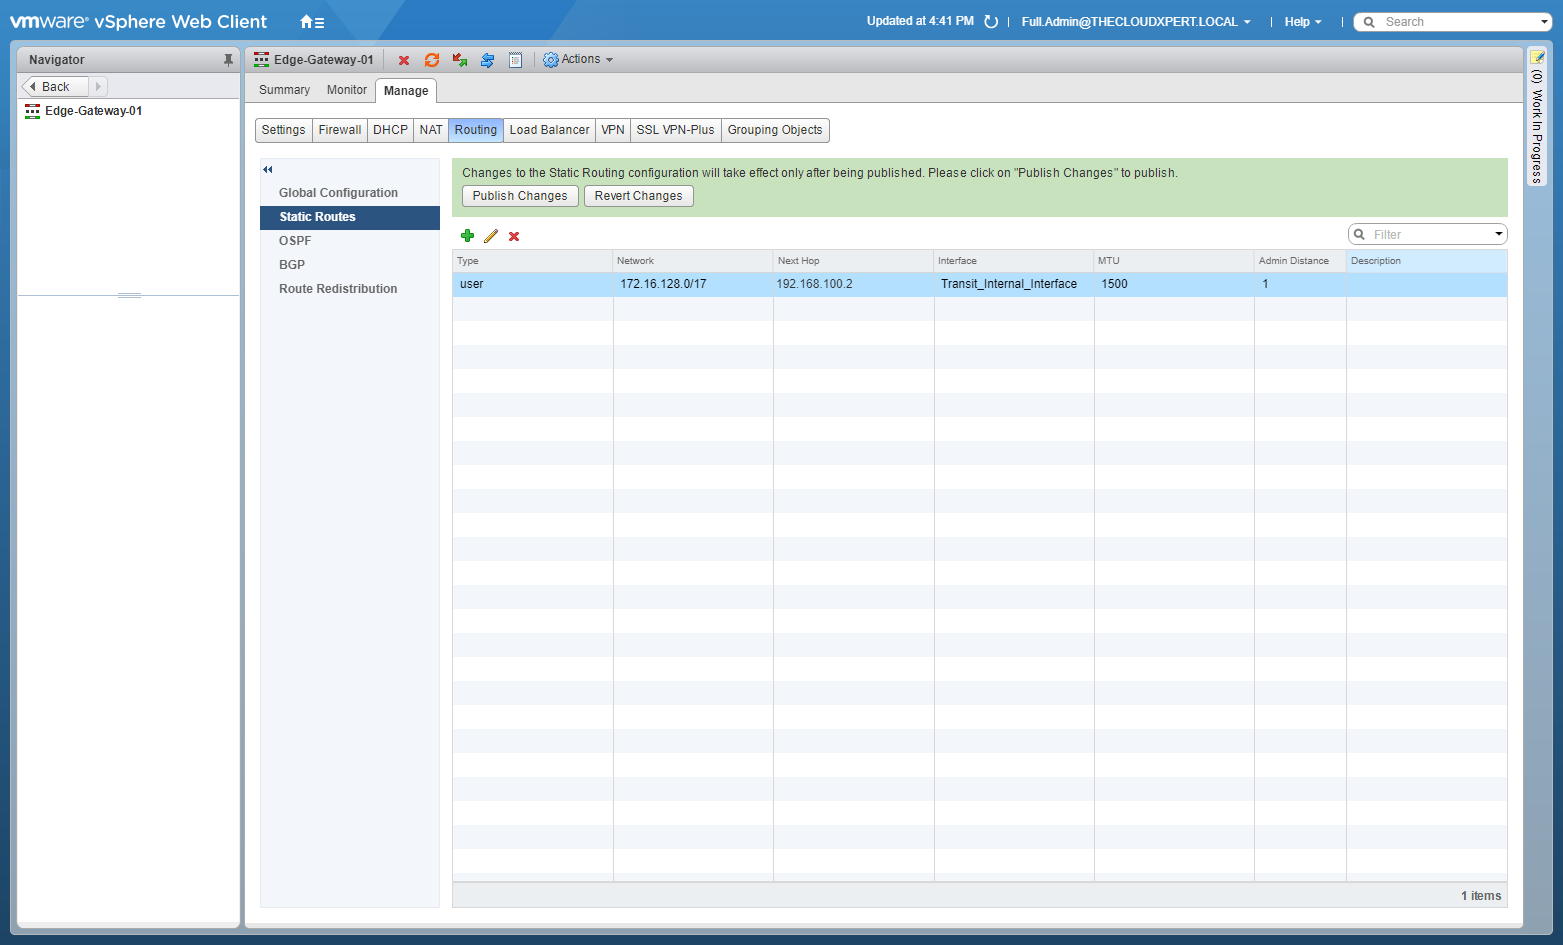
- Click Publish Changes.
Repeat the steps on each DLR and ESG as required…
Select and configure appropriate dynamic routing protocol according to a deployment plan: OSPF
This objective is covered in HOWTO: Configure VMware NSX with Dynamic Routing - OSPF .
Select and configure appropriate dynamic routing protocol according to a deployment plan: BGP
This objective is covered in HOWTO: Configure VMware NSX with Dynamic Routing - BGP .
Select and configure appropriate dynamic routing protocol according to a deployment plan: IS-IS
This Routing Protocol has been removed in NSX 6.3 and therefore I have no way to document this. Checkout the VMware Docs for more information.
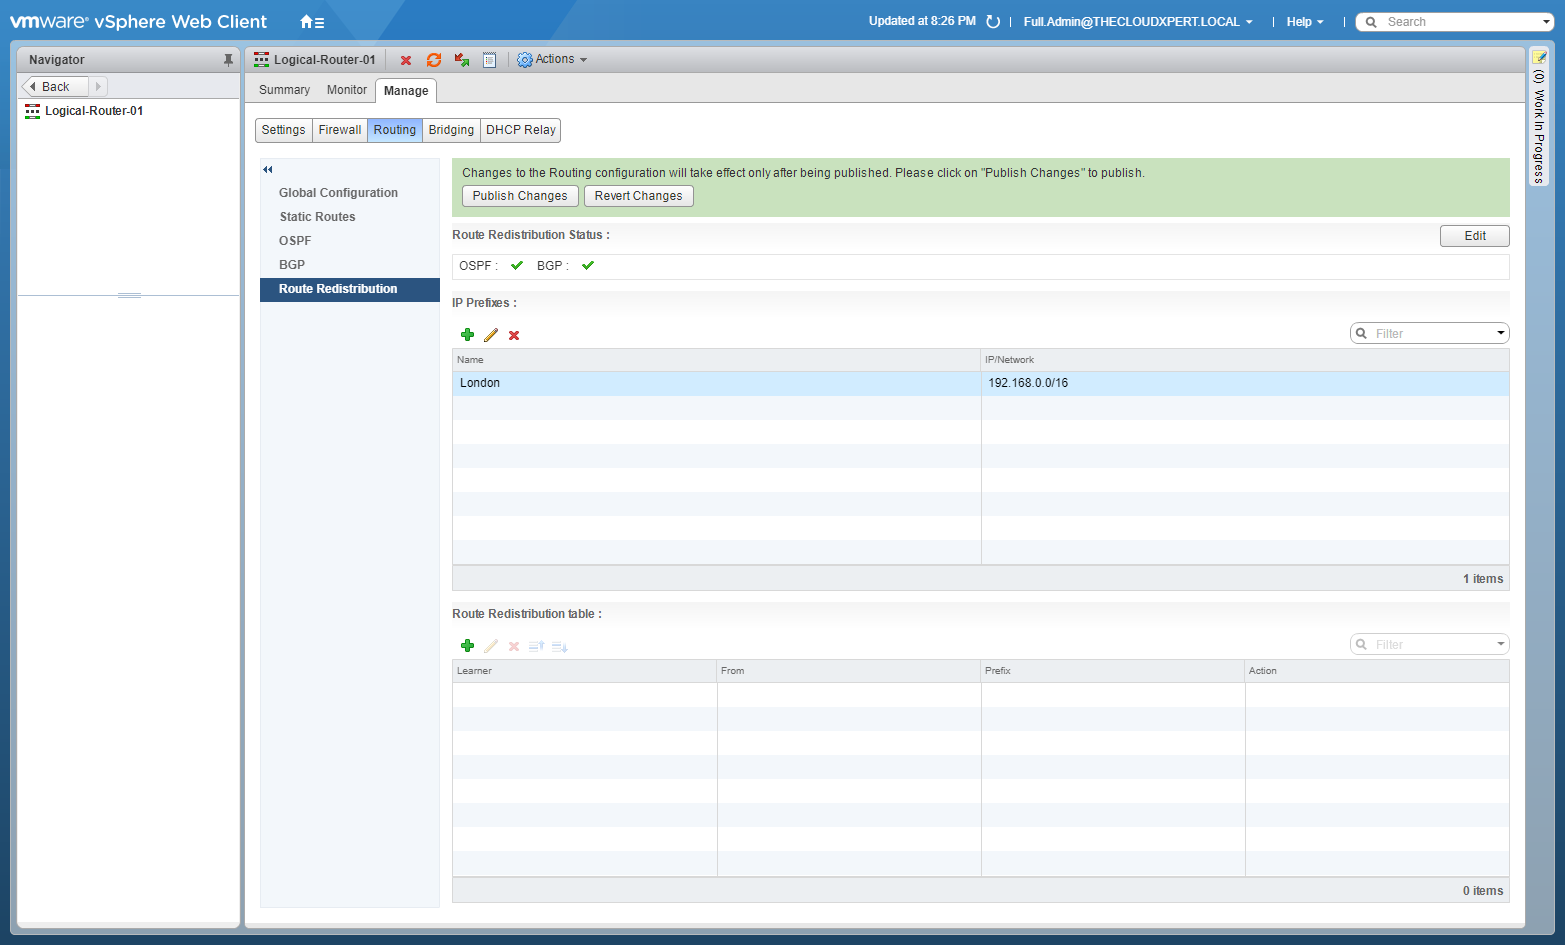
Configure route redistribution to support a multi-protocol environment
By default, routers share routes with other routers running the same protocol. In a multi-protocol environment, you must configure route redistribution for cross-protocol route sharing.
- Using your favourite web browser, navigate to the vCenter Server login page (
https://vcenter.fqdn).
- Type the administrator User name and Password and click Login.
- Click Networking and Security.
- Click NSX Edges.
- Double-Click on the target NSX Edge.
- Select the Manage tab, select Routing and then select Route Redistribution.
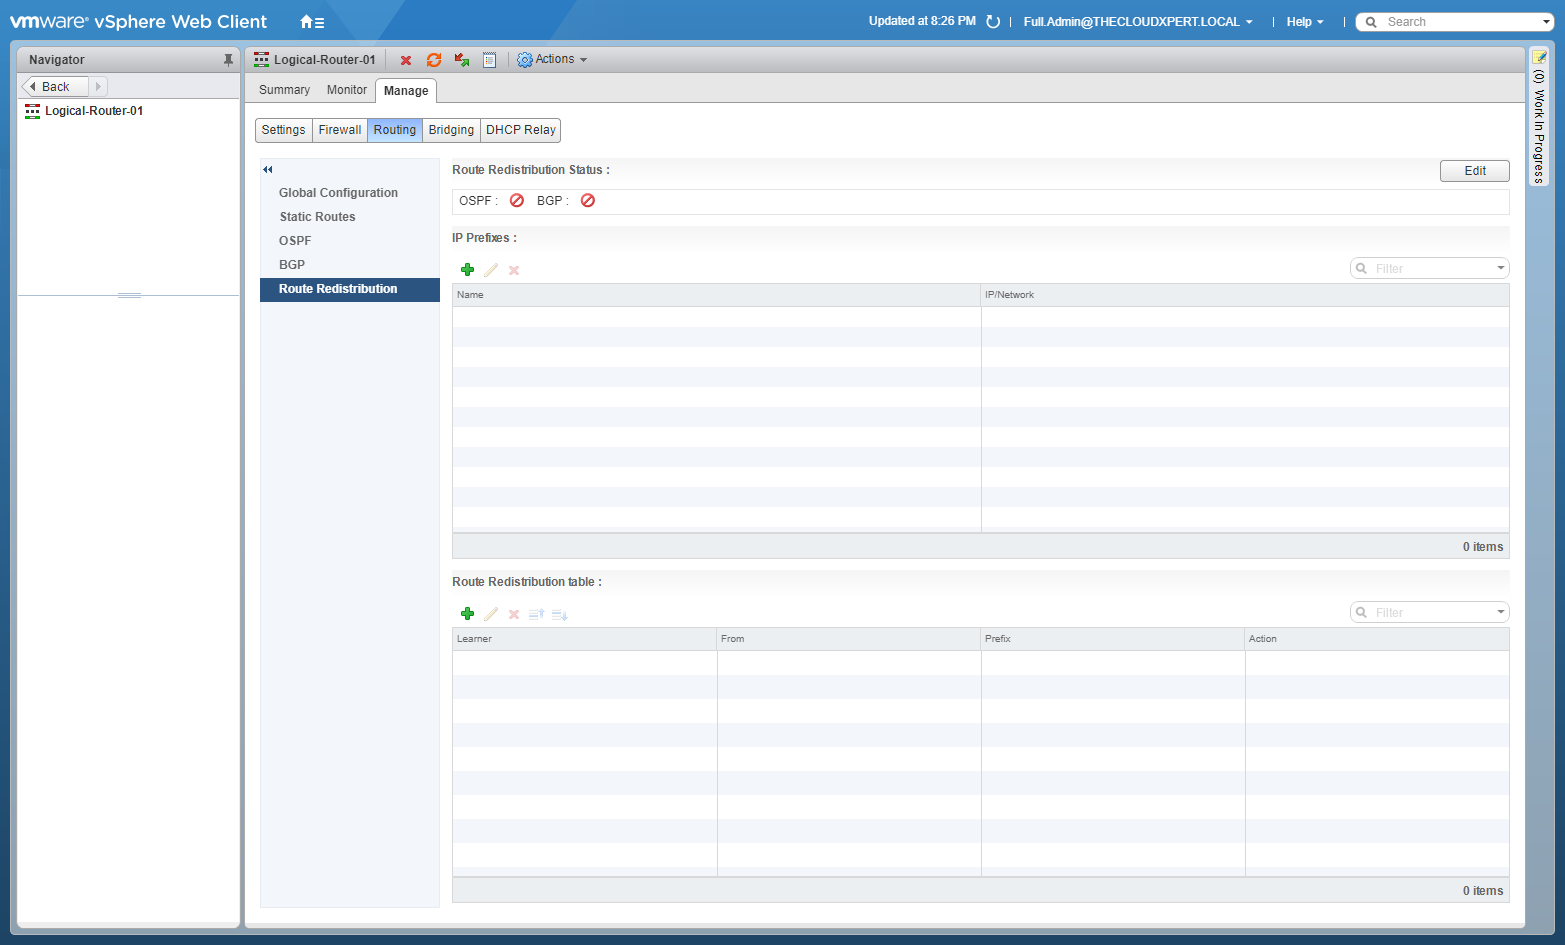
- At Route Redistribution Status, click Edit.
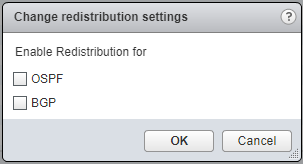
- Check both the OSPF and BGP checkboxes.
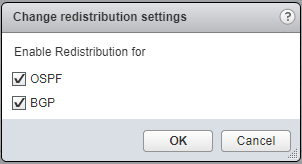
- Click OK.
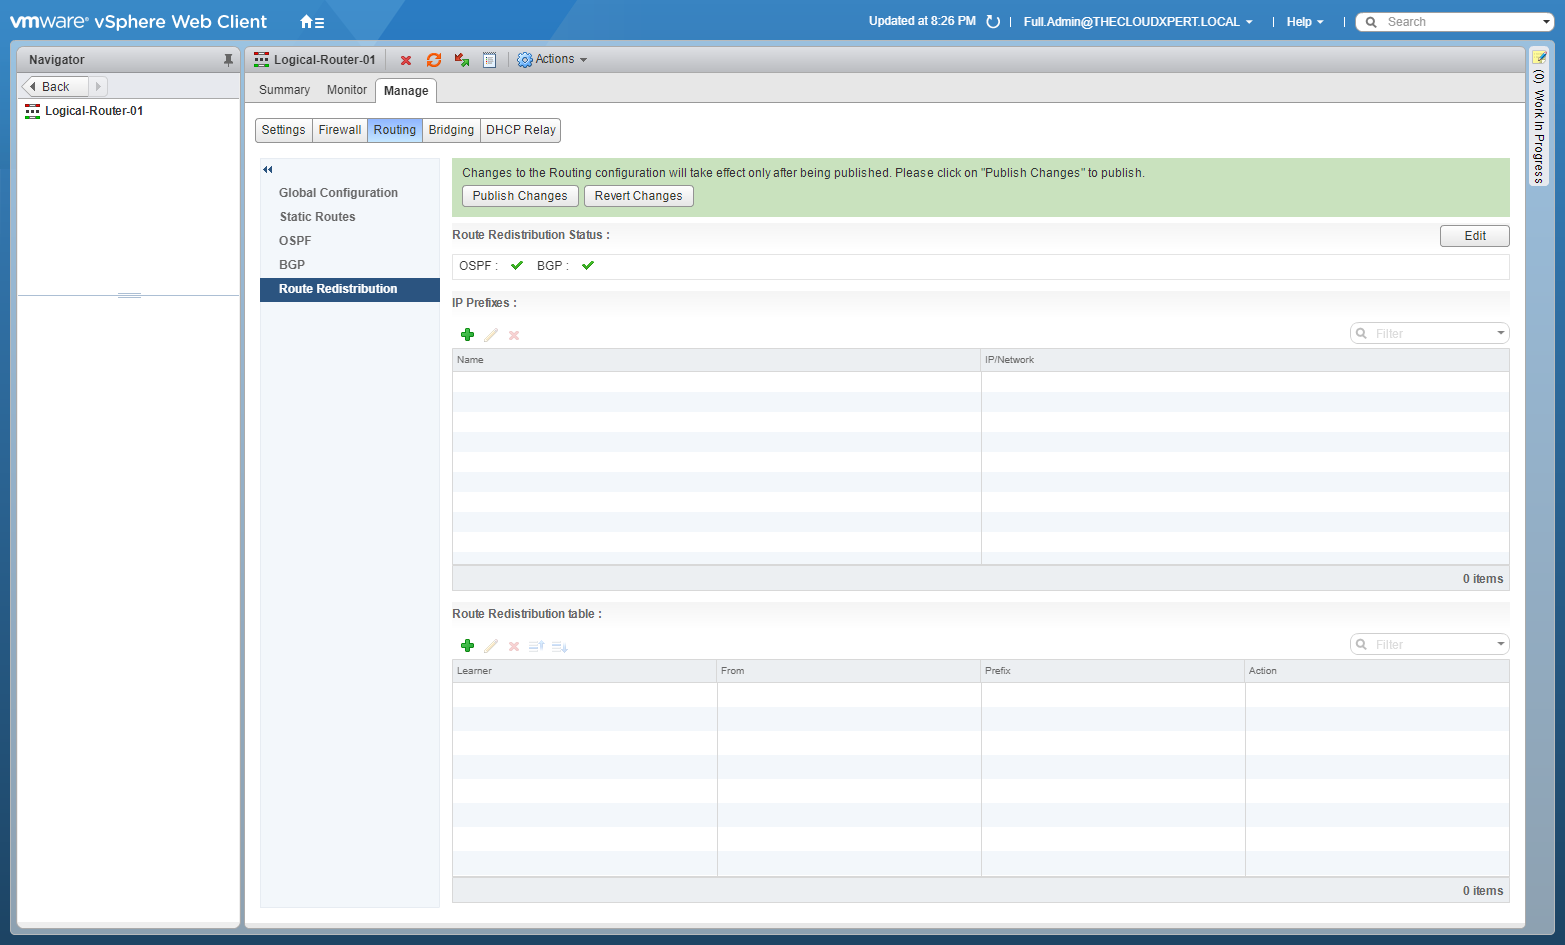
- Under IP Prefixes, click Add(+).
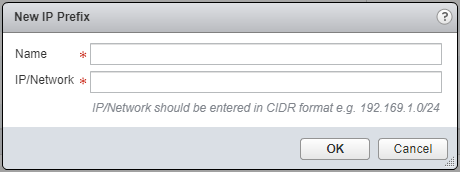
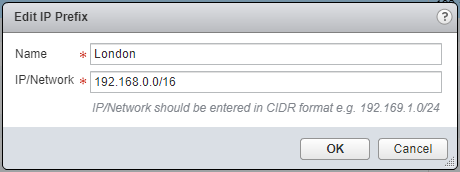
- Enter a Name for the IP Prefix and then a IP/Network in CIDR format.
- Click OK.
- At Route Redistribution Table, click Add(+).
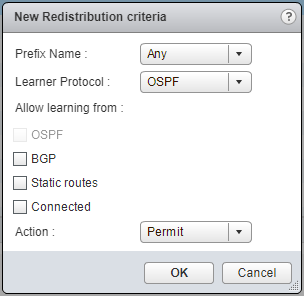
- Select the Prefix Name (Any), the Learner Protocol (OSPF/BGP), check the appropriate Allow Learning from checkboxes and select Permit from the Action dropdown.
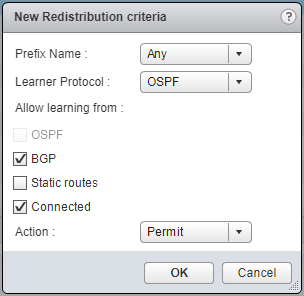
- Click OK.
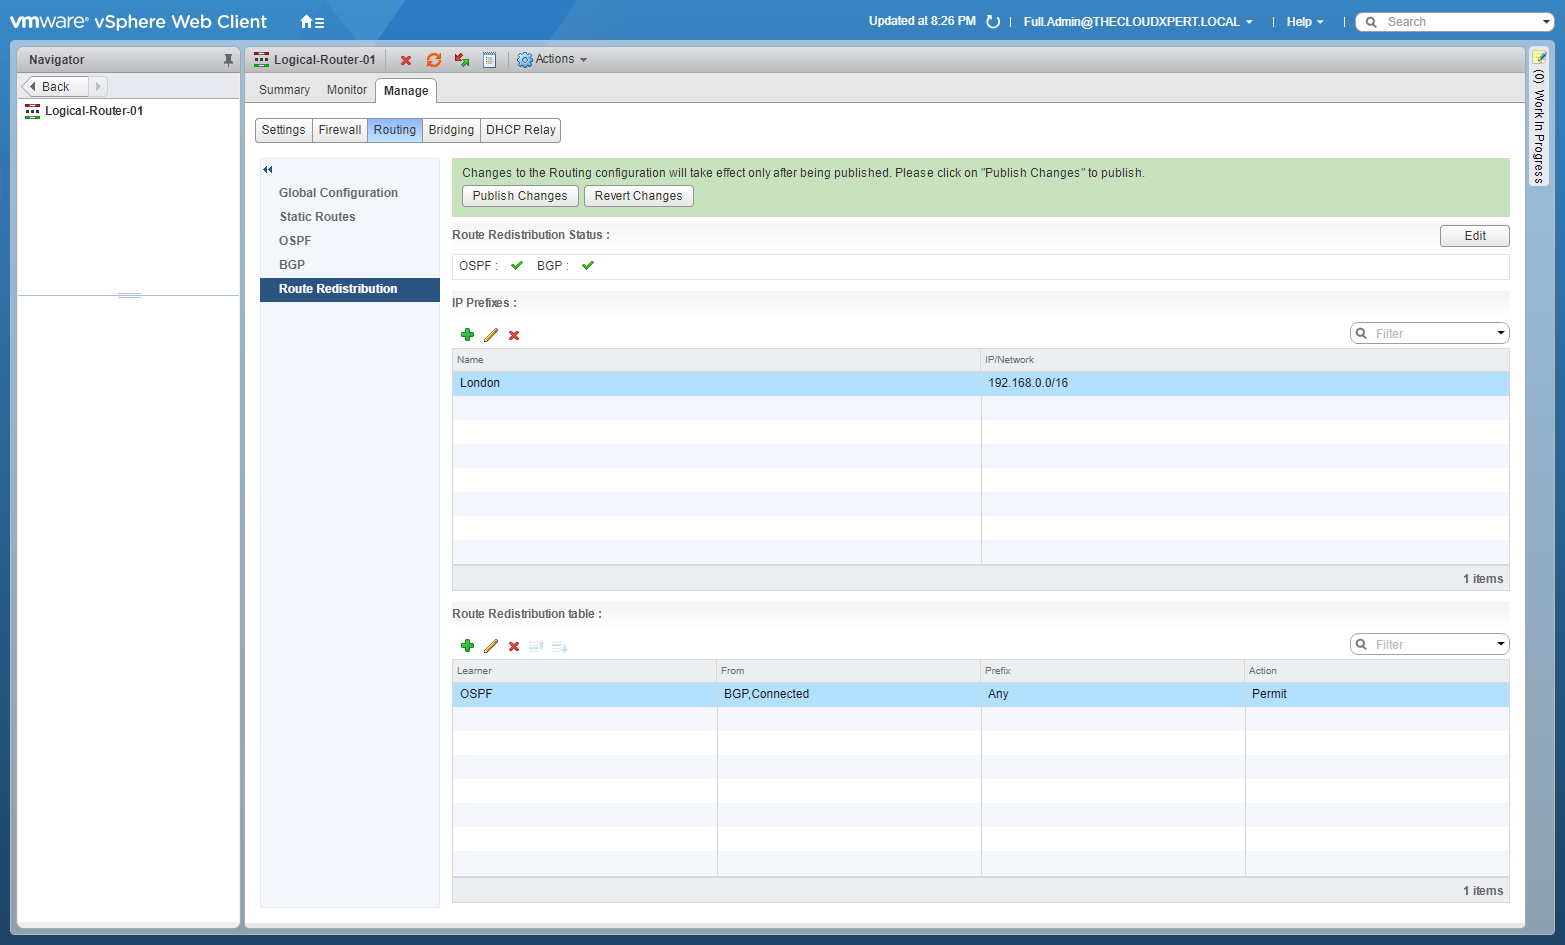
- Click Publish Changes.
Further Study
For more information on additional objectives in the exam, see VCAP6 - Network Virtualisation (NSX-V) Deployment Study Guide .
Published on 30 July 2017 by Christopher Lewis. Words: 664. Reading Time: 4 mins.
- VCAP6-NV Deploy - Objective 5.3 - Configure and Manage Role Based Access Control ()
- VCAP6-NV Deploy - Objective 8.1 - Administer and Execute calls using the VMware NSX vSphere API ()
- VCAP6-NV Deploy - Objective 2.1 - Create and Manage Logical Switches ()
- VCAP6-NV Deploy - Objective 1.3 - Configure and Manage Transport Zones ()
- VCAP6-NV Deploy - Objective 1.2 - Prepare Host Clusters for Network Virtualization ()
