Replacing the vRealize Automation 7.3 IaaS Web Certificate
Certificates VMware vRealize Automation vRealize Orchestrator
Published on 11 December 2017 by Christopher Lewis. Words: 383. Reading Time: 2 mins.
Introduction
This is the second post in a series of posts covering the replacement of vRealize Automation SSL Certificates. In this post, we will tackle replacing the vRealize Automation IaaS Web Server Certificate.
This post is based on the VMware procedure and this is documented here .
Step By Step Guide
Prerequisites
The following are expected prerequisites for this walkthrough:
- A fully deployed and working vRealize Automation solution.
- A set of certificate files:
- The RSA Private Key used to encrypt the vRA IaaS Web certificate.
- The Root CA Certificate file.
- The vRA IaaS Web Certificate file.
- The Root CA Certificate and any Subordinate/Intermediate CA Certificates are installed within the appropriate Certificate store on the local machine (normally the Trusted Root Certification Authorities and the Intermediate Certification Authority respectively).
Replacing the Infrastructure as a Service Web Certificate
- Navigate to the vRealize Automation Appliances Virtual Appliance Management Infrastructure (VAMI) interface,
https://vra.fqdn:5480.

- Log into the VAMI by typing the User Name and Password configured during the install wizard and clicking Login.
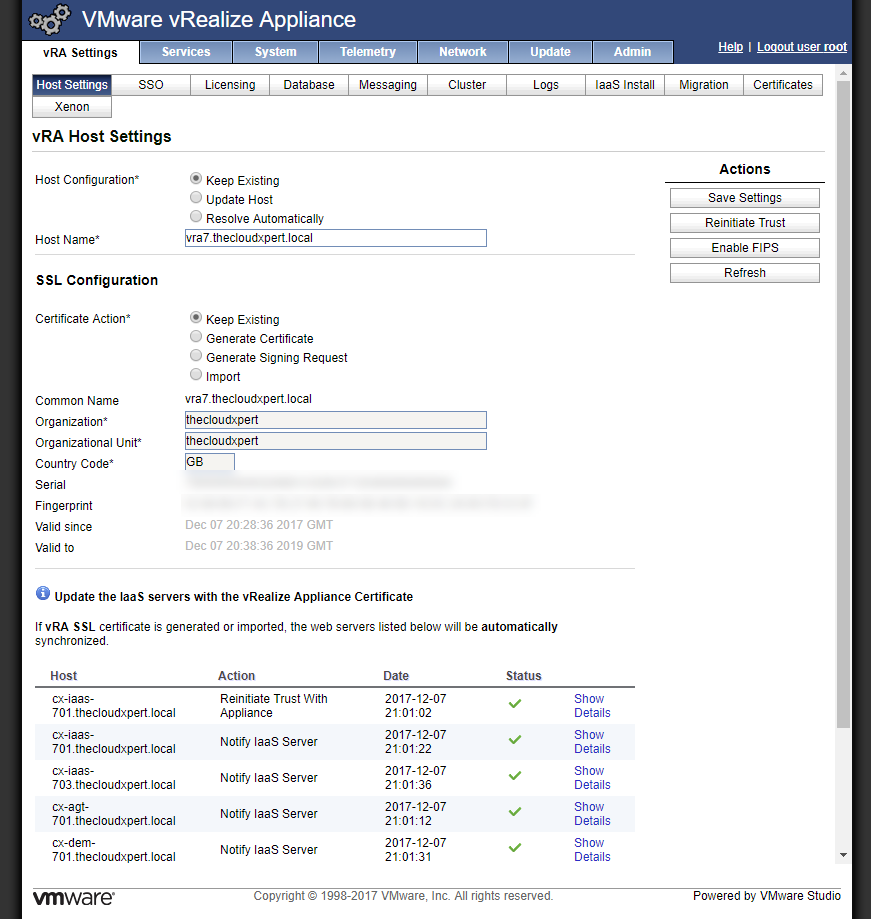
- Under vRA Settings, click Certificates.

-
Under Component Type, select the IaaS Web option.
-
Under IaaS Web Certificate, select the Import Certificate option.

- Open the RSA Private Key in a text editor and copy and paste the information into the RSA Private Key field.

-----BEGIN RSA PRIVATE KEY----- and -----END RSA PRIVATE KEY----- text.
- Open the Certificate and the Root Certificate file in a text editor and copy and paste the information into the Certificate Chain text field.

-----BEGIN CERTIFICATE----- and -----END CERTIFICATE----- text for each certificate.
-
If required, enter the Passphrase into the text field.
-
Under Actions, click Save Settings.

- (If required) Copy/Upload the vRealize Automation IaaS Web certificate to the Web Server load balancer configuration.
And there you have it!
Next Step(s)
In the next post , we will look at Replacing the vRealize Automation 7.3 Infrastructure as a Service Manager Service Certificate.
Published on 11 December 2017 by Christopher Lewis. Words: 383. Reading Time: 2 mins.
- Replacing the vRealize Automation 7.3 Appliance Certificate ()
- Replacing SSL Certificates in vRealize Automation 7.3 ()
- vRealize Automation and Orchestrator 7.3 Released! ()
- HOWTO: Configure a vRealize Automation 6 Advanced Services Endpoint for vCenter Server ()
- VCAP6-CMA Deploy - Objective 6.1: Configure Advanced Service Designer ()
