VCAP6-CMA Deploy - Objective 2.1: Configure Tenant Properties
VMware vRealize Automation VCAP6 VCAP6-CMA
Published on 15 January 2017 by Christopher Lewis. Words: 1317. Reading Time: 7 mins.
Objective 2.1 - Configure Tenant Properties
Objective Overview
- Configure the Default Tenant
- Create Tenants according to a deployment plan
- Configure an Identity Store for a Tenant
- Create Tenant Roles to meet deployment requirements
- Configure the branding for the default tenant
- Configure the branding for a non-default tenant
- Set Approval Policies for different departments
[toc]
Objective Prerequisites
The following prerequisites are assumed for this Objective:
- Fully deployed vRealize Automation Solution (See Objectives within Section 1).
Objective Breakdown
Configure the Default Tenant
- Navigate to the vRealize Automation Portal (
https://vra.fqdn/vcac)

- Type
administrator@vsphere.localinto the User name textbox and enter the relevant password into the Password textbox and then click Login.

- Under Tenants, click on the vsphere.local.

- Click the Identity Stores tab.

- Click Add Identity Store.

- We are going to create Integrated Windows Authentication, so we select Native Active Directory from the Type dropdown.

- Enter the domain name into the Domain textbox and click Add.

- Click the Administrators Tab.

- Add the desired groups and users into the** Tenant Administrator(s)** and Infrastructure Administrator(s).

- Click Update.

- Click Email Servers.

- Click Add.

- Select the Email - Outbound option and click OK.

- Enter a name into the Name text box and then fill out the information based on the type of outbound email service you’re using, then click Test Connection.

- Click Add.

- Click Add.

- Select the Email - Inbound option and click OK.

- Enter a name into the Name text box and then fill out the information based on the type of inbound email service you’re using, then click Test Connection.

- Click Add.

- If there is no other configuration required, click Logout.
Create Tenants according to a deployment plan
I can only assume that by saying “according to a deployment plan” the exam may ask you to create multiple Tenants.
- Navigate to the vRealize Automation Portal (
https://vra.fqdn/vcac)
- Type
administrator@vsphere.localinto the User name textbox and type the relevant password into the Password textbox and then click Login.
- Under Tenants, click on Add Tenant.

- Under General, add the following information:
- The name of the new Tenant in the Name textbox.
- (Optional) The description of the customer in the Description text field.
- The URL of the new tenant into the URL Name text box.
- (Optional) A contact email address for the tenant in the Contact email textbox.

- Click Submit and Next.

- Enter the following information:
- A suitable display name (in the GUI) into the Name textbox.
- Select Active Directory from the Type dropdown.
- Enter the URL (including port) for the identity store (LDAP://domain.fqdn:875) into the URL textbox.
- Enter the domain name (domain.name) into the Domain textbox.
- (Optionally) enter the Domain Alias (which shouldn’t be the domain name).
- Enter the Distinguished Name of the user used to retrieve the information from the domain into the Login user DN textbox.(In my example I am using a service account
CN=Tenant01.Readonly,OU=Users, OU=Tenant01,OU=Tenants,OU=Global, DC=thecloudxpert,DC=local).- Enter the password of the User into the Password textbox.
- Enter the Distinguished Name of the OU where vRA should start searching for Groups in the AD, in the Group Search base DN text box. (In my example this is
OU=Tenant01,OU=Tenants,OU=Global,DC=thecloudxpert,DC=local).- Enter the Distinguished Name of the OU where vRA should search for Users into the User search base DN text box. (if left blank this defaults to the same value as the Groups)
- Click Test Connection.

- Click Add.

Add Additional Identity Stores if required.
- Click Next.

- Add the desired group(s) and user(s) into the Tenant Administrator(s) and Infrastructure Administrator(s).

- Click Add.

- Click Logout.
Confirm the Tenant works
- Navigate to vRealize Automation Tenant Portal
https://vra.fqdn/vcac/<tenant>.

- Enter credentials for the Tenant Administrator for the new tenant and click Login.

- Additional Tenants can be added through the logging onto the Default Tenant using the System Administrator (
administrator@vsphere.local) account as desired.
Configure an Identity Store for a Tenant
This can be completed by System Administrator when the tenant is created or by the Tenant Administrator of a particular tenant. As I have covered the System Administrator steps already, here I will show how to Login as the Tenant Administrator so that you can change the existing or add an additional Identity Store.
- Navigate to the VMware vRealize Automation Tenant Portal (
https://vra.fqdn/vcac/org/<tenant>)
- Enter the credentials for the Tenant Administrator and click Login.

- Click Administration > Identity Stores.

From here you can choose to configure existing Identity Store properties or Click Add Identity Store.
Create Tenant Roles to meet deployment requirements
The Tenant roles are:
- Tenant Administrator
- Service Architect
- Business Group Manager
- Support User
- Business User
- Approval Administrator
- Approver
I think the Role names are self explanatory, but check out the VMware vRealize Automation Product Documentation for more information.
Within vRealizer Automation you can assign Tenant Roles in two ways:
- Directly to AD Groups and Users
- Using vRA Custom Groups
I will demonstrate how to do this on the Approval Administrator role, but the procedure is the same for all Tenant roles highlighted above.
Let’s take a look at both approaches:
Directly to AD Groups and Users
- Navigate to
https://vra.qdn/vcac/<tenant>to check the logon page exists.
- Type the credentials for the Tenant Admin for the new tenant and click Login.
- Click Administration.

- Click Users & Groups > Identity Store Users & Groups.

- Within the Search box, type the user you want to grant the Approval Administrator role and press Enter.

- Click on the User/Group.

- From within the Add roles to this user list, check the Approval Administrator checkbox.

- Click Update.
Using vRA Custom Groups
- Navigate to the Tenant Portal (
https://vra.qdn/vcac/<tenant>).
- Type the credentials for the Tenant Admin for the new tenant and click Login.
- Click Administration.
- Click Users & Groups > Custom Groups.

- Click Add.
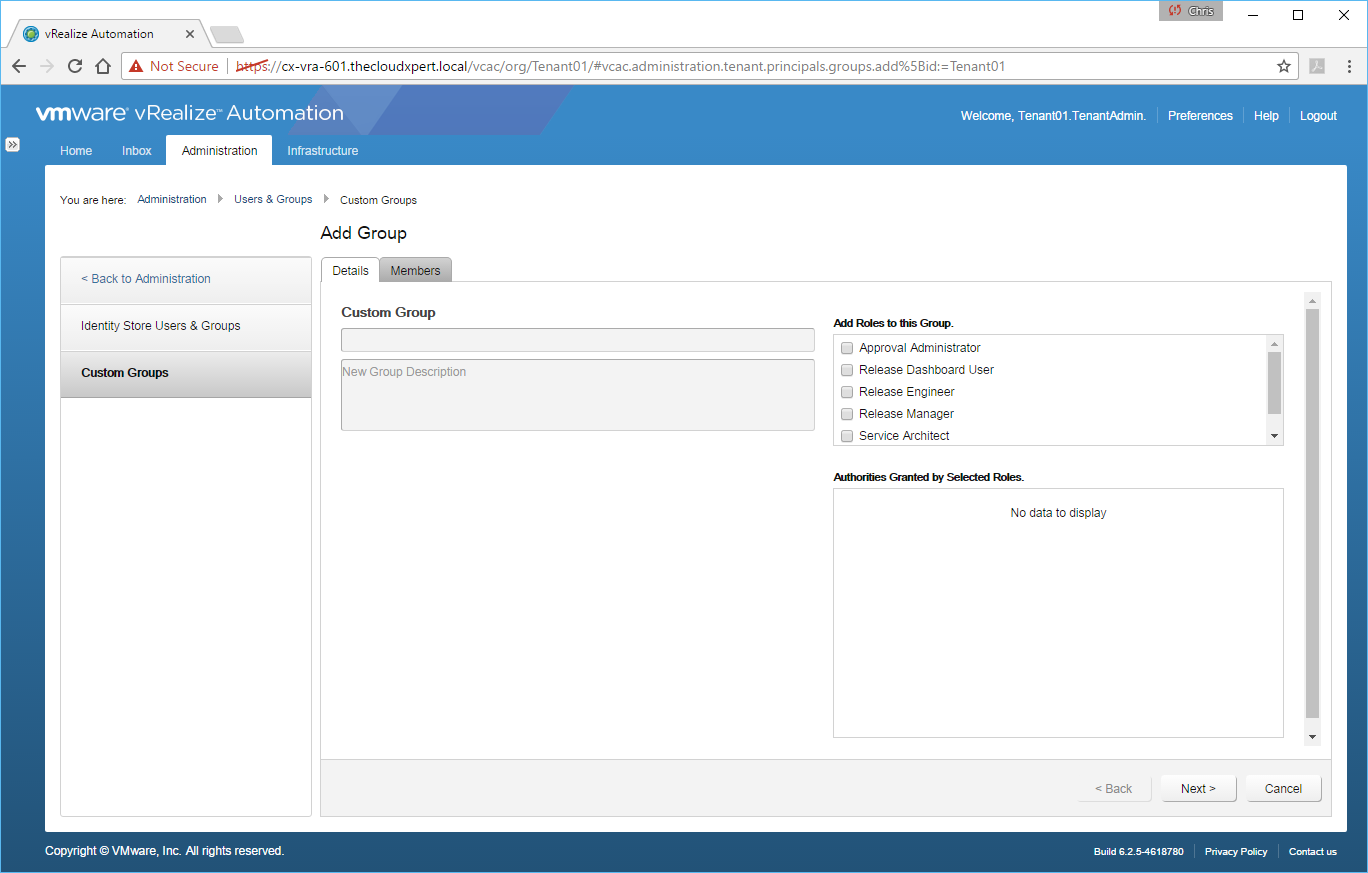
- Enter a name for the new group into the Custom Group textbox and check the Approval Administrator checkbox from the Add Roles to this Group list.

- Click Next.

- Enter an Active Directory User or Group name into the** Search** text box, click **Enter **and select the correct User/Group from the list.

- Click Add.

Configure the branding for the Default tenant
The configuration of Branding in the default tenant is the responsibility of the System Administrator and/or the Tenant Administrator for the tenant. In this section, I will cover configuring branding as the System Administrator, in the next section I will cover completing changes to Branding withing a non-Default Tenant as a Tenant Administrator (the process for which could be also used to update the Default Tenant as a Tenant Administrator).
- Navigate to the vRealize Automation Portal (
https://vra.fqdn/vcac)
- Type
administrator@vsphere.localinto the User name textbox and enter the relevant password into the Password textbox and then click Login.
- Click Branding.

- Uncheck the Use Default checkbox to enable the ability to make changes to the Default Tenant Branding.
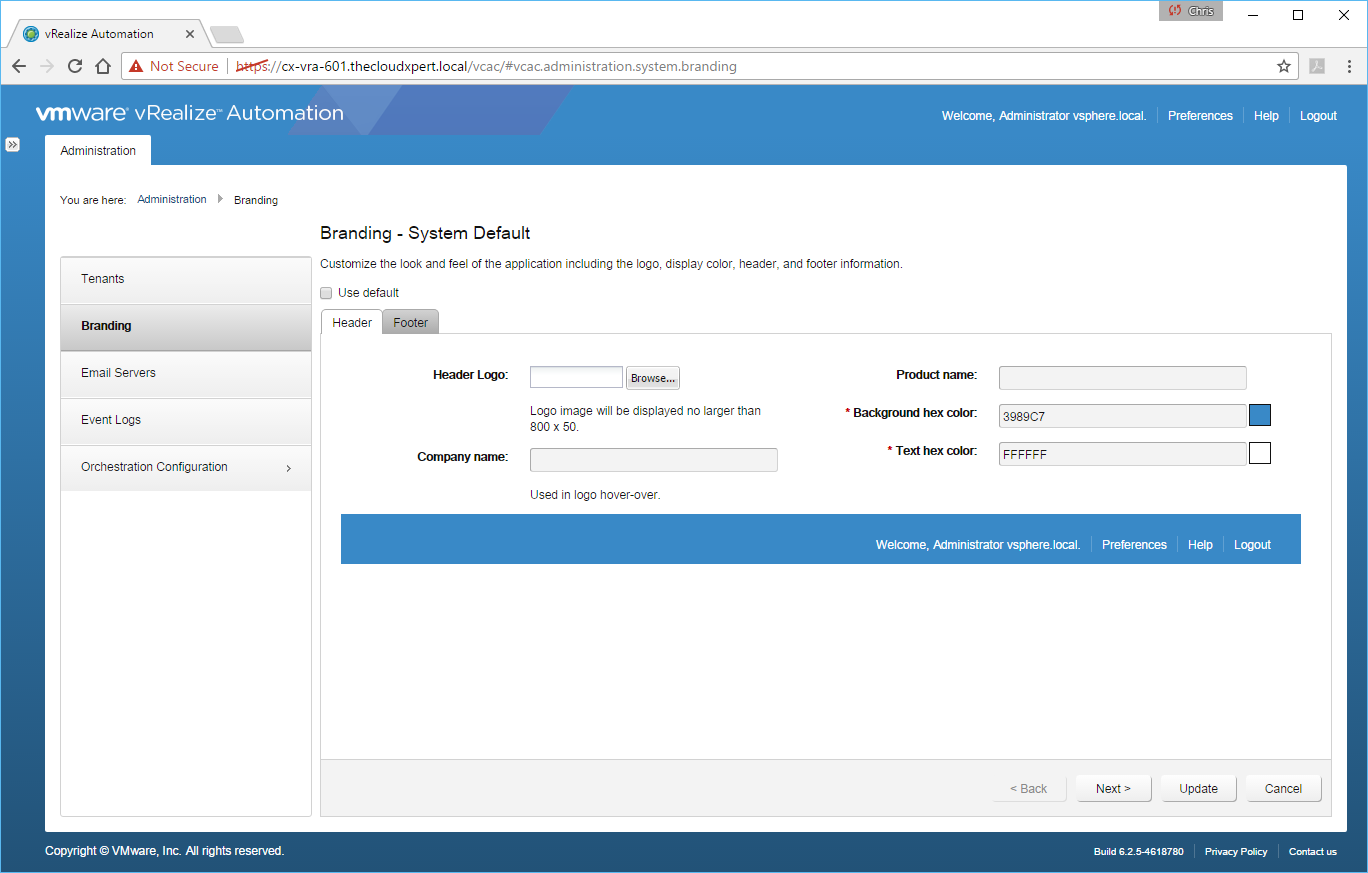
- Click Header and make changes to the following:
- Logo
- Product Name
- Background Colour
- Font Colour
- Company Name

- Click Footer to make changes to the following:
- Copyright Notice
- Privacy Polic Link
- Contact Link
- Once all the changes are complete, click Update to apply the changes.

And there you have you swanky new colour scheme for the Default Tenant.
Configure the branding for a non-default tenant
The branding of the non-default tenant is completed by a Tenant Administrator.
- Navigate to vRealize Automation Tenant Portal (
https://vra.qdn/vcac/<tenant>).
- Type the credentials for the Tenant Admin for the new tenant and click Login.
- Click Administration.

- Click Branding.

- Uncheck the checkbox to enable the ability to make changes to the branding.

- Make any necessary changes to branding in both Header and Footer tabs and click Update.

Set Approval Policies for different departments
The Tenant Administrator or Approval Administrator can create Approval Policies. As I have previous created a Custom Group for the Approval Administrator Role, I’m going to log in with my Approval Administrator user for this next section.
- Navigate to the Tenant Portal (
https://vra.qdn/vcac/<tenant>).
- Type the credentials for the Approval Administrator for the tenant and click Login.

- Click Administration.

- Click Add.
Published on 15 January 2017 by Christopher Lewis. Words: 1317. Reading Time: 7 mins.
- HOWTO: Install the VMware vRealize Automation 6.x IaaS Components (Simple Install) ()
- HOWTO: Install the VMware vRealize Automation 6.x IaaS Prerequisites ()
- VCAP6-CMA Deploy - Objective 1.1: Deploy and Manage a vRA Appliance and IaaS Server as Single nodes ()
- HOWTO: Configure the VMware vRealize Automation 6.x Appliance (Minimal Deployment) ()
- HOWTO: Deploy the Identity Appliance for vRealize Automation 6.x ()
