HOWTO: Configure VMware NSX with Dynamic Routing - OSPF
VMware NSX-V VCAP6-NV VCIX6-NV HOWTO
Published on 1 August 2017 by Christopher Lewis. Words: 552. Reading Time: 3 mins.
Introduction
Dynamic Routing provides the necessary forwarding information between Layer 2 broadcast domains. There are 3 types of Dynamic Routing supported by VMware NSX-V: OSPF, BGP and IS-IS.
In this post, as part of the VCAP6-NV Deployment Study Guide , we will be covering the configuration of OSPF.
Step By Step Guide
Prerequisites
The following prerequisites are assumed for this Objective:
- A working VMware vSphere 6.x environment.
- A working VMware NSX 6.x environment.
Configure a Router ID for each NSX Edge
To configure OSPF, each NSX Edge must have a Router ID configured. The steps to do this is covered in HOWTO: Configure the Router ID for a VMware NSX Edge .
Configure OSPF on a Distributed Logical Router (DLR)
- Using your favourite web browser, navigate to the vCenter Server login page (
https://vcenter.fqdn).
- Type the administrator User name and Password and click Login.
- Click Networking and Security.
- Click NSX Edges.
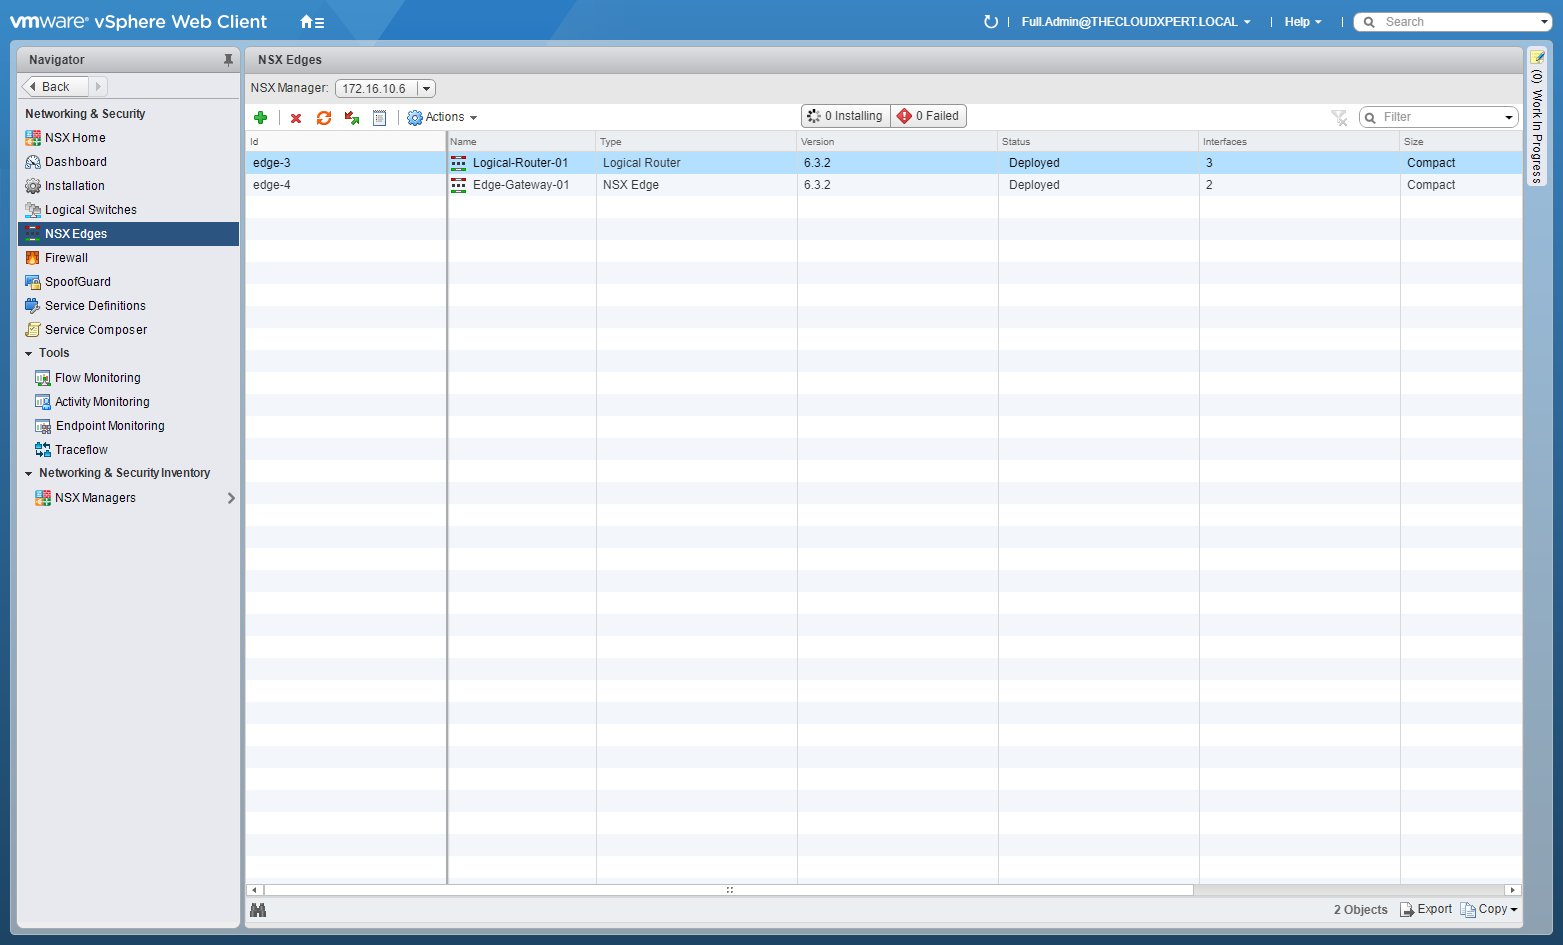
- Double-Click on the target DLR.
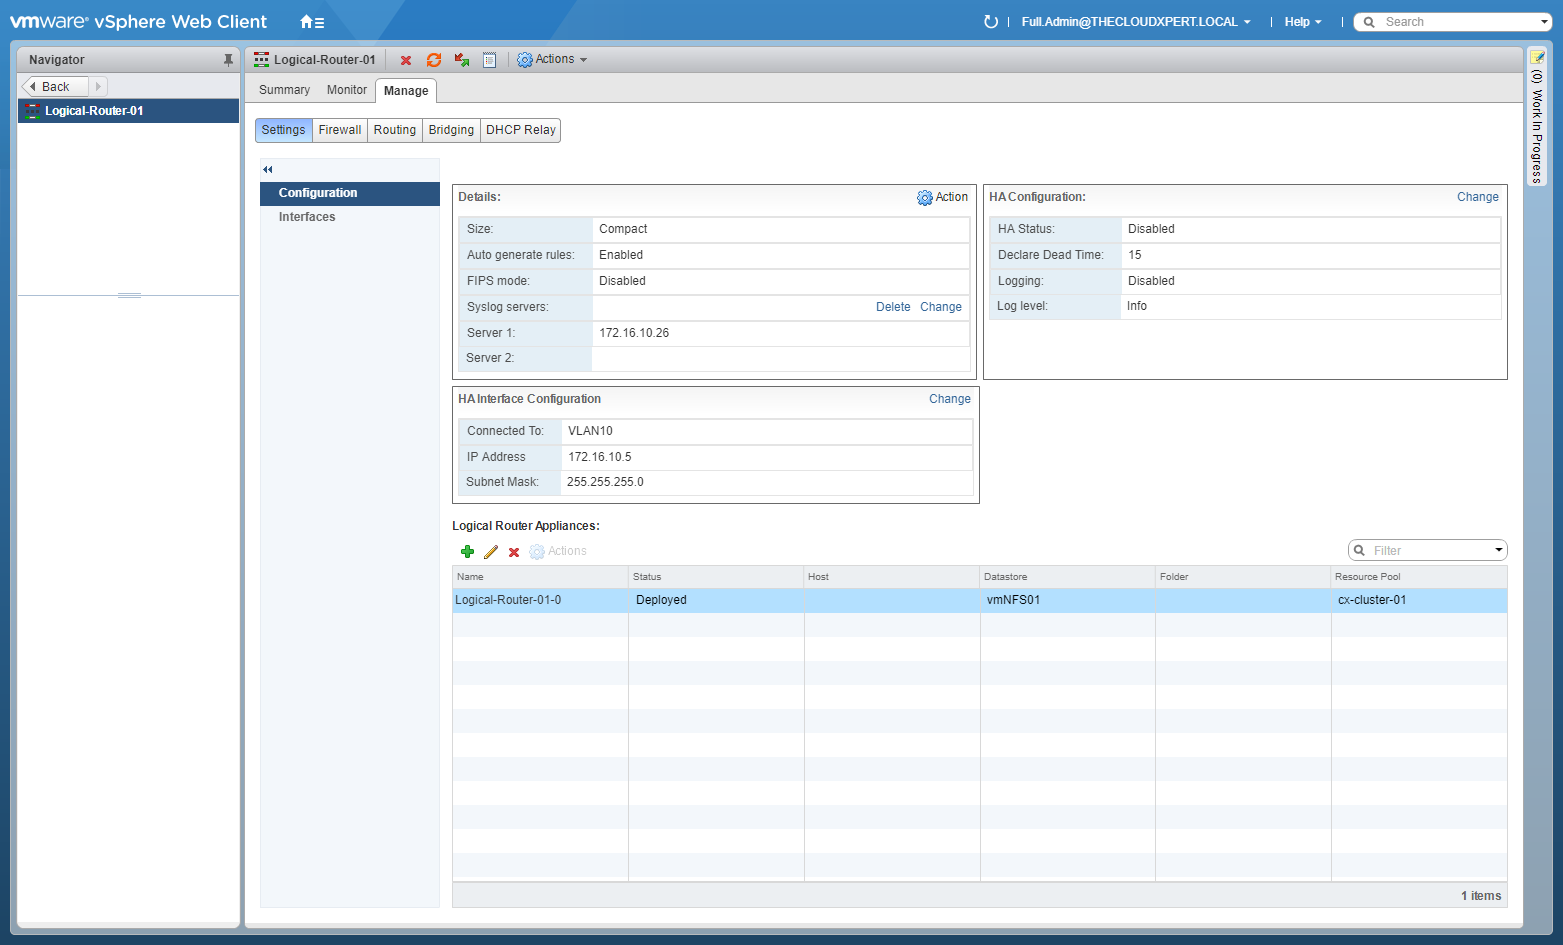
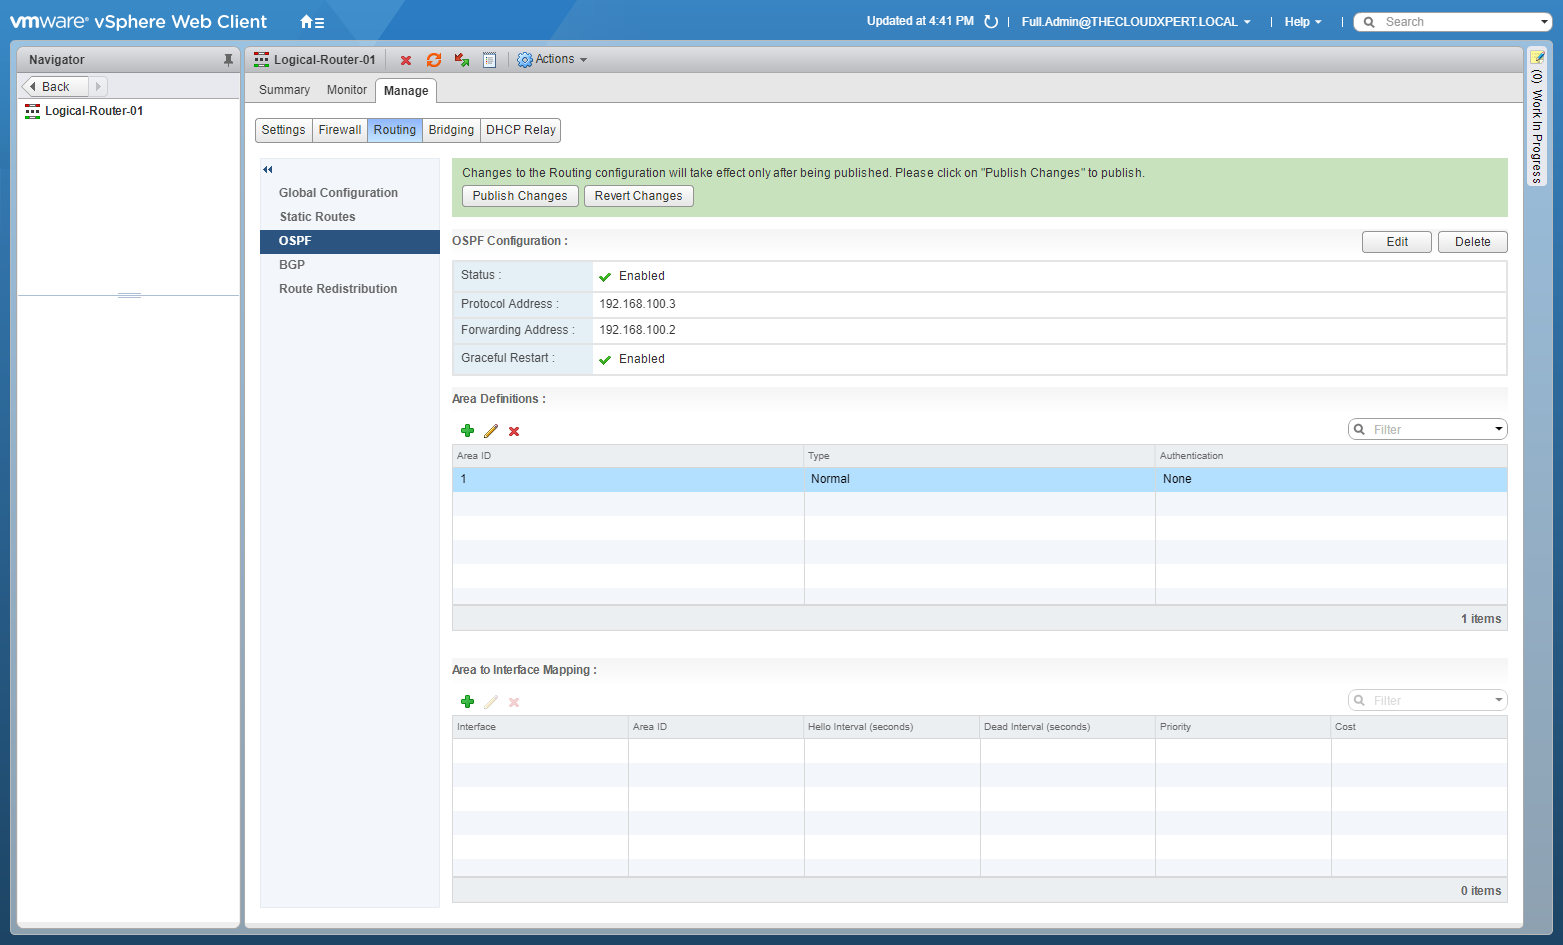
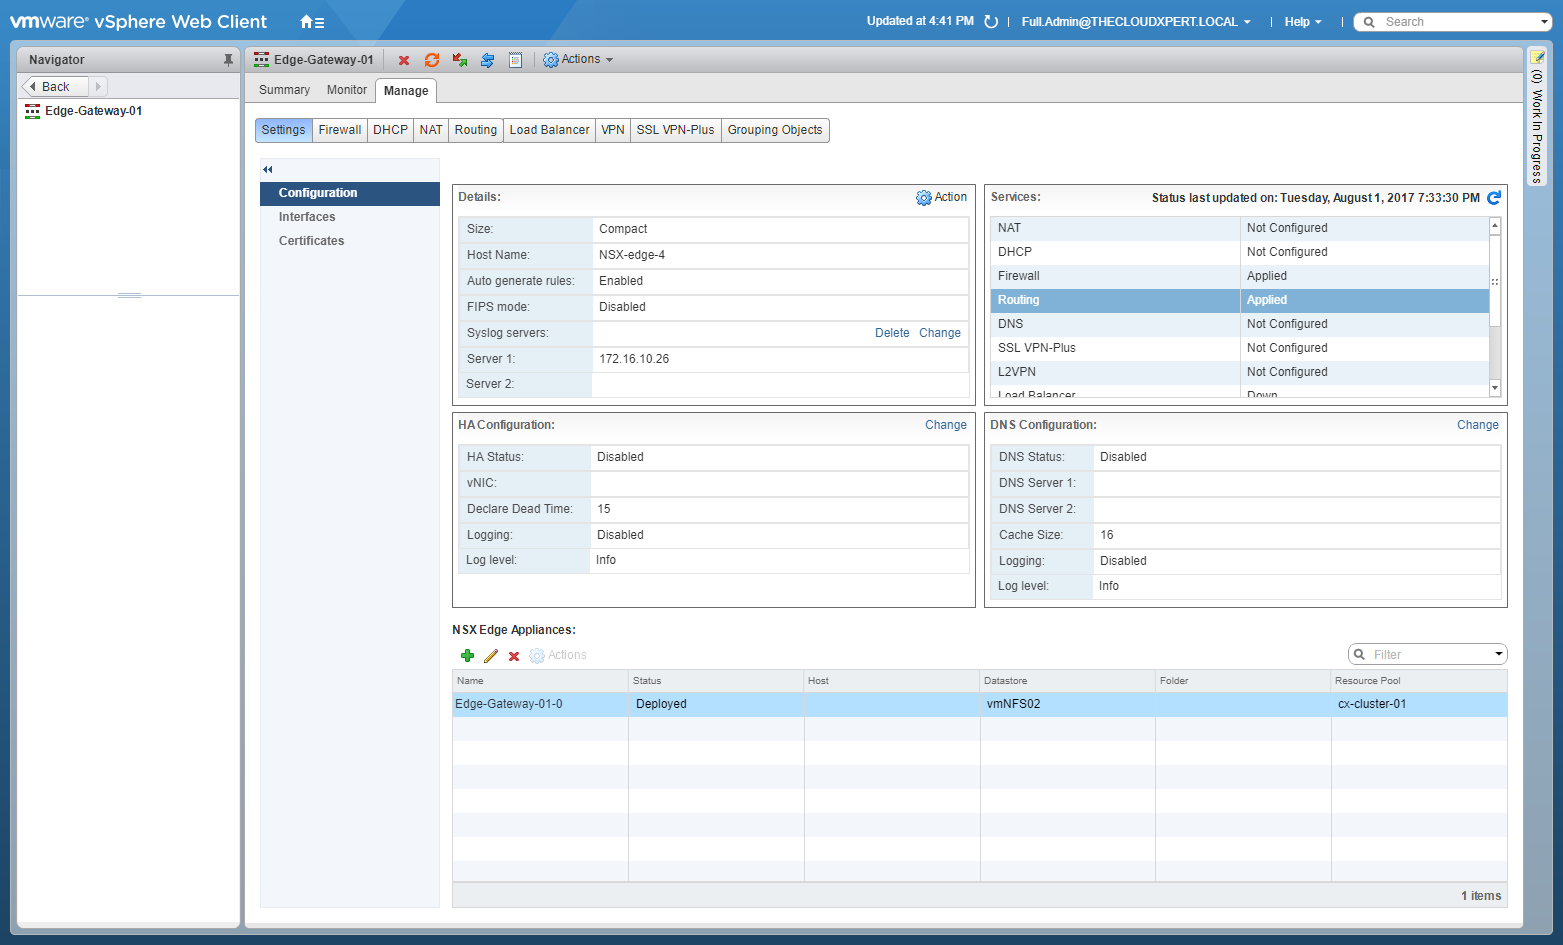
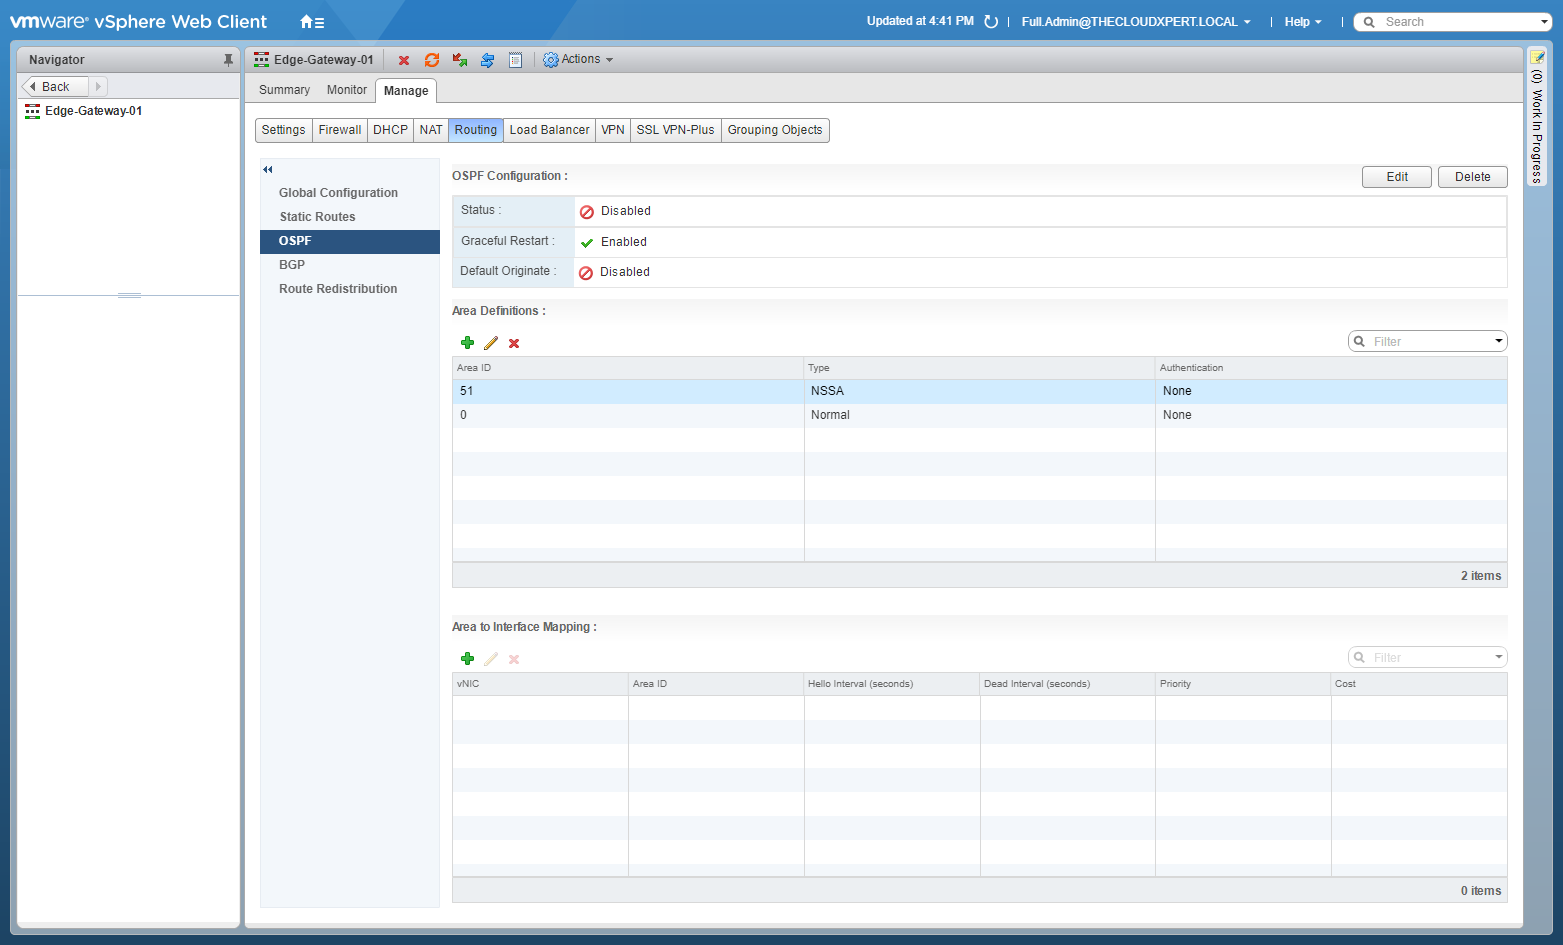
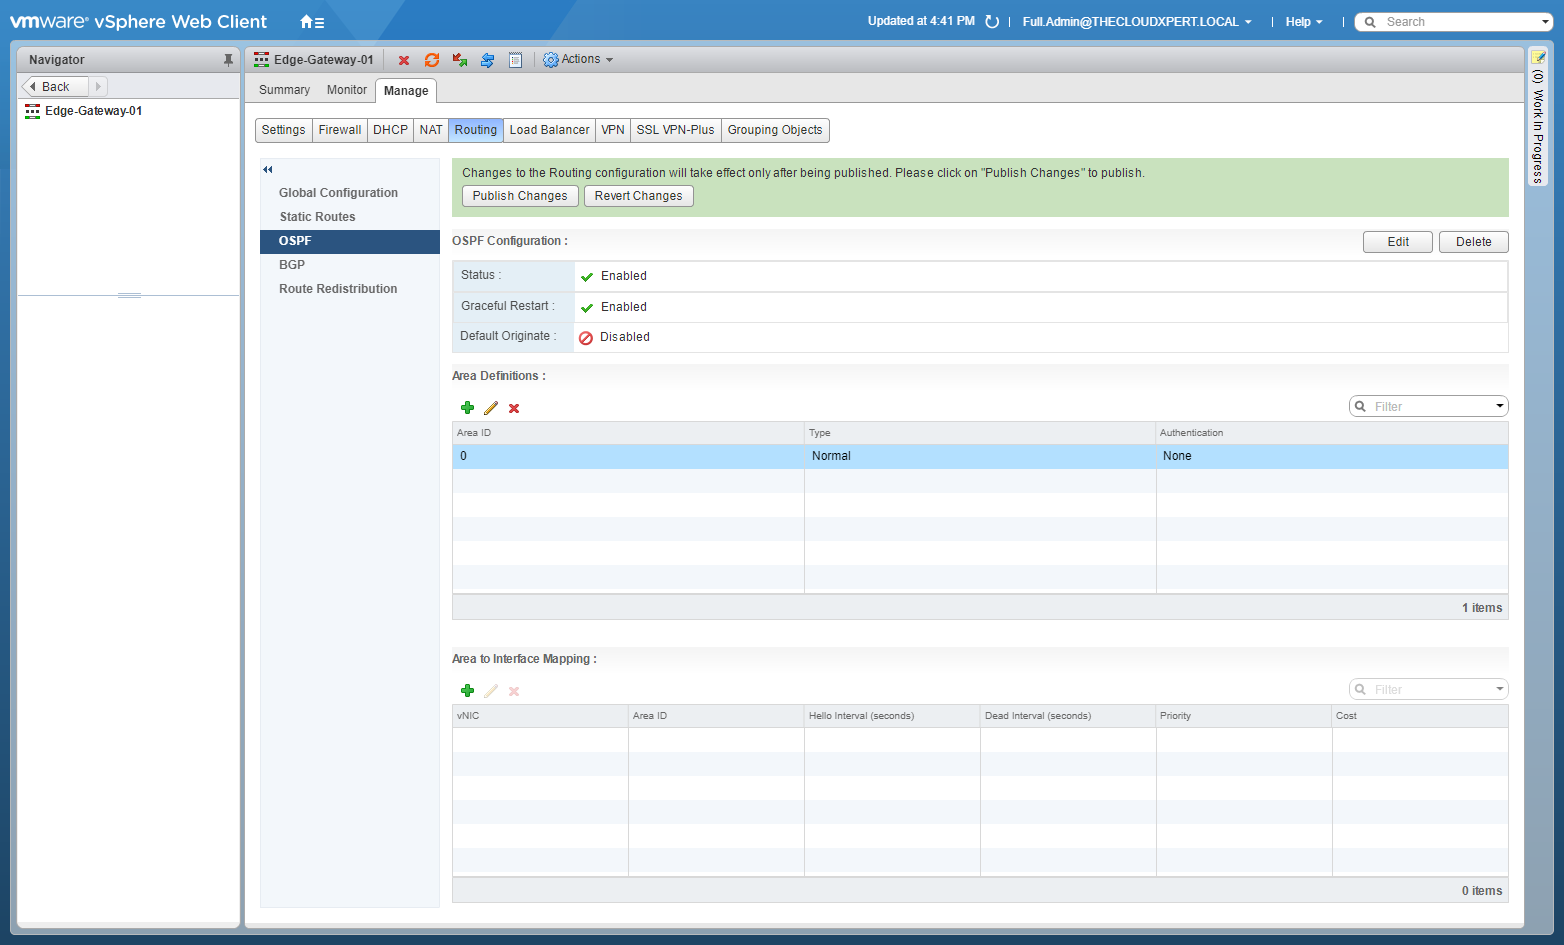
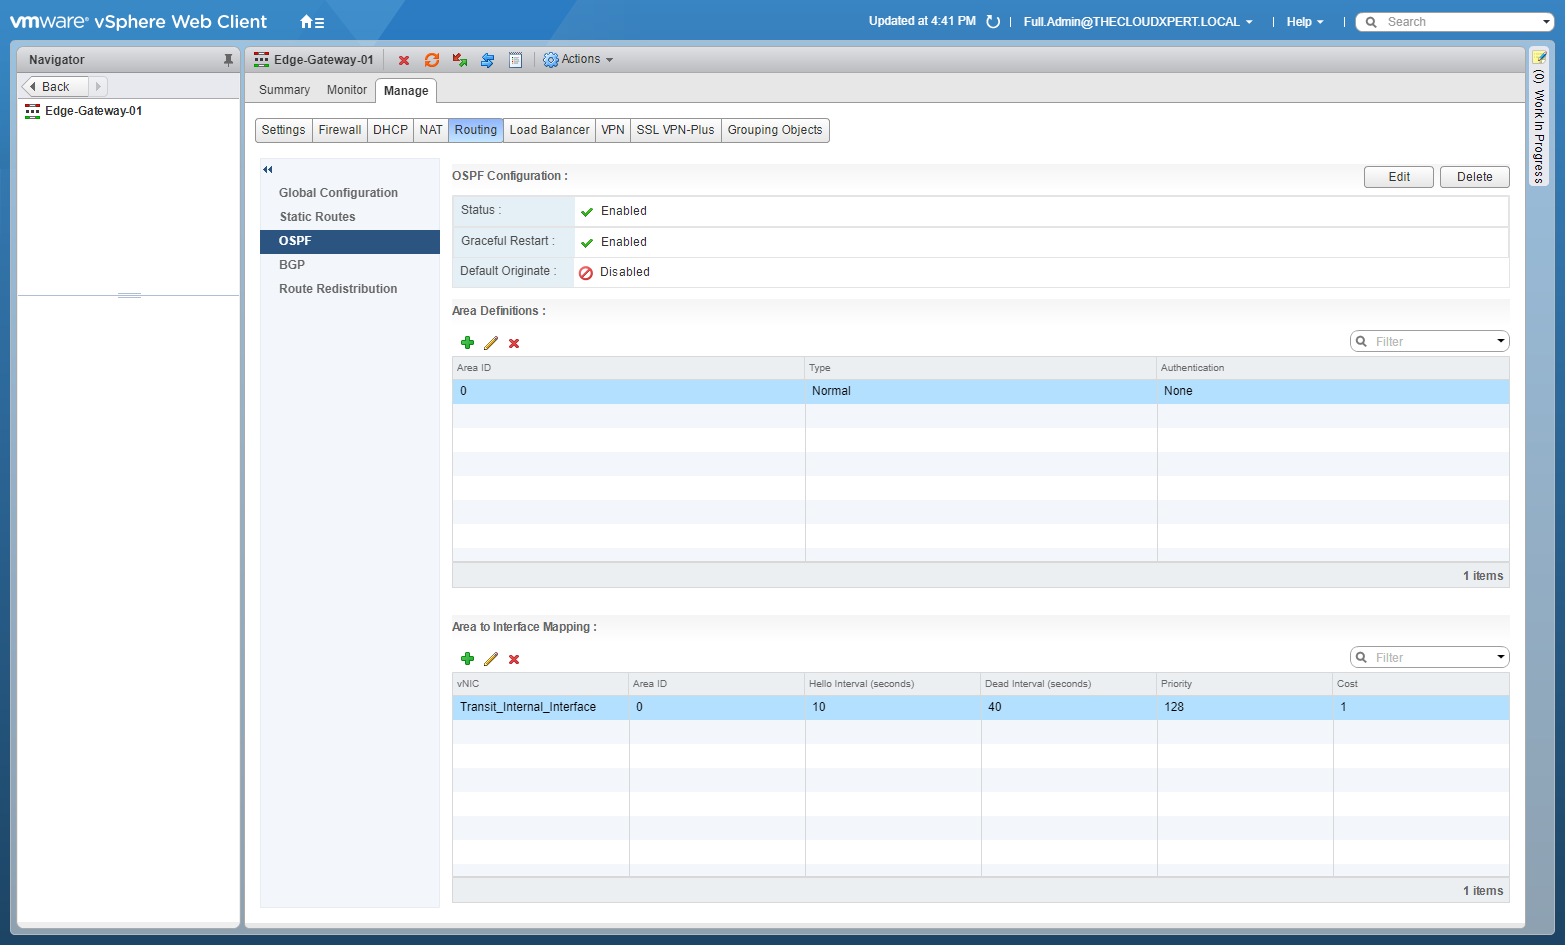
- Click the Manage tab, select Routing and then select OSPF.
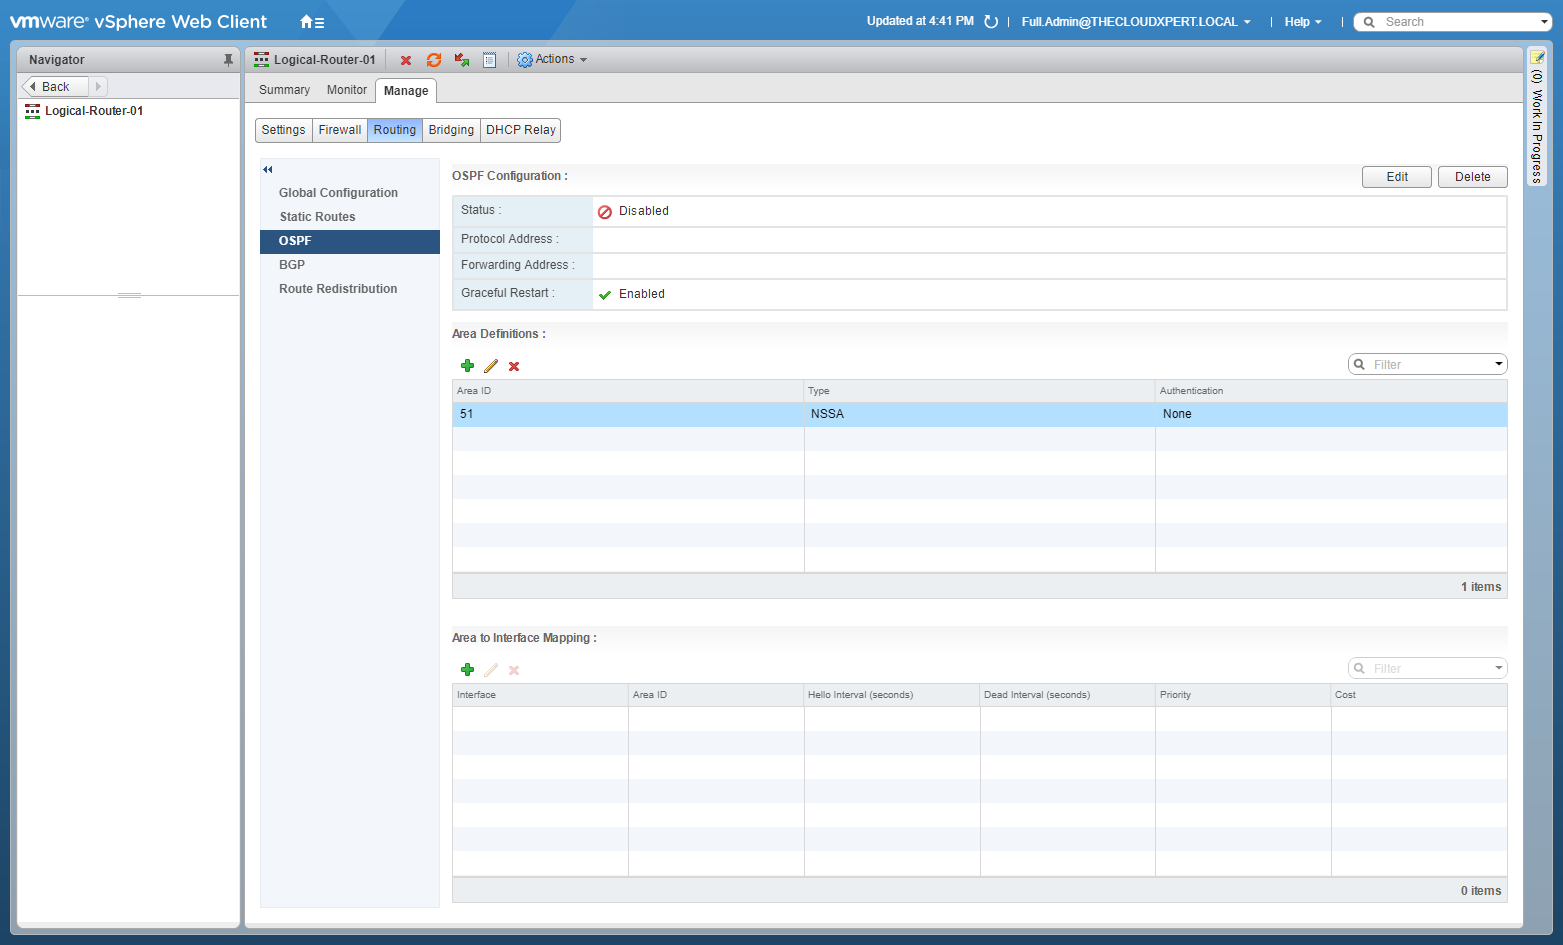
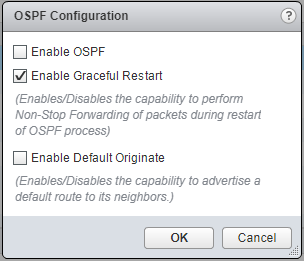
- At OSPF Configuration, click Edit.
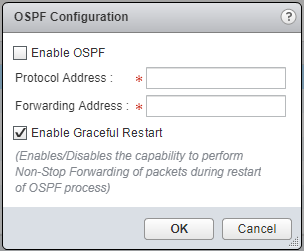
- Check the Enable OSPF checkbox and enter the Protocol Address and Forwarding Address.
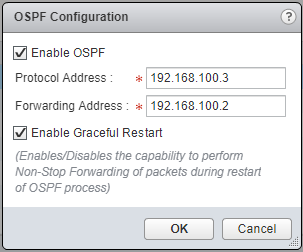
- Click OK.
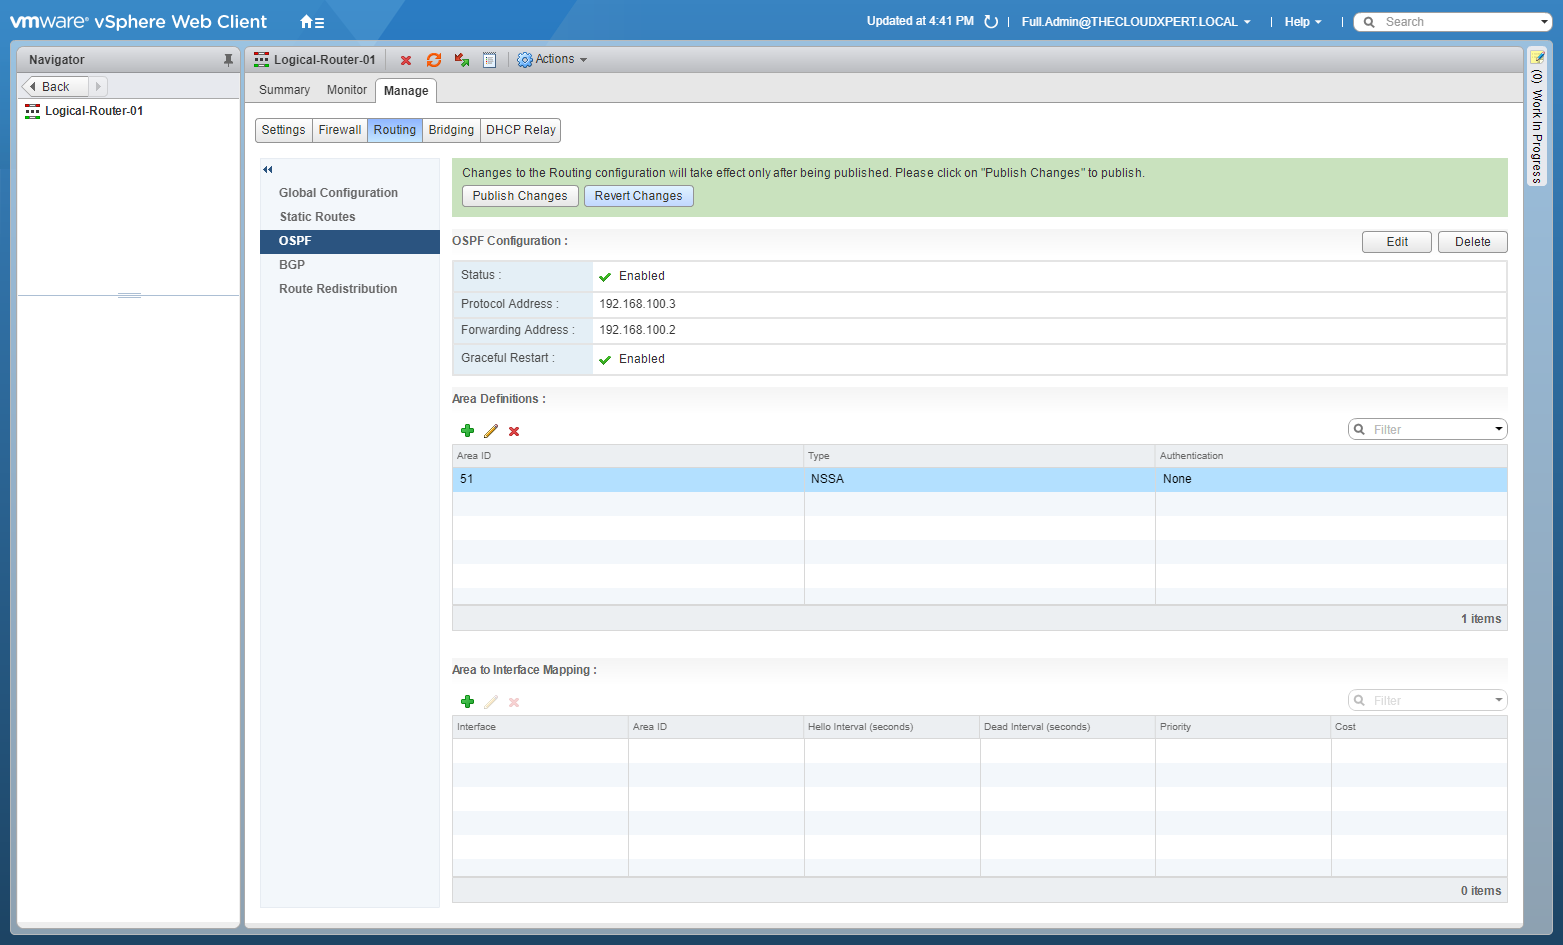
- Click Publish Changes.
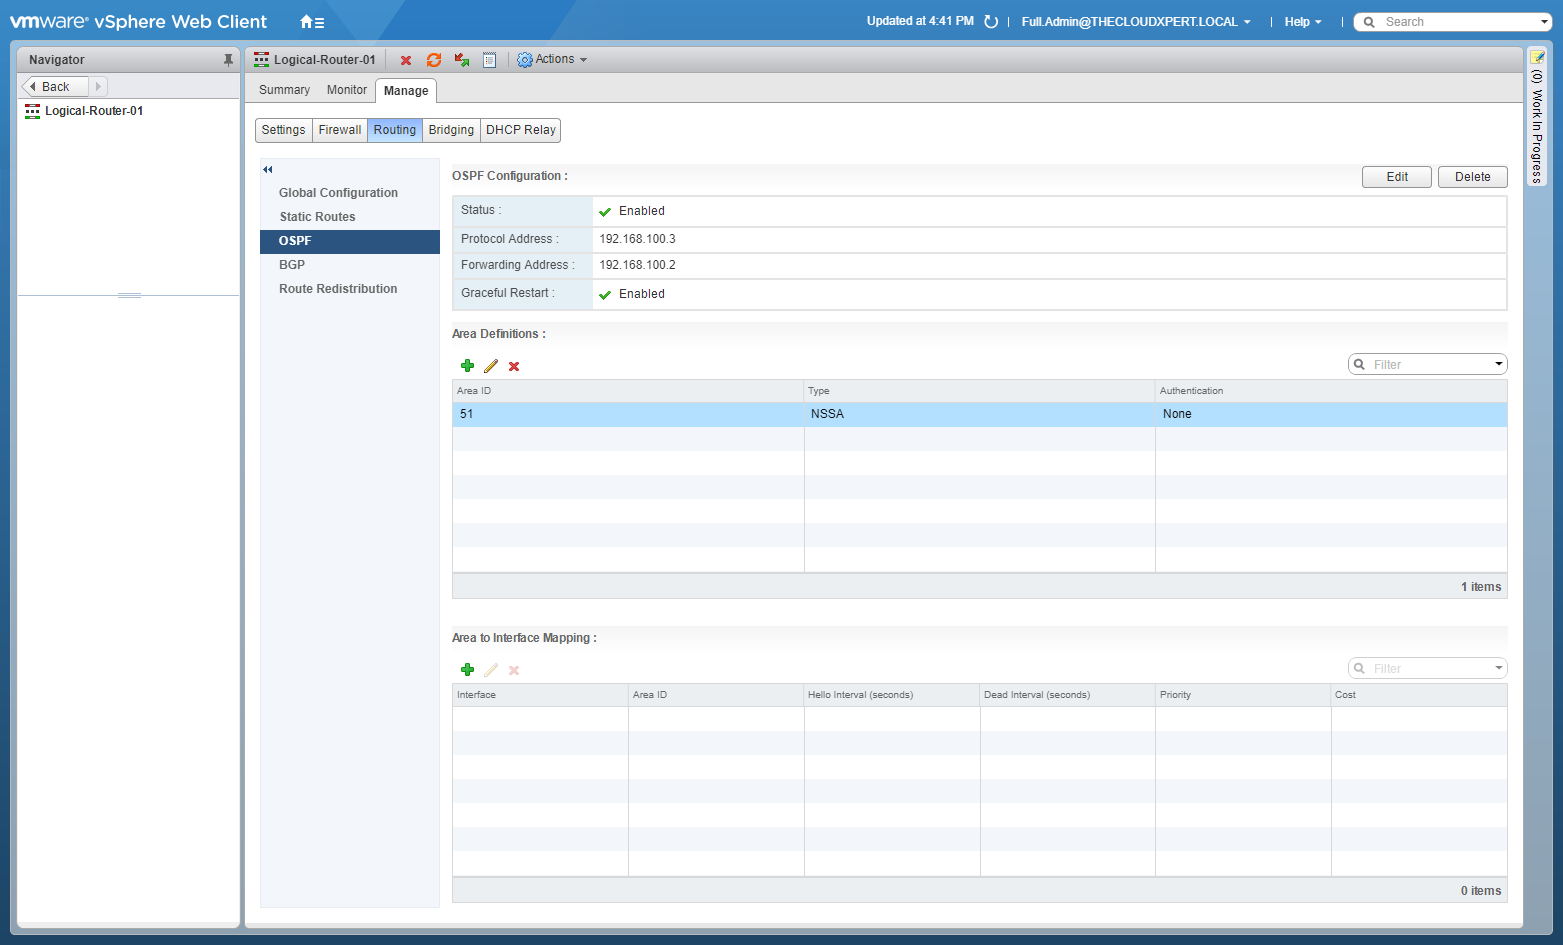
- Under Area Definition, select Area ID 51 and click Delete (X).
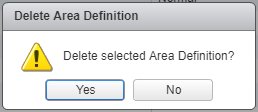
- Click Yes.

- Under Area Definition, click Add(+).
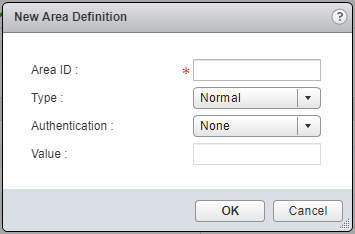
- Type an Area ID, select a Type of Area (Normal or NSSA) from the dropdown, select Authentication method (None, MD5 or Password) and (if required enter a Value.
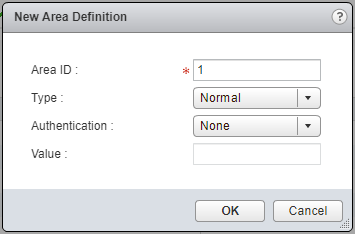
- Click OK.
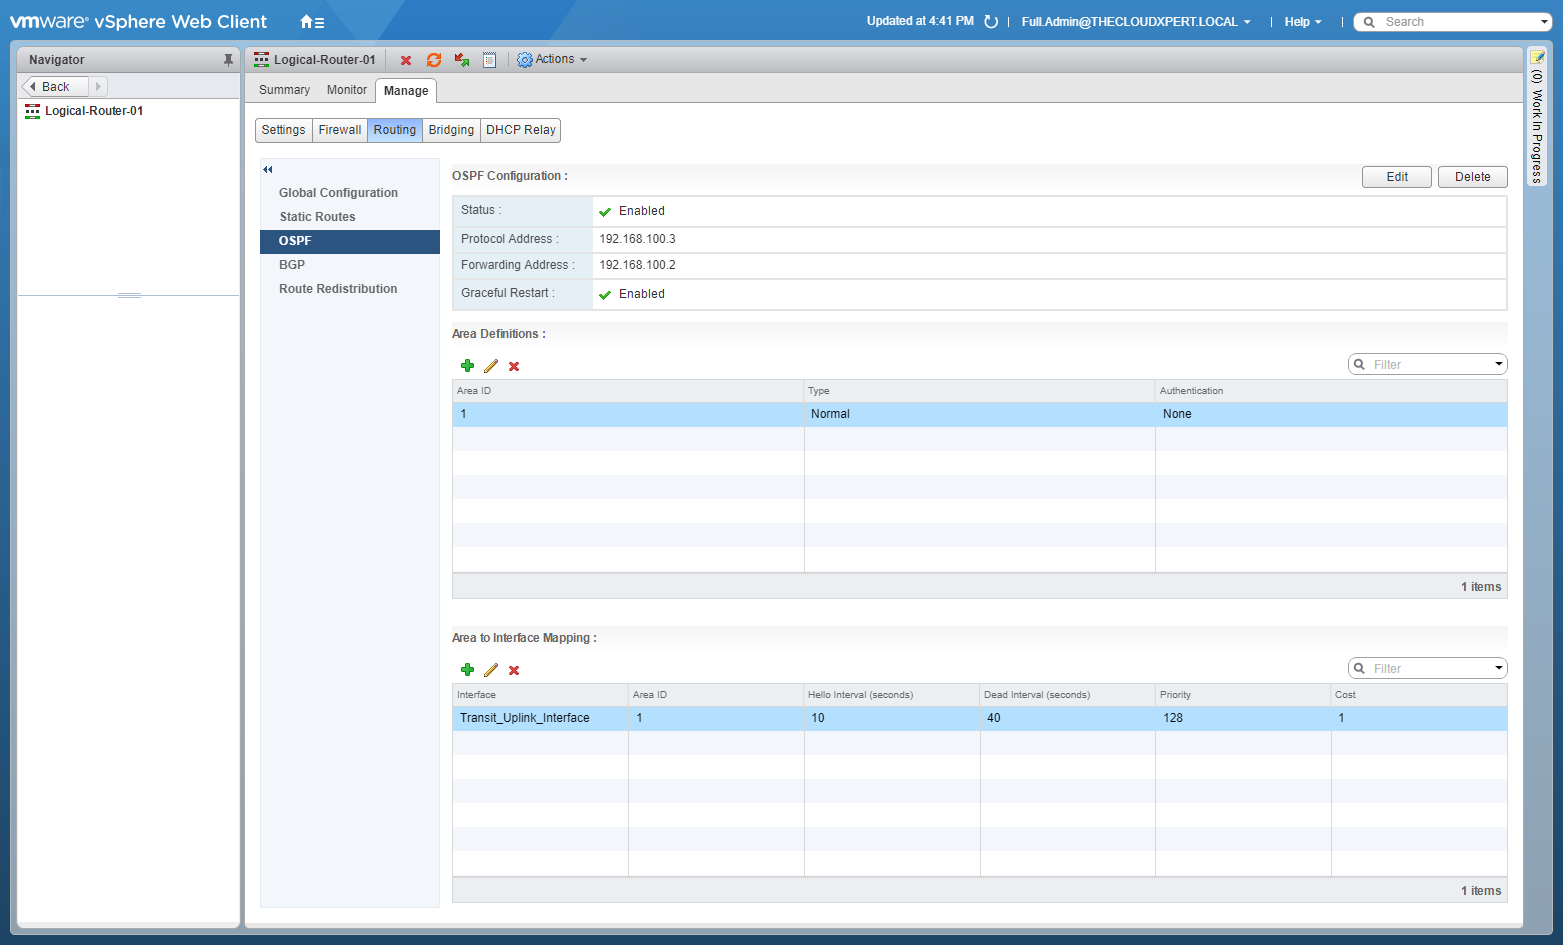
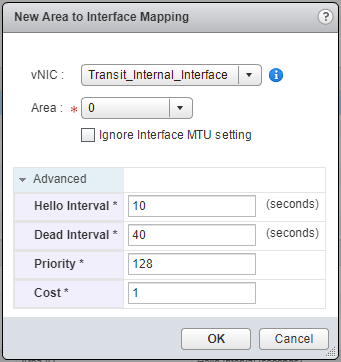
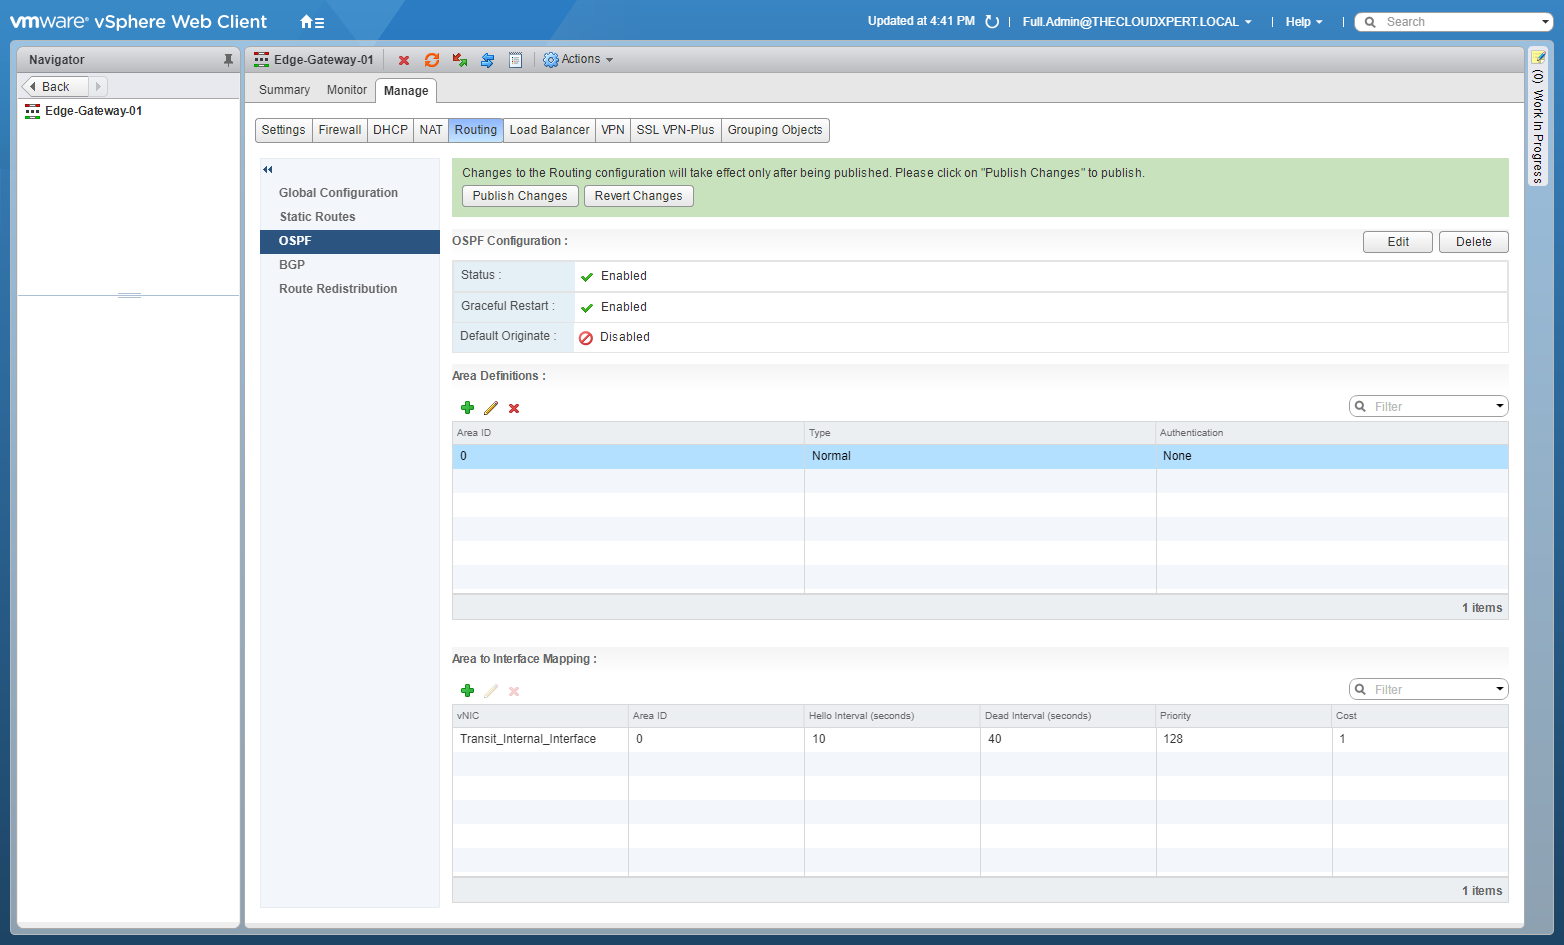
- Under Area to Interface Mapping, click Add(+).
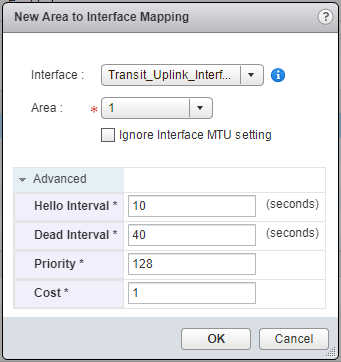
- Select the correct Interface from the dropdown, the correct Area and optionally make changes to the Advanced settings. Then click OK.

- Click Publish Changes.
Configure OSPF on an Edge Services Gateway (ESG)
- Using your favourite web browser, navigate to the vCenter Server login page (
https://vcenter.fqdn).
- Type the administrator User name and Password and click Login.
- Click Networking and Security.
- Click NSX Edges.
- Double-click on the target ESG.
- Click the Manage tab, select Routing and then select OSPF.
- At OSPF Configuration, click Edit.
- Check the Enable OSPF checkbox.
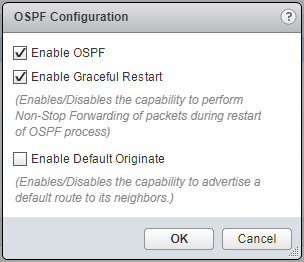
- Click OK.

- Under Area Definition, select Area ID 51 and click Delete (X).
- Click Yes.
- Under Area to Interface Mapping, click Add(+).
- Select the appropriate vNIC, the Area and then Click OK.
- Click Publish Changes.
Checking Route Redistribution (OSPF)
These steps should be completed for each of the NSX Edges in the OSPF configuration.
- Using your favourite web browser, navigate to the vCenter Server login page (
https://vcenter.fqdn).
- Enter appropriate User name and Password and click Login.
- Click Networking and Security.
- Click NSX Edges.
- Double-click on the target NSX Edge.
- Click Route Redistribution.
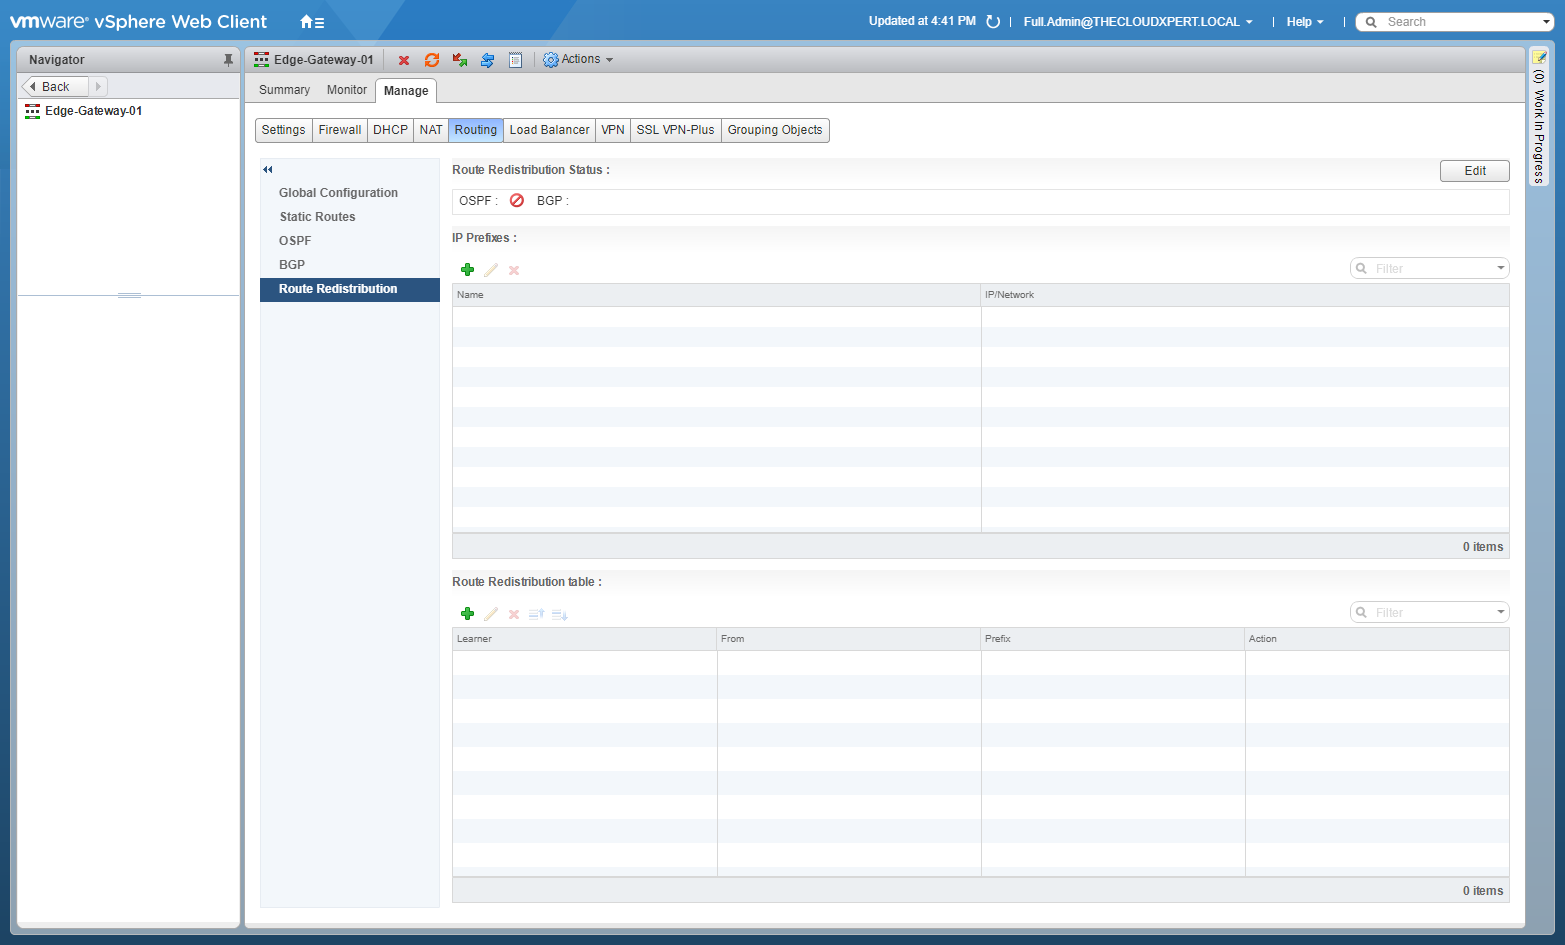
Checking if Route Redistribution is enabled for OSPF
- If the Route Distribution Status is OSPF set to Disabled, click Edit.

- Check the OSPF checkbox.
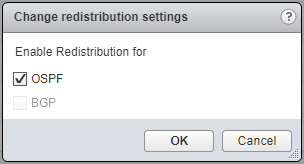
- Click OK.
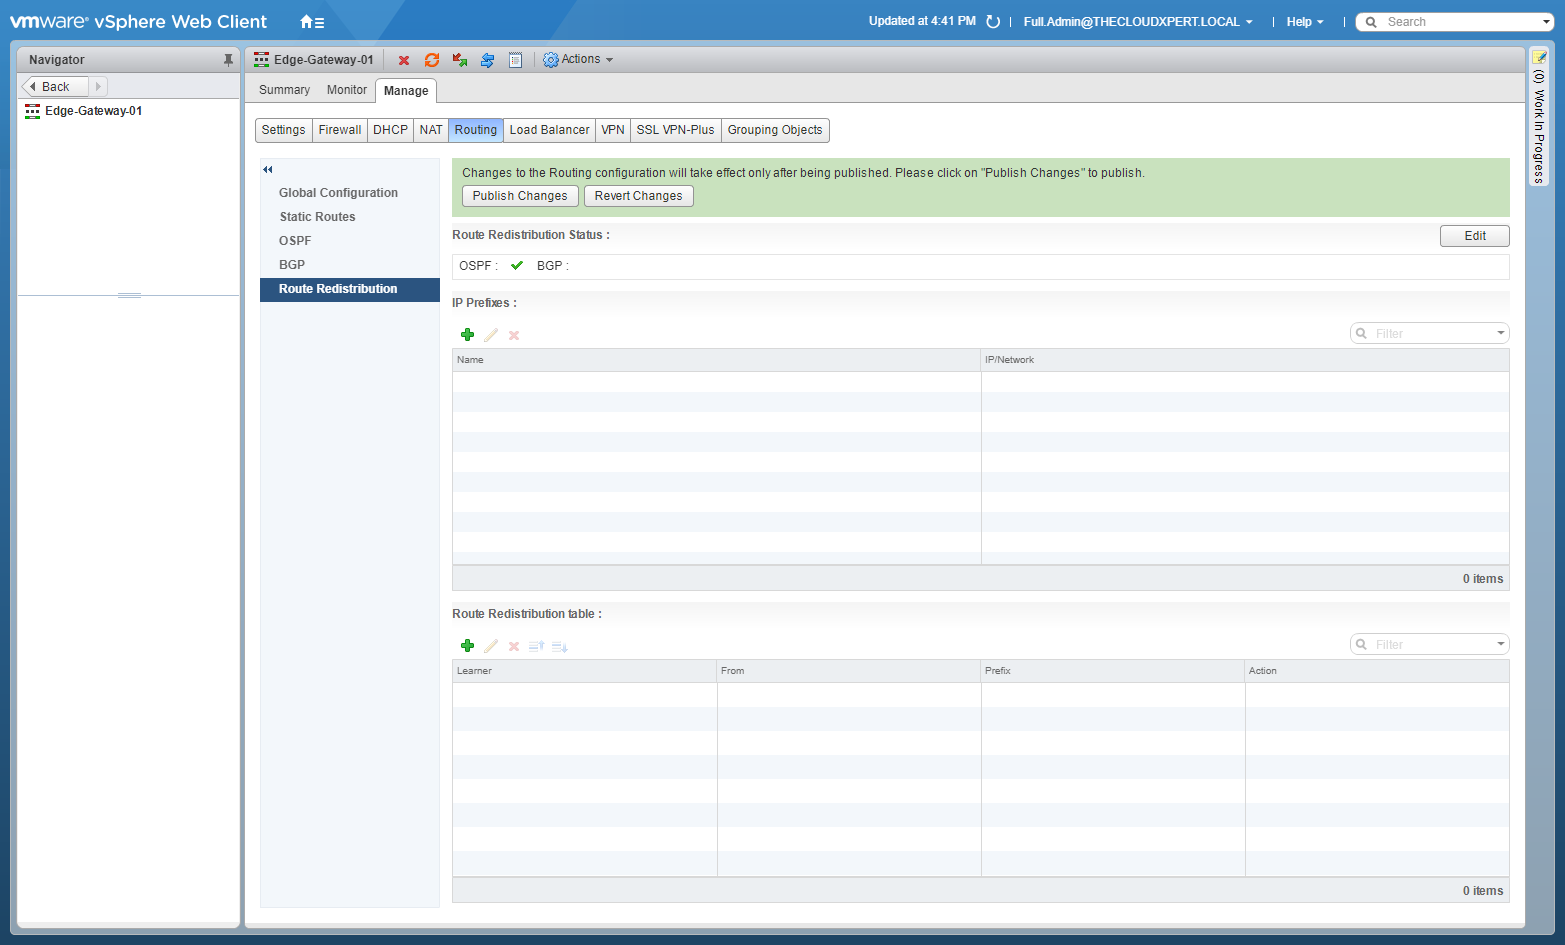
- Click Publish Changes.
Checking the Route Redistribution Table is updated
- If the Route Distribution Table is empty, click Add(+).
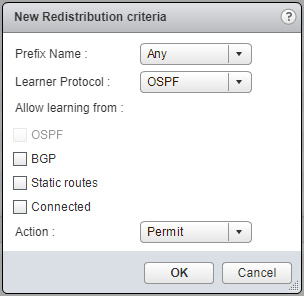
- Select the Prefix Name (Any), the Learner Protocol (OSPF), check the Connected checkbox and select Permit from the Action dropdown.
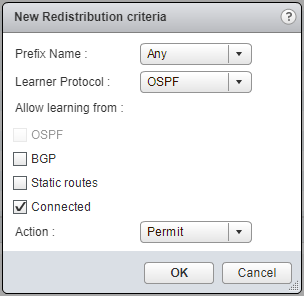
- Click OK.
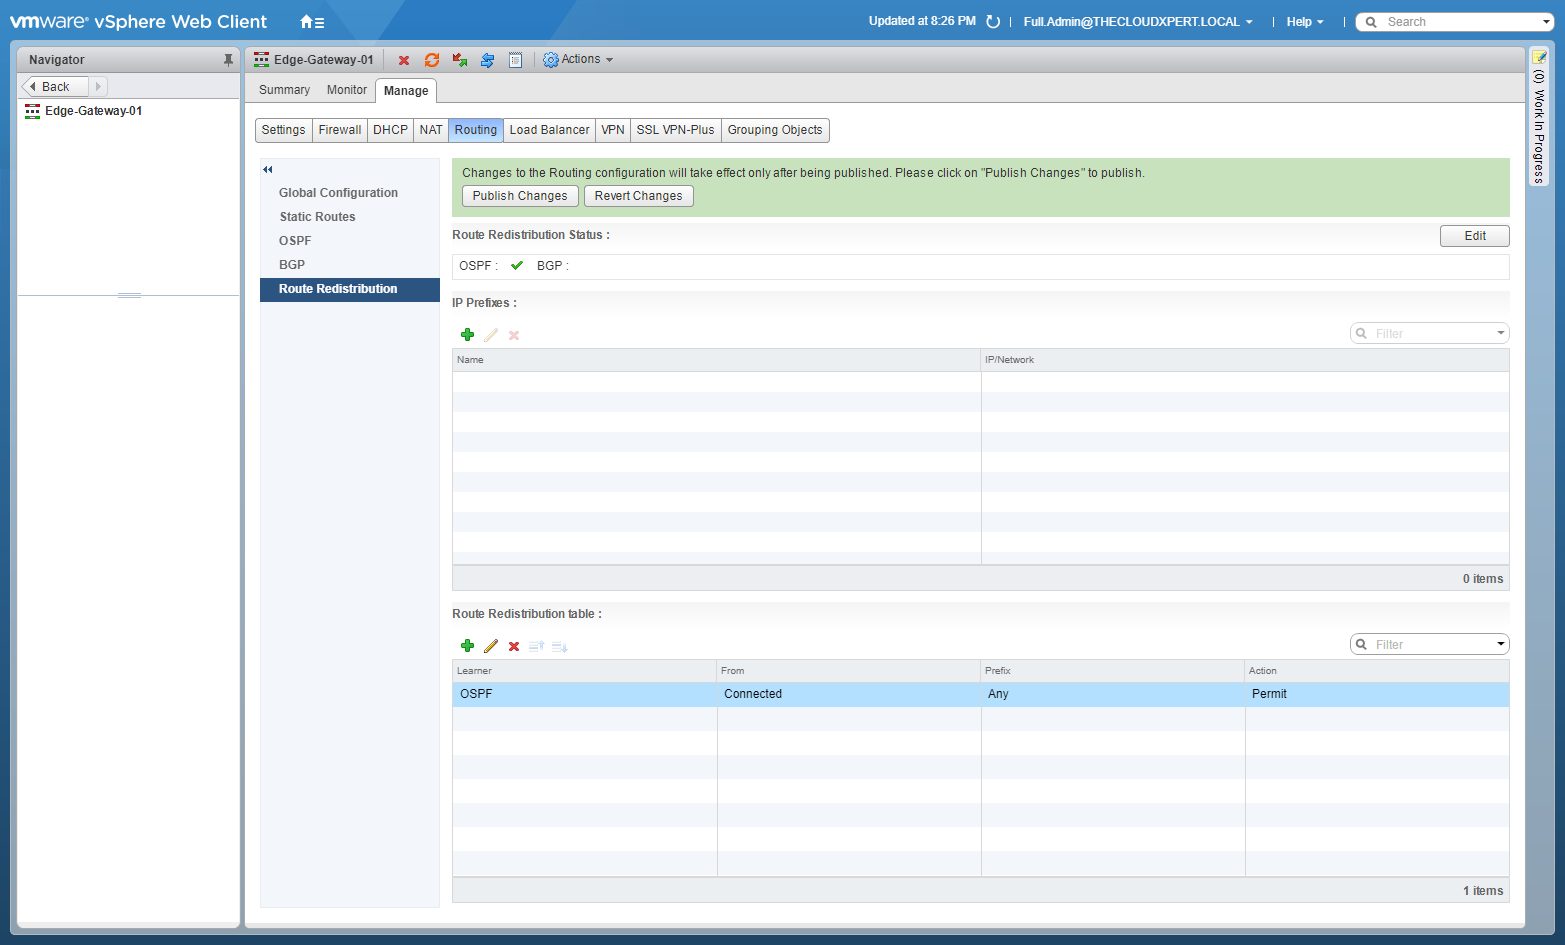
- Click Publish Changes.
Published on 1 August 2017 by Christopher Lewis. Words: 552. Reading Time: 3 mins.
- HOWTO: Configure the Router ID for a VMware NSX Edge ()
- VCAP6-NV Deploy - Objective 5.1 - Backup and Restore Network Configurations ()
- HOWTO: Deploy a VMware NSX Edge Services Gateway (ESG) ()
- HOWTO: Deploy a VMware NSX-V Distributed Logical Router (DLR) ()
- VCAP6-NV Deploy - Objective 1.1 - Deploy VMware NSX Infrastructure components ()
